


Location: Northern border of California
Duration: 5-10 hours
Elevation Change: 6860′ – 14,179′
Recommended Map: Mt. Shasta – Tom Harrison
I use Gaia now. Don’t forget to download the terrain data while you have reception and save your phone battery in airplane mode. Have your entire group download the data and route plan. Knowing where you are all day is pretty sweet.
Check the reply at the bottom of my posts for annual condition reports from me. Create an account and tell us how it goes for you too! This website lets you upload pics or groups of pics totaling under 2meg at a time, with a max of 20 images. contact me for more detail and thanks for adding good beta and pics! I just skied the Hotlum Bolam route May 23, 2023, and added some pics in the Reply. And now I just got back from the Clear Creek Route ski descent 6-2-23. Sorry if I confuse you, there is a lot to say. I am obviously not a journalist or guidebook writer. I literally re-write these MST ski descent descriptions every single time I read them. Your best intel is here: www.shastaavalanche.org
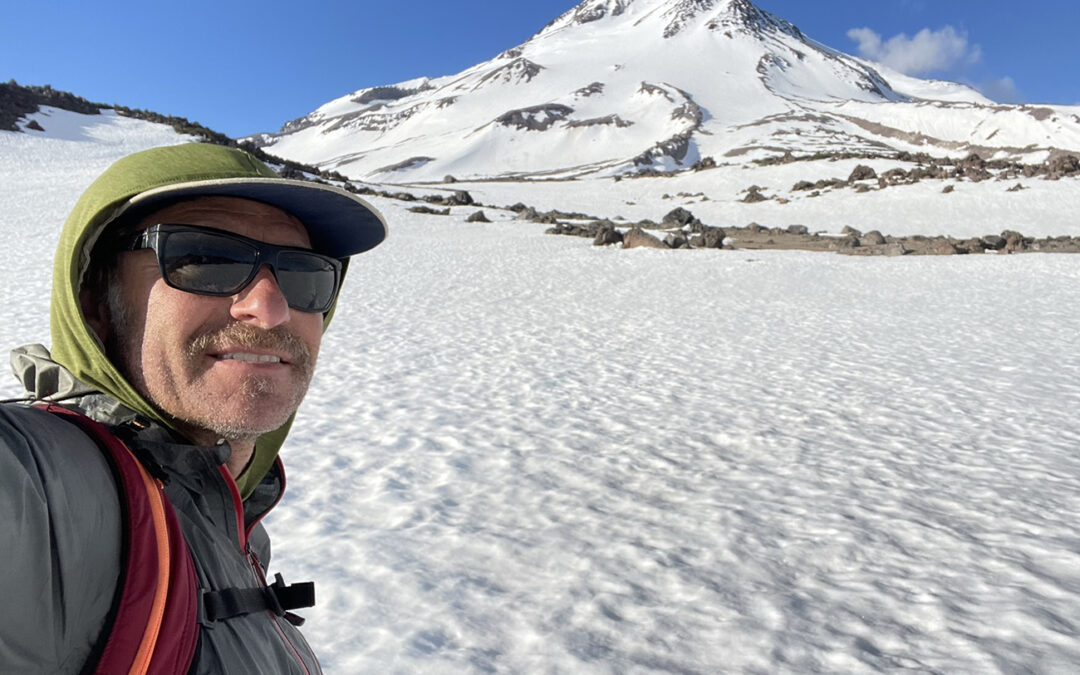
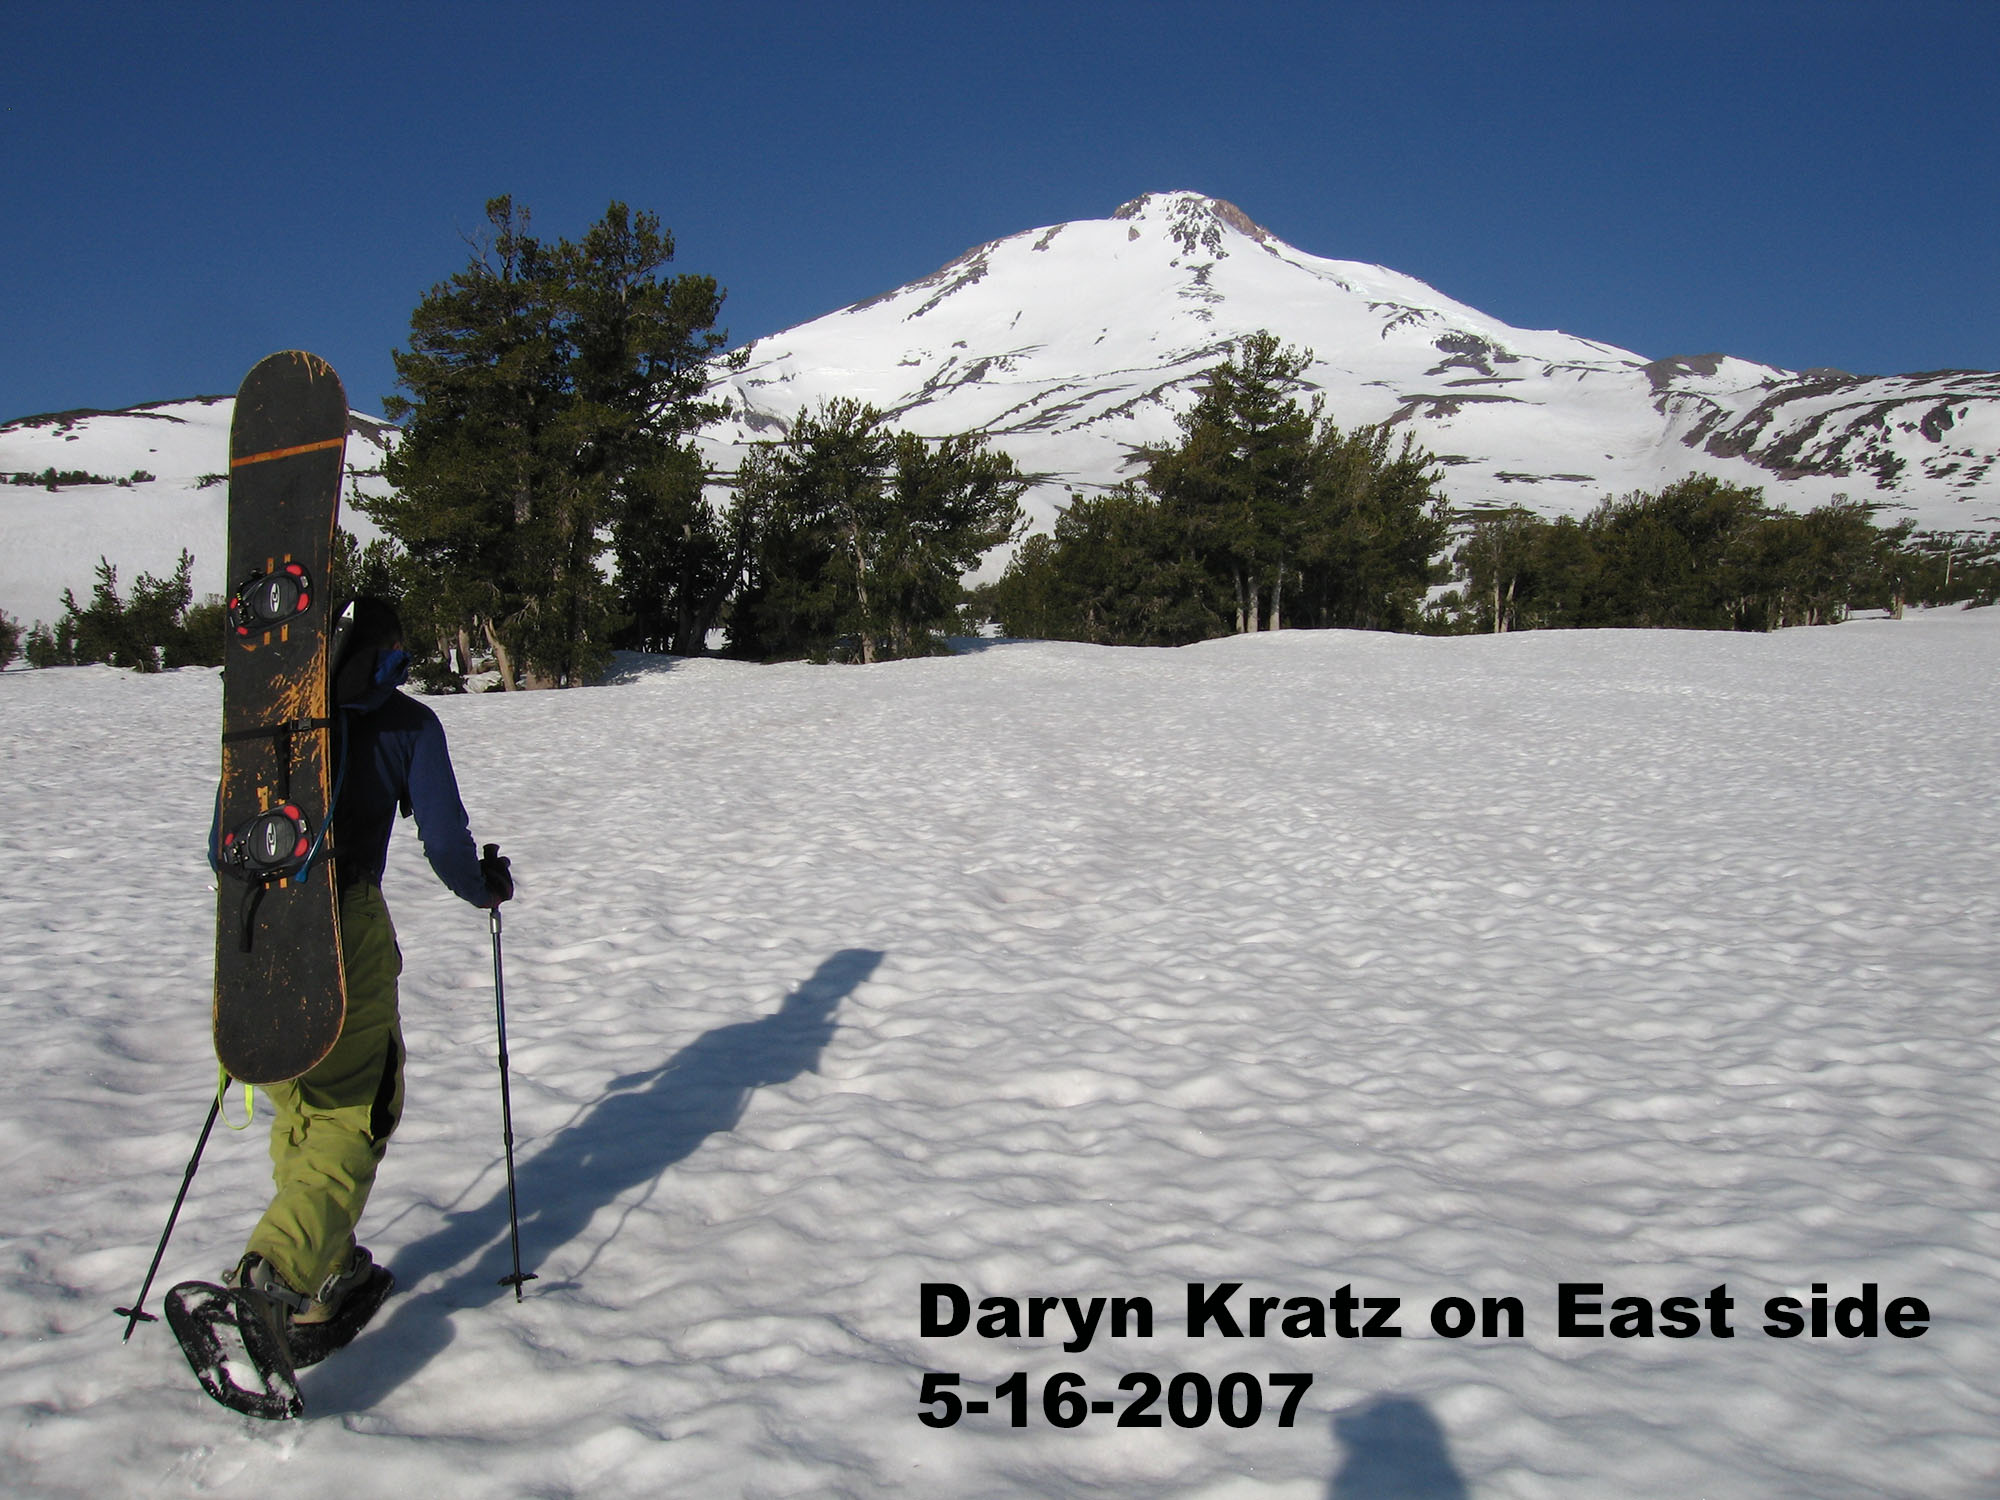
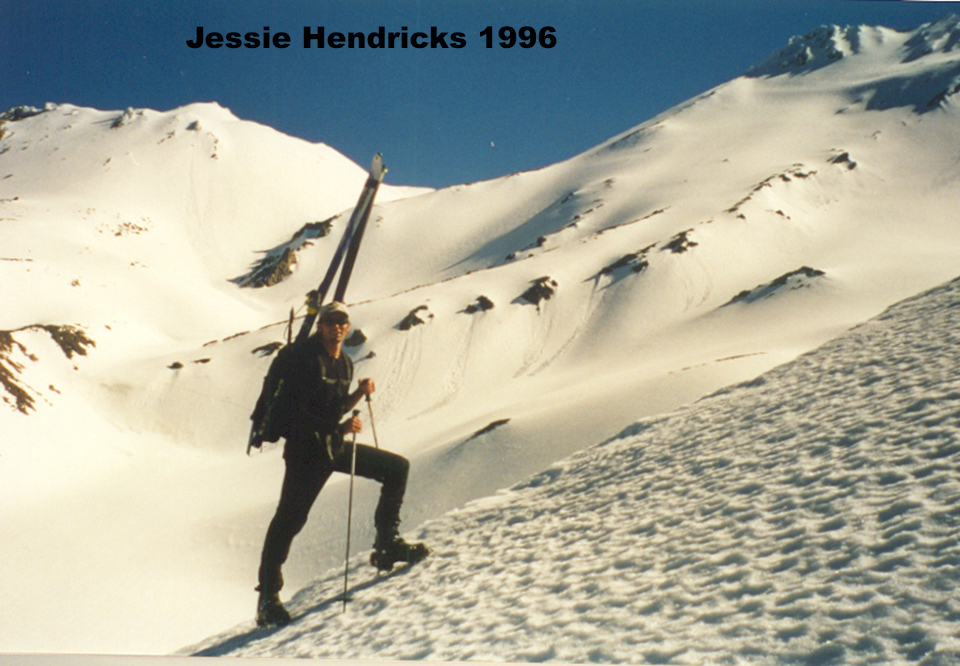
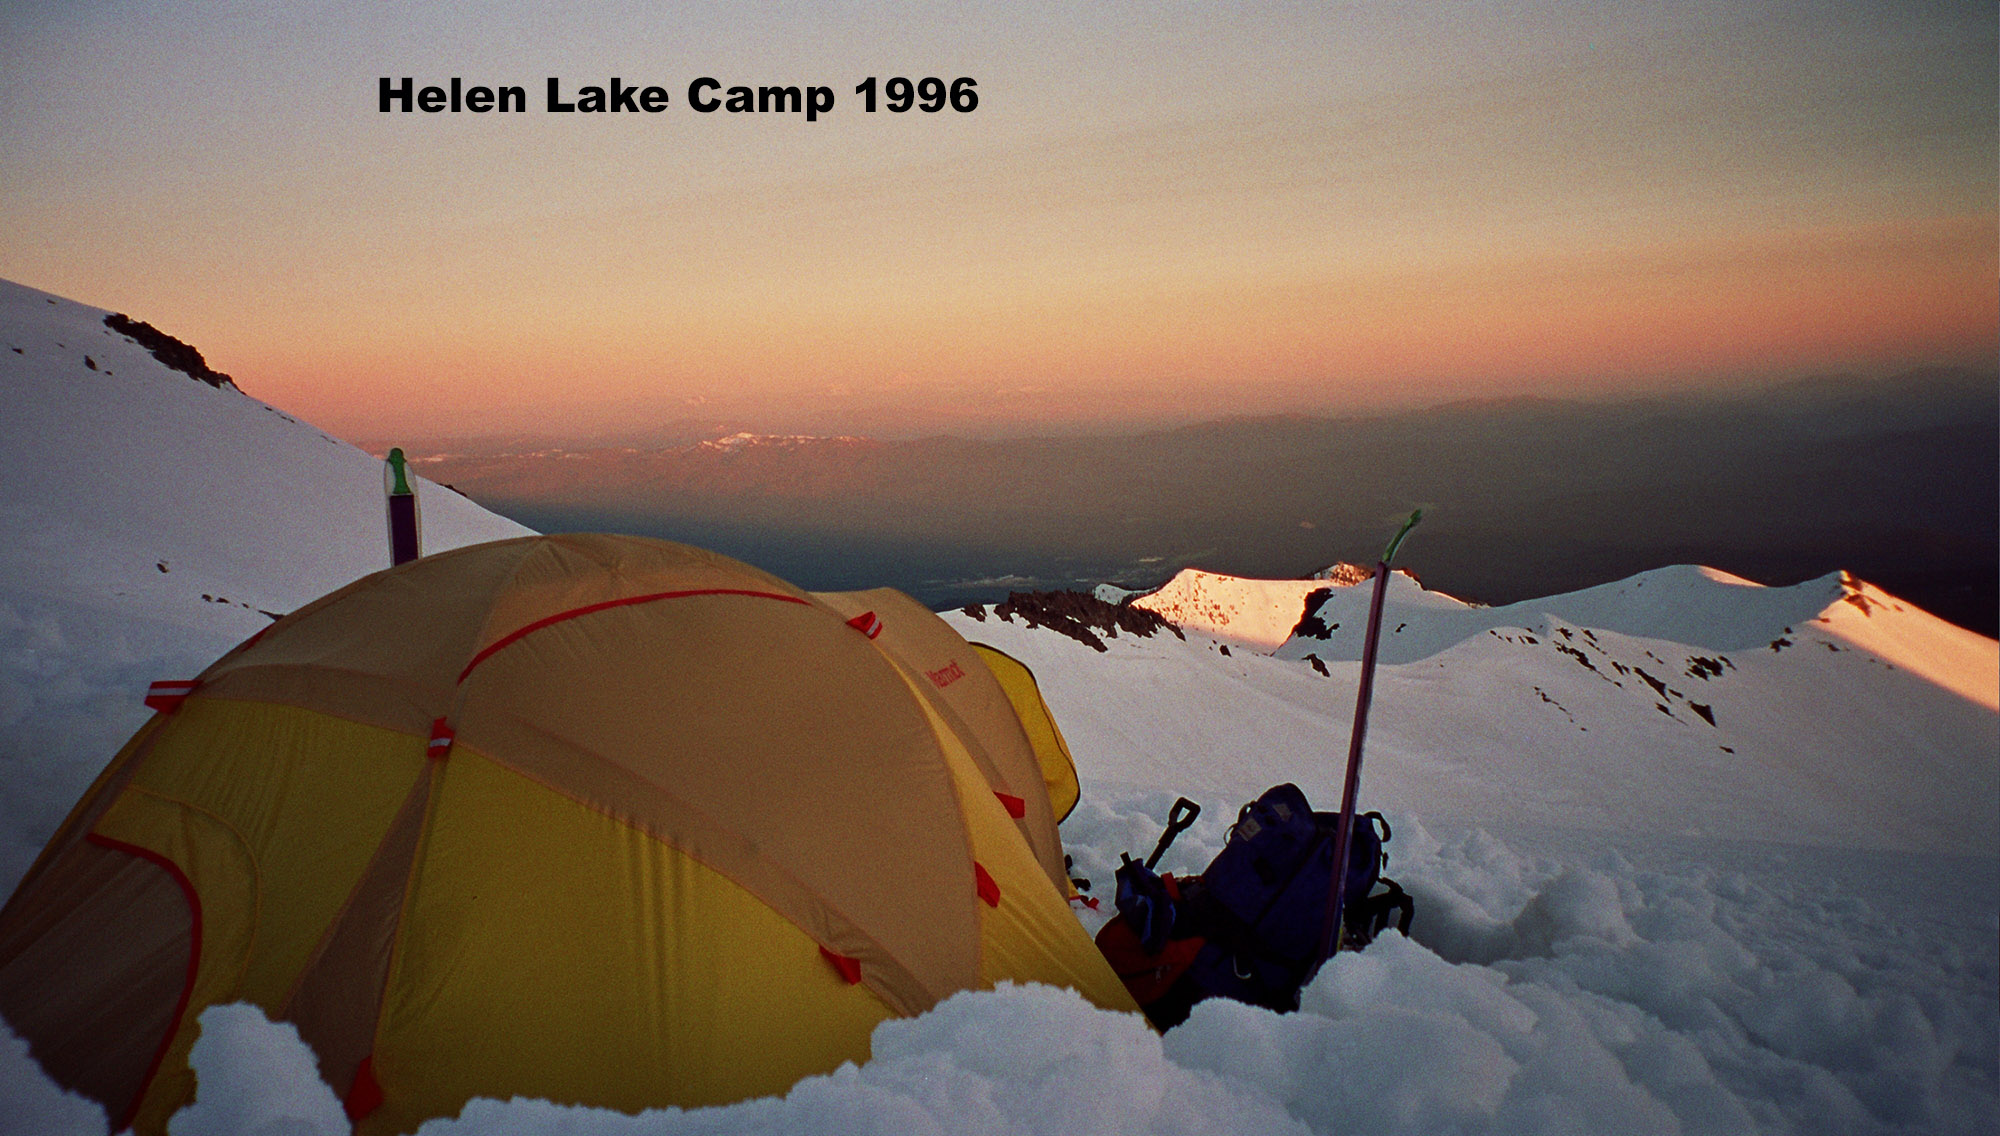
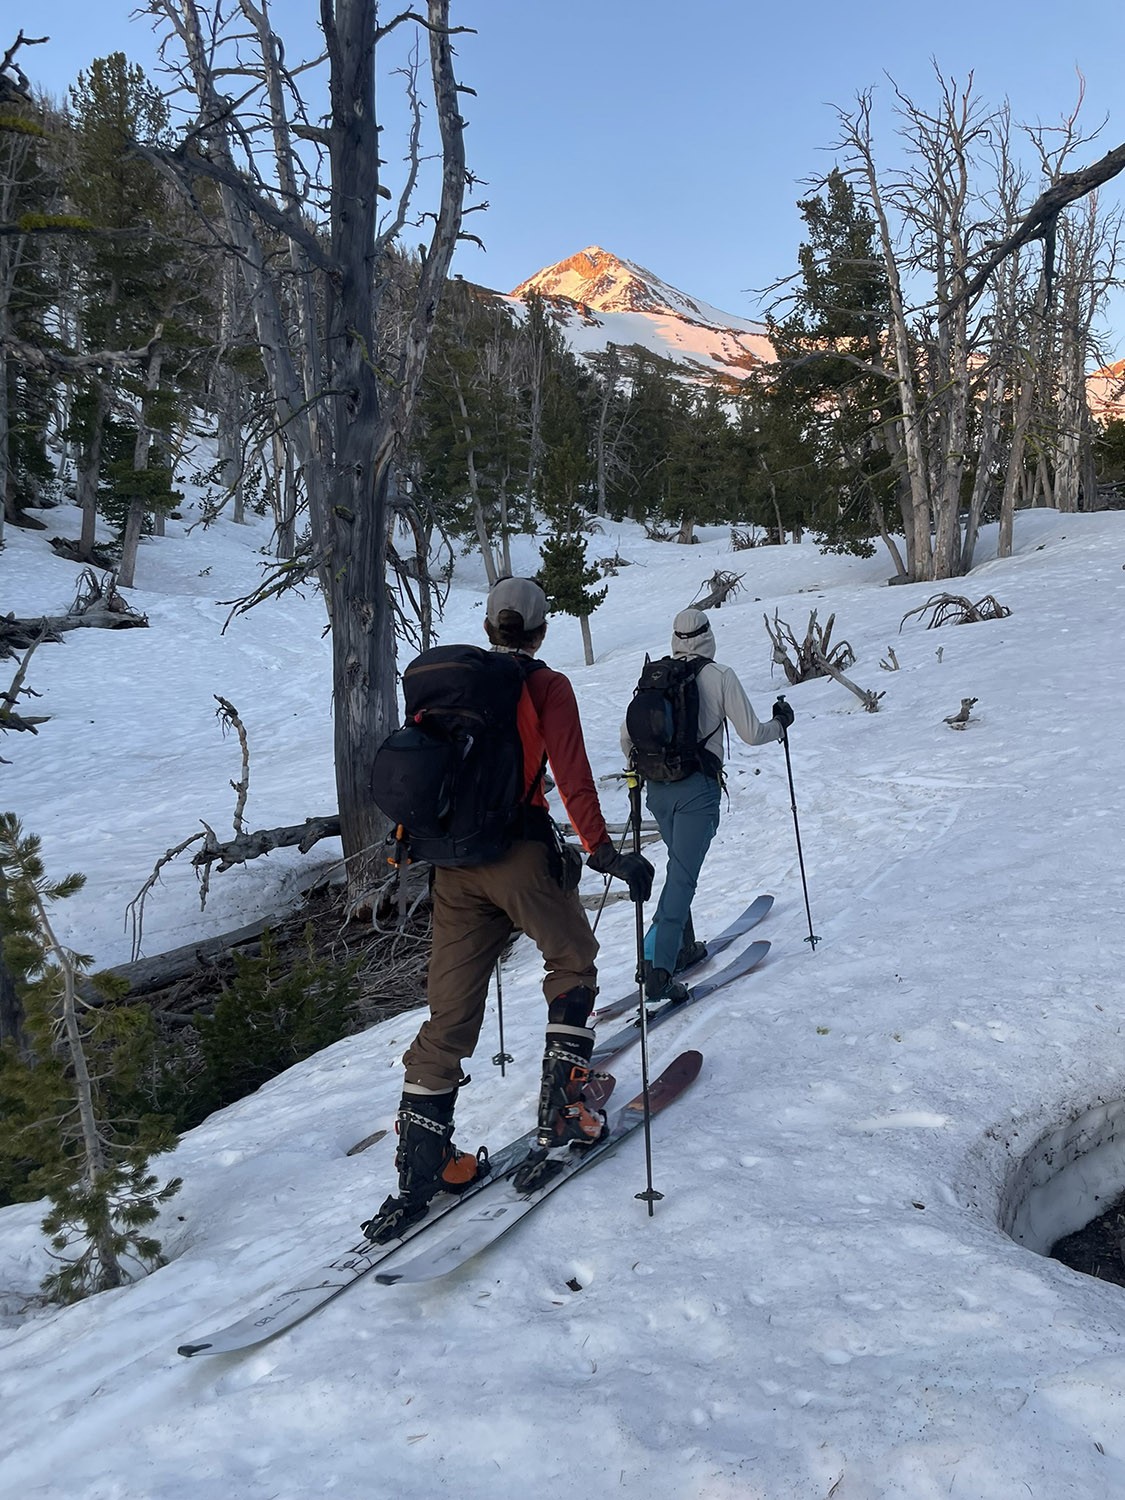
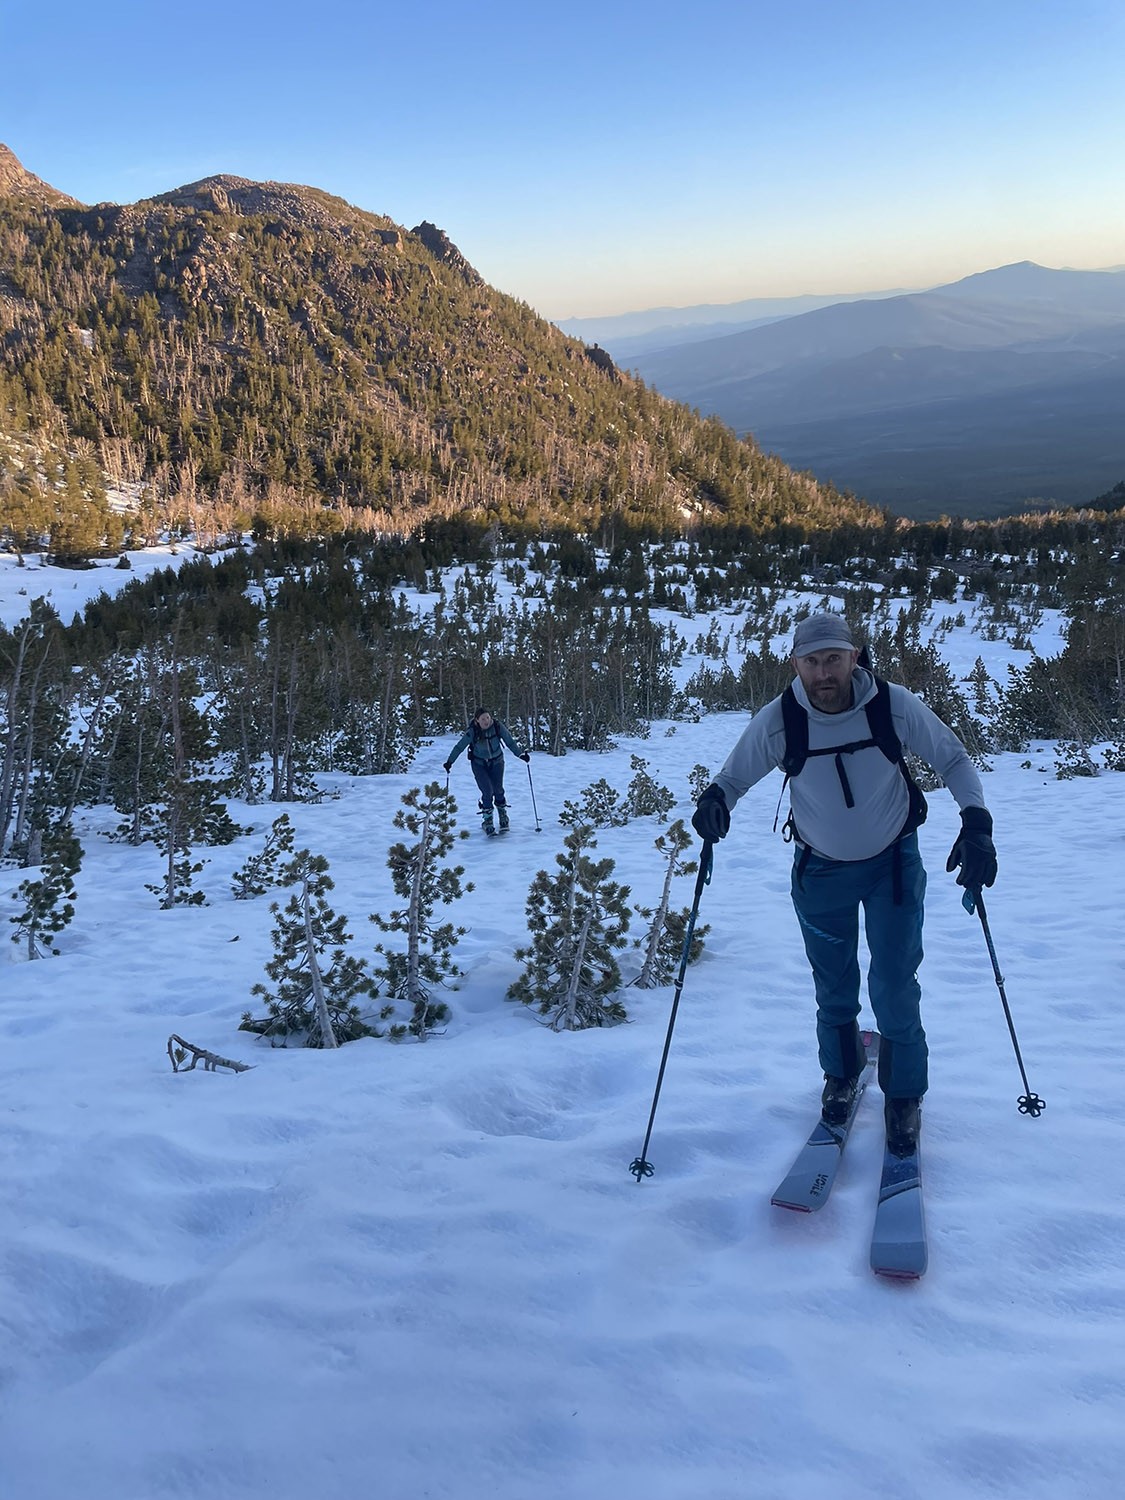
“She’s a big dog”, Jamie Schectman told us all as he rallied my friends and I onto our first climb of Mt. Shasta in the mid 90’s. Jamie now owns Best Pies in June Lake, CA. He showed me there are bigger mountains than Tahoe, and California has an incredible corn skiing quality that is unreal in May and June. I don’t remember if we checked the weather that first time. It was raining and snowing overnight, and we camped in the mud at 10,500 and even tried going UP in a snowy whiteout the next morning for an hour, only to survival-ski down the next morning with huge packs. Don’t do it that way. But that was still super fun in our late 20’s to learn by doing. I have only slept on Mt. Shasta 2 other times. Camping in the snow on a big ski mountaineering trip is really fun, but it is also MORE work compared to starting in the dark, early in the morning with lightweight packs. I like to camp in the backcountry away from people as well, and that isn’t Shasta. And finally, you just don’t need to sleep on the mountain. You have skis to get down. Setting up camp makes sense to me if there is a ski objective beyond the distance you can comfortably reach in a day. Mt. Shasta’s summit is actually not that far from the car. The air is thin up there however, so I’m suggesting you go light and return before the altitude gets to you. And ski down without camping gear on your back, so you can enjoy the skiing. I must admit though, you will be really digging deep to stay safe, motivate, breathe, and ski down in a day. I’ve rarely felt great. I usually feel anywhere from terrible to ok when I’m booting up the last 1500′. I also know that you won’t sleep well or feel great either if you camp halfway up. Try it either way, it all builds character!
WEATHER – I only ski Mt.Shasta in the spring, and if the forecast is for sun and light winds under 20 mph. Why go through the effort to plan, pack, drive, get up crazy early, schlog for hours on low angle terrain…only to turn around in bad visibility or wind affected variable crust? Mt. Shasta doesn’t have tree skiing or wind protected couloirs. The locals ski powder on Shasta earlier in the winter, generally in the lower half of the terrain. That sounds awesome, but I have no experience like that because of the drive time and uncertainty of ski conditions.
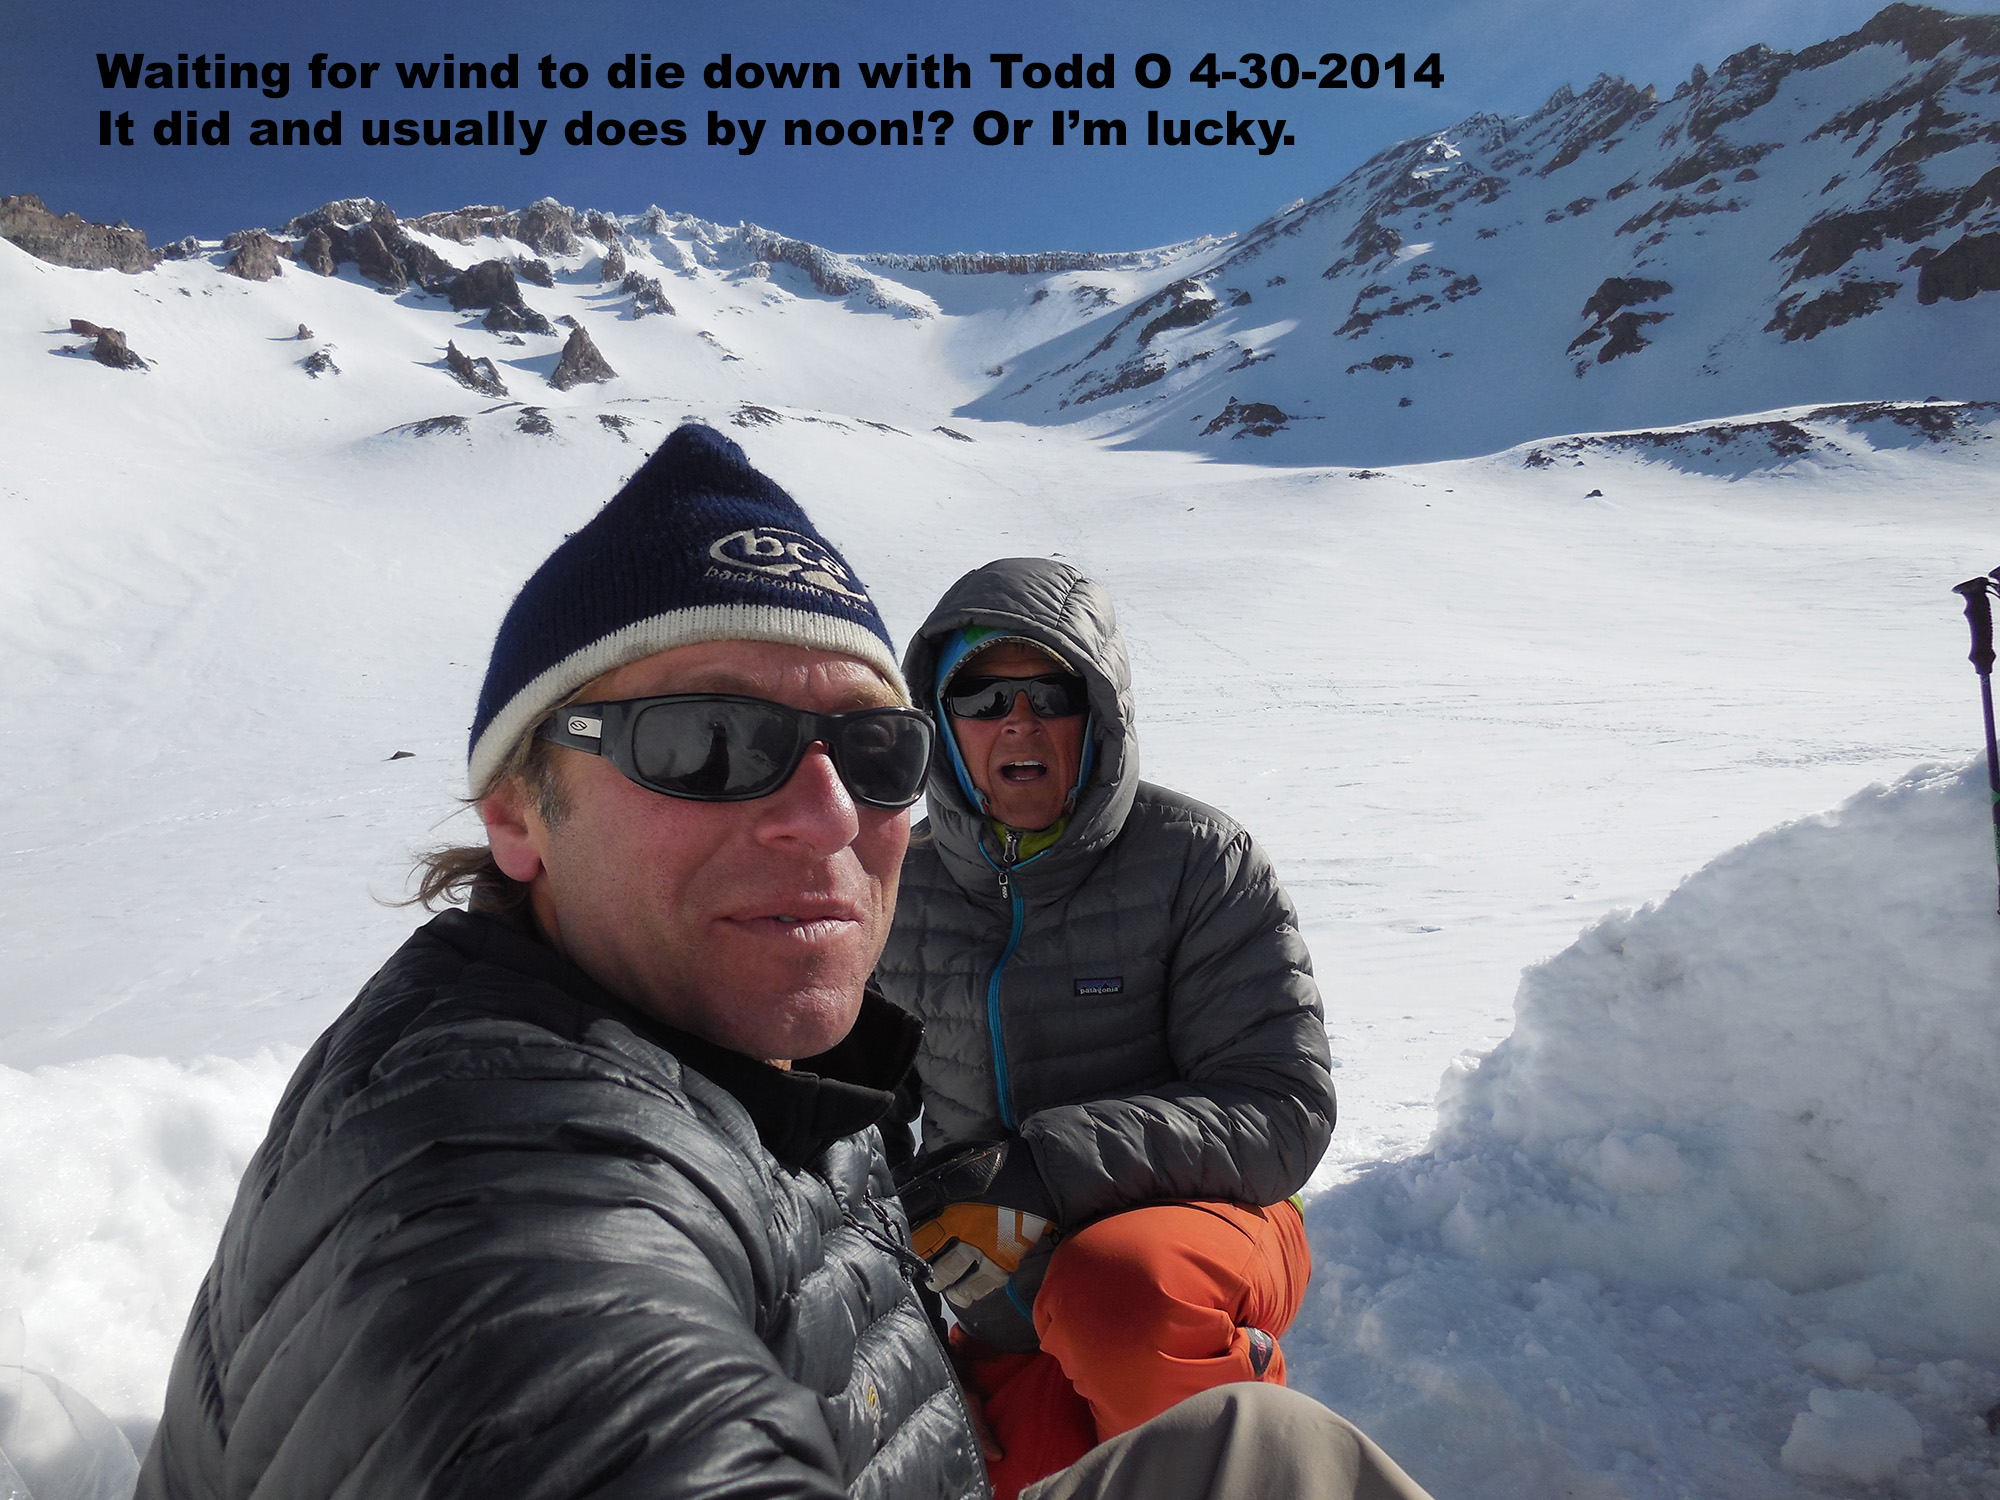
I don’t know if science agrees, but I find the Shasta wind subsides slowly through the morning and clouds come in the afternoon. In other words, if the weather report was pretty good, yet you are surprised with early morning 30mph winds, maybe just keep going if you are not in any danger of rock fall. The lower mountain has a mellow angle, and you can’t exactly get back to work that afternoon anyway. What else do you have to do? Just keep going and see if the wind dies down. This has happened to me half the time I have gone up there. I’m not talking about stormy periods. I just find wind comes in the morning stronger than expected and dies down by the time I make it to the summit. A lot! Why? I don’t know, but that’s better than the reverse! When you get to the steep upper half of the mountain, you will now need to assess whether you think there is any chance of soft snow for your descent. Skiing steep, firm, and bumpy snow for a few runs near a chairlift is tolerable. It’s a different story at 12-14k when you have been going for 8 hours.
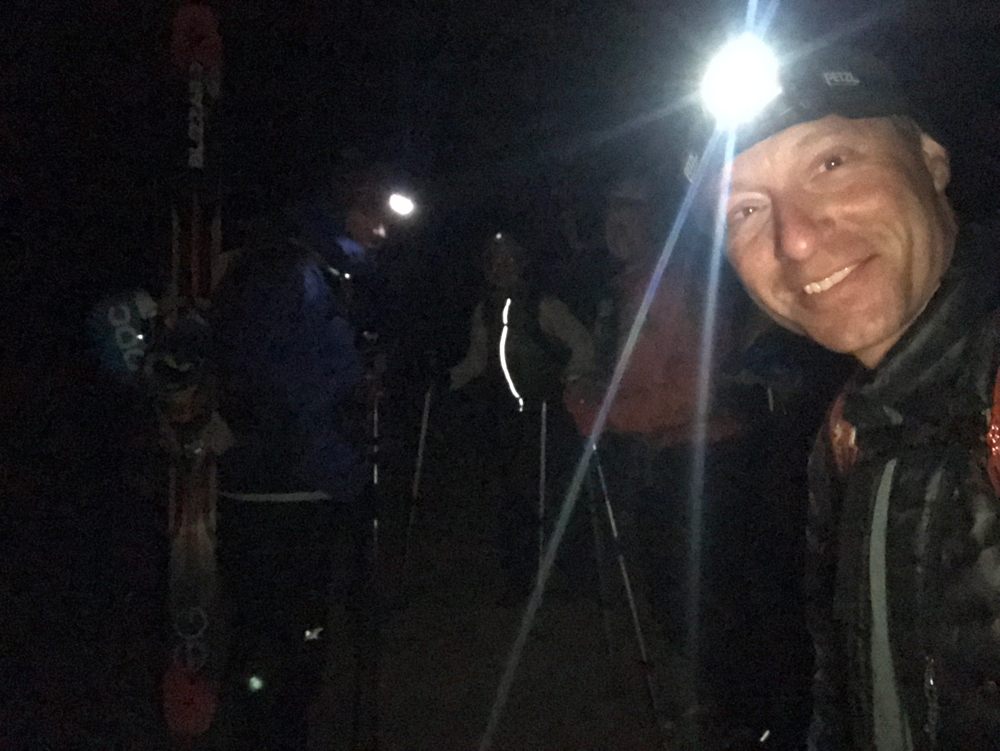
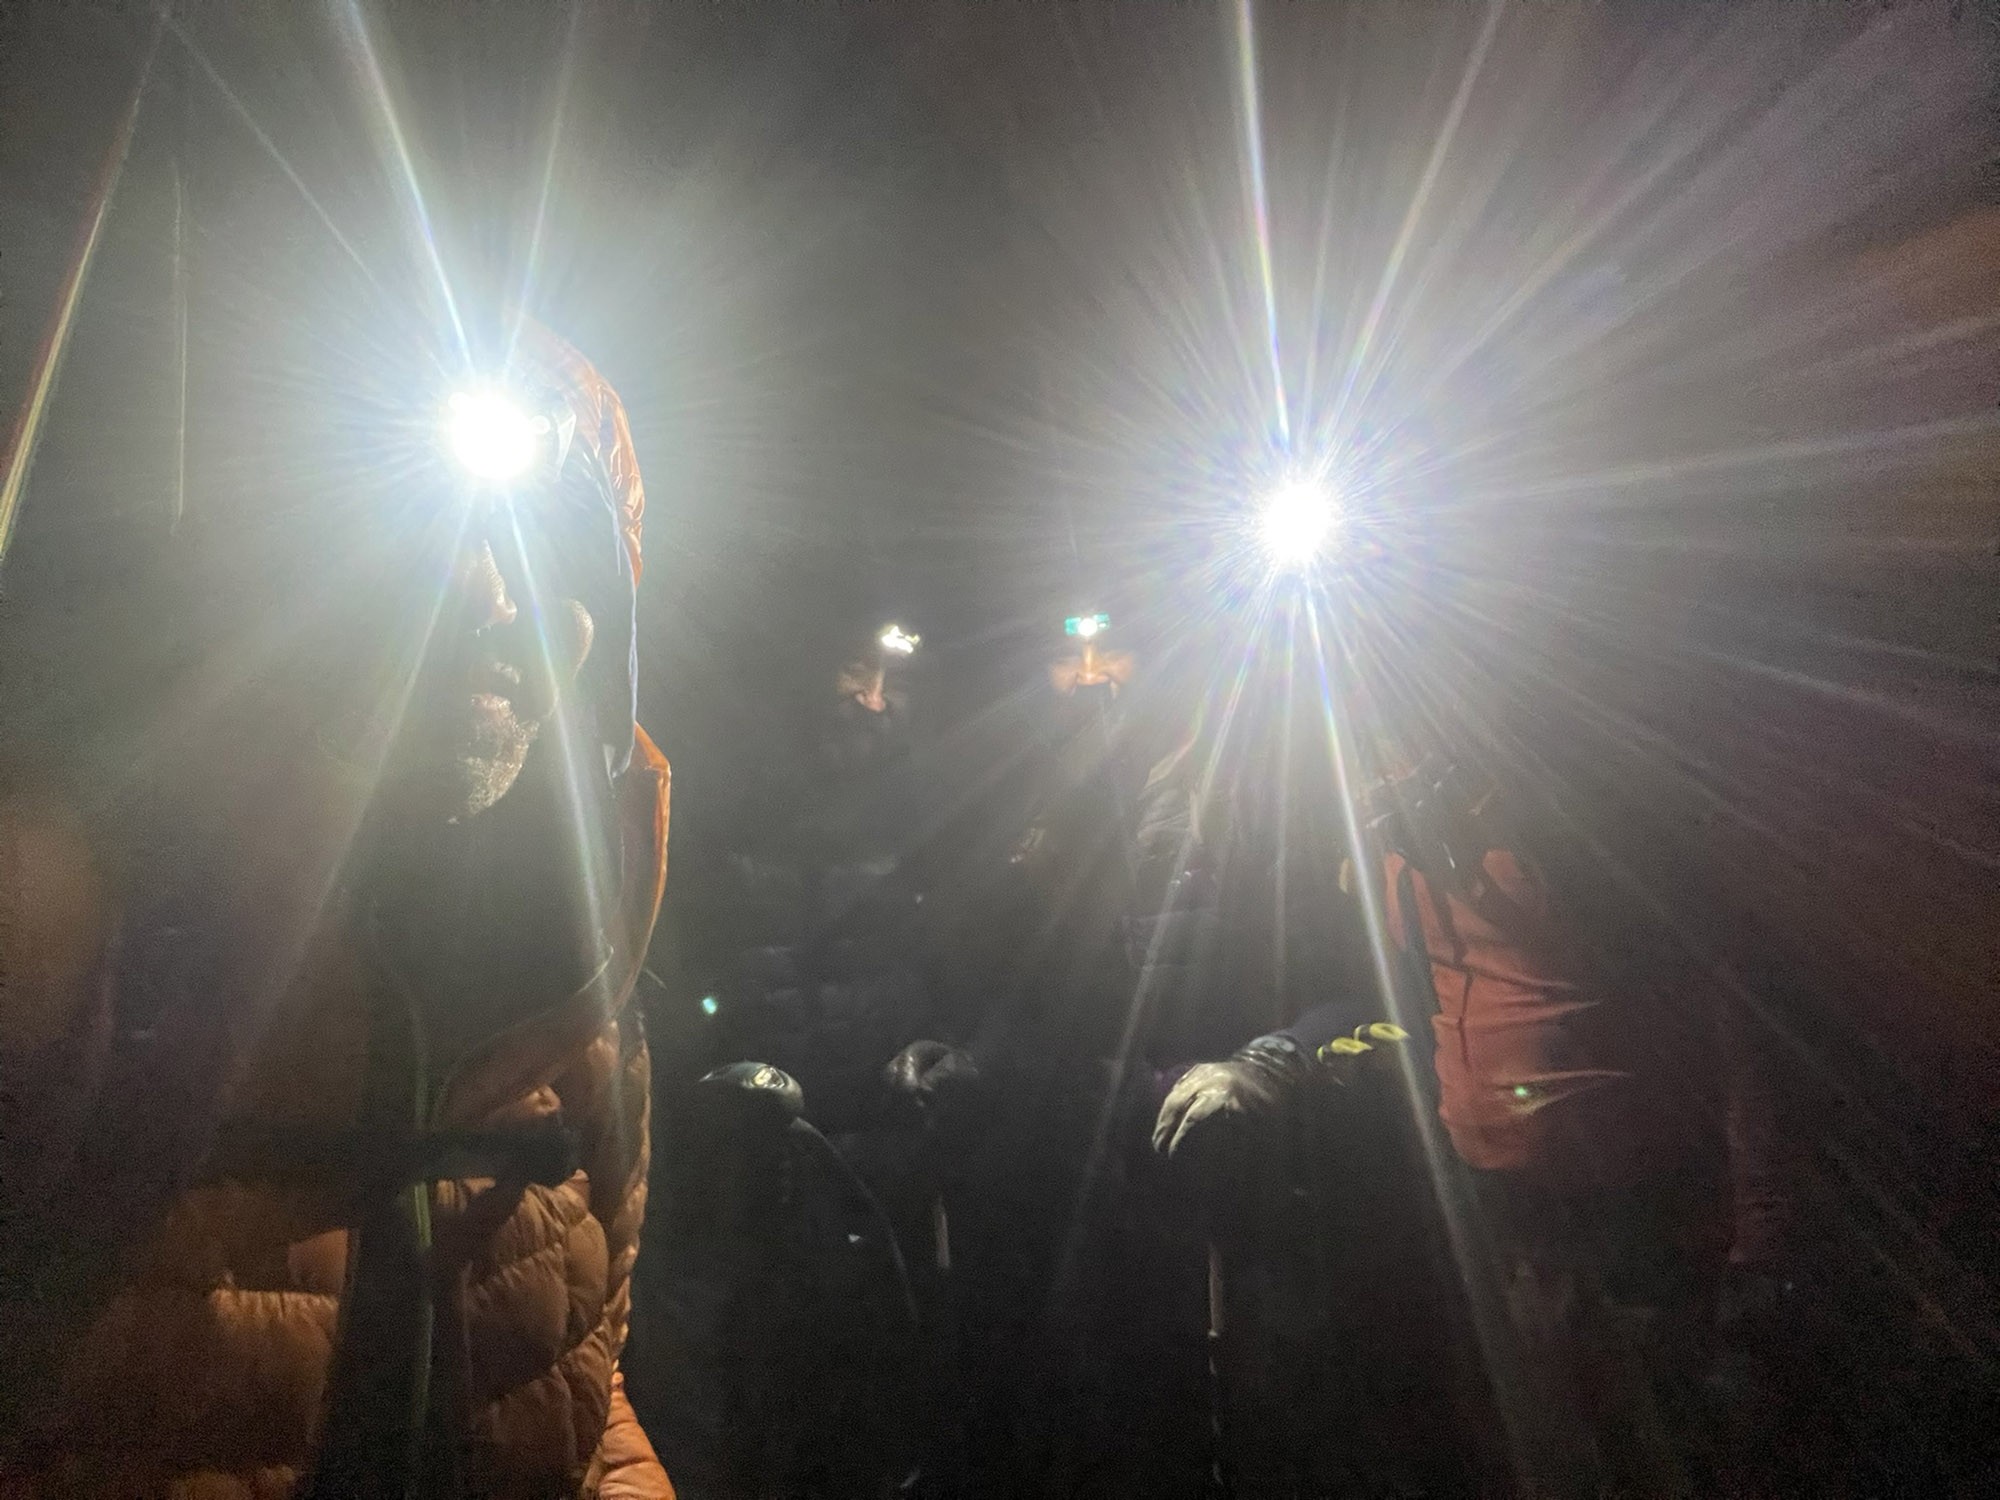
I look at pinpointed NOAA weather before and during my Shasta Climbs. That forecast is not super accurate due to this huge mountain creating its own weather sometimes, but I obsess over it. I follow the weather report during my climb if my phone is working. You can click the “hourly” button on the NOAA website or use the WINDY phone app. Go to a big ski descent like this when your chances of making it to the top are high! Furthermore, acclimatization to altitude takes nearly a week, but also is NOT generally required during your first 24 hours. So just go in a day. Start at 3 am if you are a beginner. Start at 5 am if you are fast. You can always slow down if you need more time for the snow to soften for skiing down. Ask other skiers in the parking lot how their day went. What time did the snow soften for them? You might expect a similar weather pattern the following day if there is no known change in the forecast. Visibility is crucial above tree line in the mountains and can change unexpectedly on a big peak like this. Use a GPS app, this saves me time and stress frequently.
Conditions – If you’re not skiing or snowboarding, but rather walking up and down as a mountaineer, the weather can be a bit worse, and it may not matter. Firm conditions are faster and safer when you are walking with crampons up AND down. People die most every year in falls on Mt. Shasta, get some experience and instruction with crampons and ice axe. My website is aimed at backcountry ski and snowboard touring, however. I find it frustrating to see so many people pick their days far in advance for a mission like this, and worse, on holiday weekends. What kind of ski experience is that? You need the best possible conditions to succeed and enjoy a big peak ski like this. Put together the pieces. Wind direction and temperatures determine if you will ski soft snow or hard crust on different aspects. This matters a little more for a skier than a mountaineer. And which aspect still has good surface quality for skiing and when? Think about what the conditions will really be like way up there and monitor how they are improving or deteriorating for your descent on your summit day. Or just go shred whatever you get, like we all did when we were younger. I loved every minute of it and skied plenty of great snow. But it’s a big effort to rally your crew, drive up there and suffer a long climb into high elevation, only to turn around due to unsafe skiing conditions or weather. call me anytime and I’ll help you trip plan. Or hire an AMGA ski guide from the Shasta locals at Shasta Mountain guides, or one of the three kick ass Tahoe based companies: International Alpine guides, Blackbird Guides or Alpenglow Expeditions, all owned by IFMGA guides.
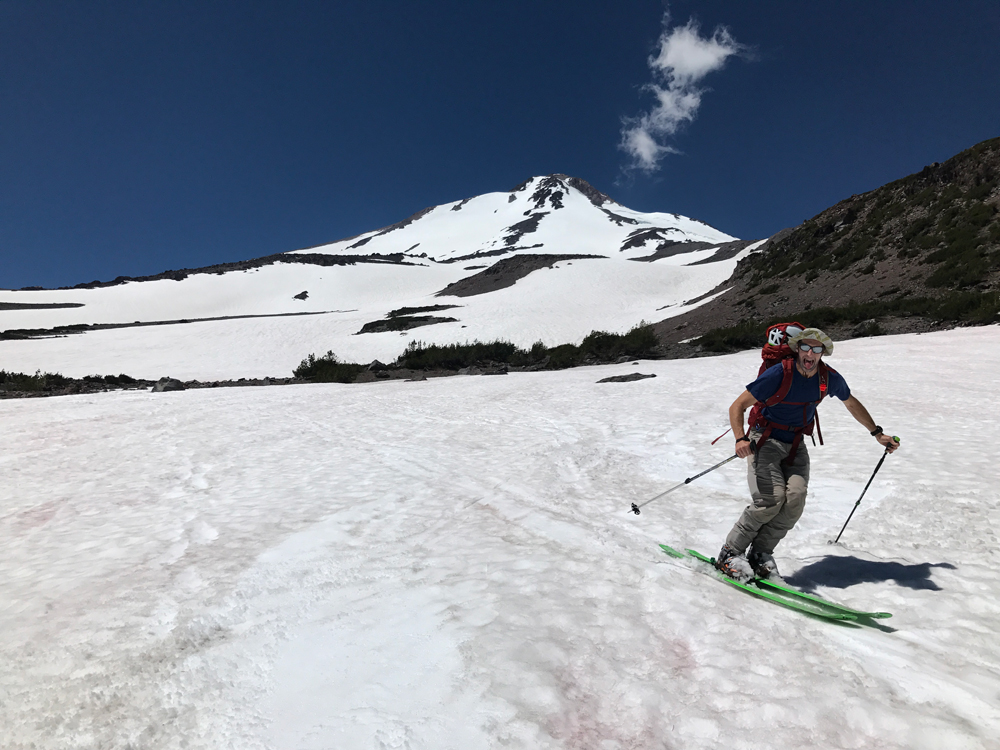
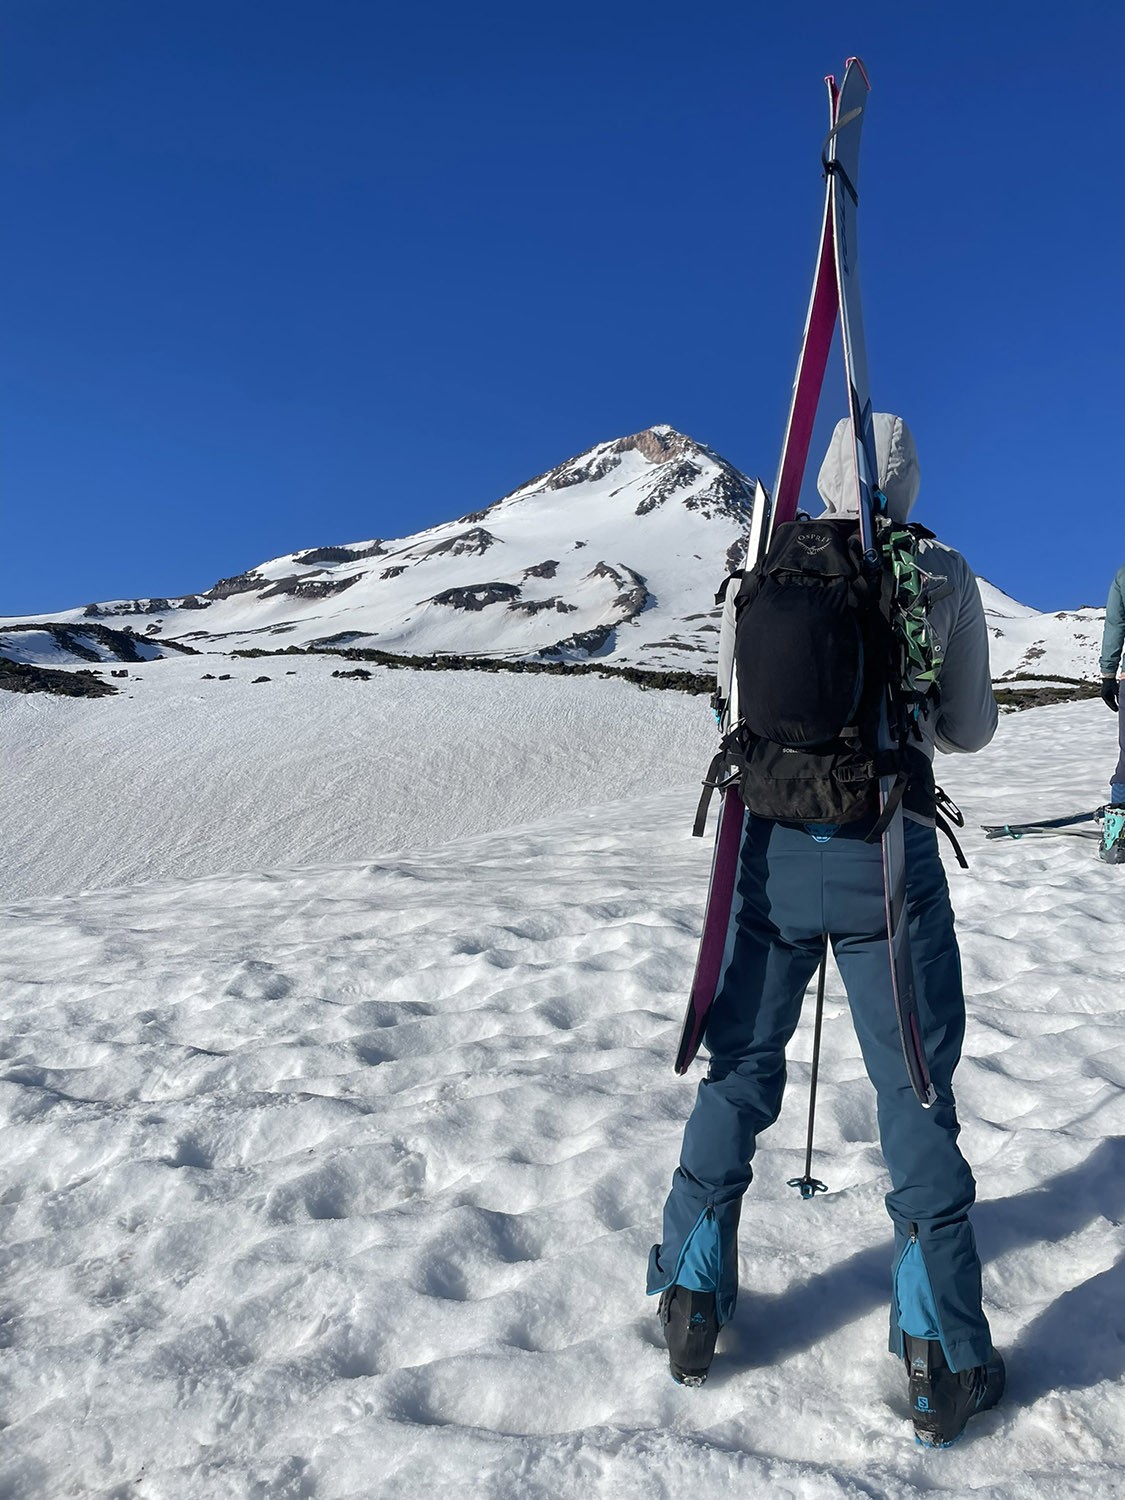
SKI CHOICE – Go as light, but take skis that you ski well in steep bumpy crust up high, AS WELL as bumpy, soft mush down low. I have also skied great 1″ pen corn for 5000′ many times of course. For me, I like 112 waist skis that are around 1700 grams. This year that was Armada Locator 112 with Atomic Backland MTN bindings. 350-gram bindings like this mitigate the extra beef of my skis and perform just as well as anything on the market for ski touring. I also like selling Dynafit and ATK bindings. This setup can handle anything. I can’t believe we survived all those years with skinny lightweight skis and tele bindings, only to side slip around and make tiring jump turns. The snow is generally just too variable with such a span of elevation. Skinny skis are ok if you know it’s all smooth and perfect. That is not Mt. Shasta. I recommend a ski waist measurement between 106 and 112. Don’t get me wrong, I own and appreciate 100mm underfoot skis. I also own and love Voile Hyper V8 which are ultralight and even fatter. Most of the time Mt. Shasta is NOT going to be butter smooth. Volcanos see much more wind and sun than your local mountains, because of the Volcano cone shape. For me, even if I have intel that the snow surface really is smooth 1″ edge penetration corn. I have found that I can surf down the hill now like snowboarders with a lot less fatigue and just do better. I’m sold.
SNOWBOARDING – I have taken friends on solid snowboards with lightweight snowshoes a few times and it worked out fine for Avy Gulch and Brewer Creek routes. You don’t skin or traverse on the way back down, and your solid board is lighter than a splitboard. IF the snow is firm at the car, maybe just walk to the summit from there and put your solid board on your backpack for the entire day. There may be little reason to even bring snowshoes. Certainly, bring the absolute lightest ones you can find. We sell MSR, Atlas Helium and Verts. There are some very lightweight Splitboards from Voile and Jones at our shop. If the overnight temps don’t freeze the snow solid near the car, you will want a splitboard because skinning will be a lot less tiring than snowshoeing.
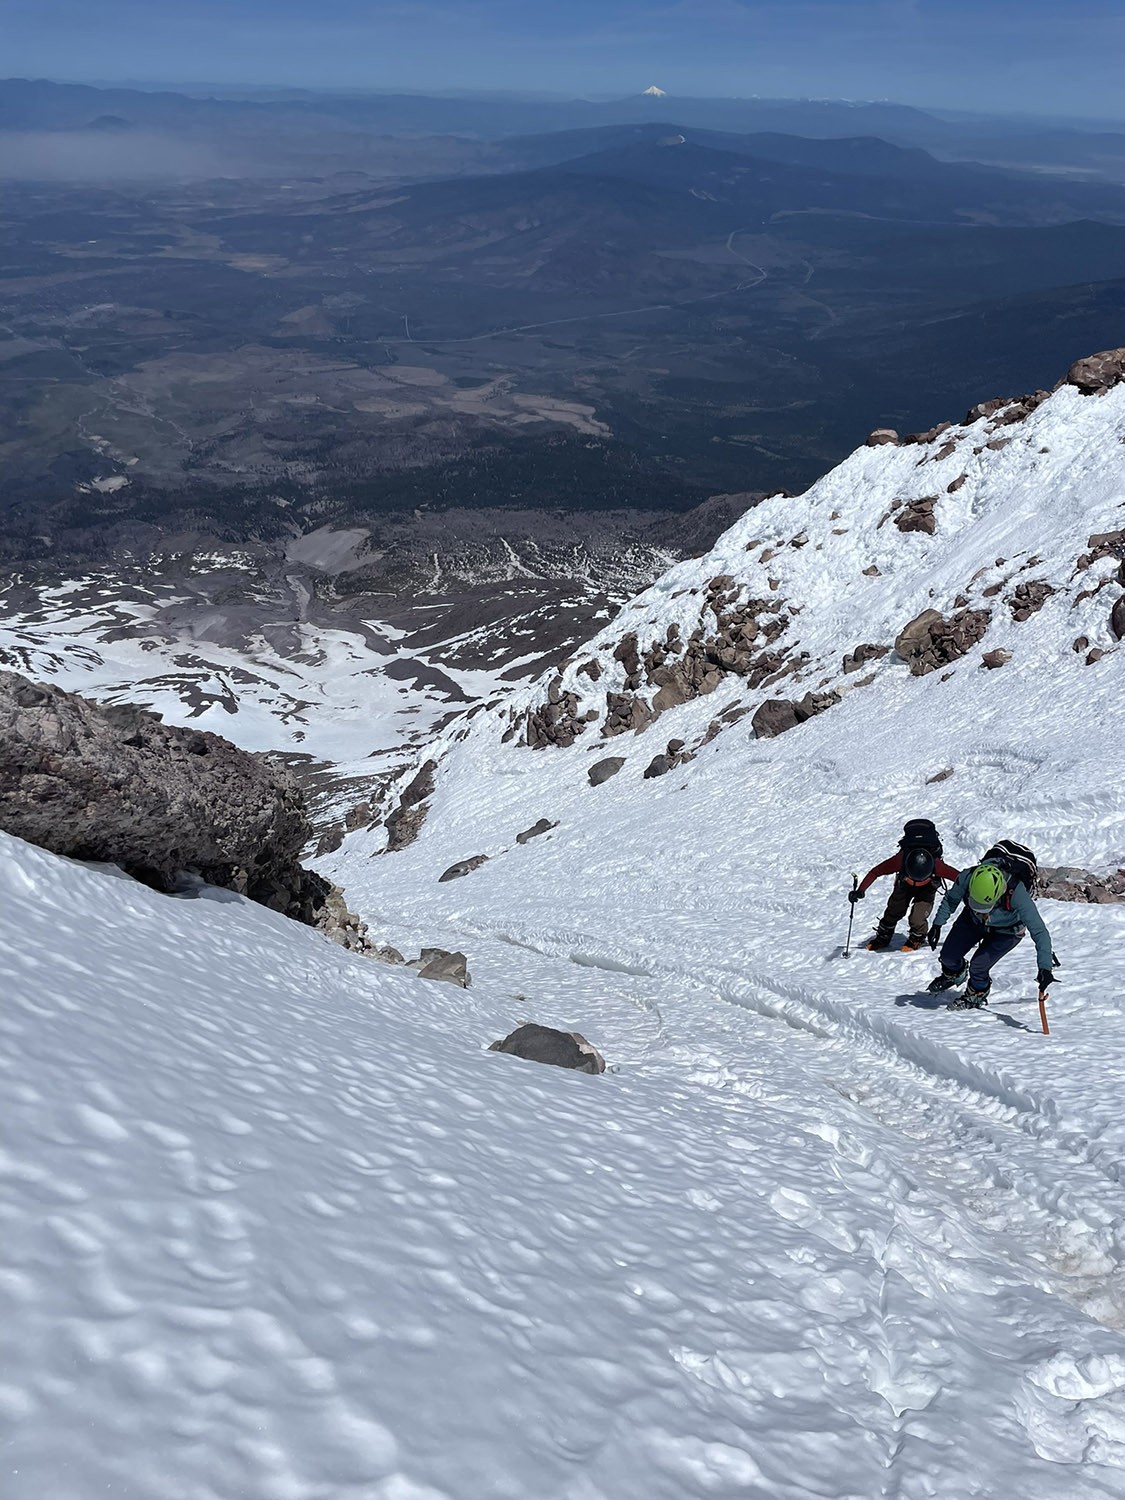
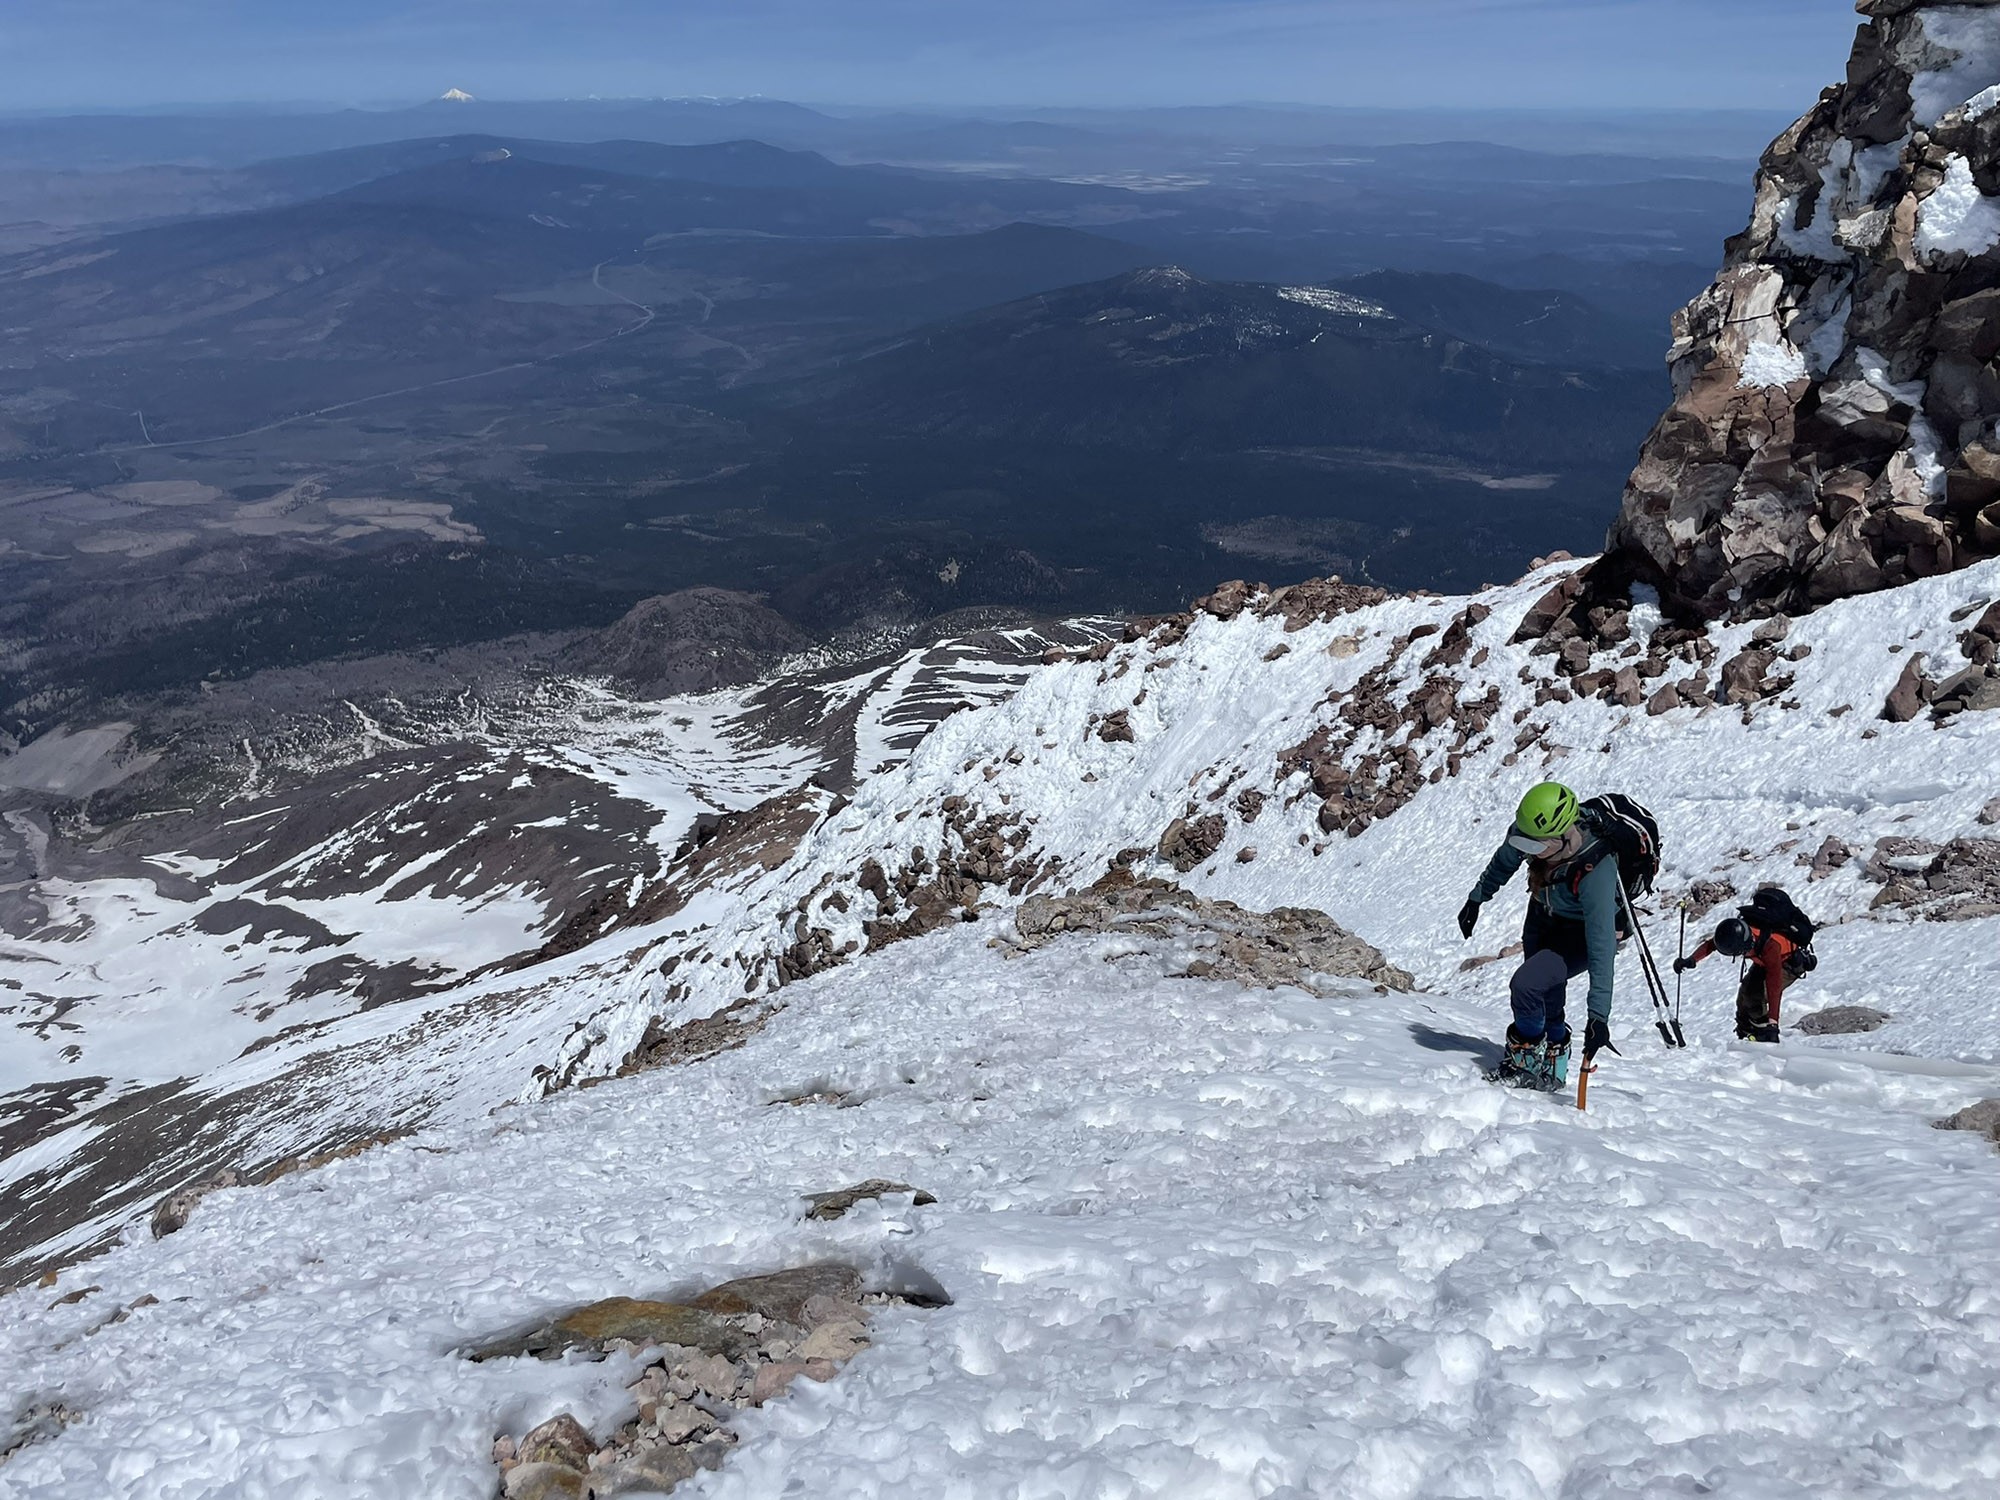
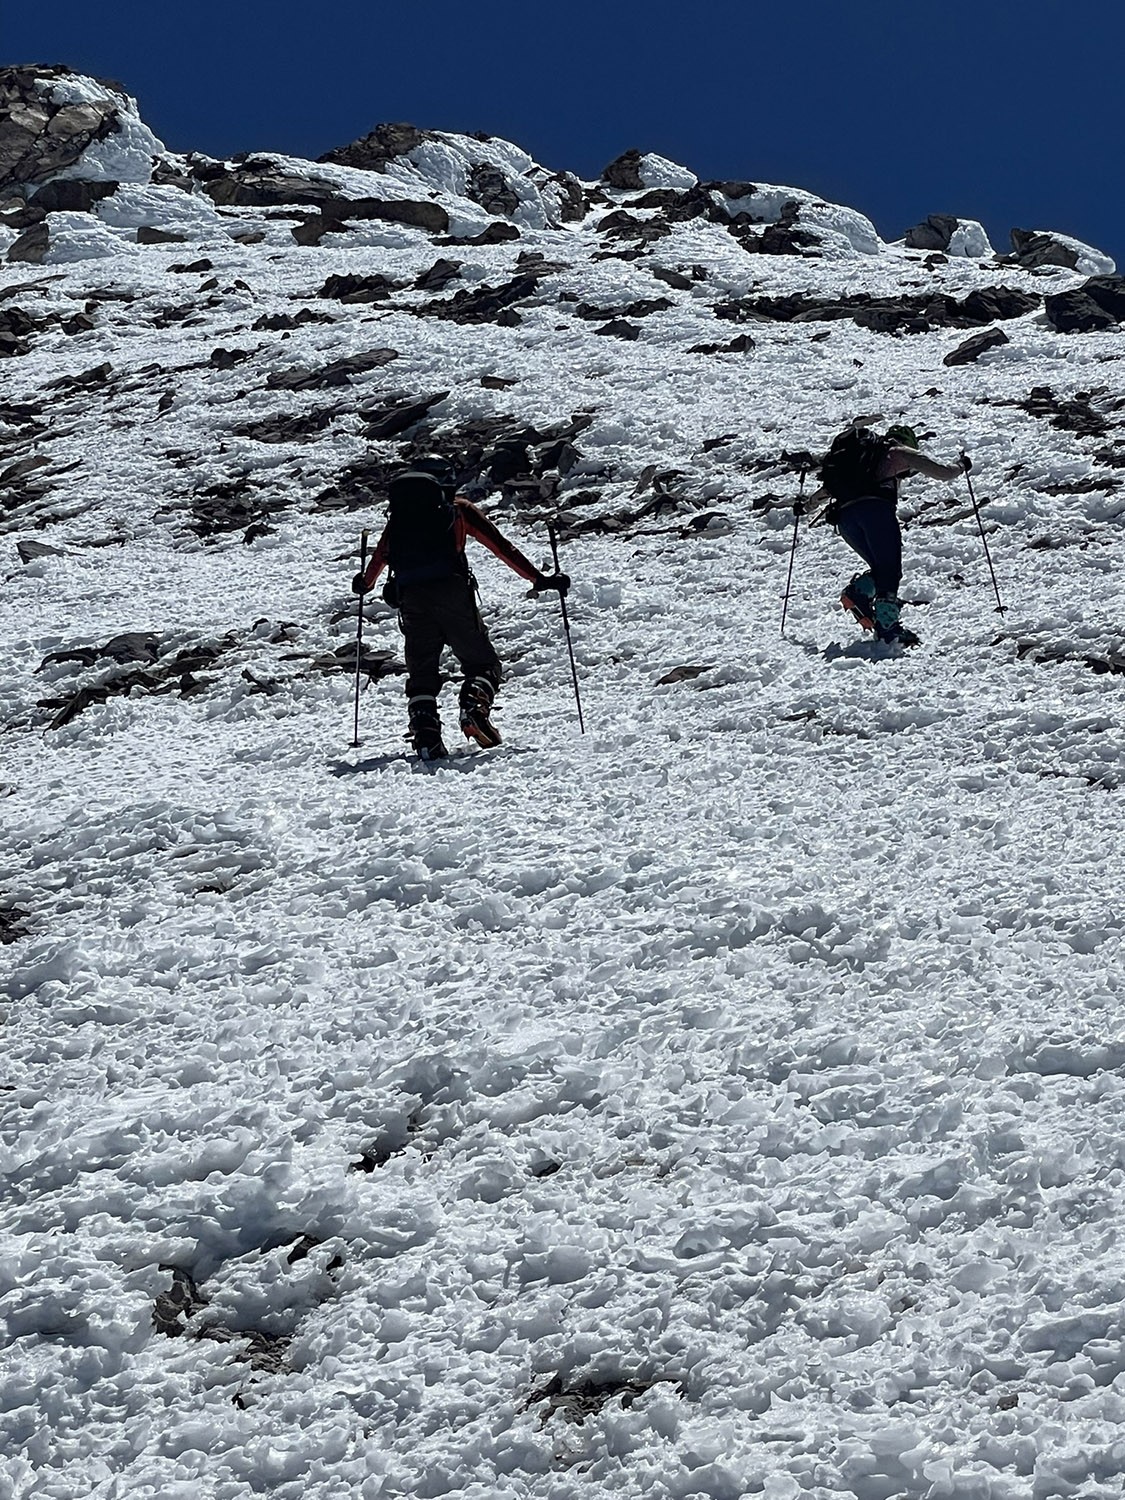
Ski and Snowboarding tips – You are rarely skiing well with the added stresses in a high elevation climb like this. It’s going to be a long day after less sleep, and anxiety will be with you. Set your expectations for slow survival turning on the way down. Sure, you will lean into your turns with confidence in places on the mountain. You will also be above NO FALL ZONES in unfamiliar snow surface conditions. Some of the surface snow will be crusty and bumpy at the same time, unlike ski area conditions you have experience with. Some slopes will be too warm, leading to wet slide potential. Rocks come whizzing down, and even people. Start your descent slow with wide turns and watch your partners to make sure they are doing ok. They may not know the stem christie turn technique, where you snowplow into a parallel turn. They may not know that up and down body movement helps your bases and edges carve and then let go in funky snow. The Rythm of movement really matters in the backcountry. You can get lazy at a ski area and just bomb around over confidently. Snowboarders should be aware when it may be smart to descent with an Ice Axe in hand. However, don’t expect to self-arrest on your climb or descent. Practicing self-arrest is advised, but it is very unlikely you will slide down any slope unharmed in the mountains. Axe and Crampons allow you to keep from falling, not stop a fall. Self-Arrest practice is really a mountaineering concept. When you ski or snowboard, you are going faster, and those sticks will prevent any chance of self-arresting with an axe. Consider your skis and snowboards to be the lifesaving tool like an axe or crampons. You are not on Mt. Shasta to shred, you are there to make a safe and fun descent.
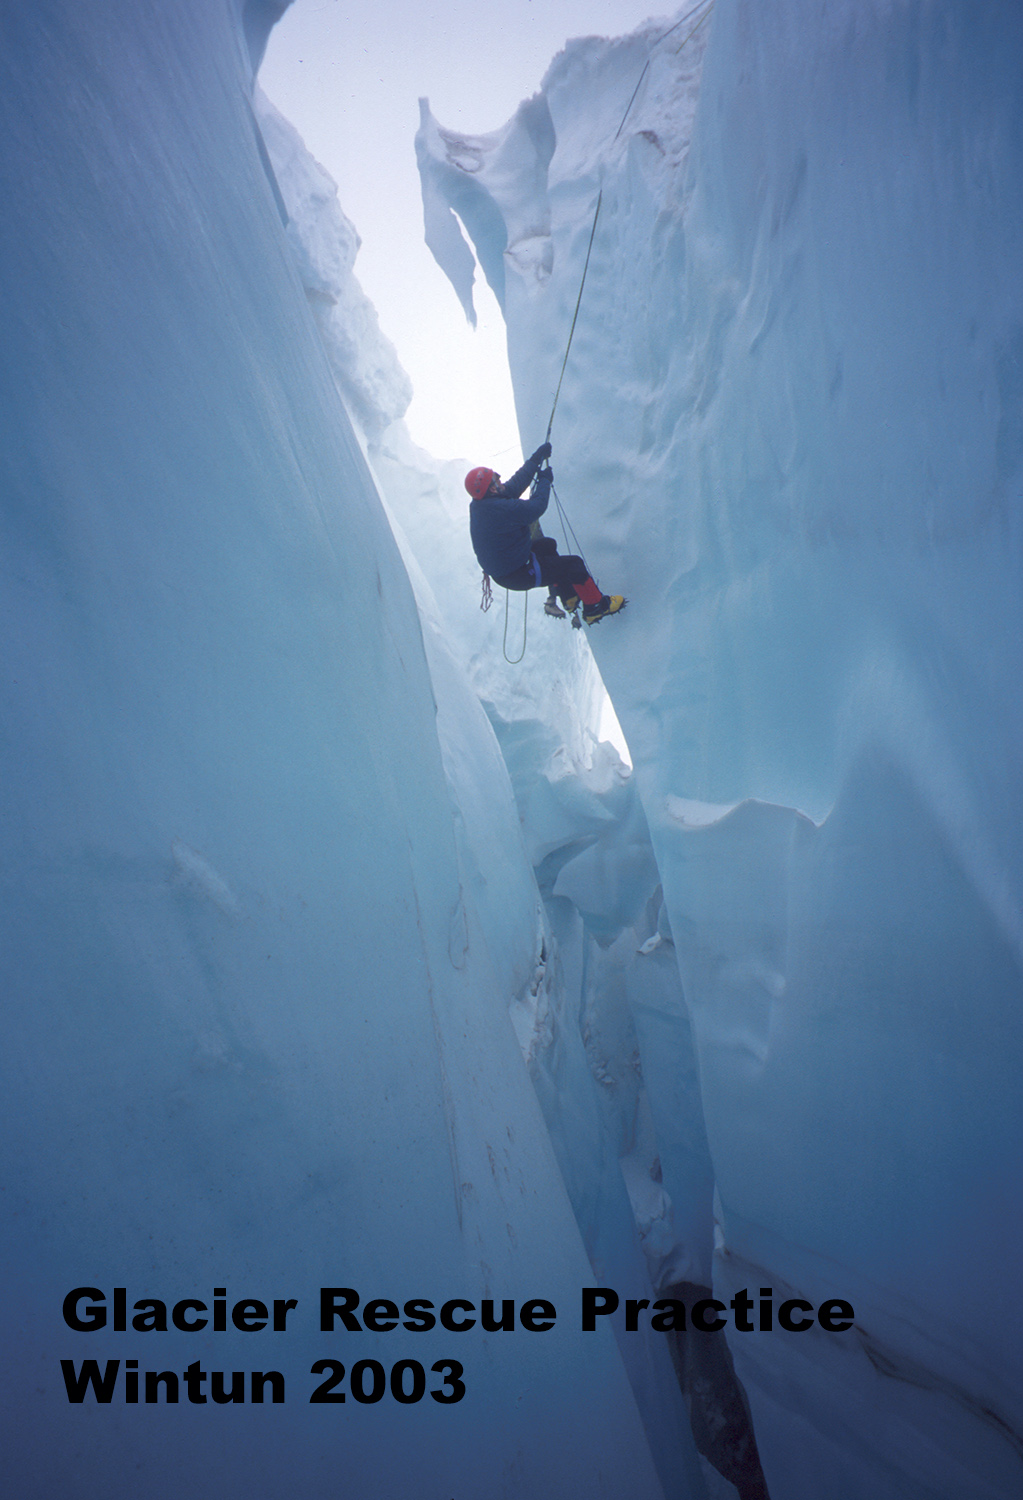
Someone in the group ideally will be the most experienced and choose a path down the mountain that minimizes risks. Rescue is a long way away and often impossible. You don’t want to catch and edge and crash in the upper half of the mountain, it is very steep. And you don’t want to get hurt in the remote settings around Mt. Shasta. Everyone should have a GPS app or device and communication tech like Zoleo, InReach or Sat phone. You should make short term and long-term plans with your partners during the day. Good communication reduces risk and stress.
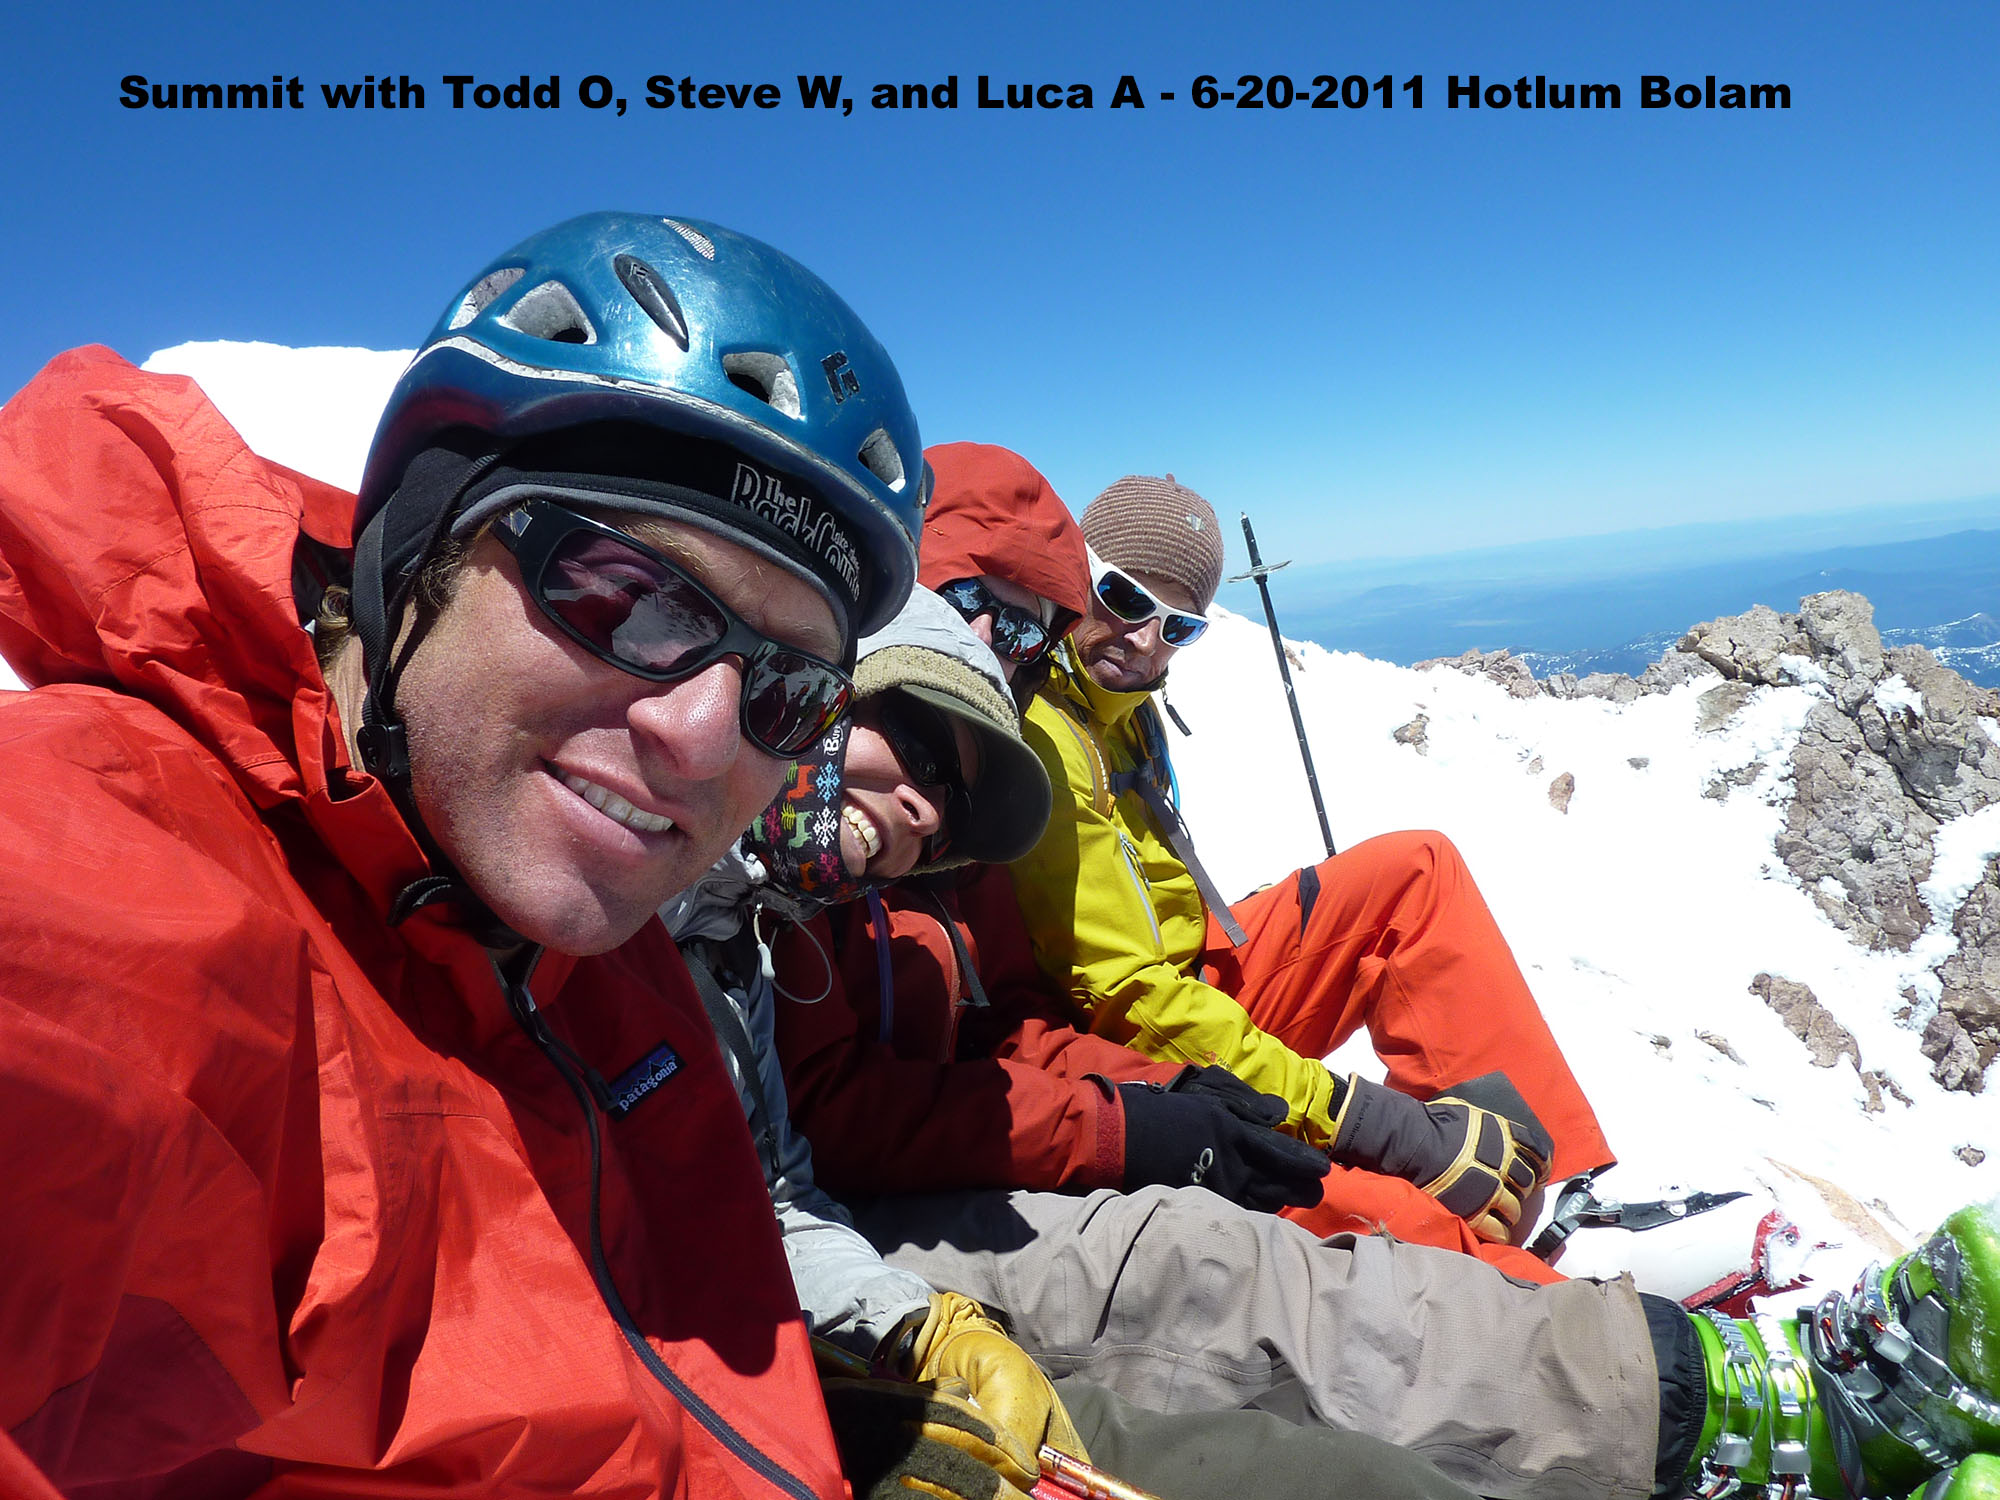
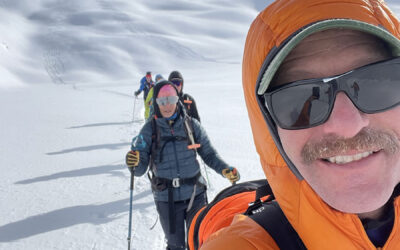
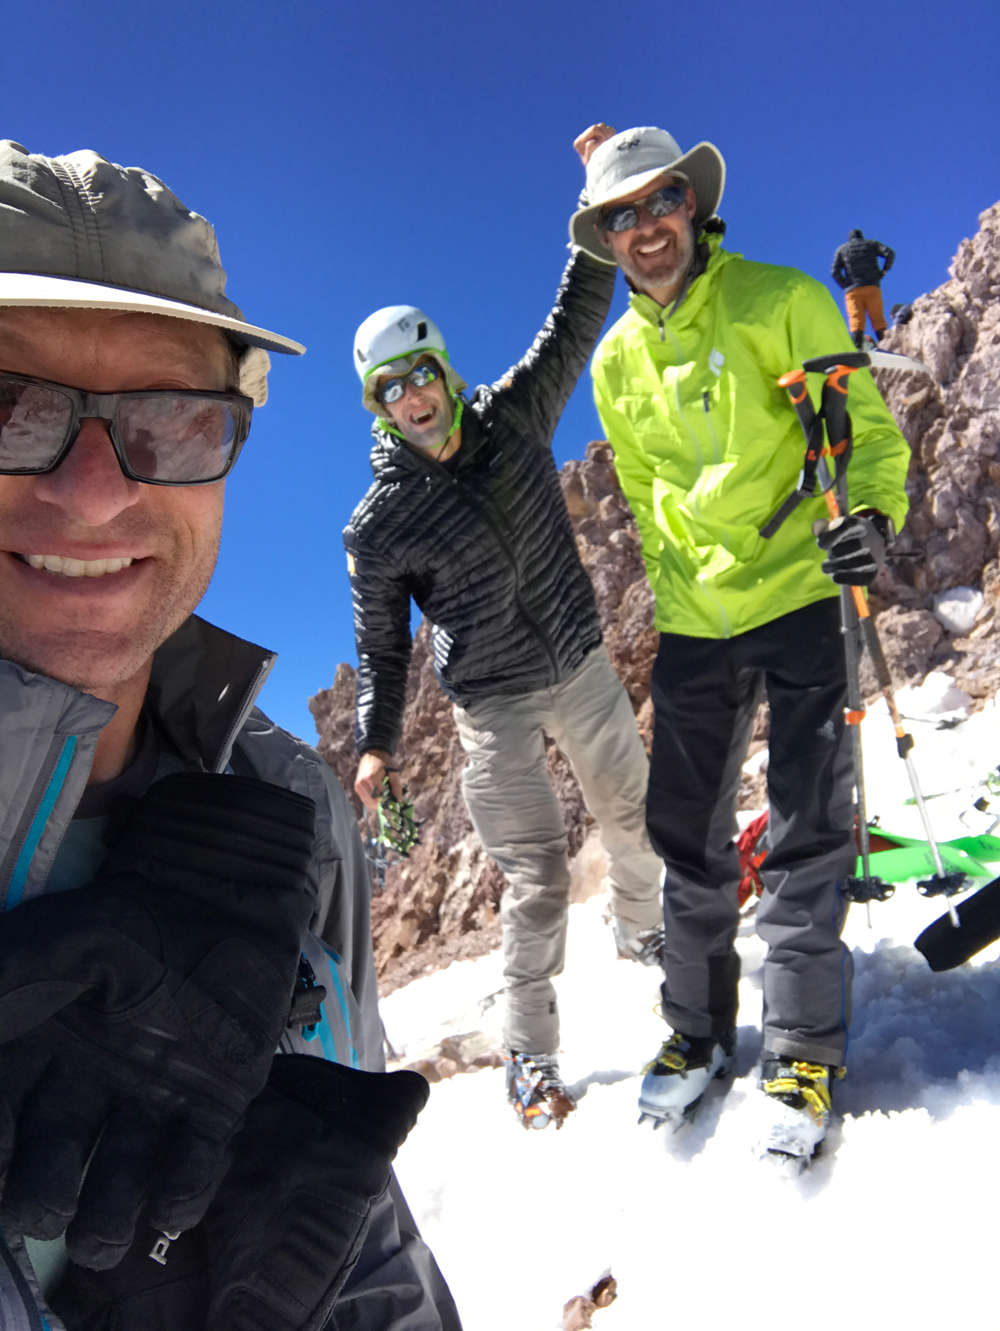
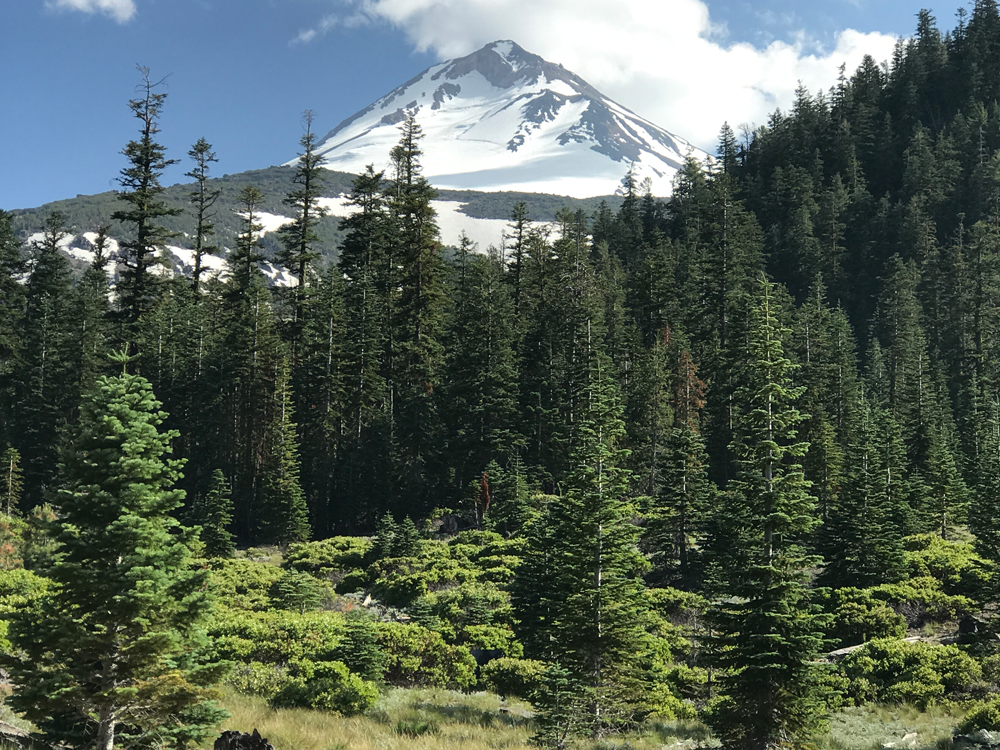
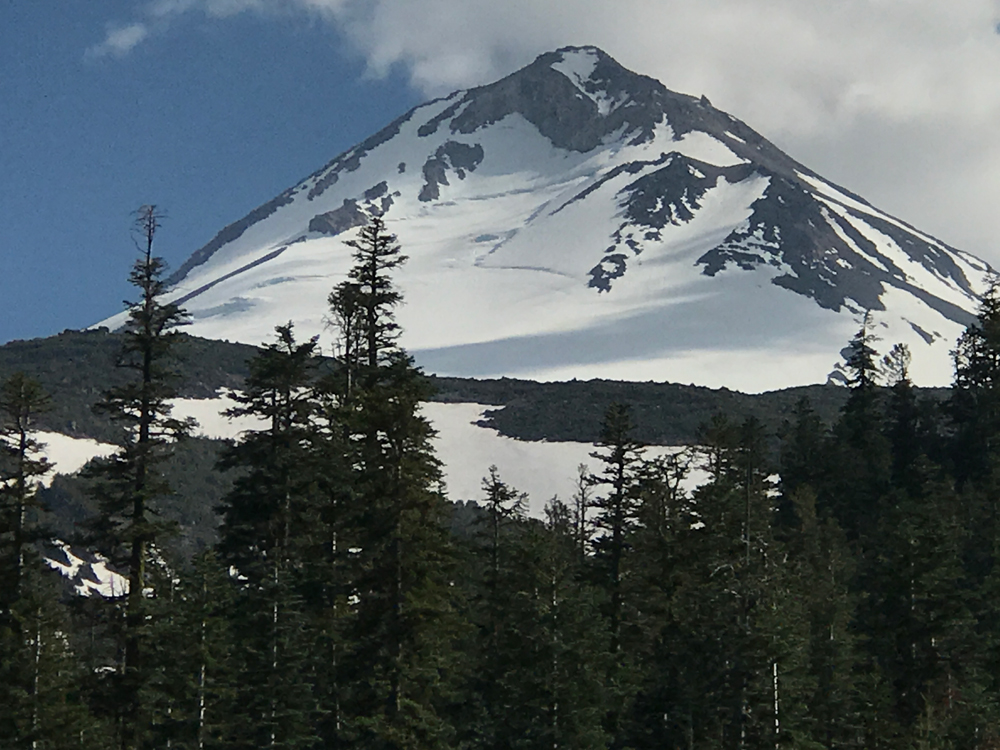
Below are some of my thoughts on the main ski routes of Mt. Shasta. I have gone up there about 50 times and skied from the summit on almost all of those days. I have also enjoyed skiing a few other routes up there like the Konwakiton Glacier below The Thumb, and Mt. Shastina. Mt. Shasta is a 5-hour drive from our shop in Truckee, and it’s the same driving time regardless of whether you go 395 from Reno, 89 from Truckee, or 5 from Sacramento. Watch out for deer, especially in the evening on hwy 89 between McCloud and Old Station. There are police as well, especially around Susanville. And don’t fall asleep while driving! Your sleep deprived and tired obviously coming back. The mosquitos can crush you at any Mt. Shasta Trailhead, so bring bug spray and a sleeping plan. Have caffeine drinks in the cooler for your return. The routes are found on any maps we sell at the shop but check out the caltopo.com website. You can zoom in and really understand the trade routes on Shasta. Draw those in on your phone app and take the intel with you. Snow cover varies over time so you may prefer variations. Shop around for the best path to climb or ski as you go, and also learn the trade routes. They are publicized for a reason. They avoid crevasses and follow the least steep and exposed path.
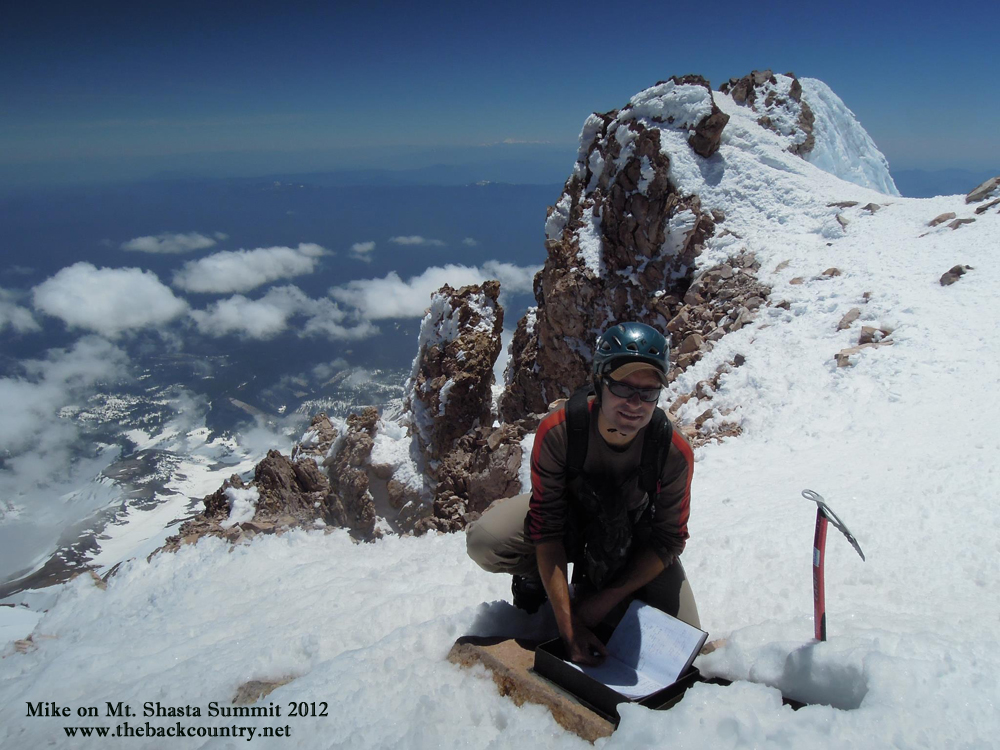
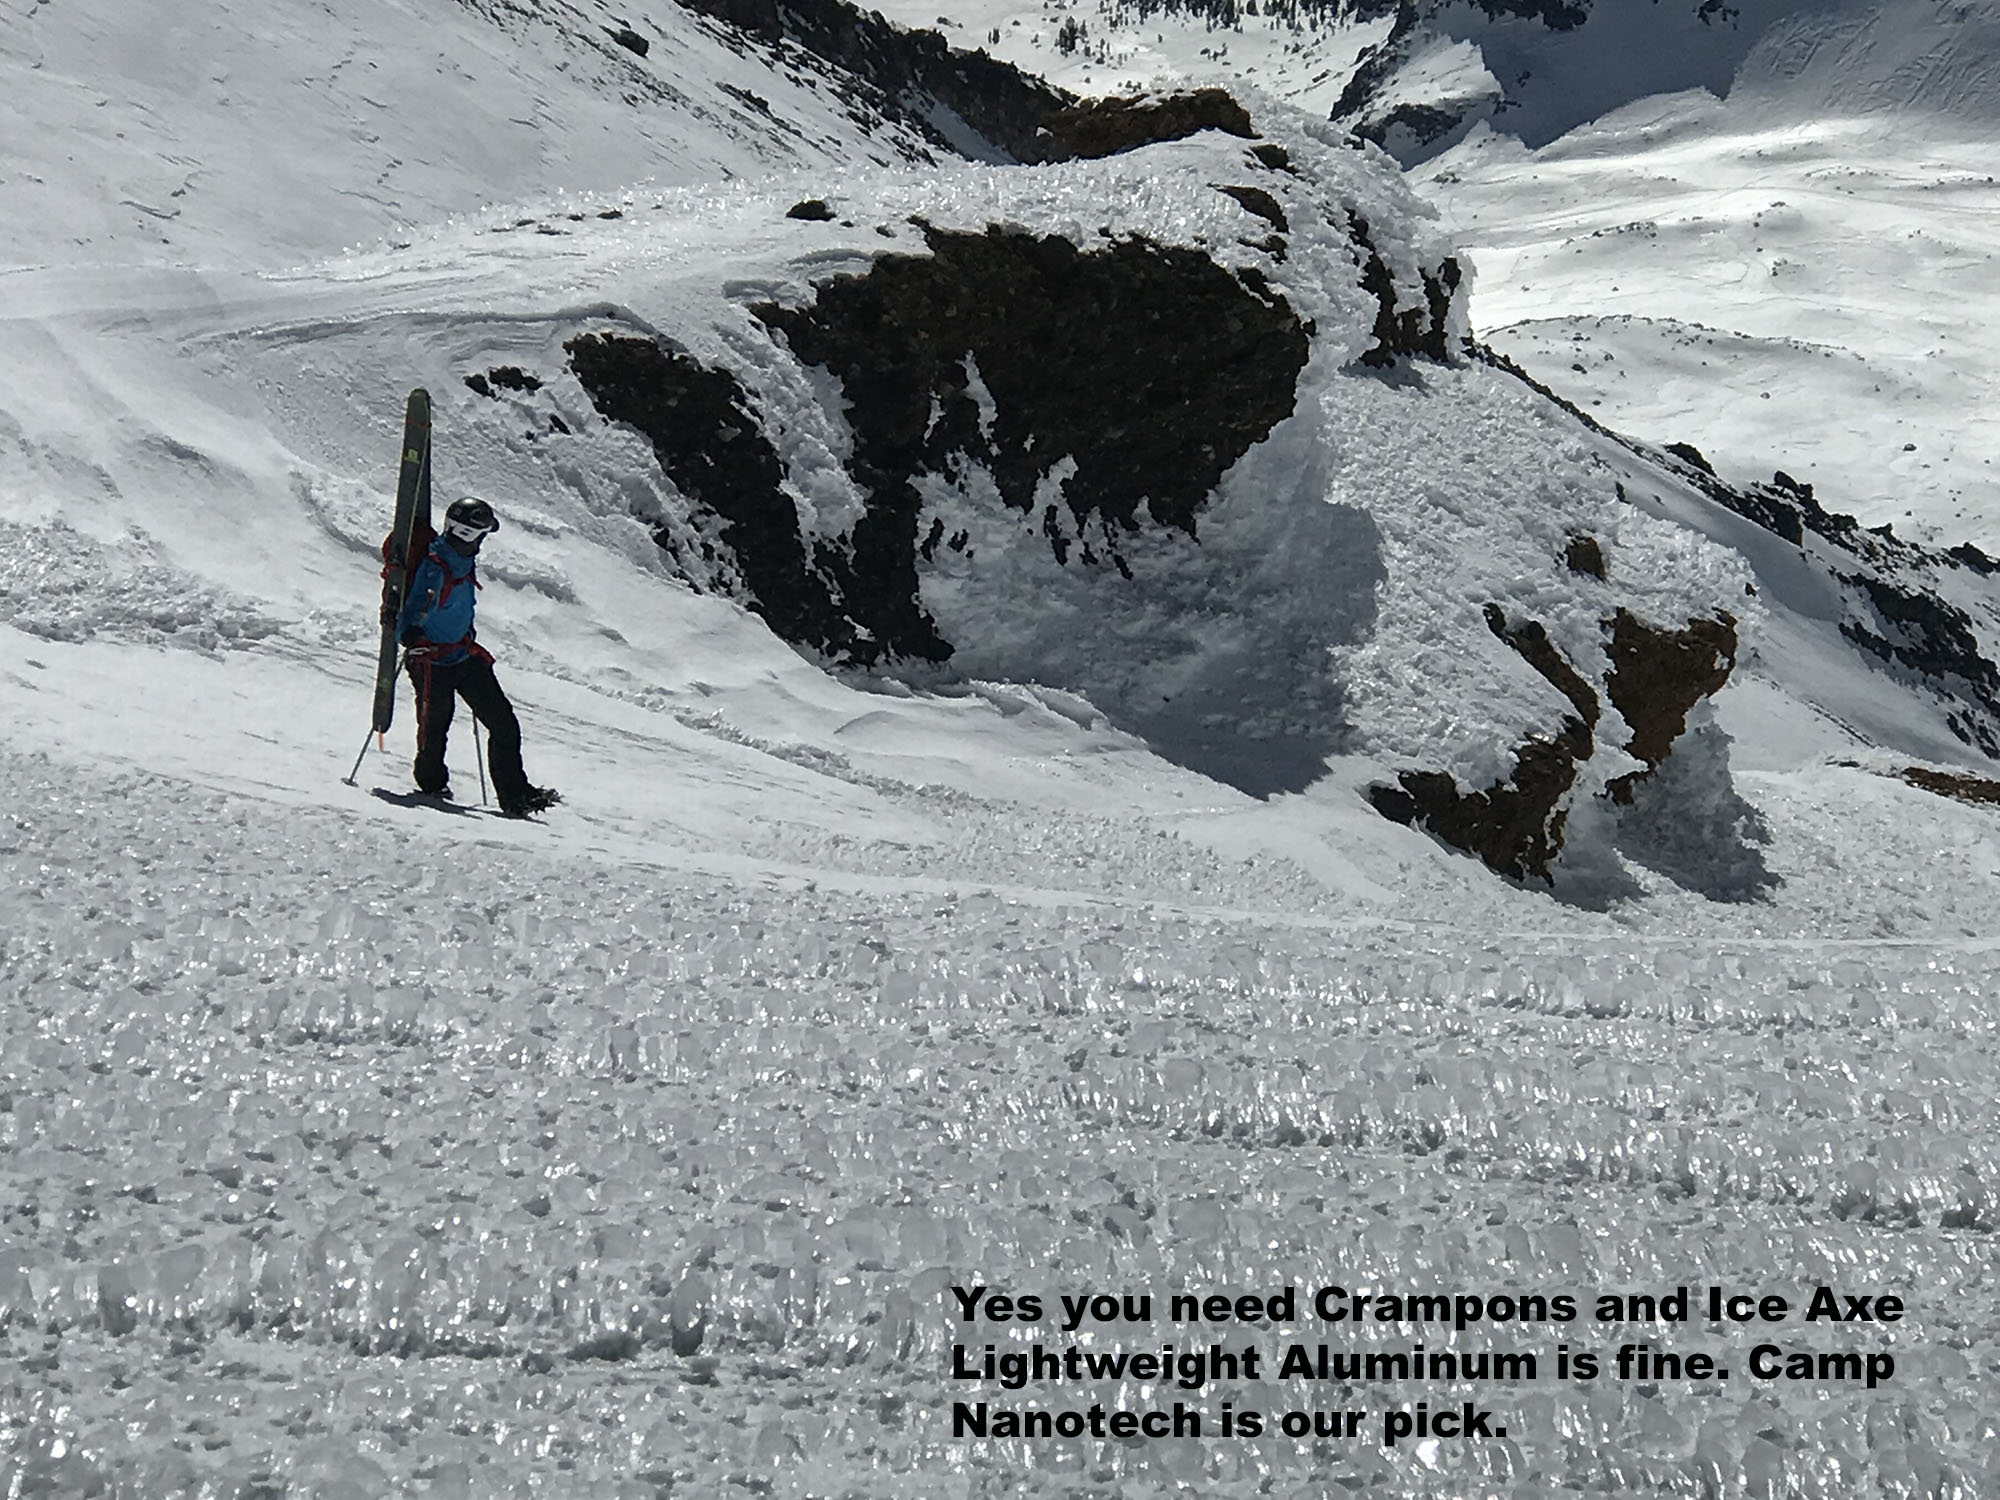
We sell lightweight aluminum boot crampons and ice axes at our shop The BackCountry in Truckee, and you will need them. I like the Camp Nanotech kit best. I also wear a super lightweight rock-climbing helmet, and bring the lightest layers of clothing that will get the job done. A Sun Hoody will help you burn less and stay warmer at the top. Bring food you really like and force yourself to drink and eat. Remember that everyone feels bad at high altitude and keep looking for motivation to keep going. Music helps me a lot. Watch for symptoms of High-Altitude Sickness, and don’t be afraid to take some breaks. I have felt terrible, taken a short nap to recover or wait out wind squalls, and continued to a successful day. Although you really should be at the top by maybe 1pm, and leave a cushion for trouble, I have been on top many times at 3pm and found great corn snow all the way back. I find Mt. Shasta is mostly firm in the steep upper 2000′ on all sides. However, you are probably skiing Mt. Shasta in April, May or June when midday warming can send rocks or even wet slides into your path. That is mostly a problem on the South Side. Make it easy on yourself and start WAY earlier than you think. Only venture onto a climb of this magnitude with partners who are near equal in endurance and skill. Make sure to get a summit pass to climb above 10,000′ and bring a wag bag (provided free at trailheads). The summit permit is $25/person or $30/annual. No dogs are allowed on the mountain. If the trailhead is going to be under snow, then try to get a permit at the plowed south side entrance or at the McCloud ranger station on hwy 89. They should put a second self-serve permit station on the highway since so many people go to the east and north trailheads before the snow melts out.
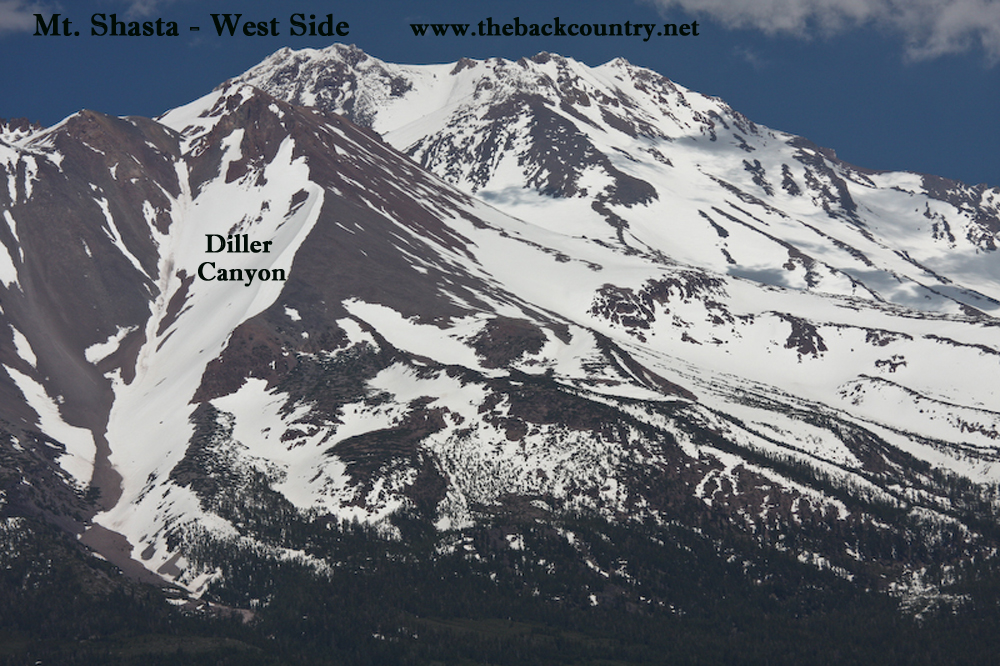
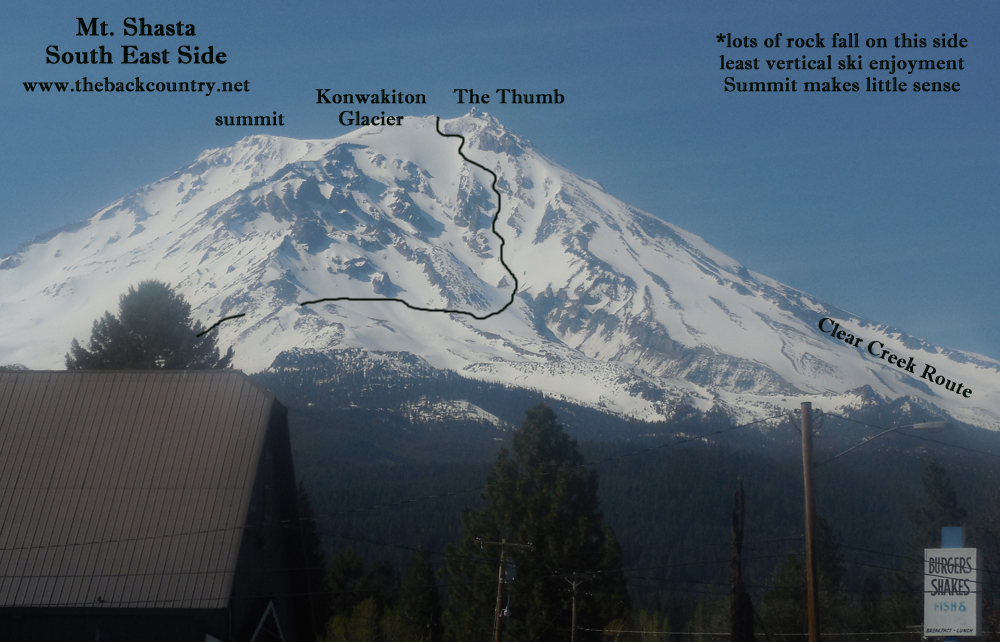
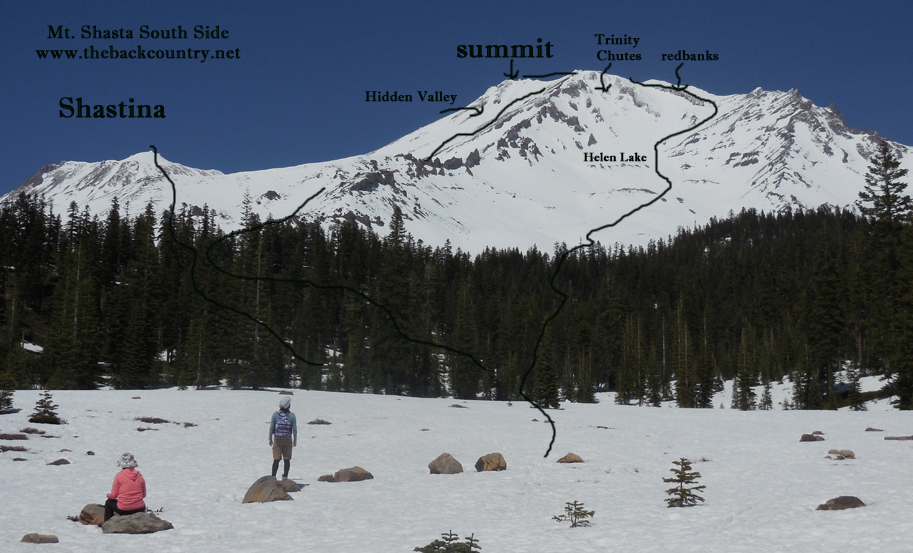
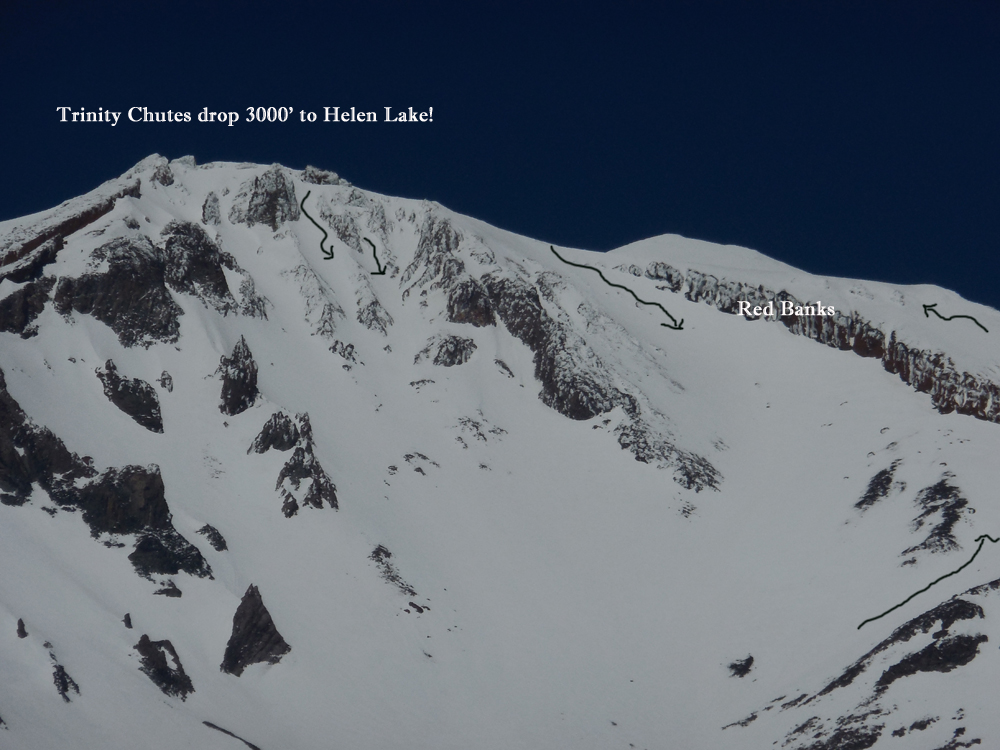
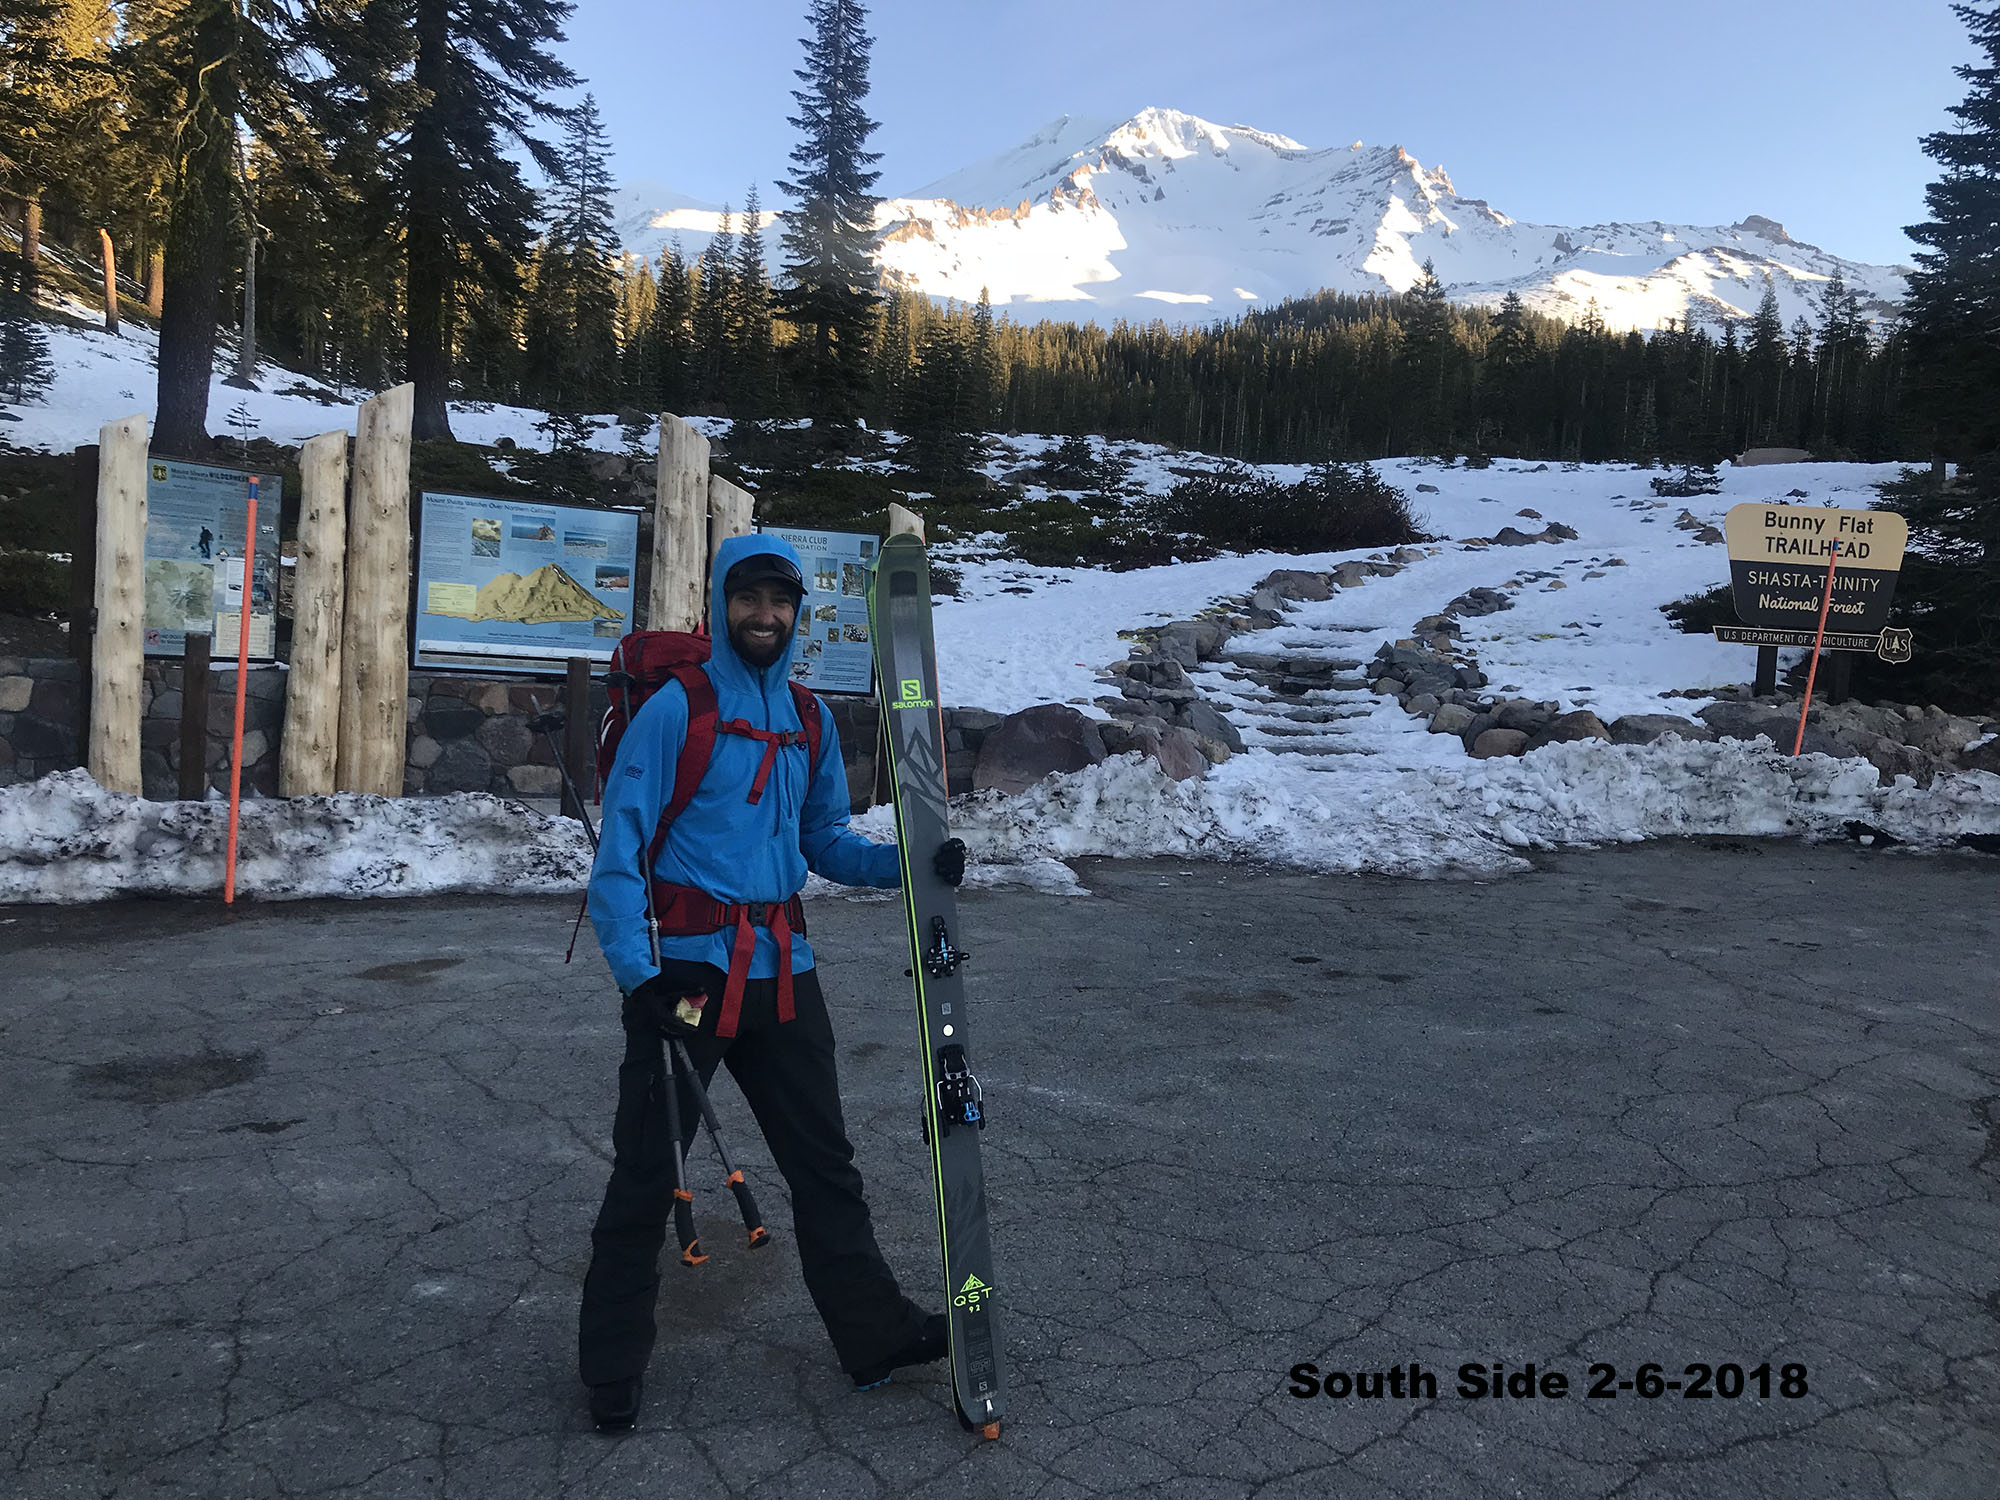
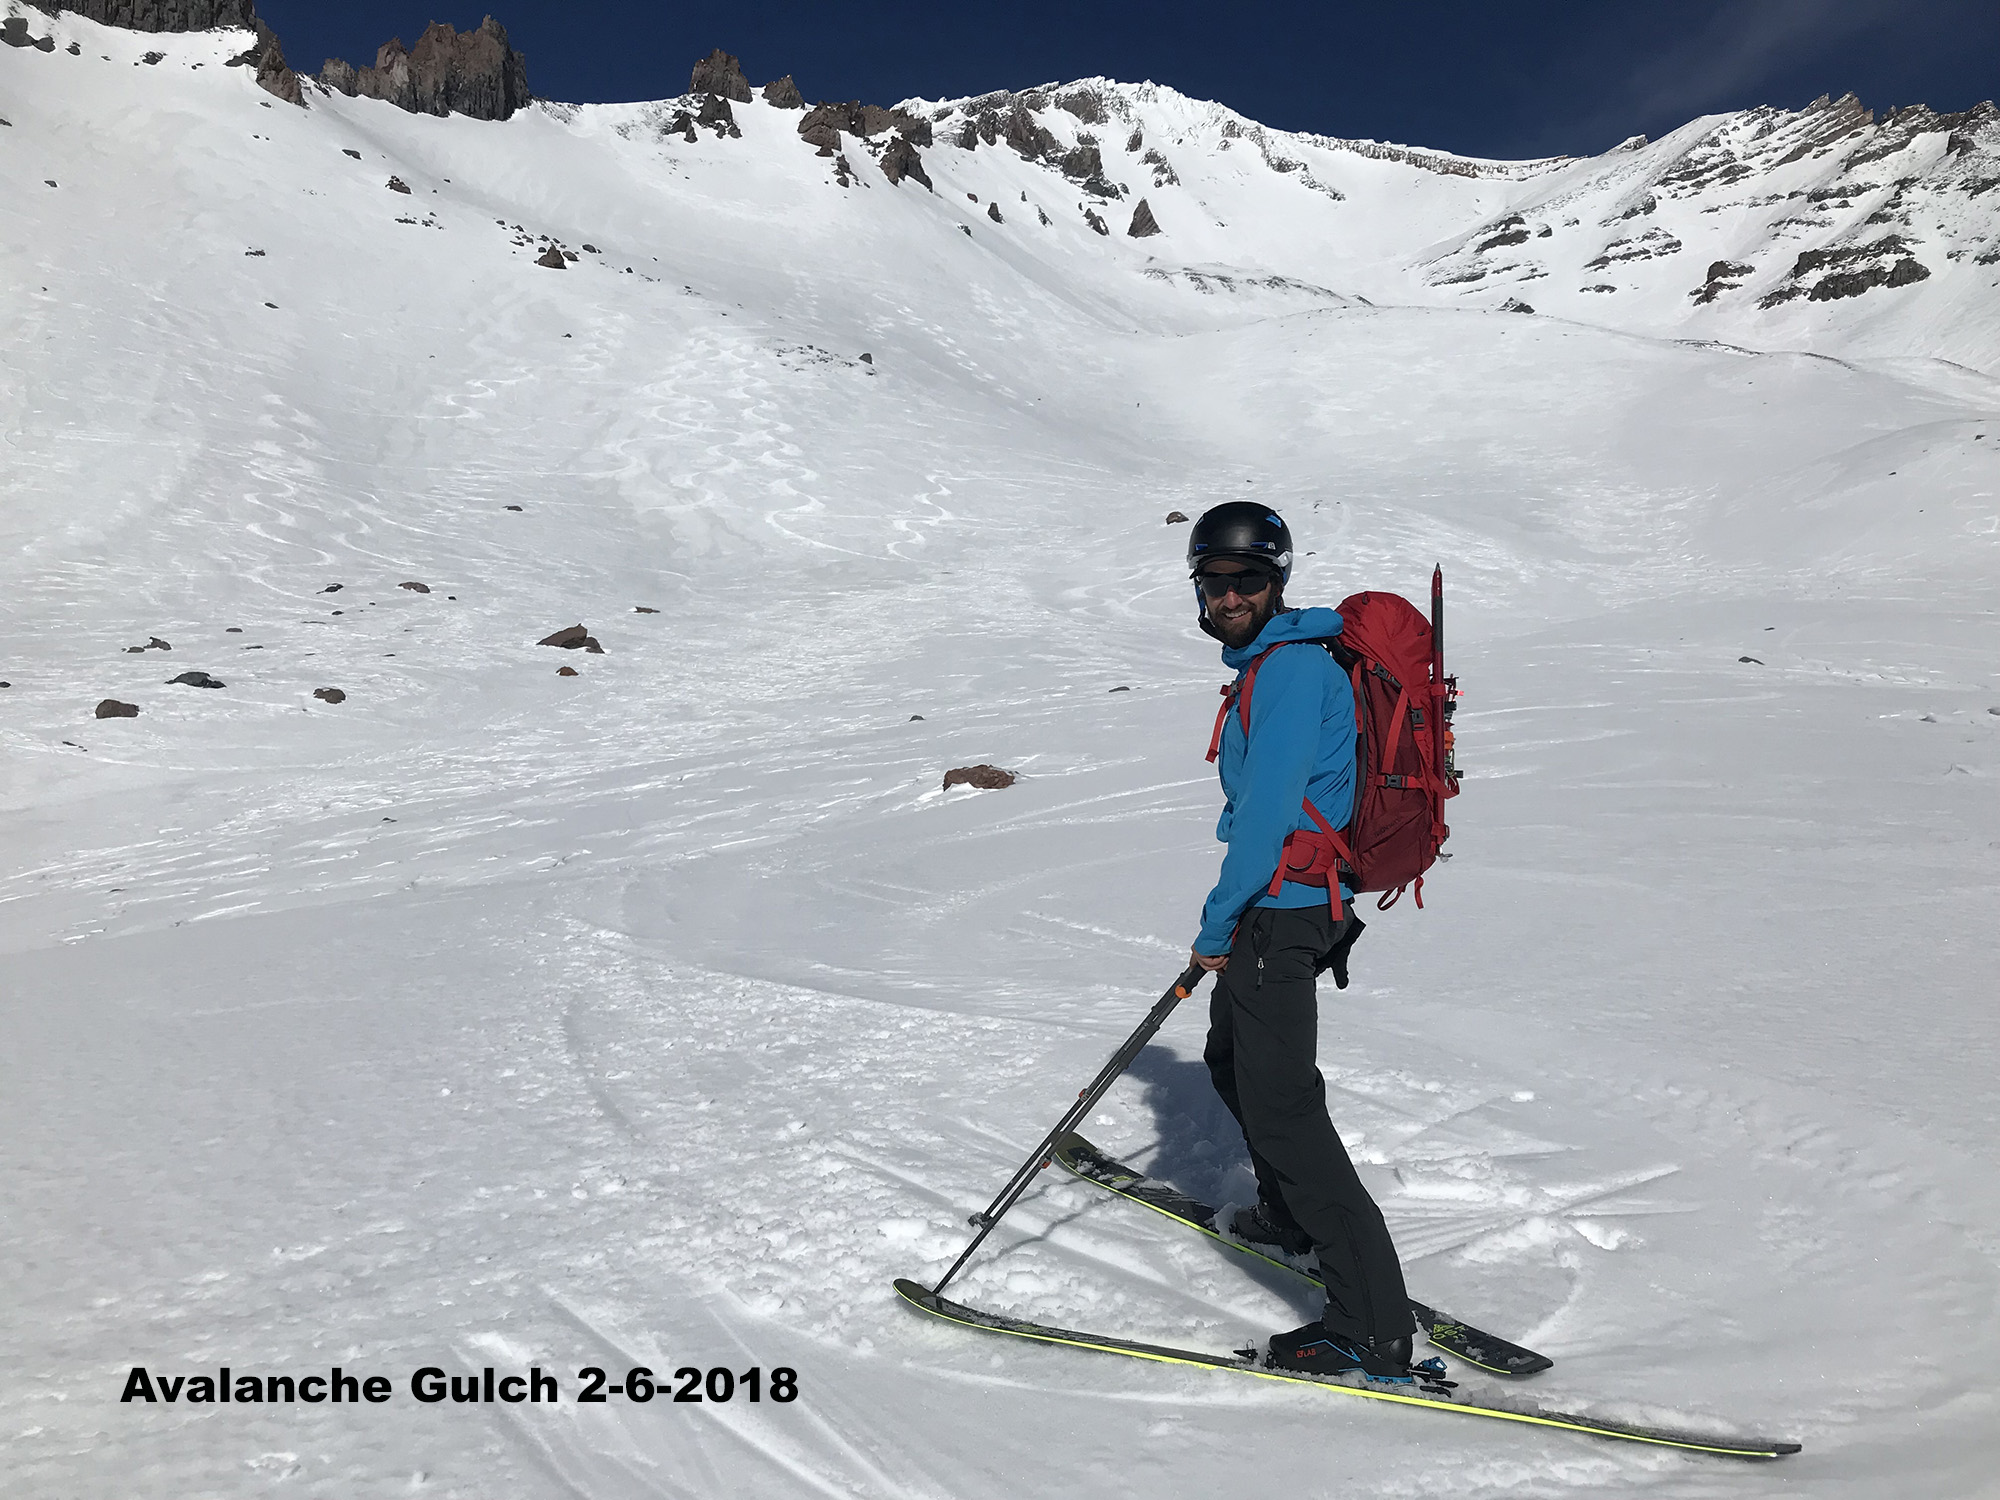
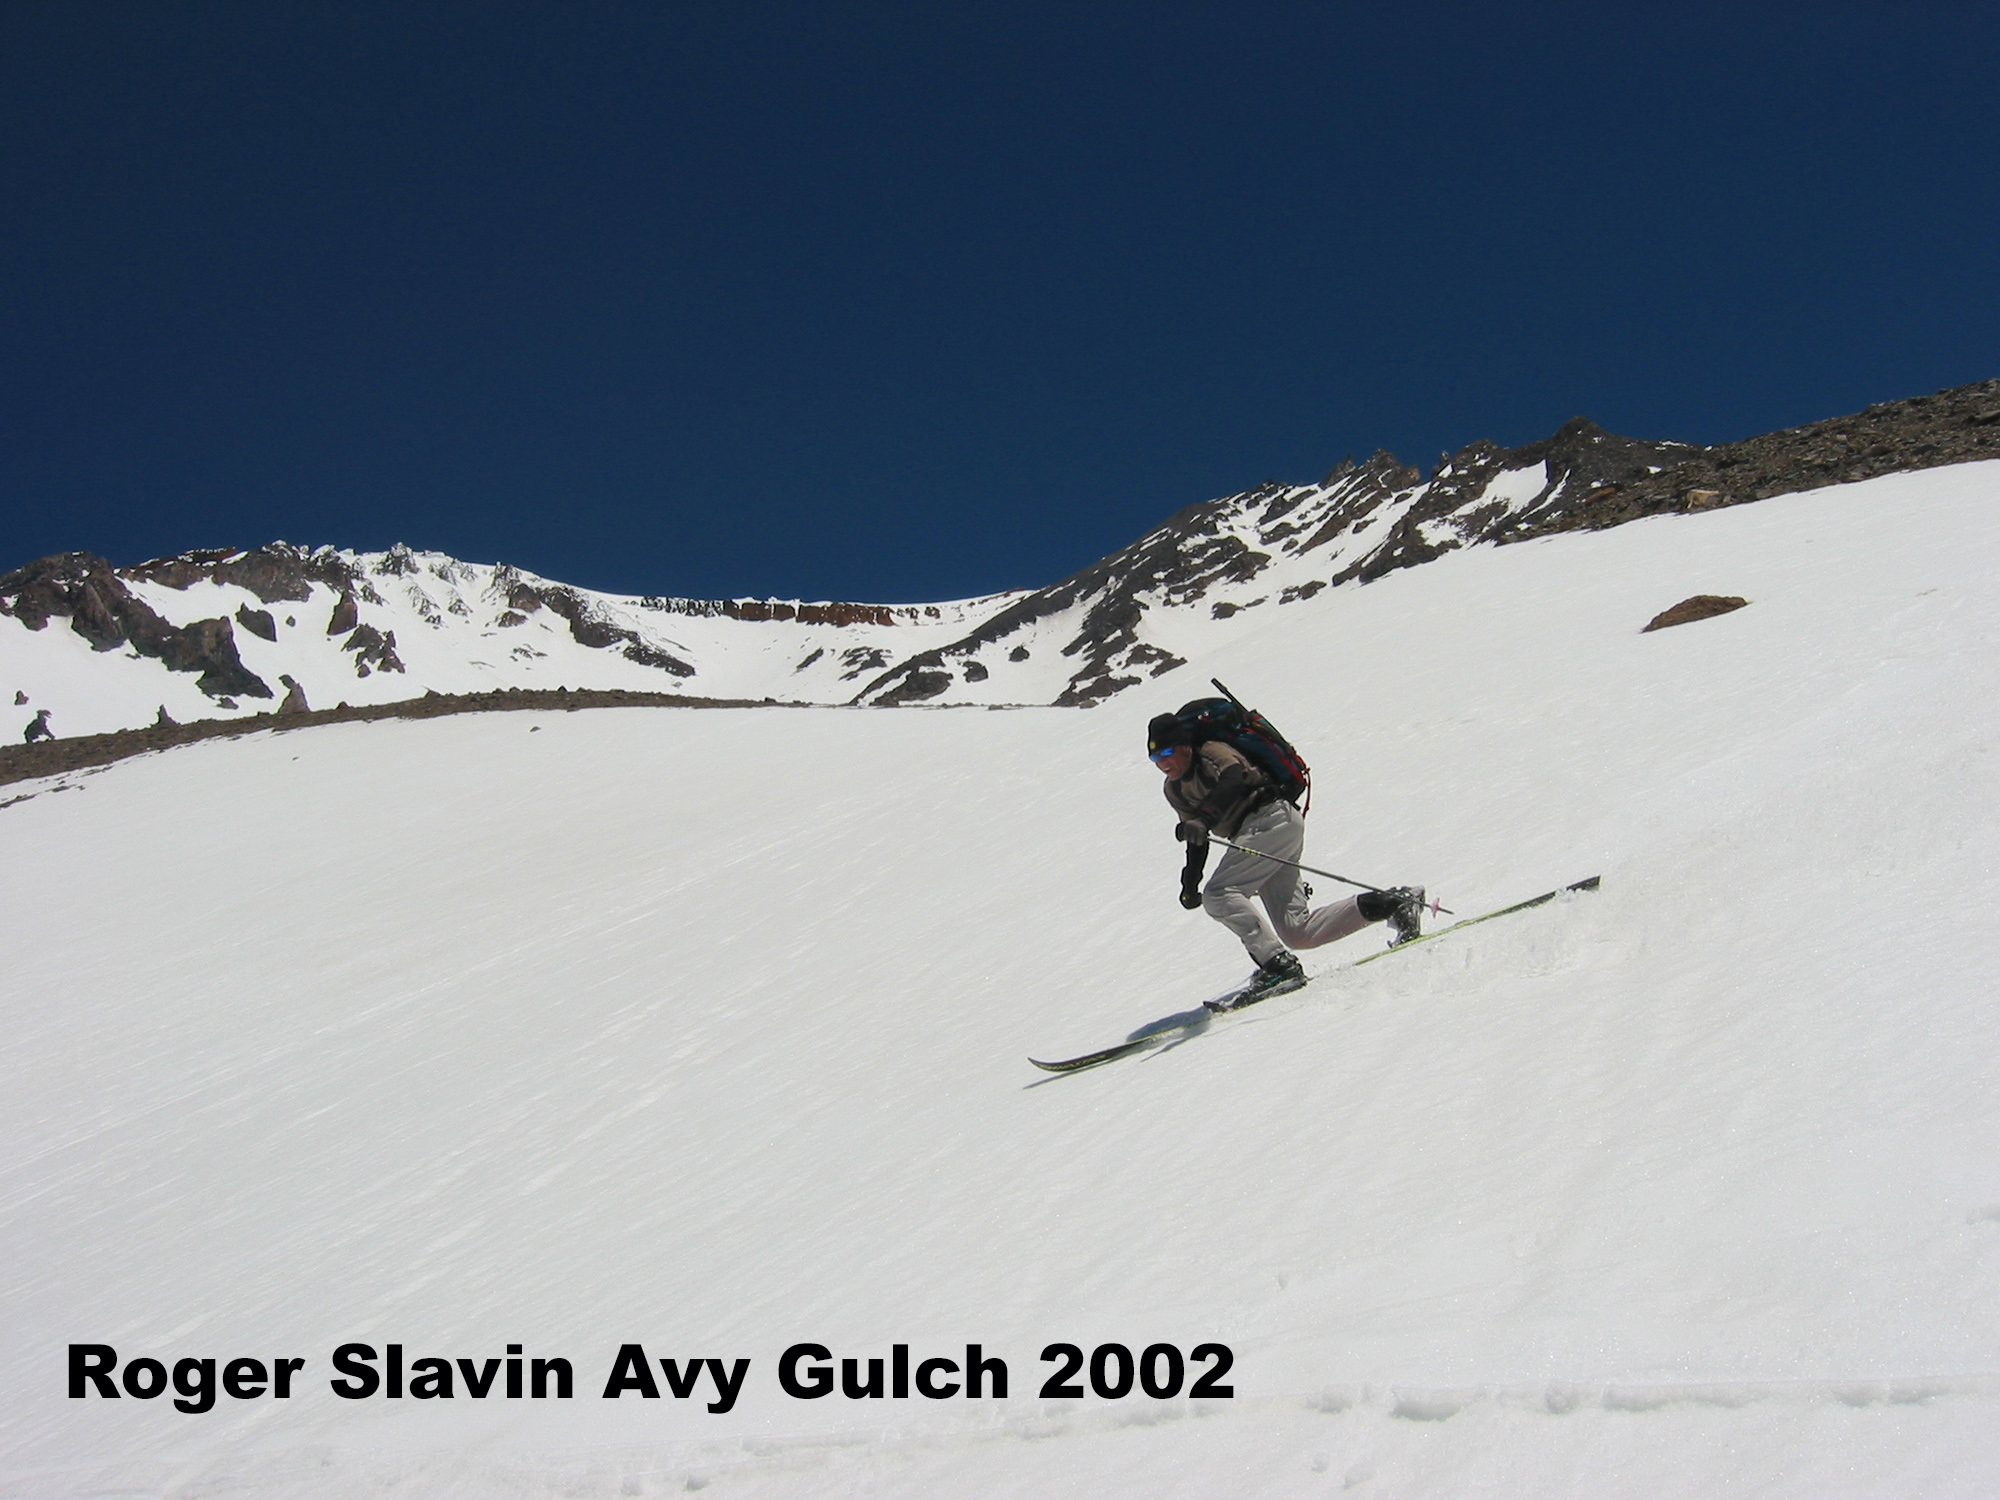
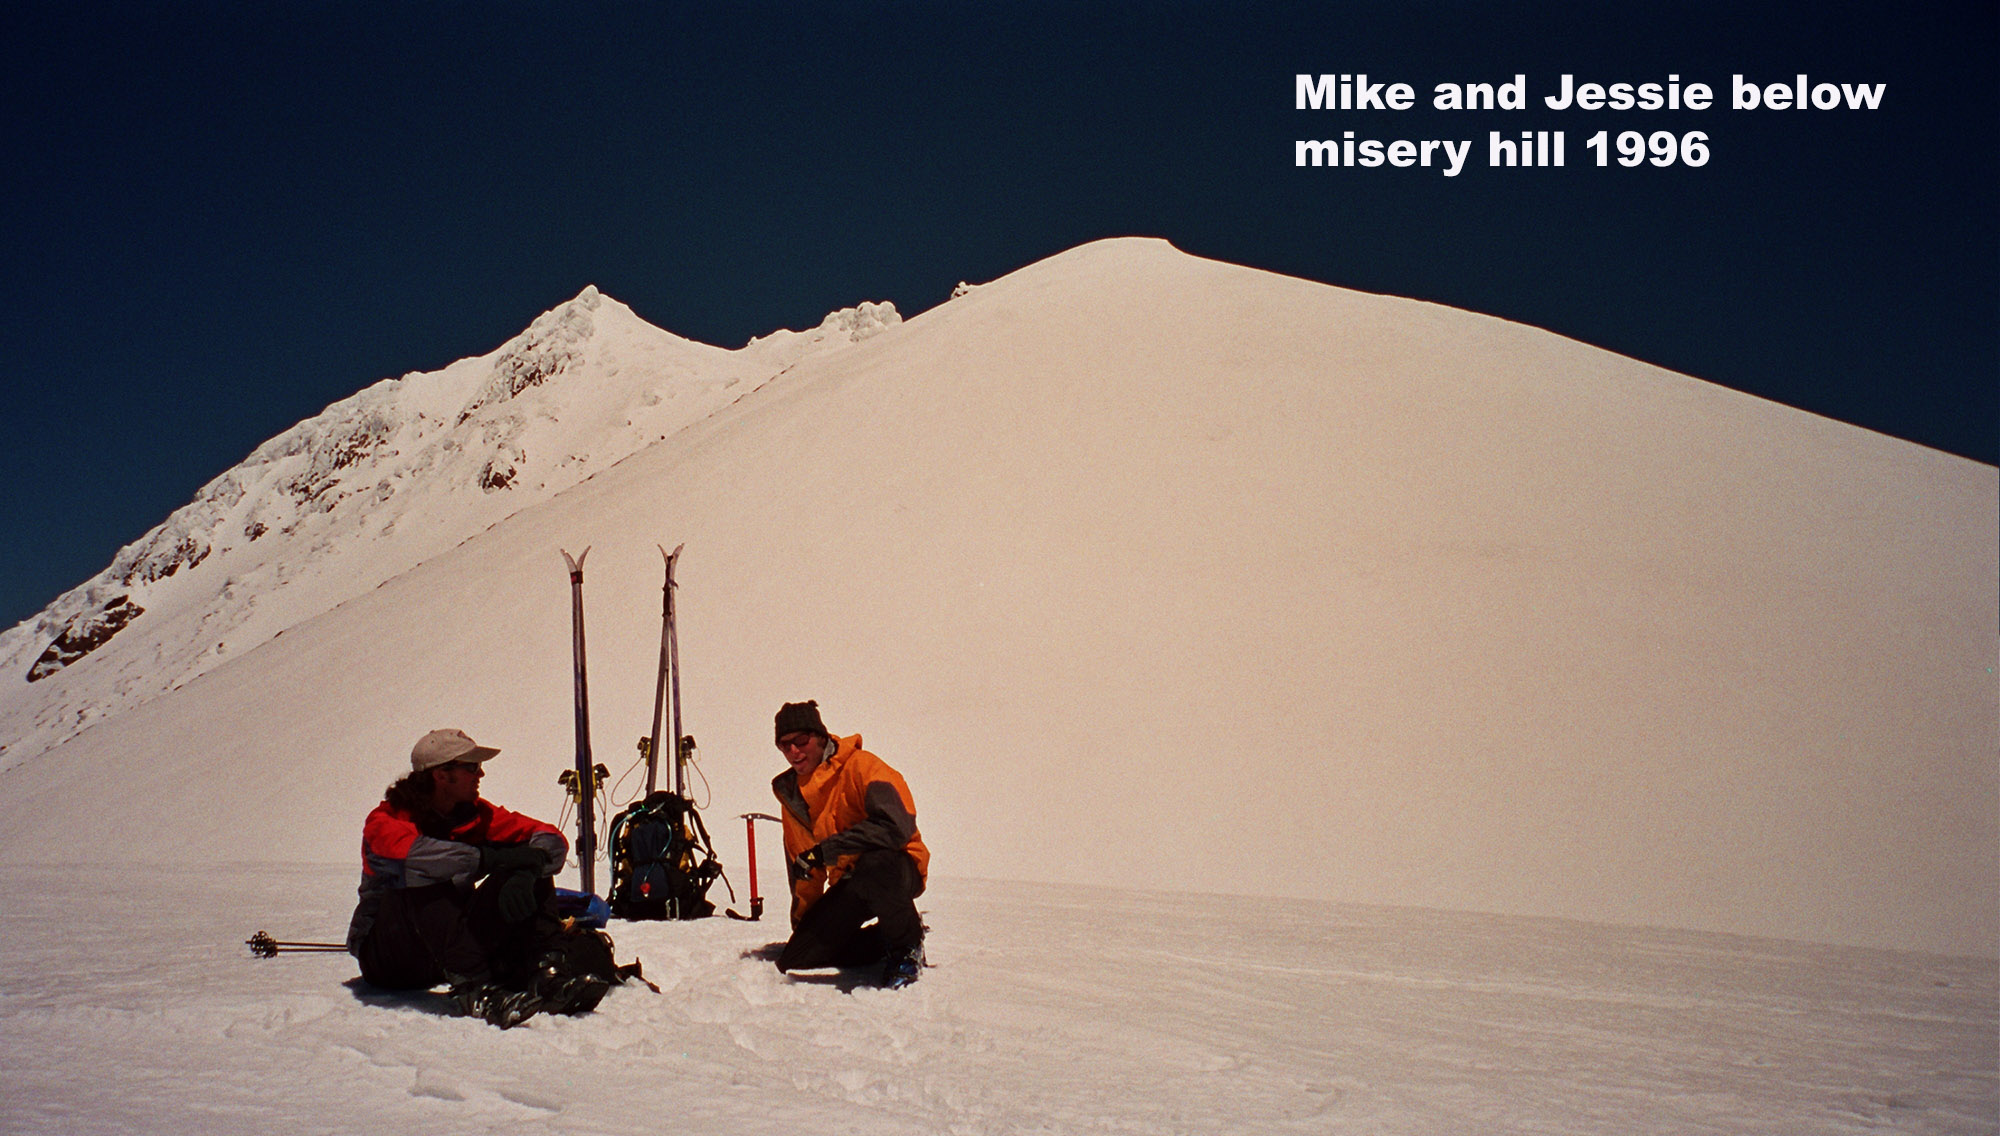
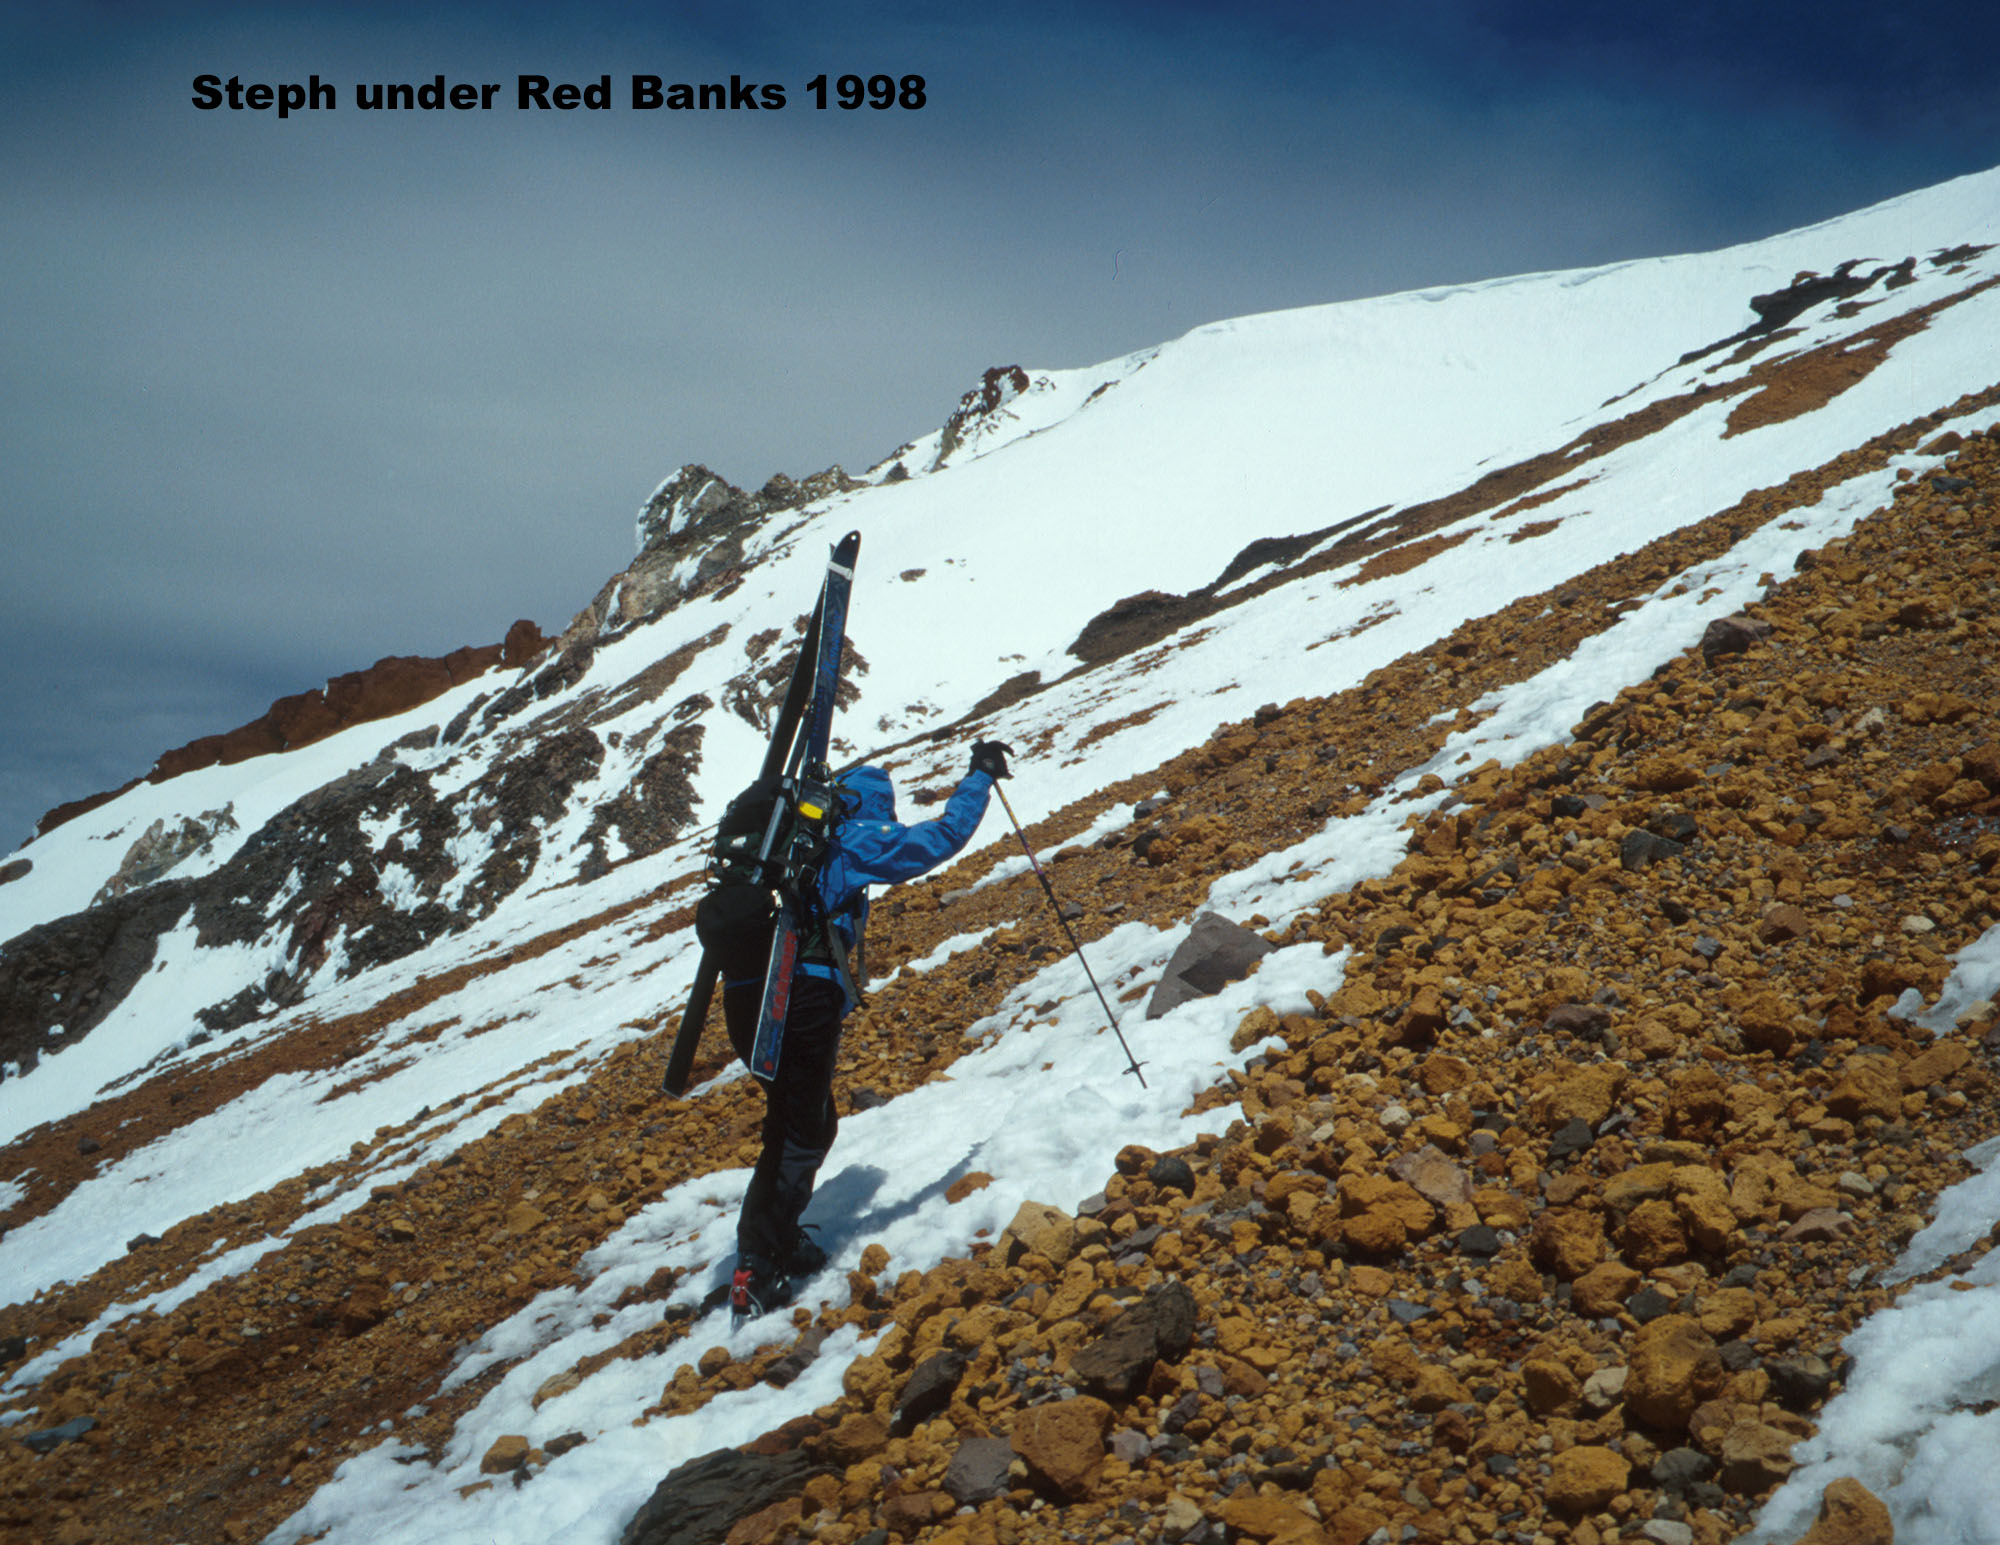
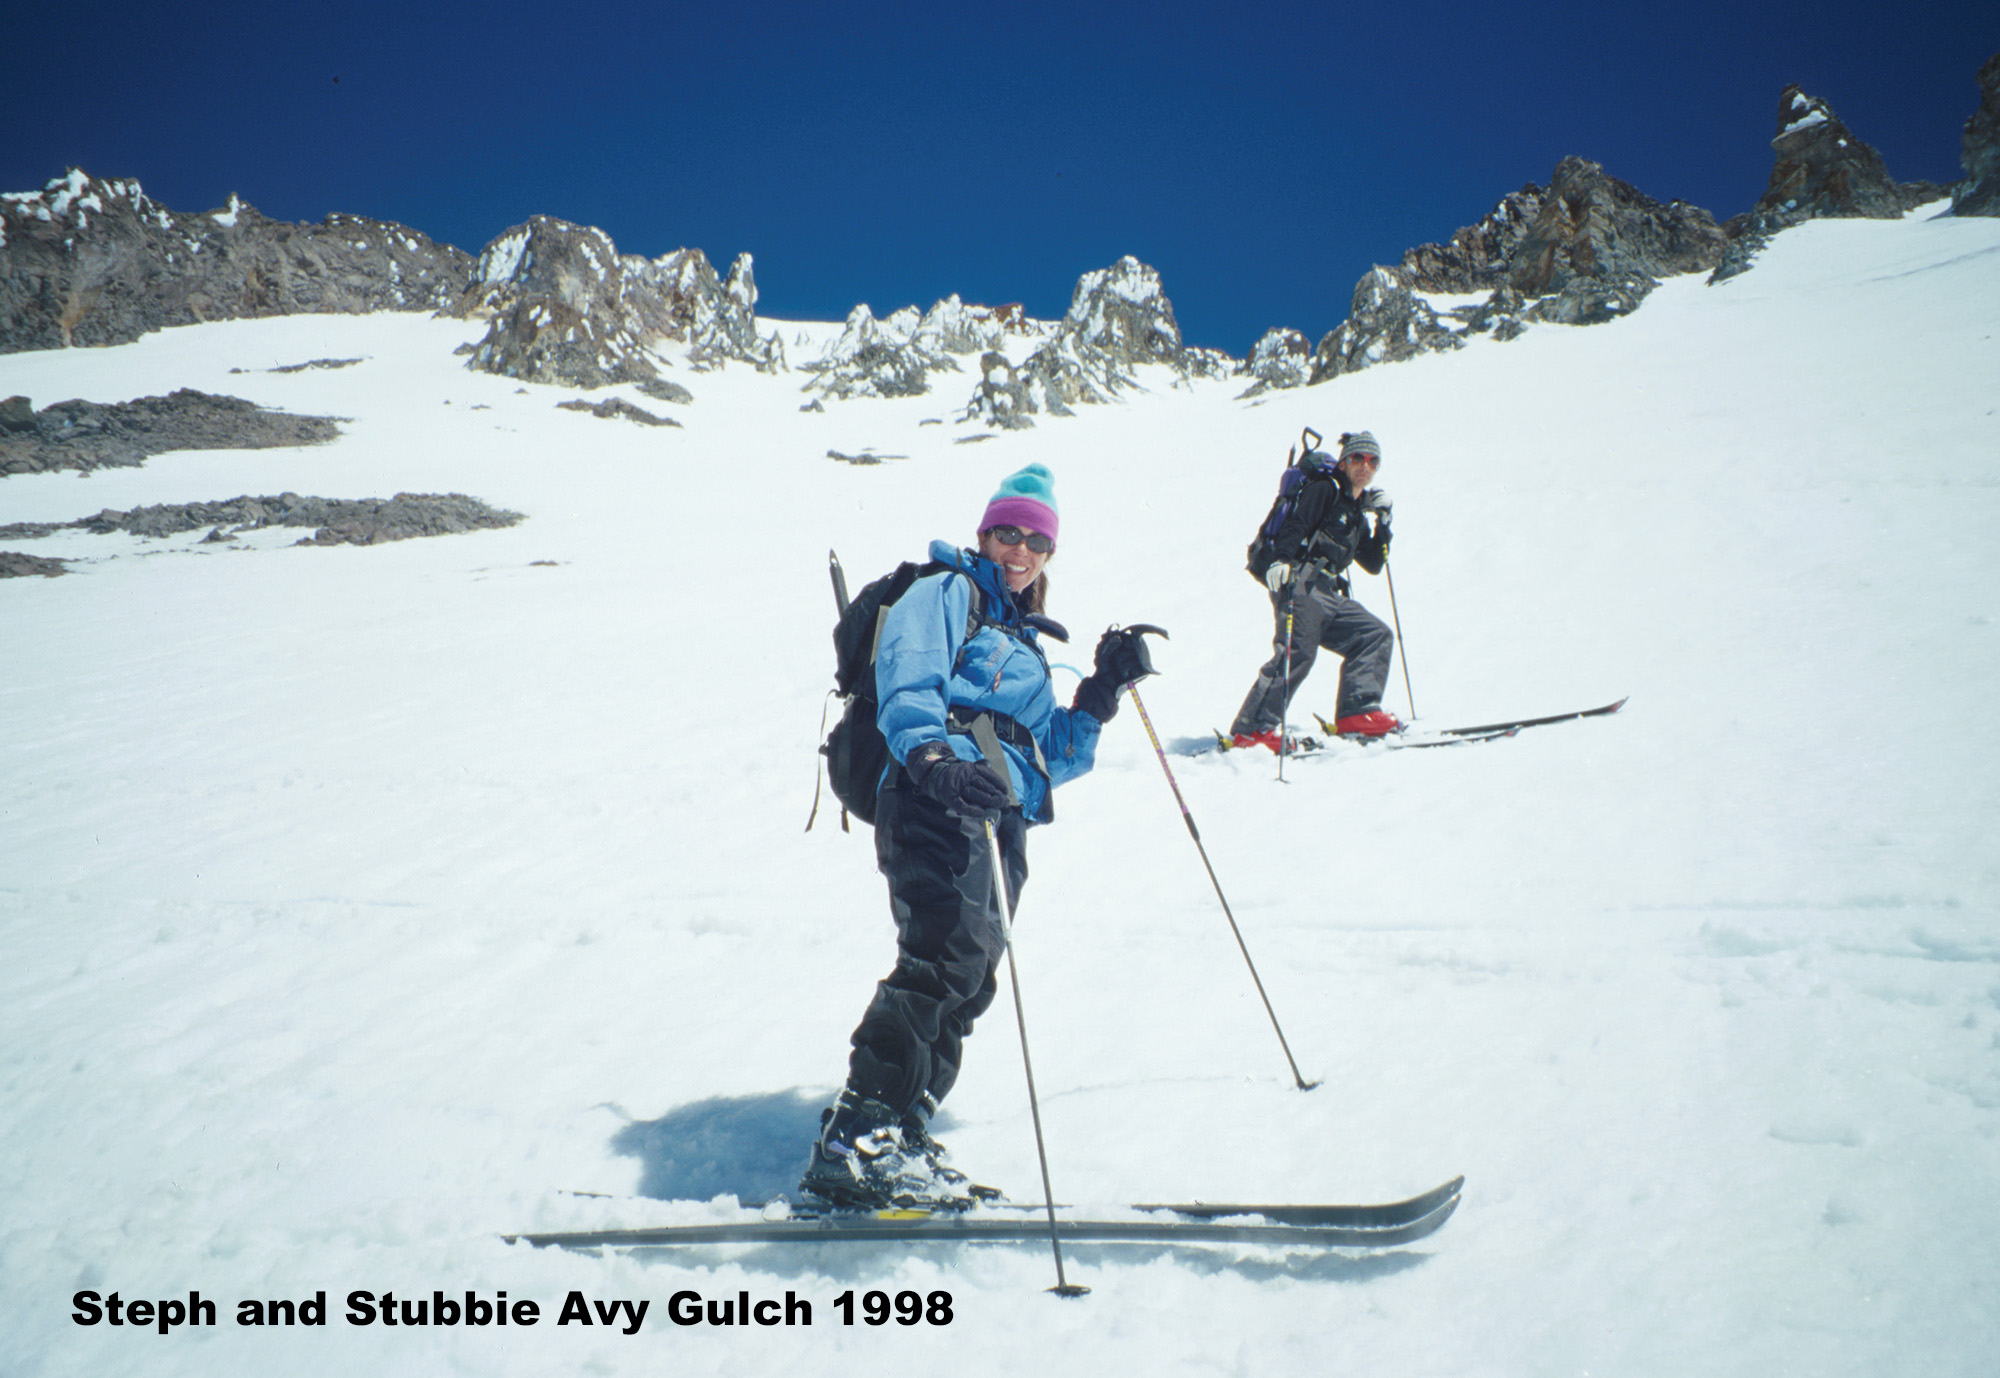
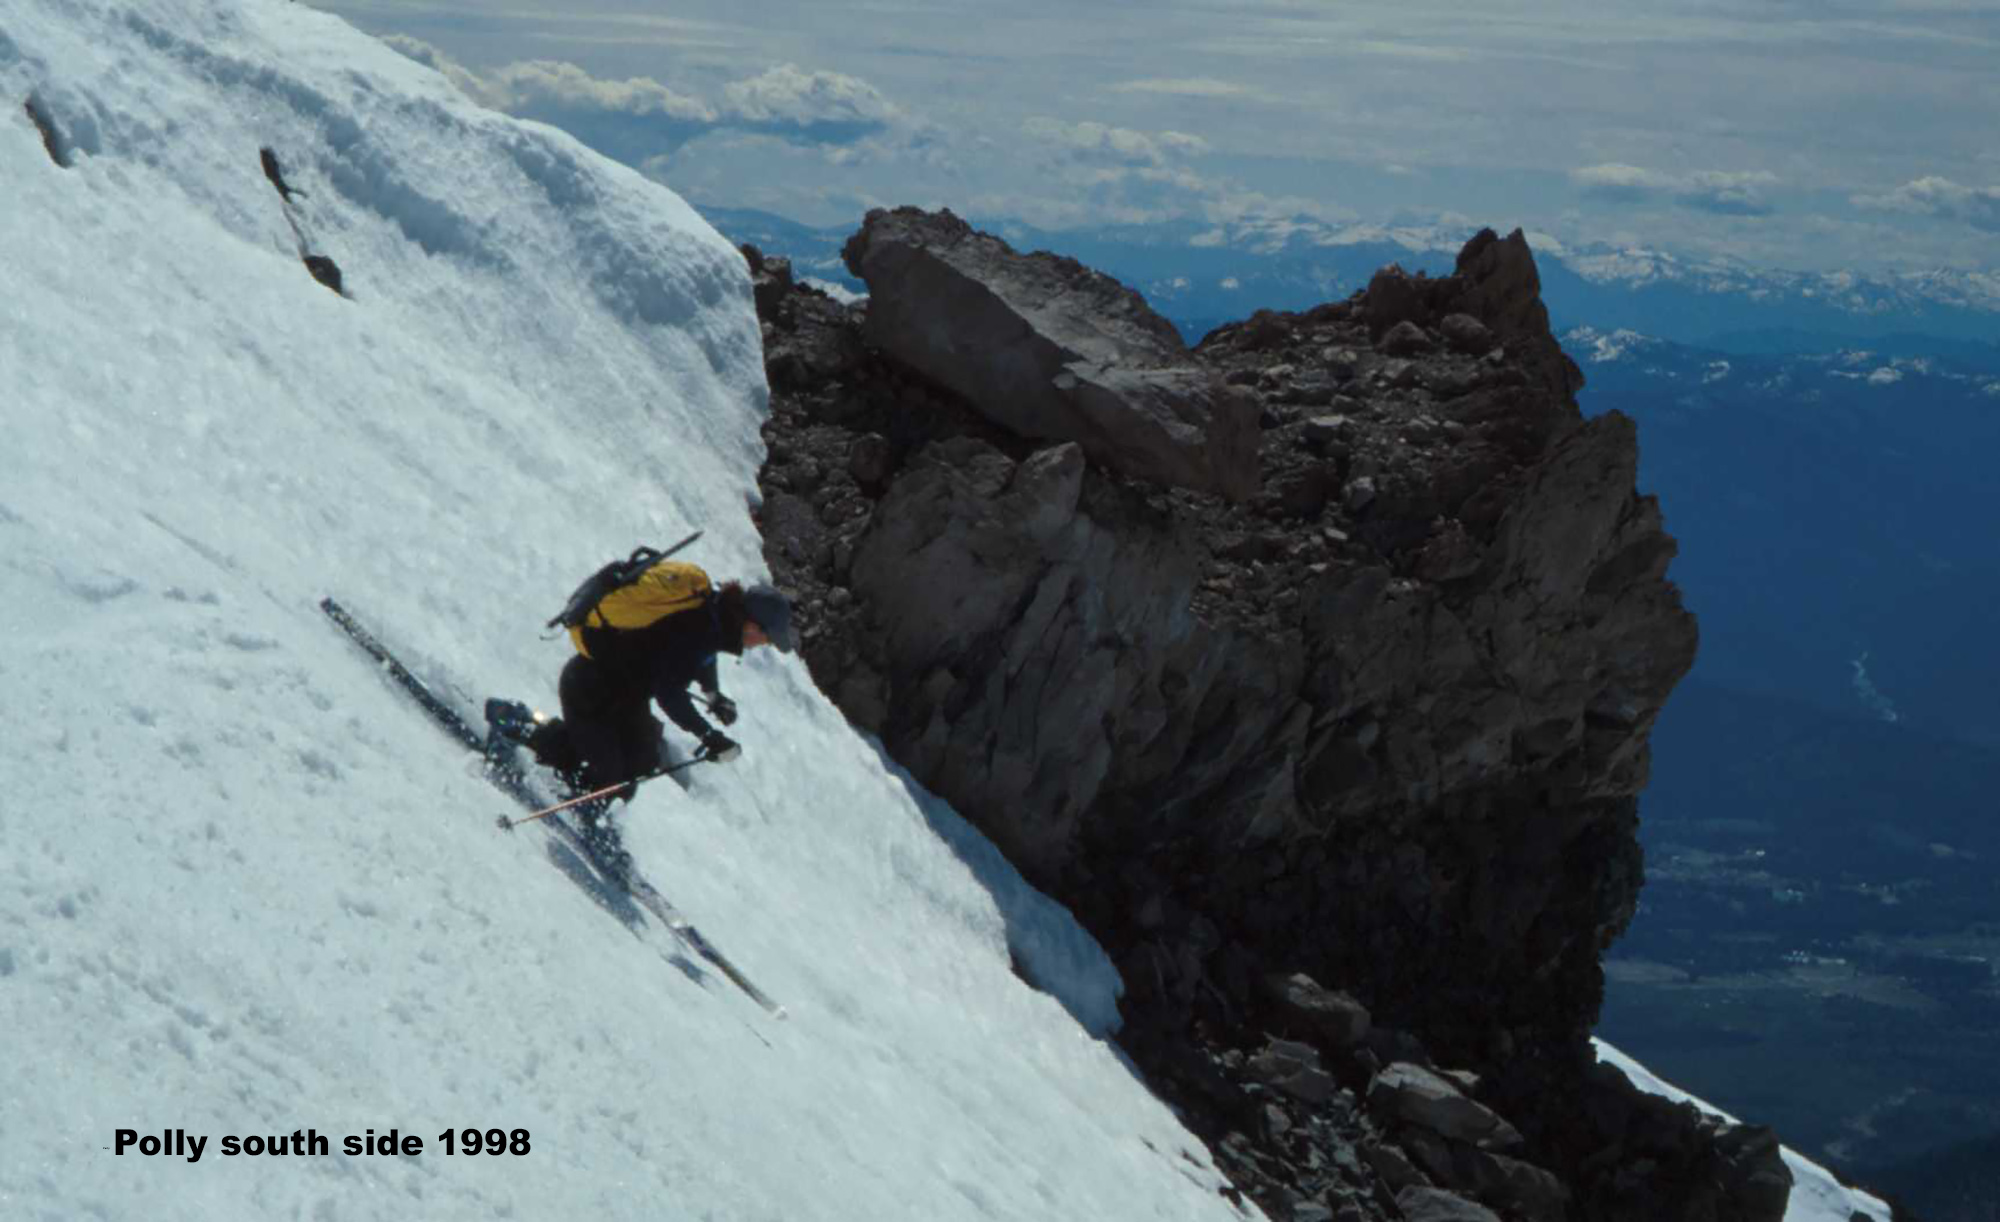
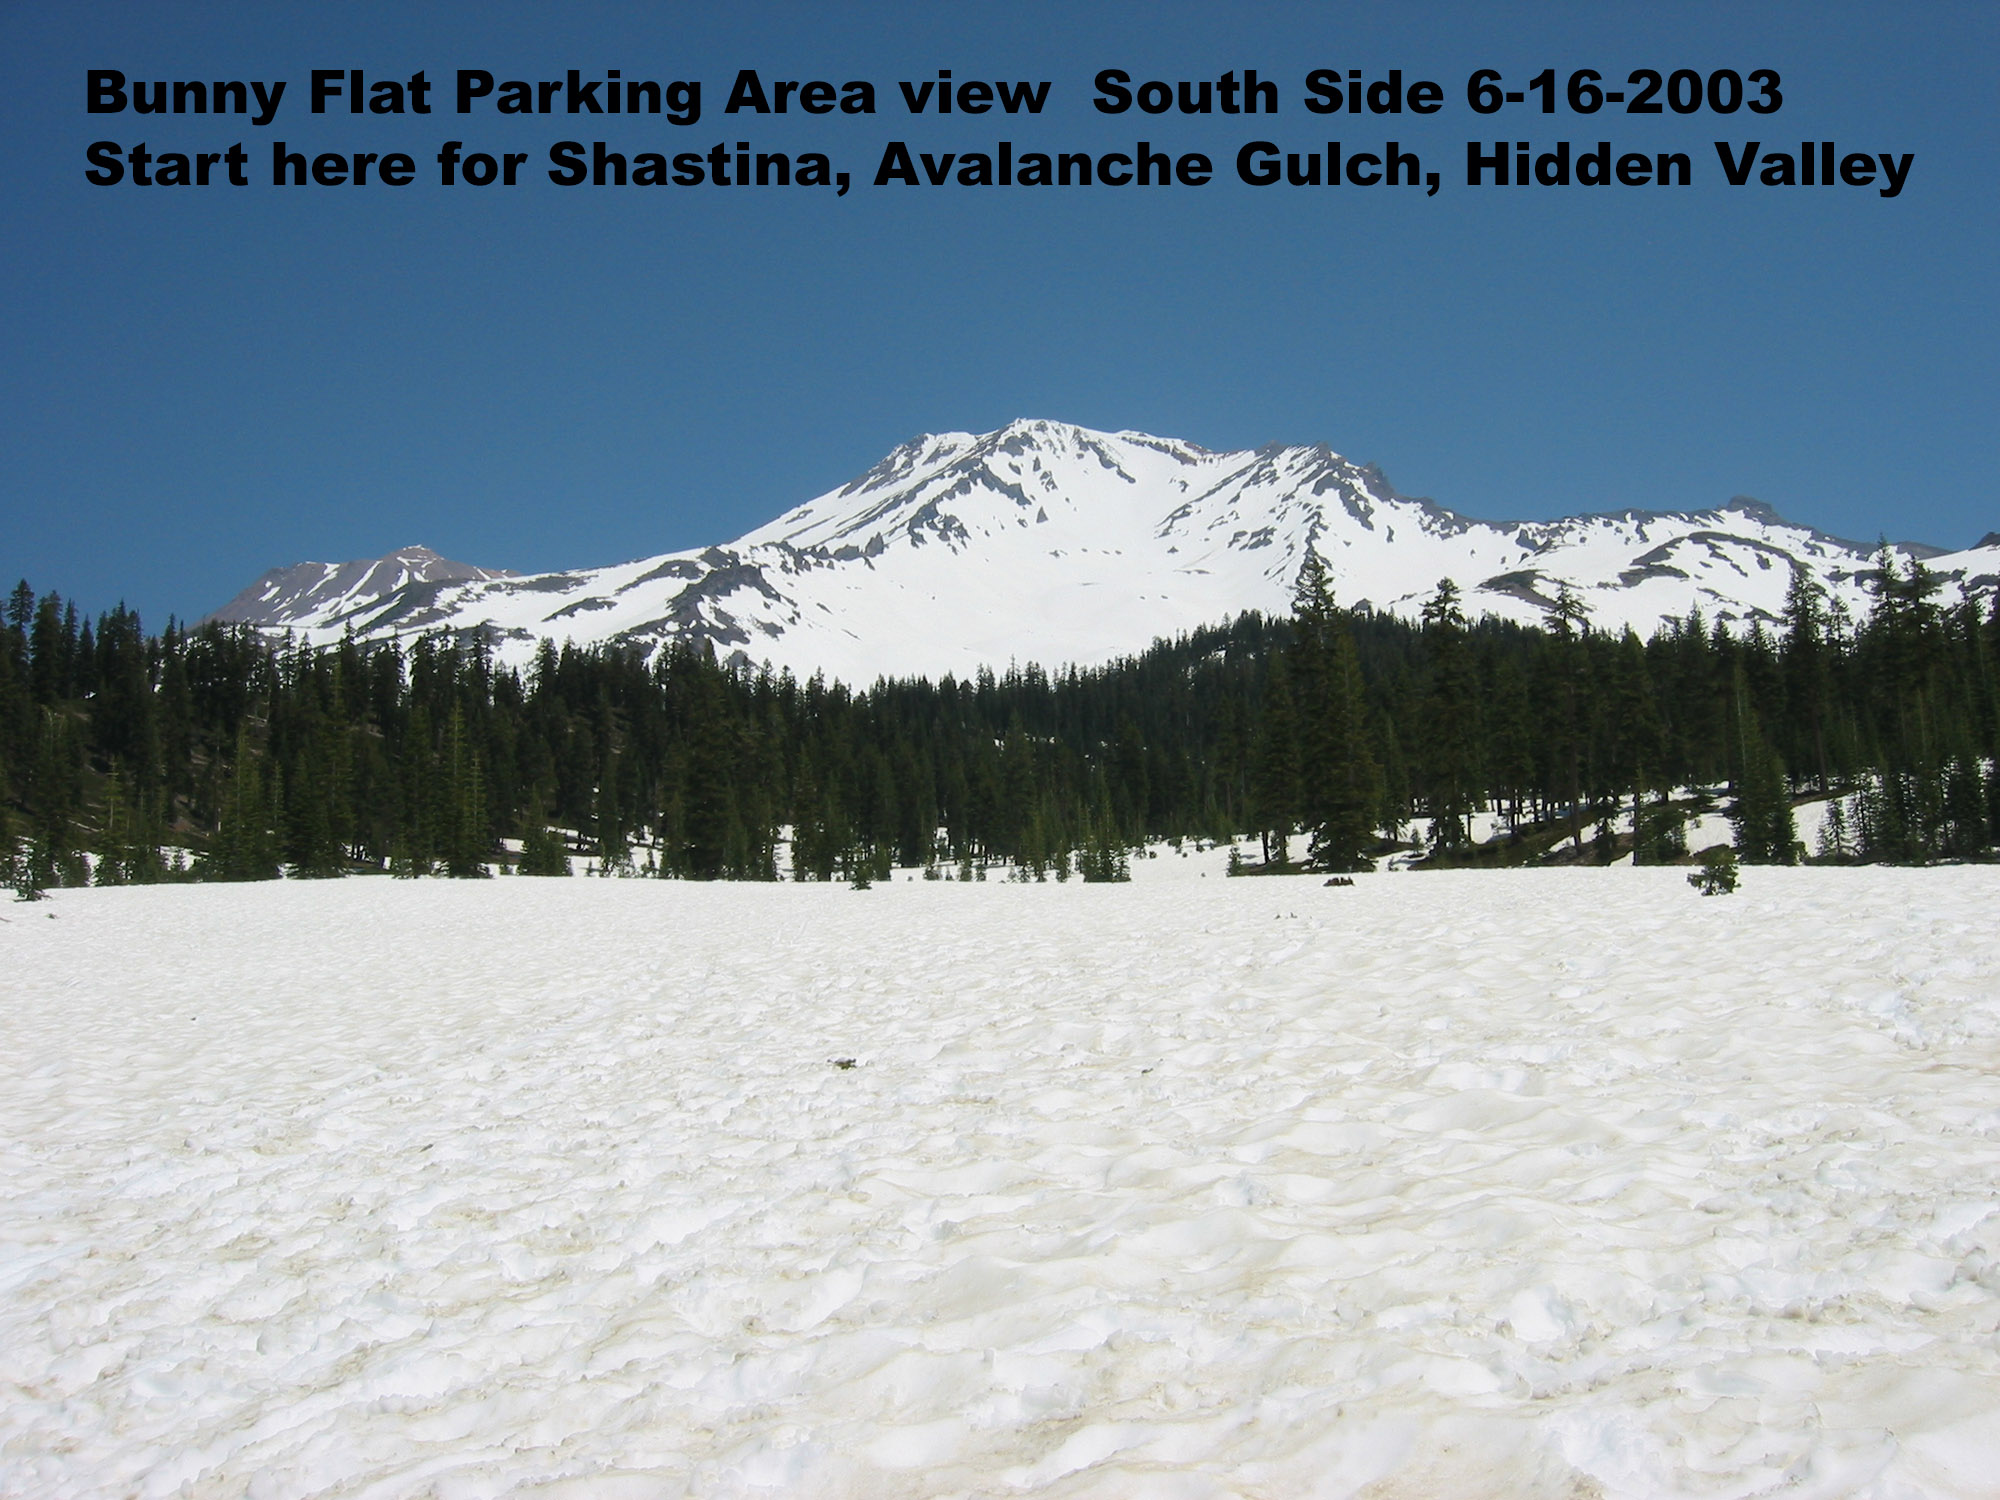
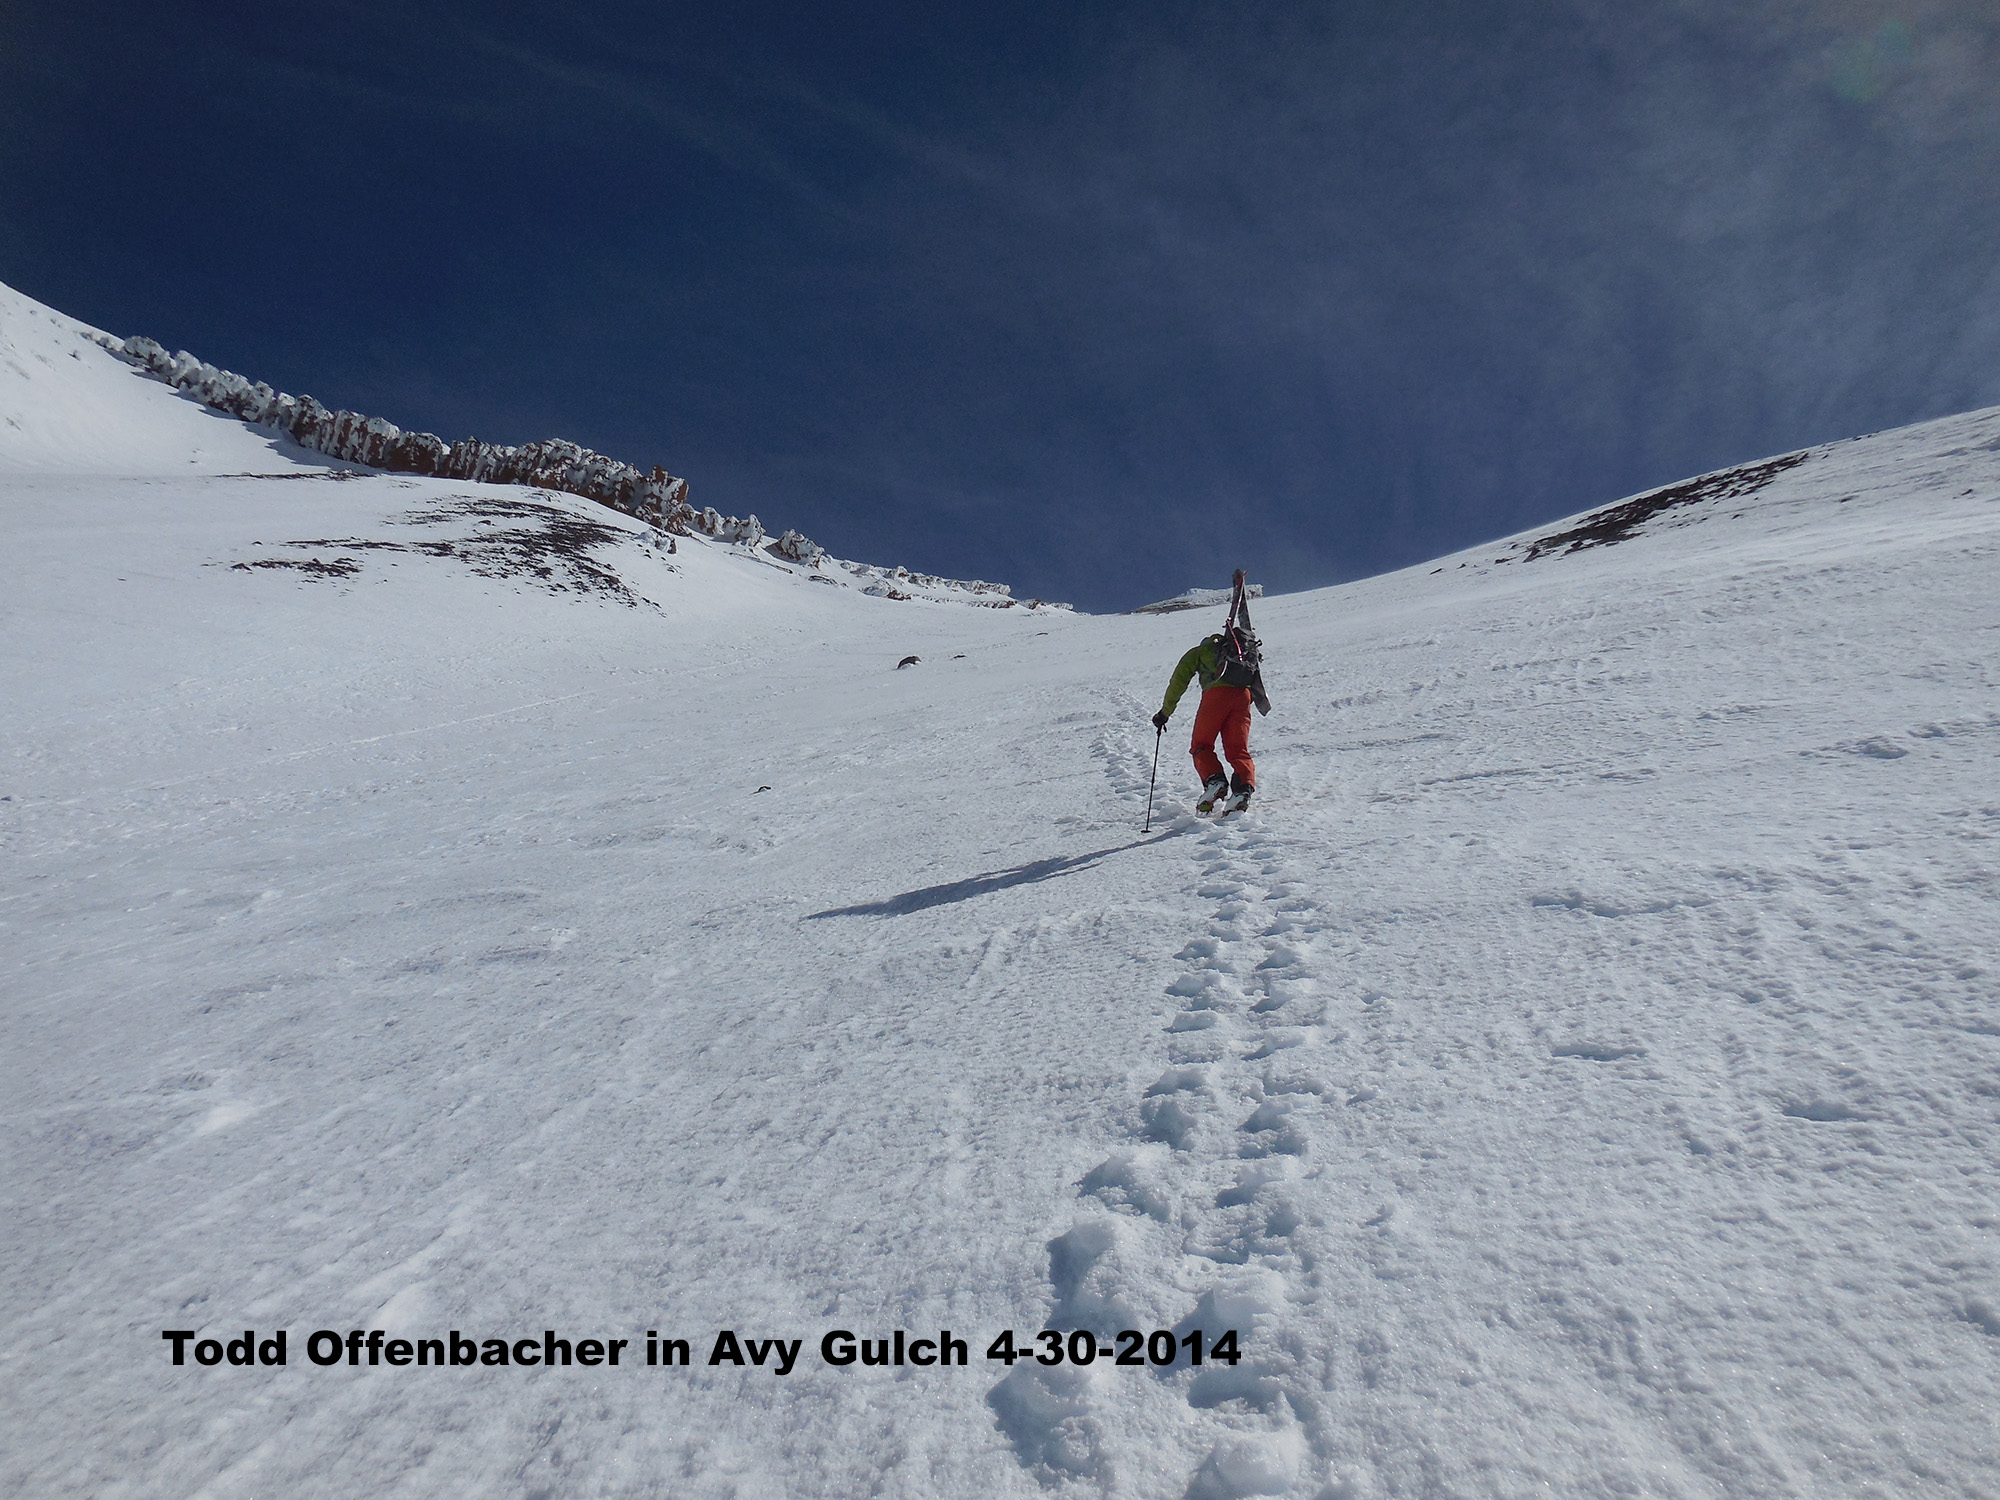
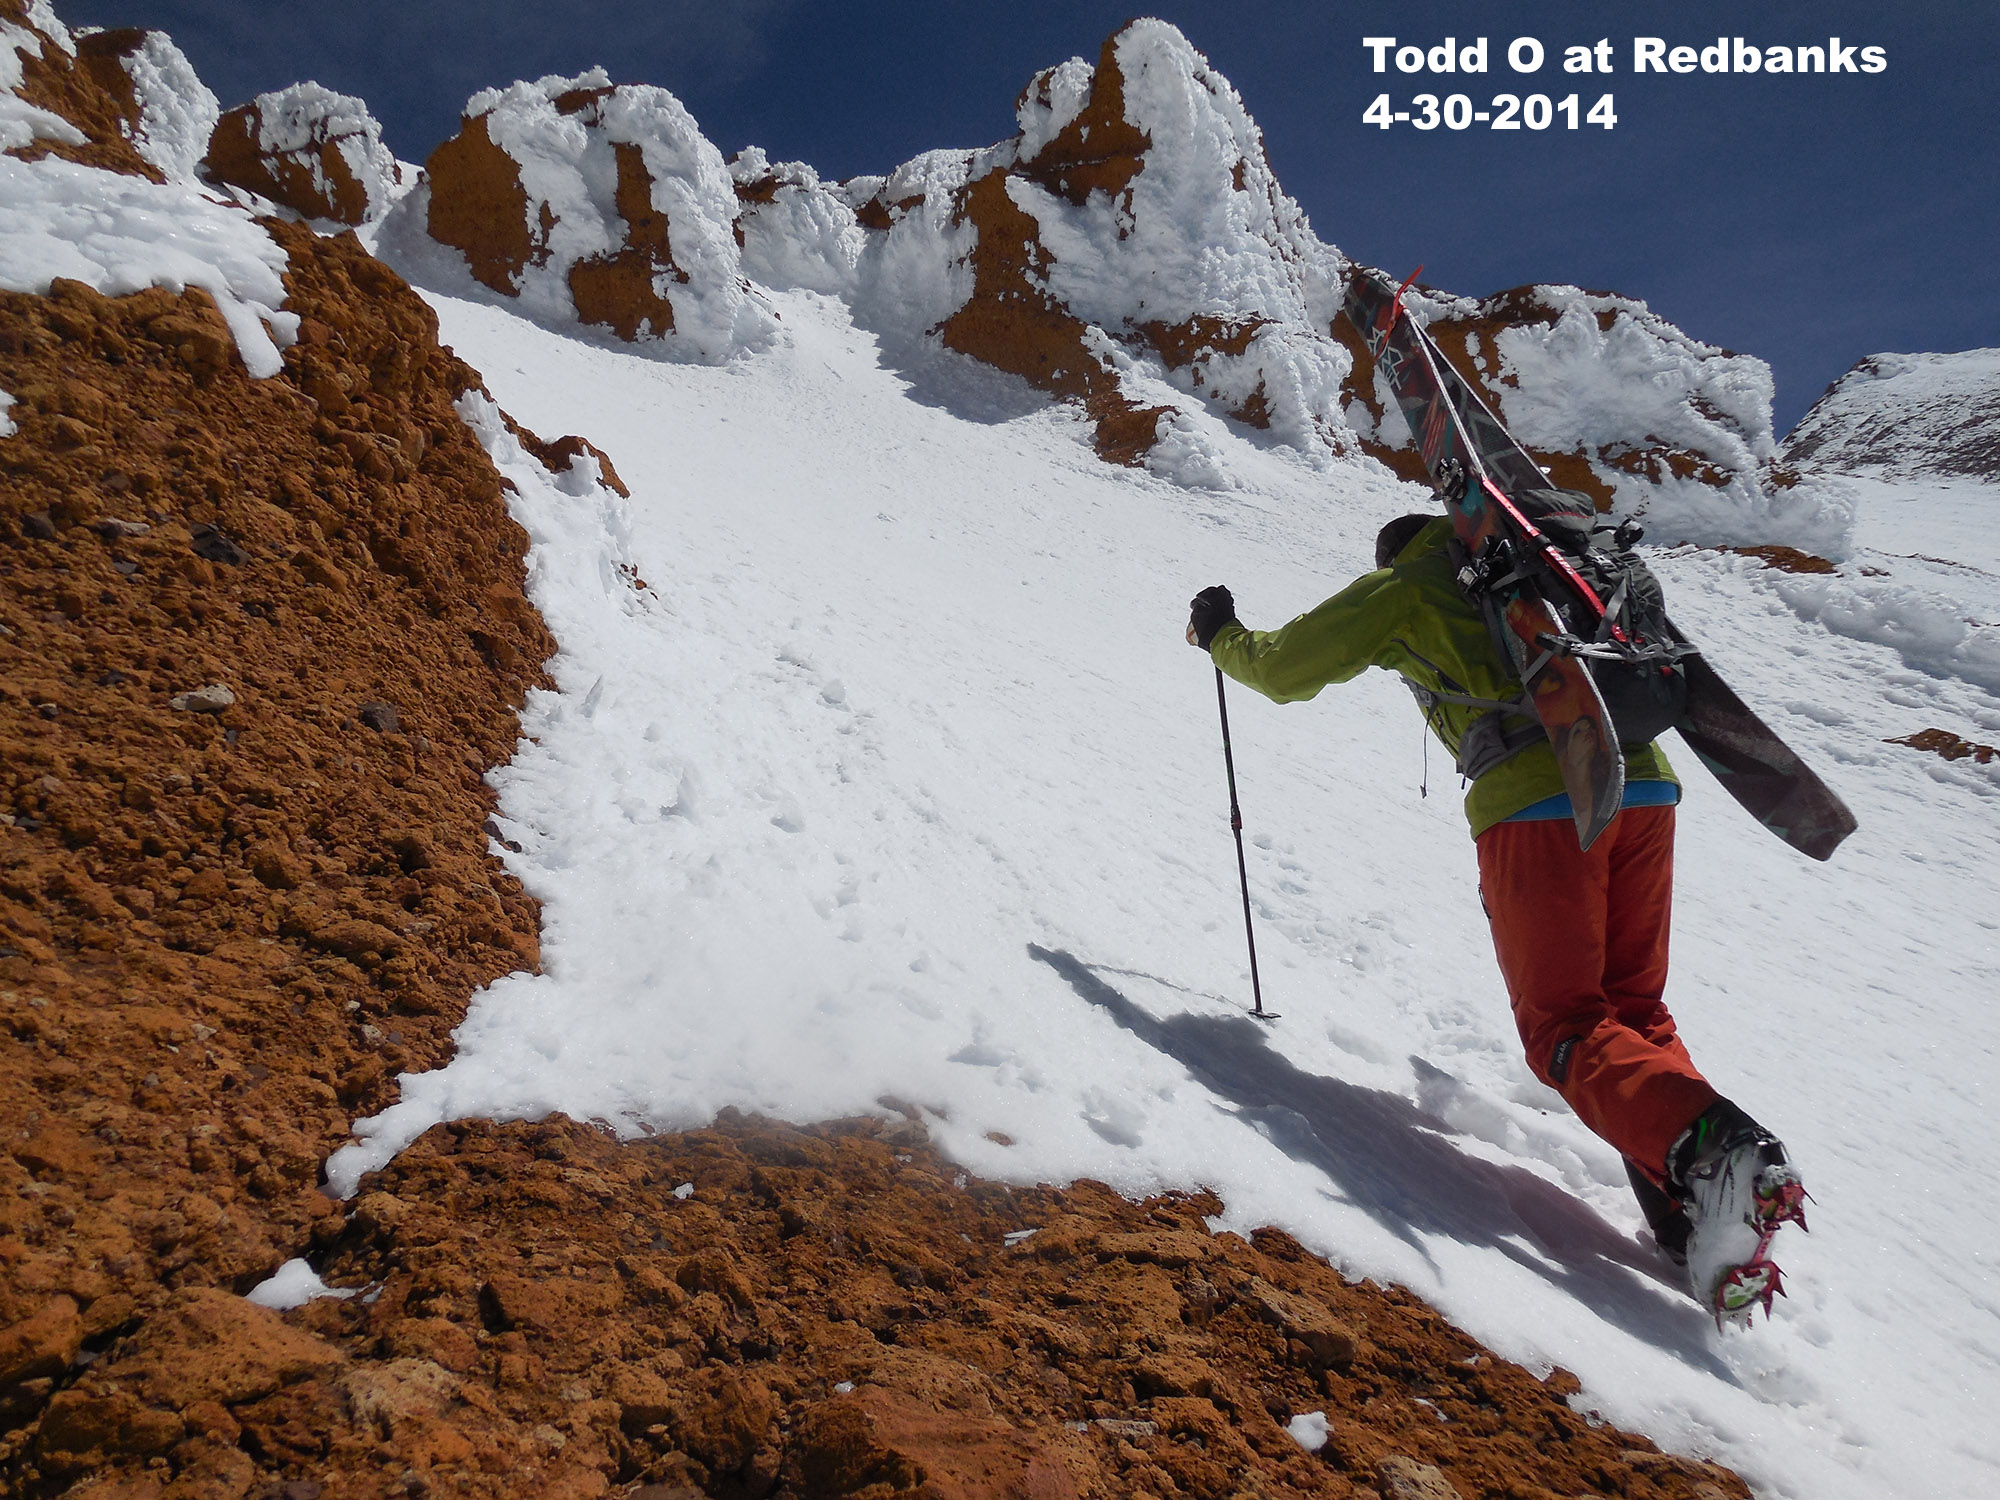
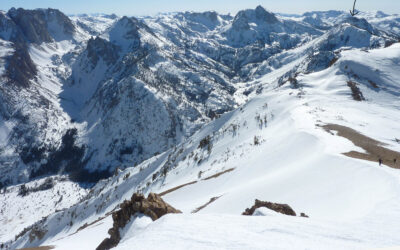
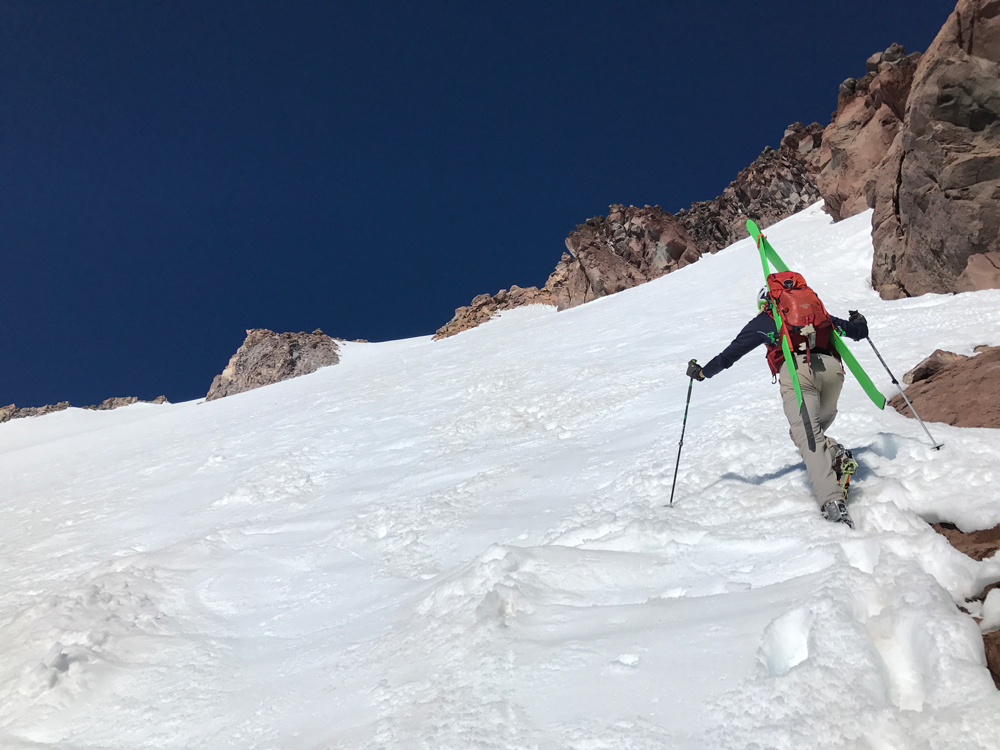
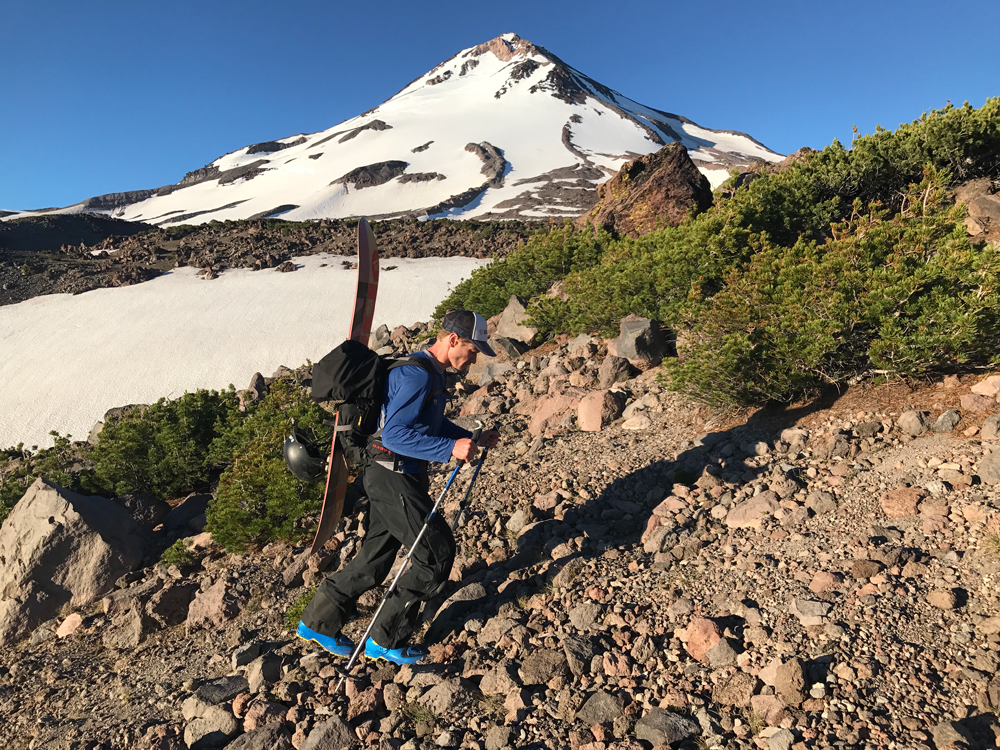
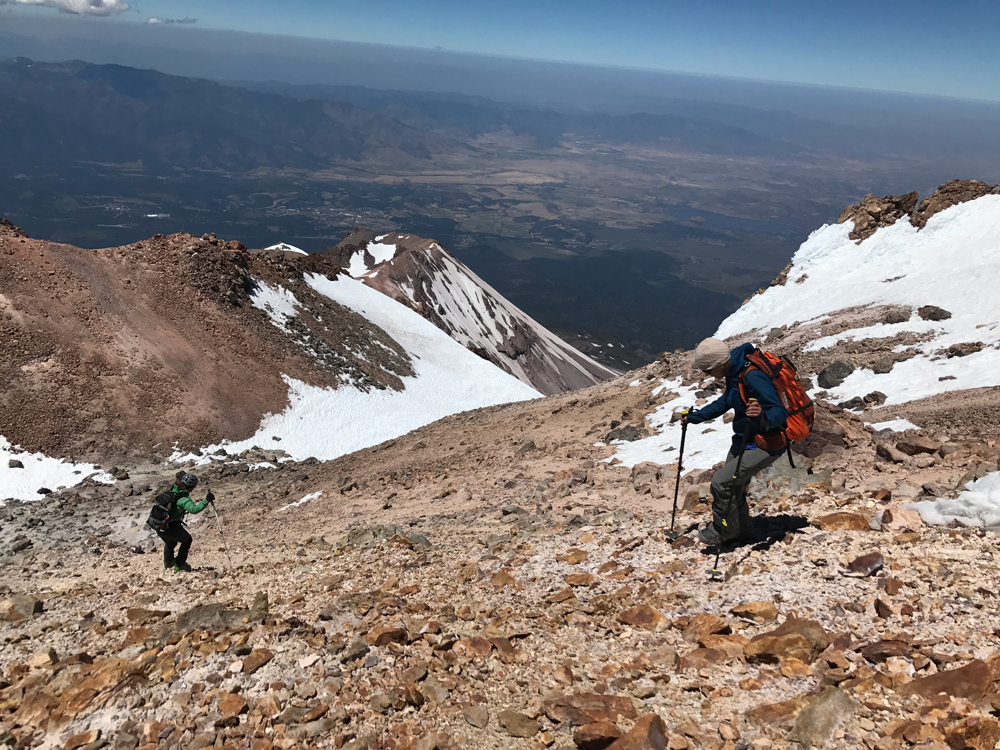
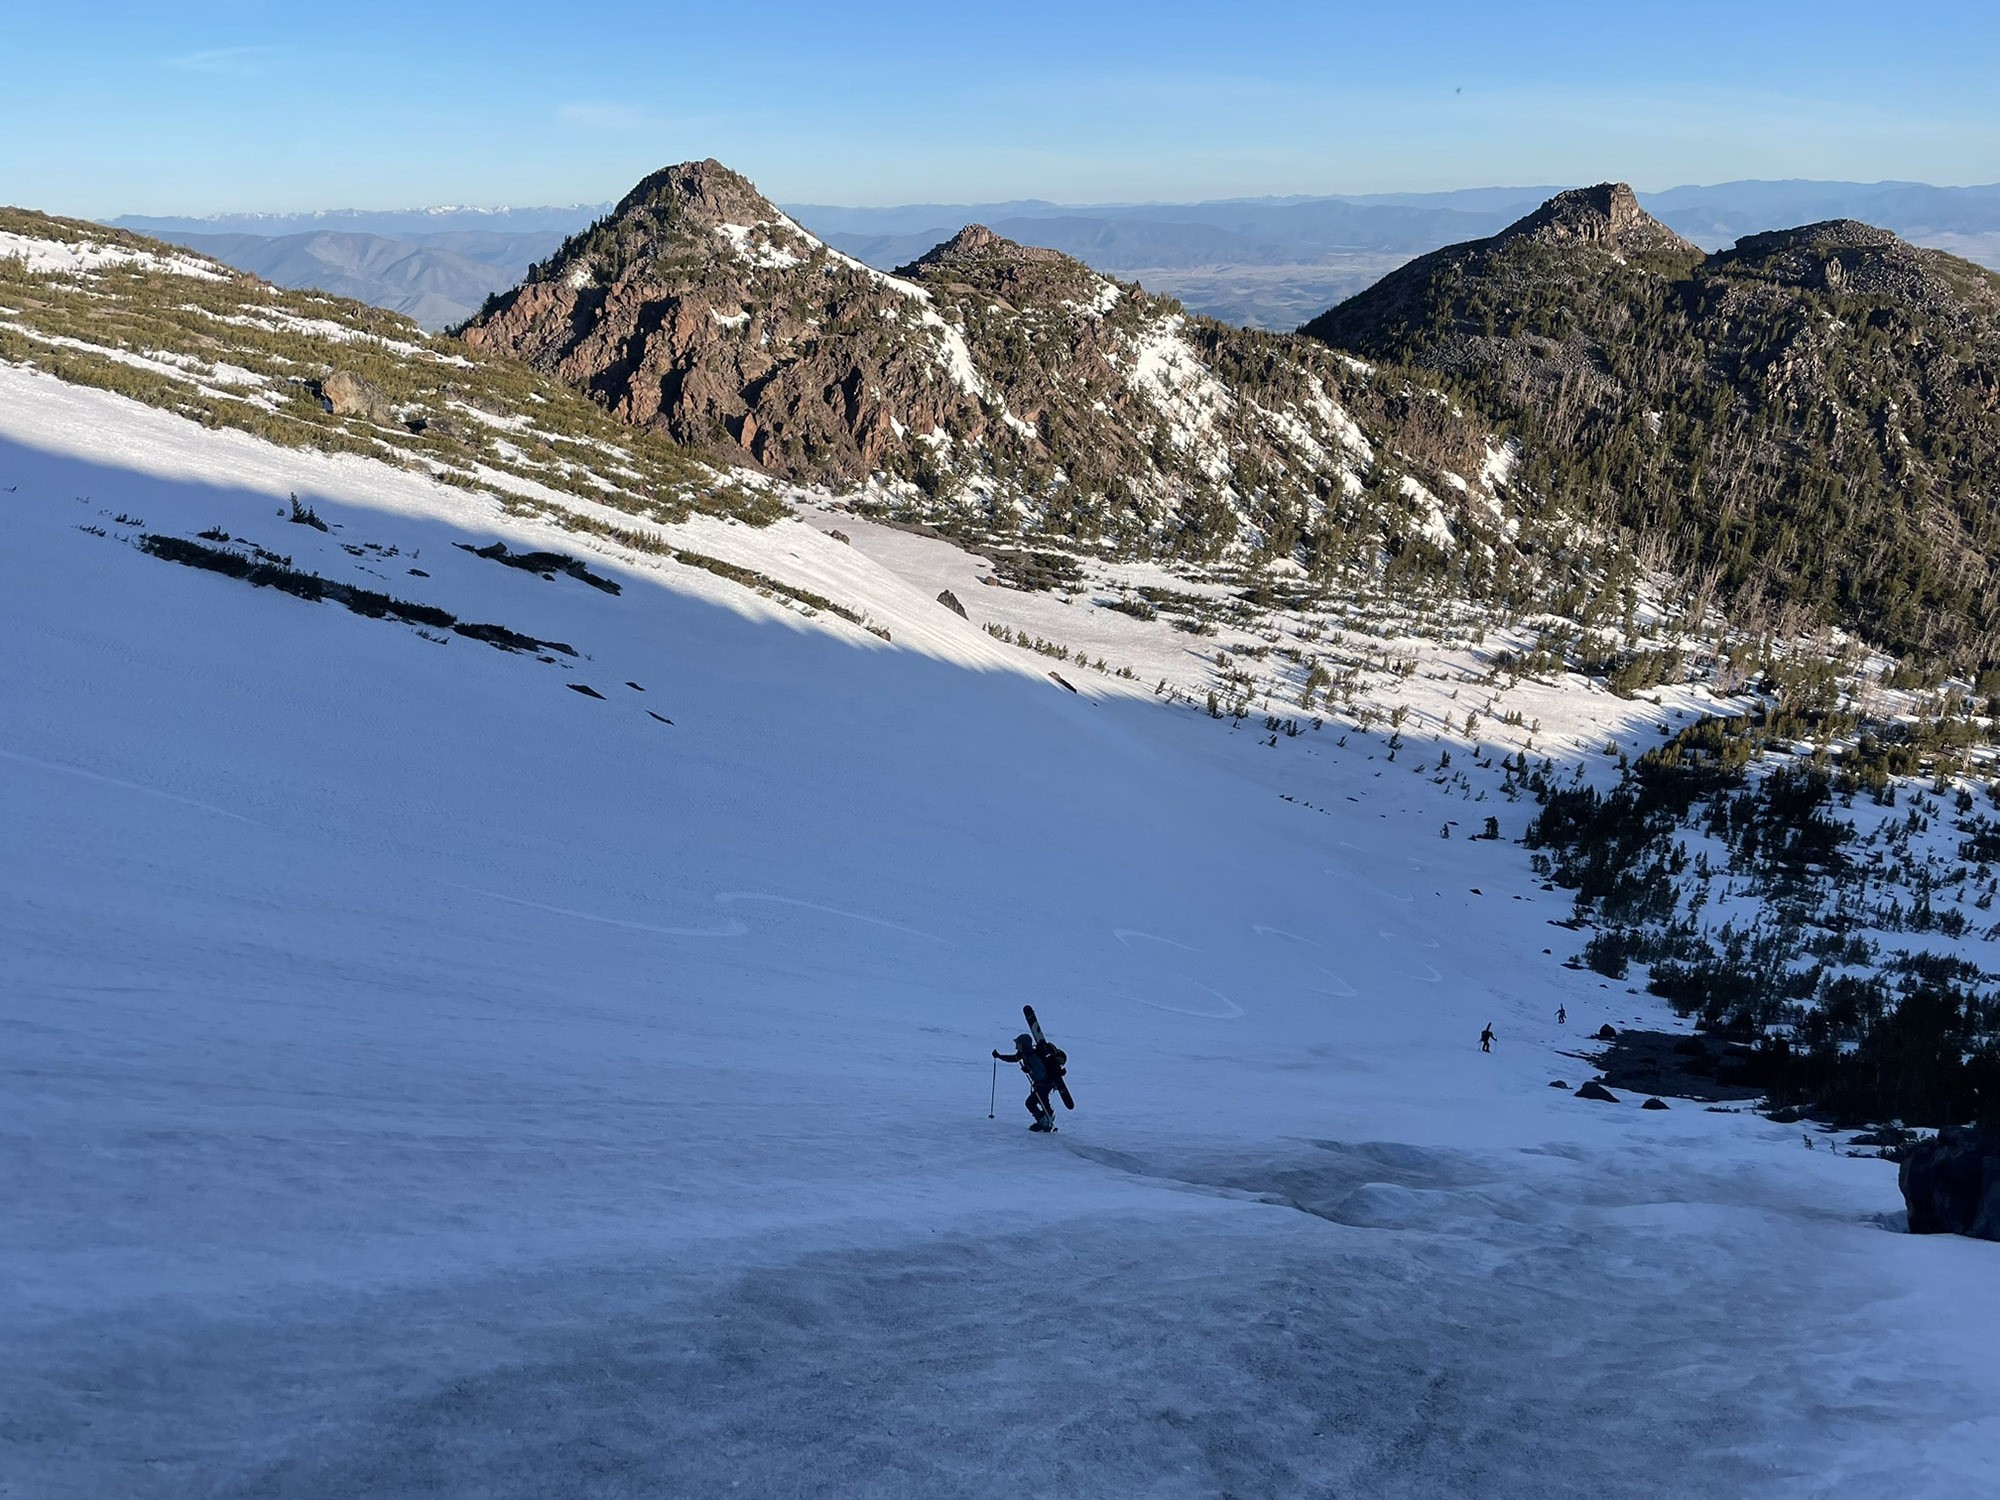
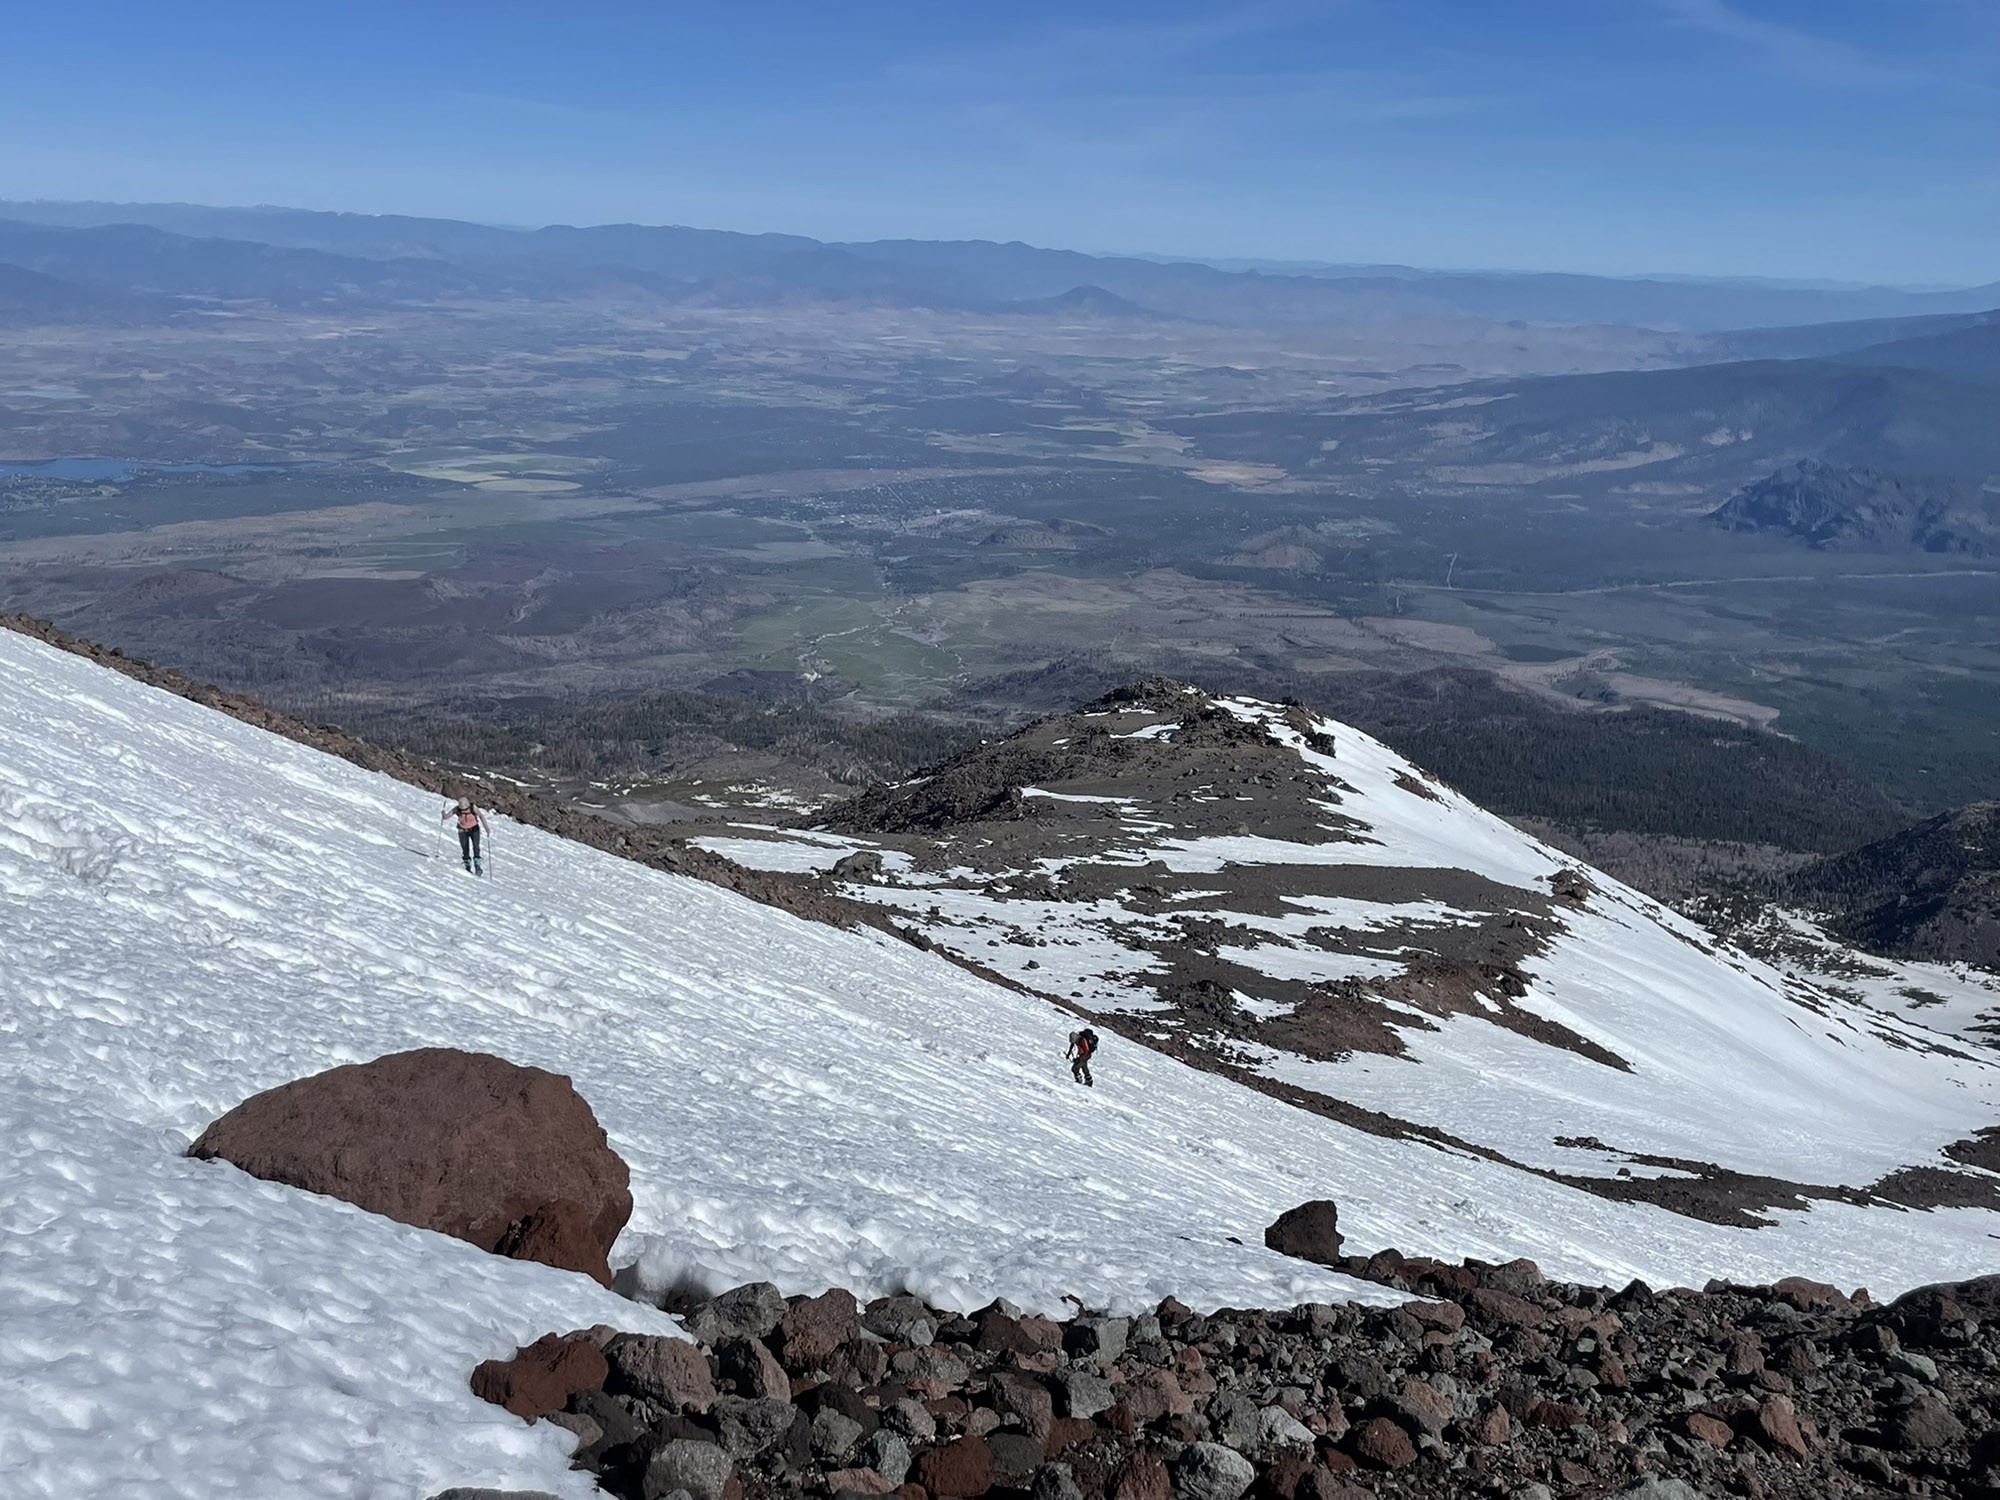
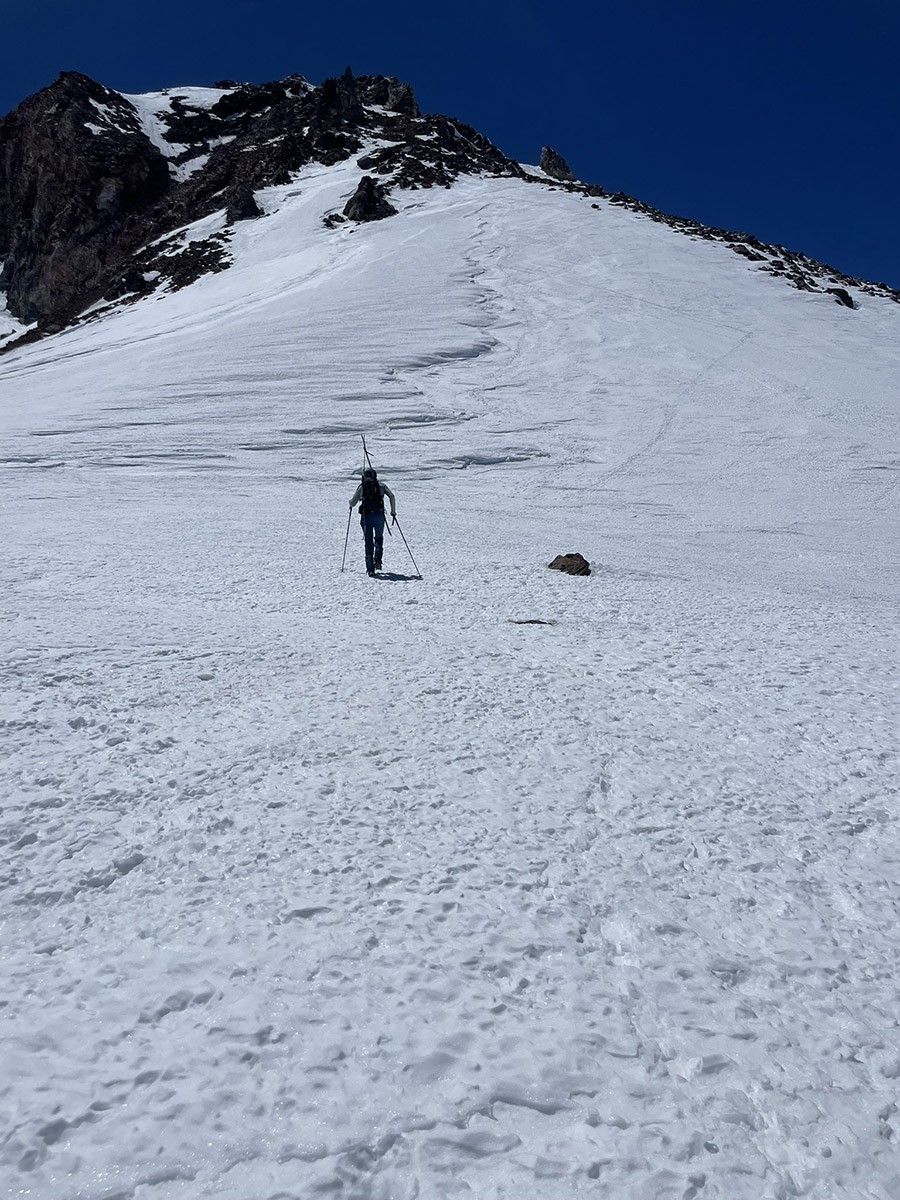
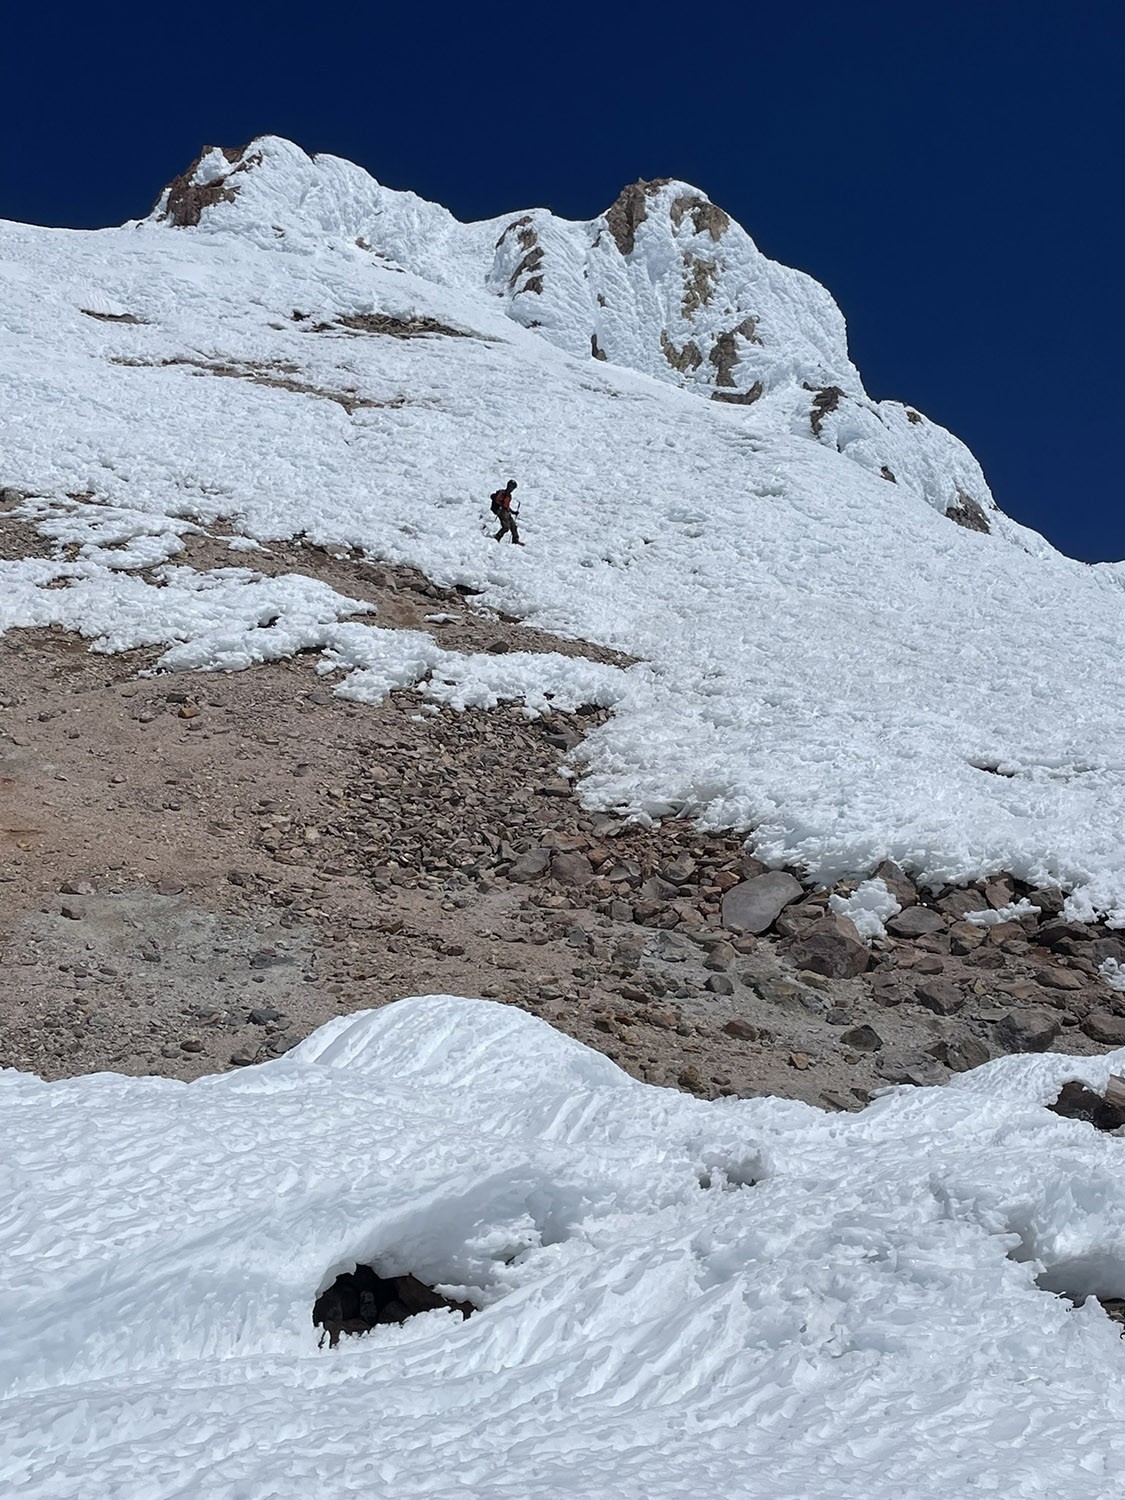
SOUTH SIDE – The first route most people ski is Avalanche Gulch on the South Side, from the Bunny Flat Parking Lot at 6880′. You drive a few miles toward the mountain from the town of Mt. Shasta on a paved road. You can sleep in your vehicle at the trailhead and get both your climbing permit at any time of day or night and drop money in a lockbox. Also don’t forget to pick up the required WAG BAG right there. One known hazard is rockfall coming down from the “Redbanks” zone around 13,000′ which you must climb through. The rocks come down from extreme warming and also from wind. I’ve been hit pretty far down the mountain from a baseball sized rock that sailed down the slope thousands of feet higher. You can’t hide easily when it’s happening, so look uphill and assess this as you go. You can see most of the route from the car and talk to people about their experience. Skiing is not going to be good above 13k on the south side at “Misery Hill”. Consider leaving the skis there to move faster to the summit and back. Like the other routes, you will likely skin to mid mountain and then shoulder your skis on your pack for the steep upper half
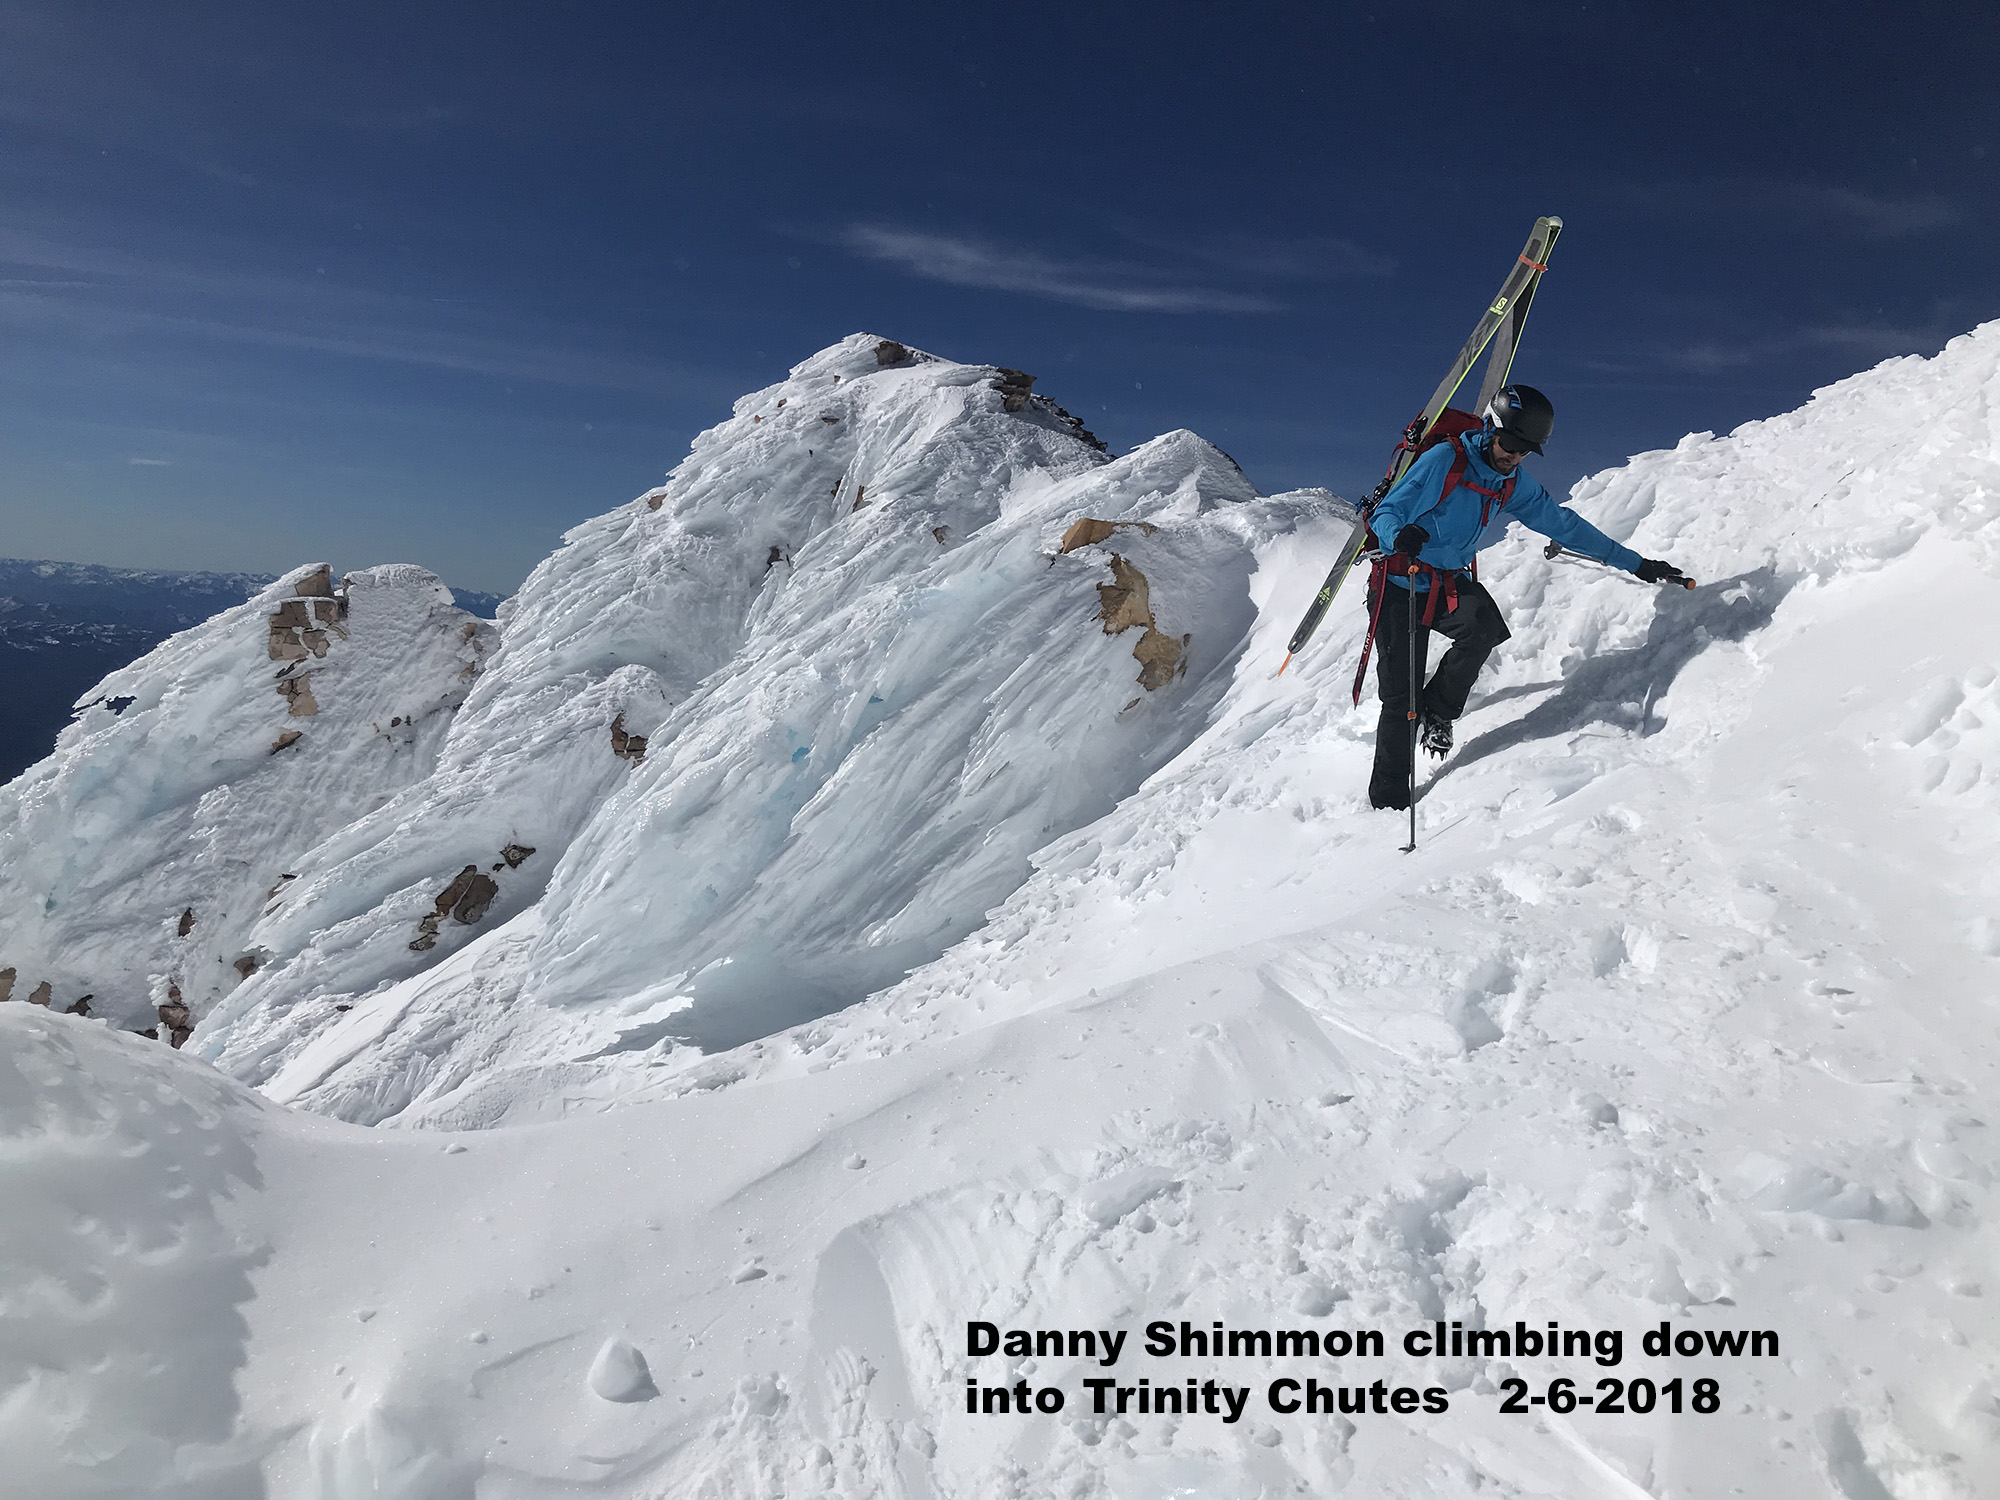
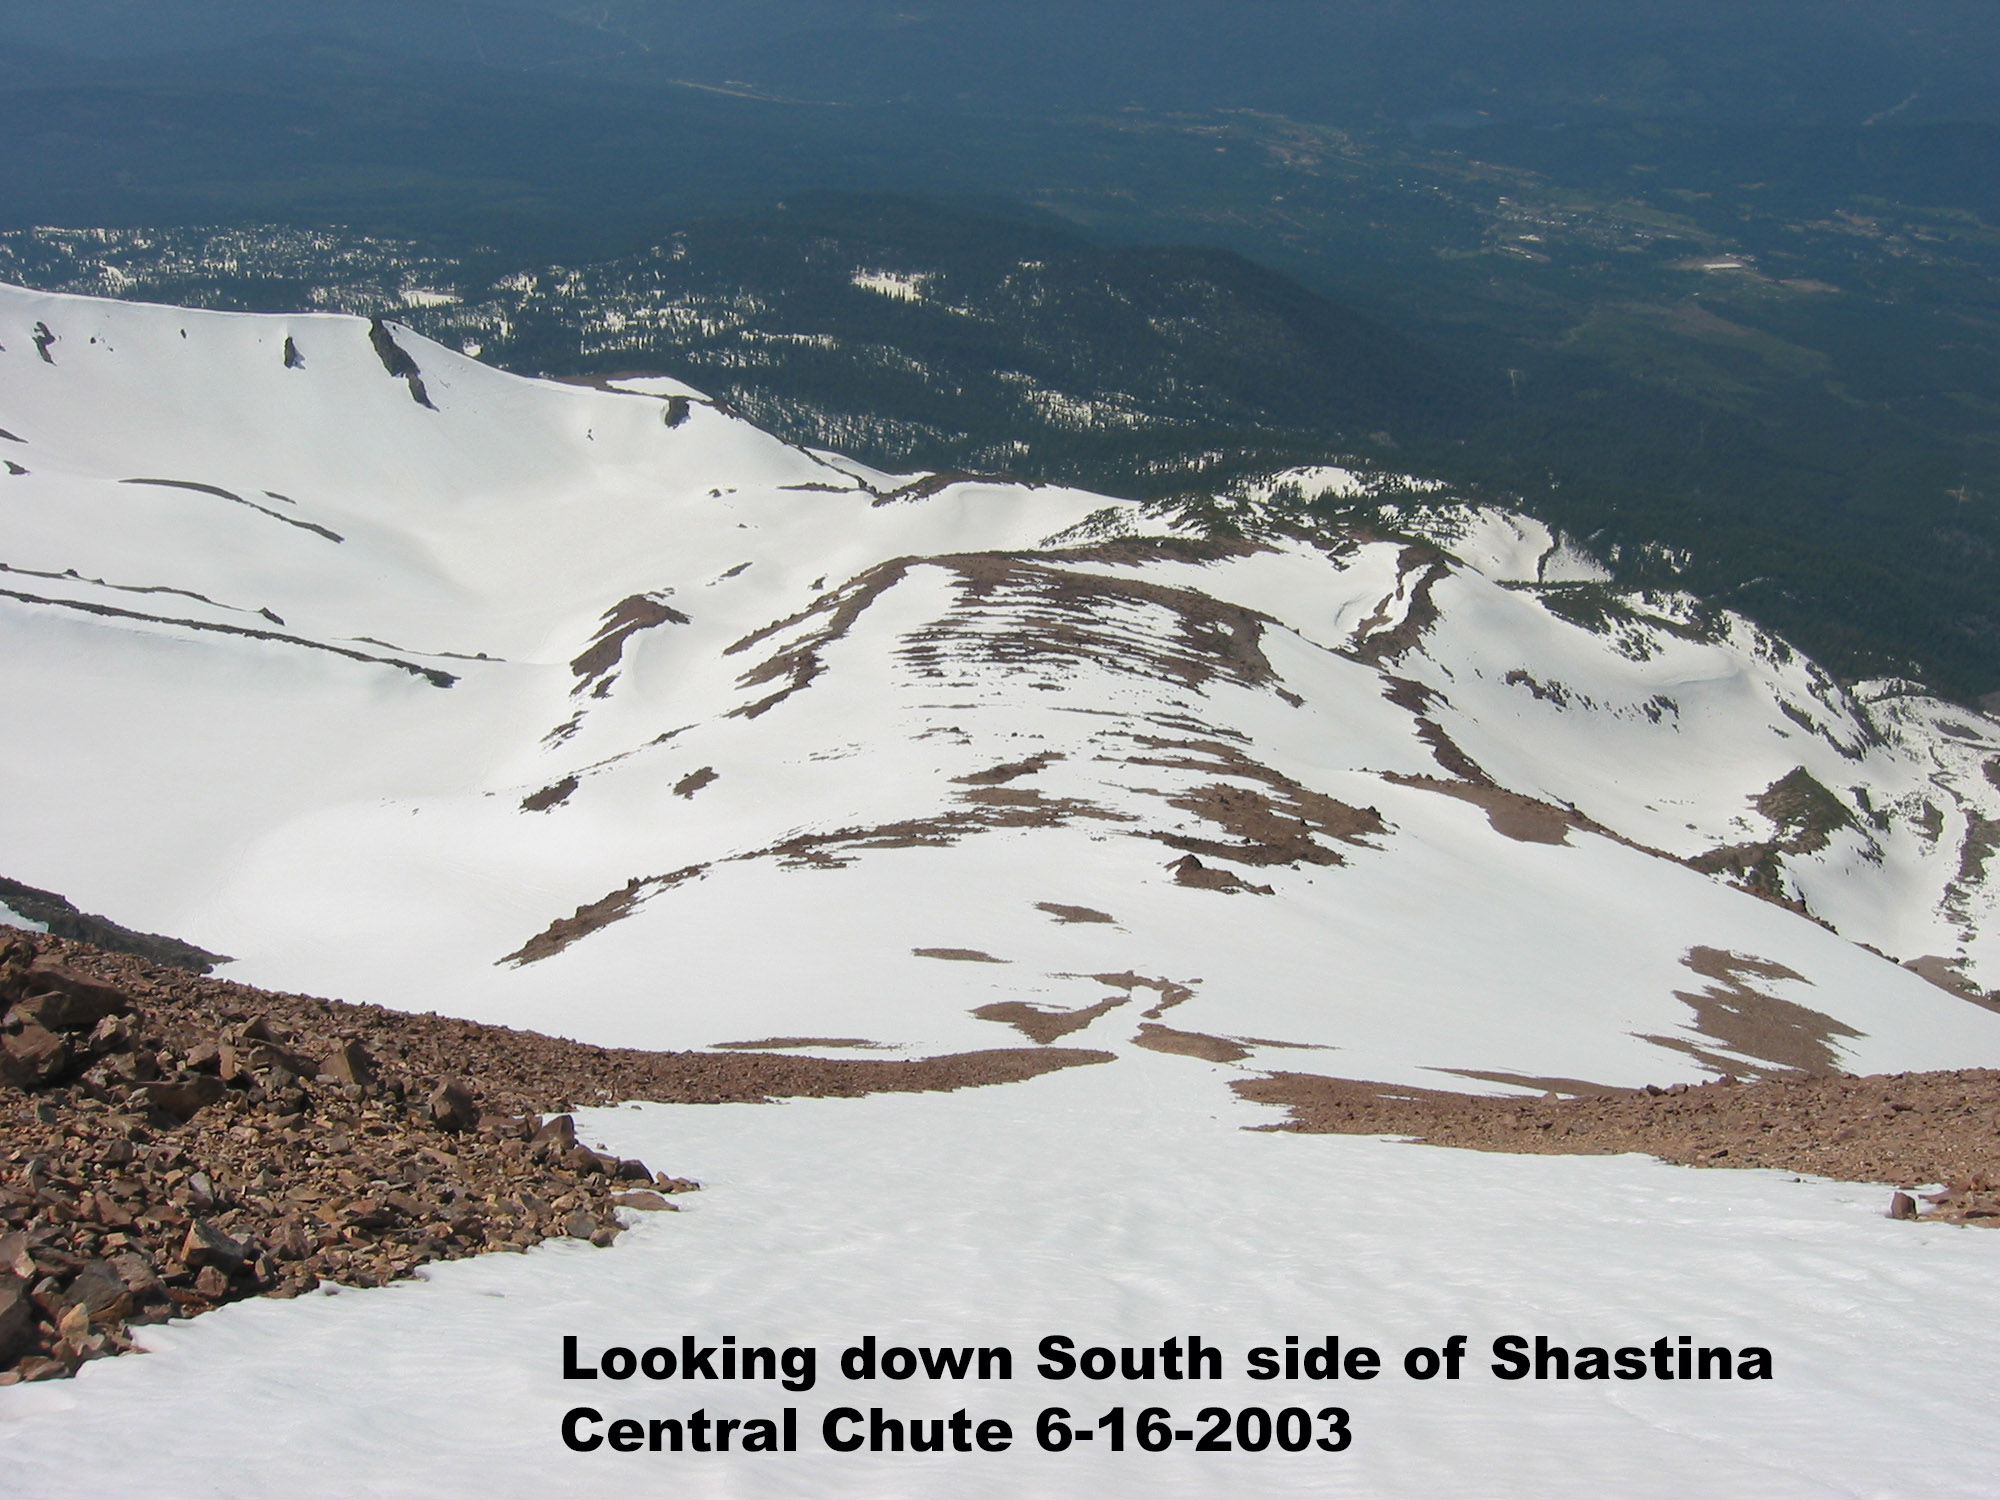
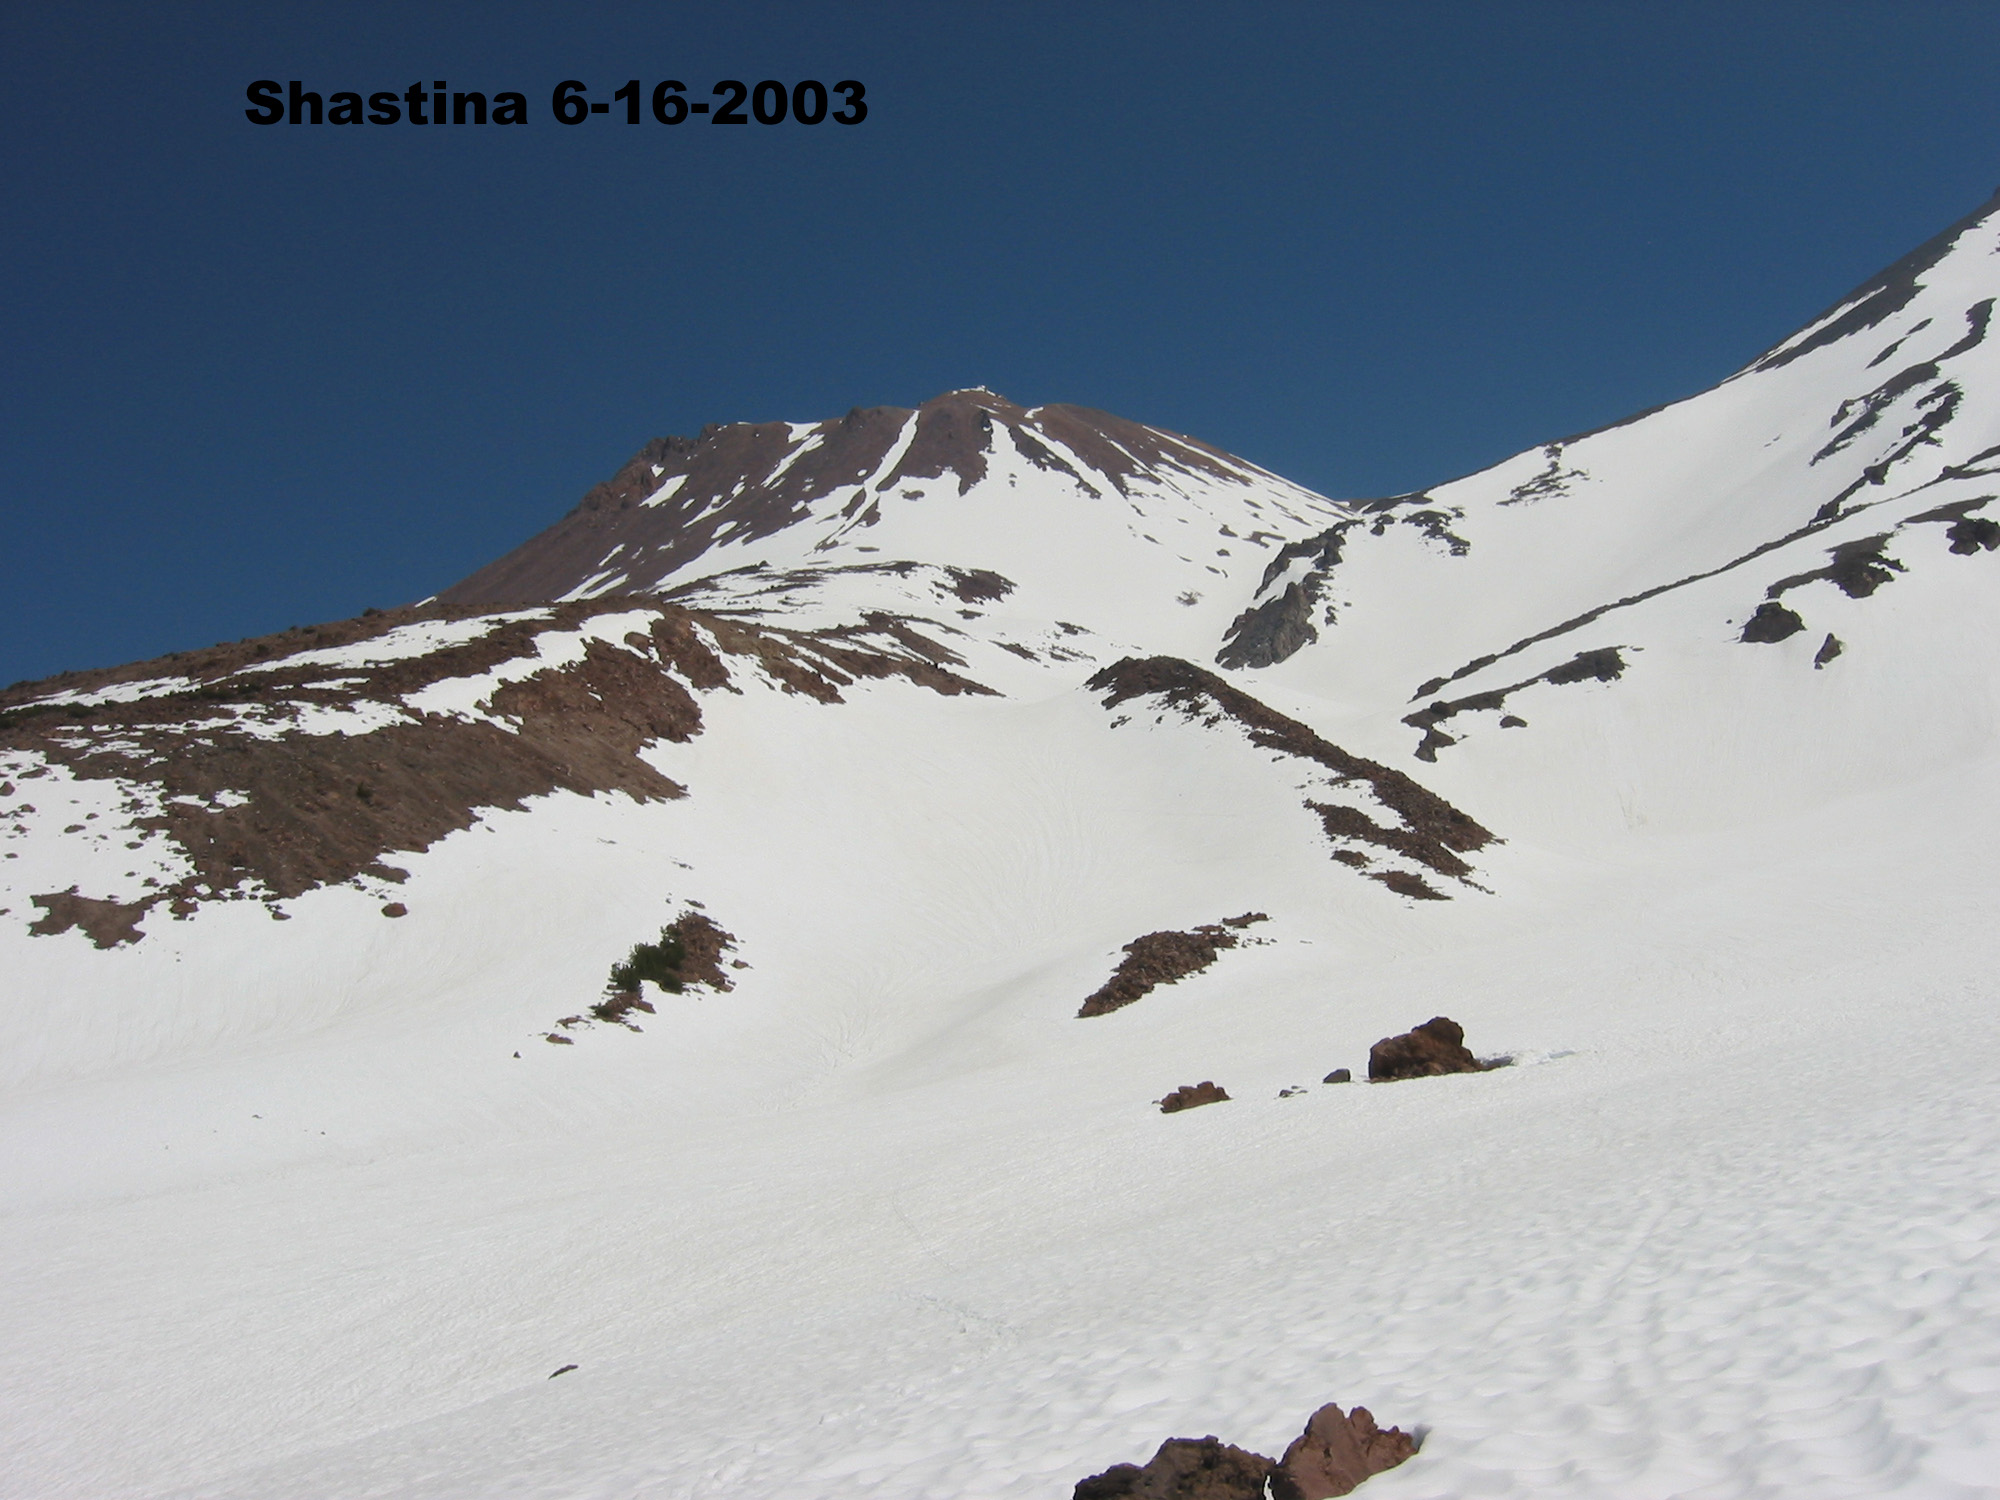
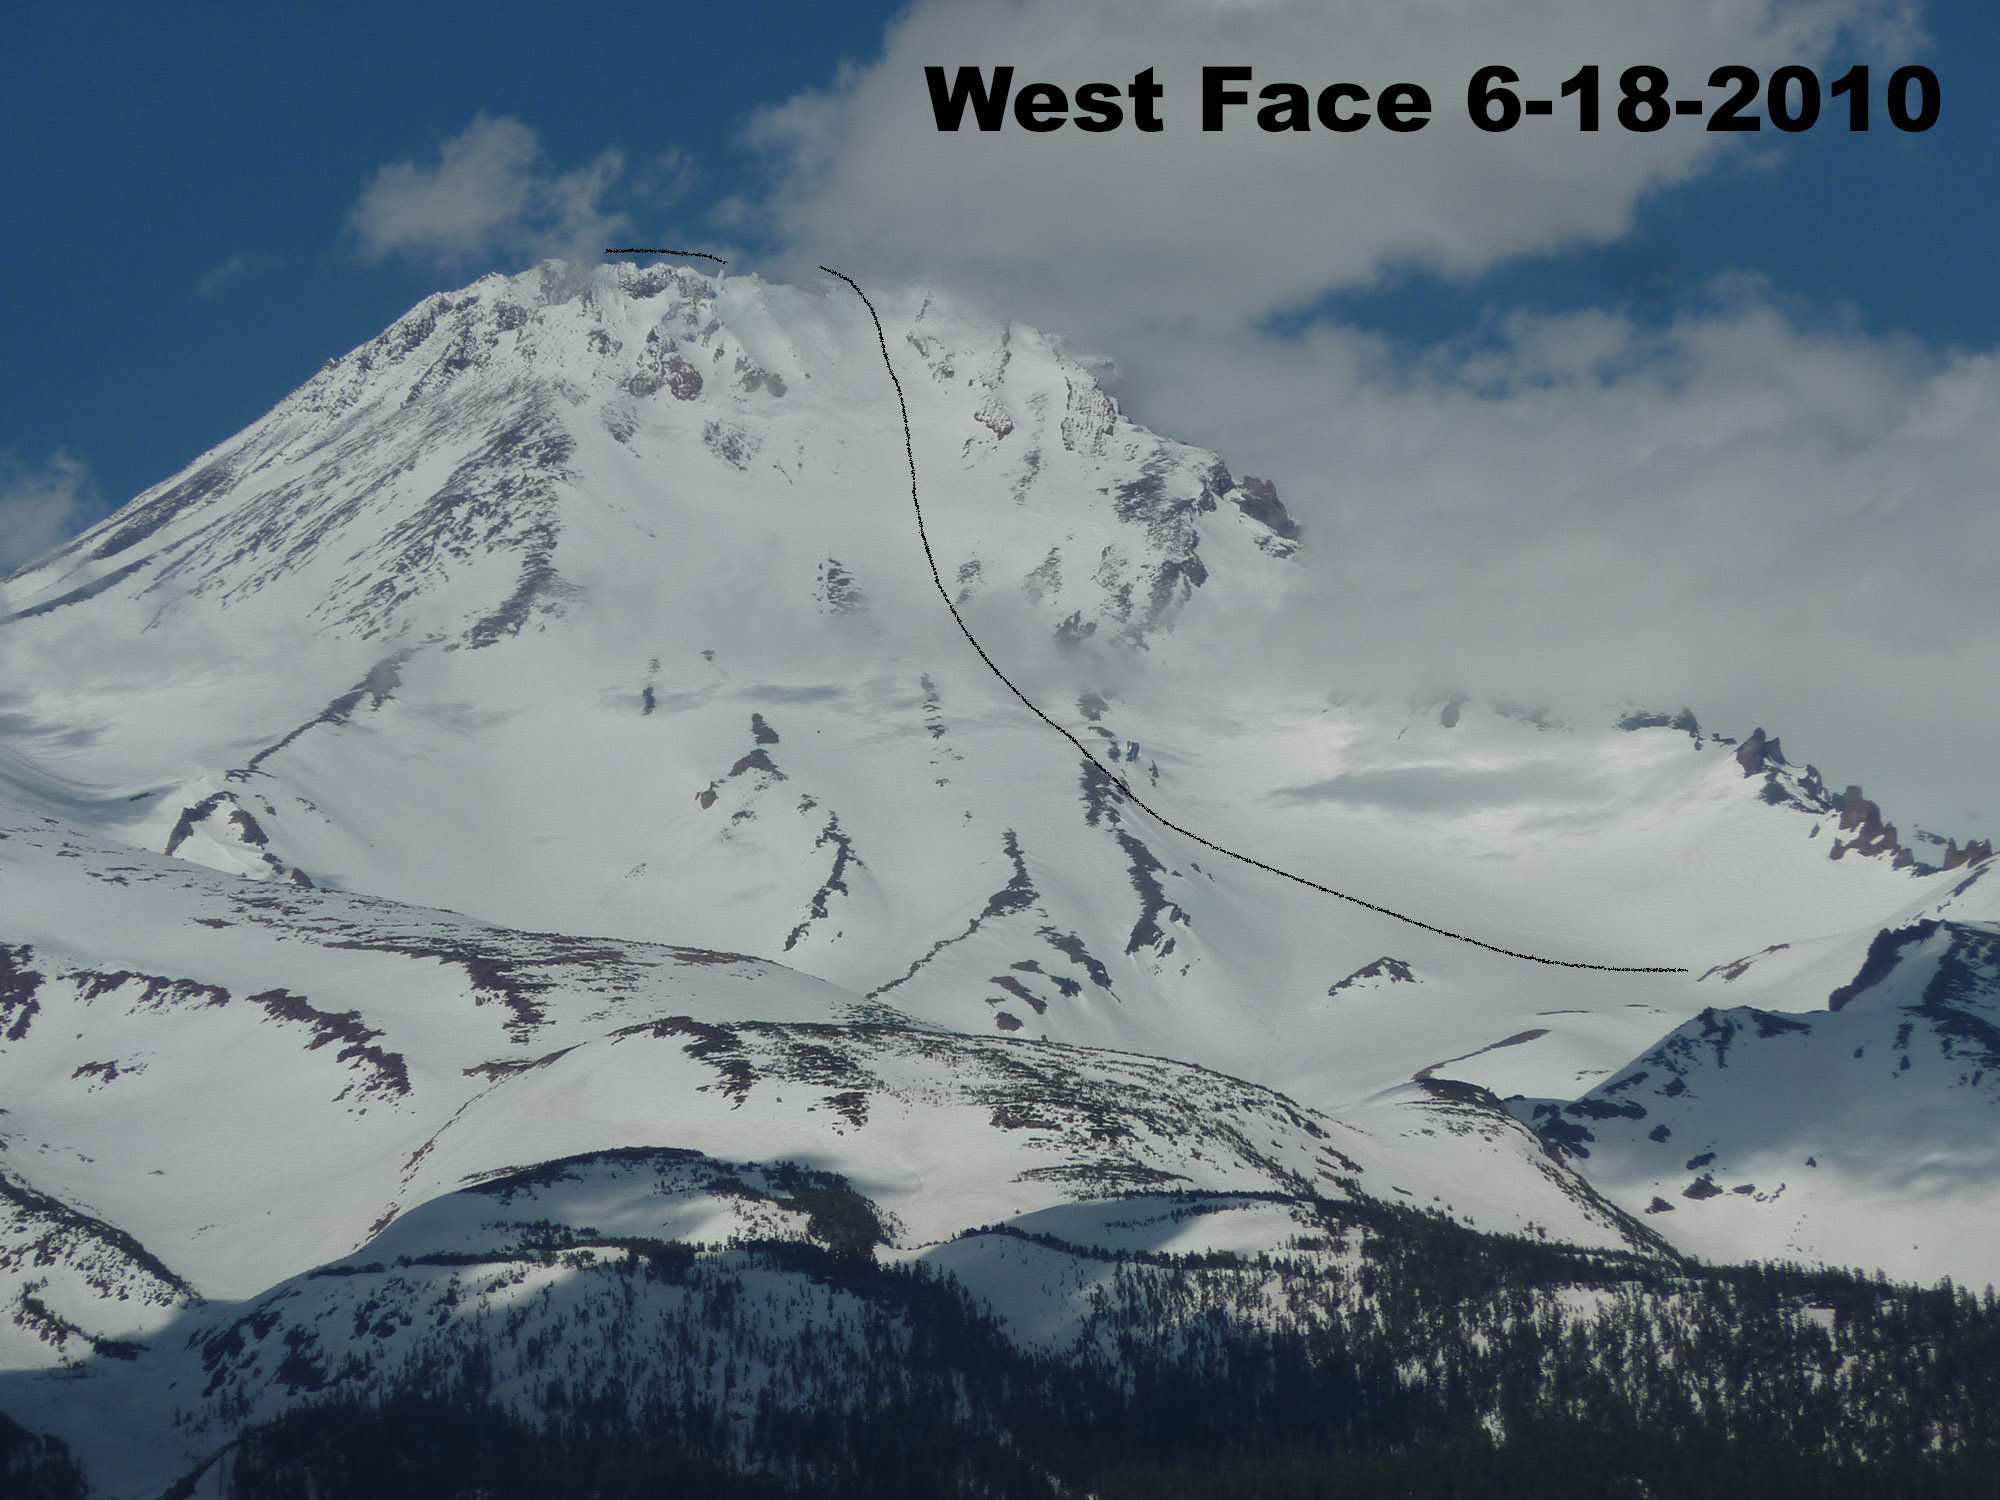
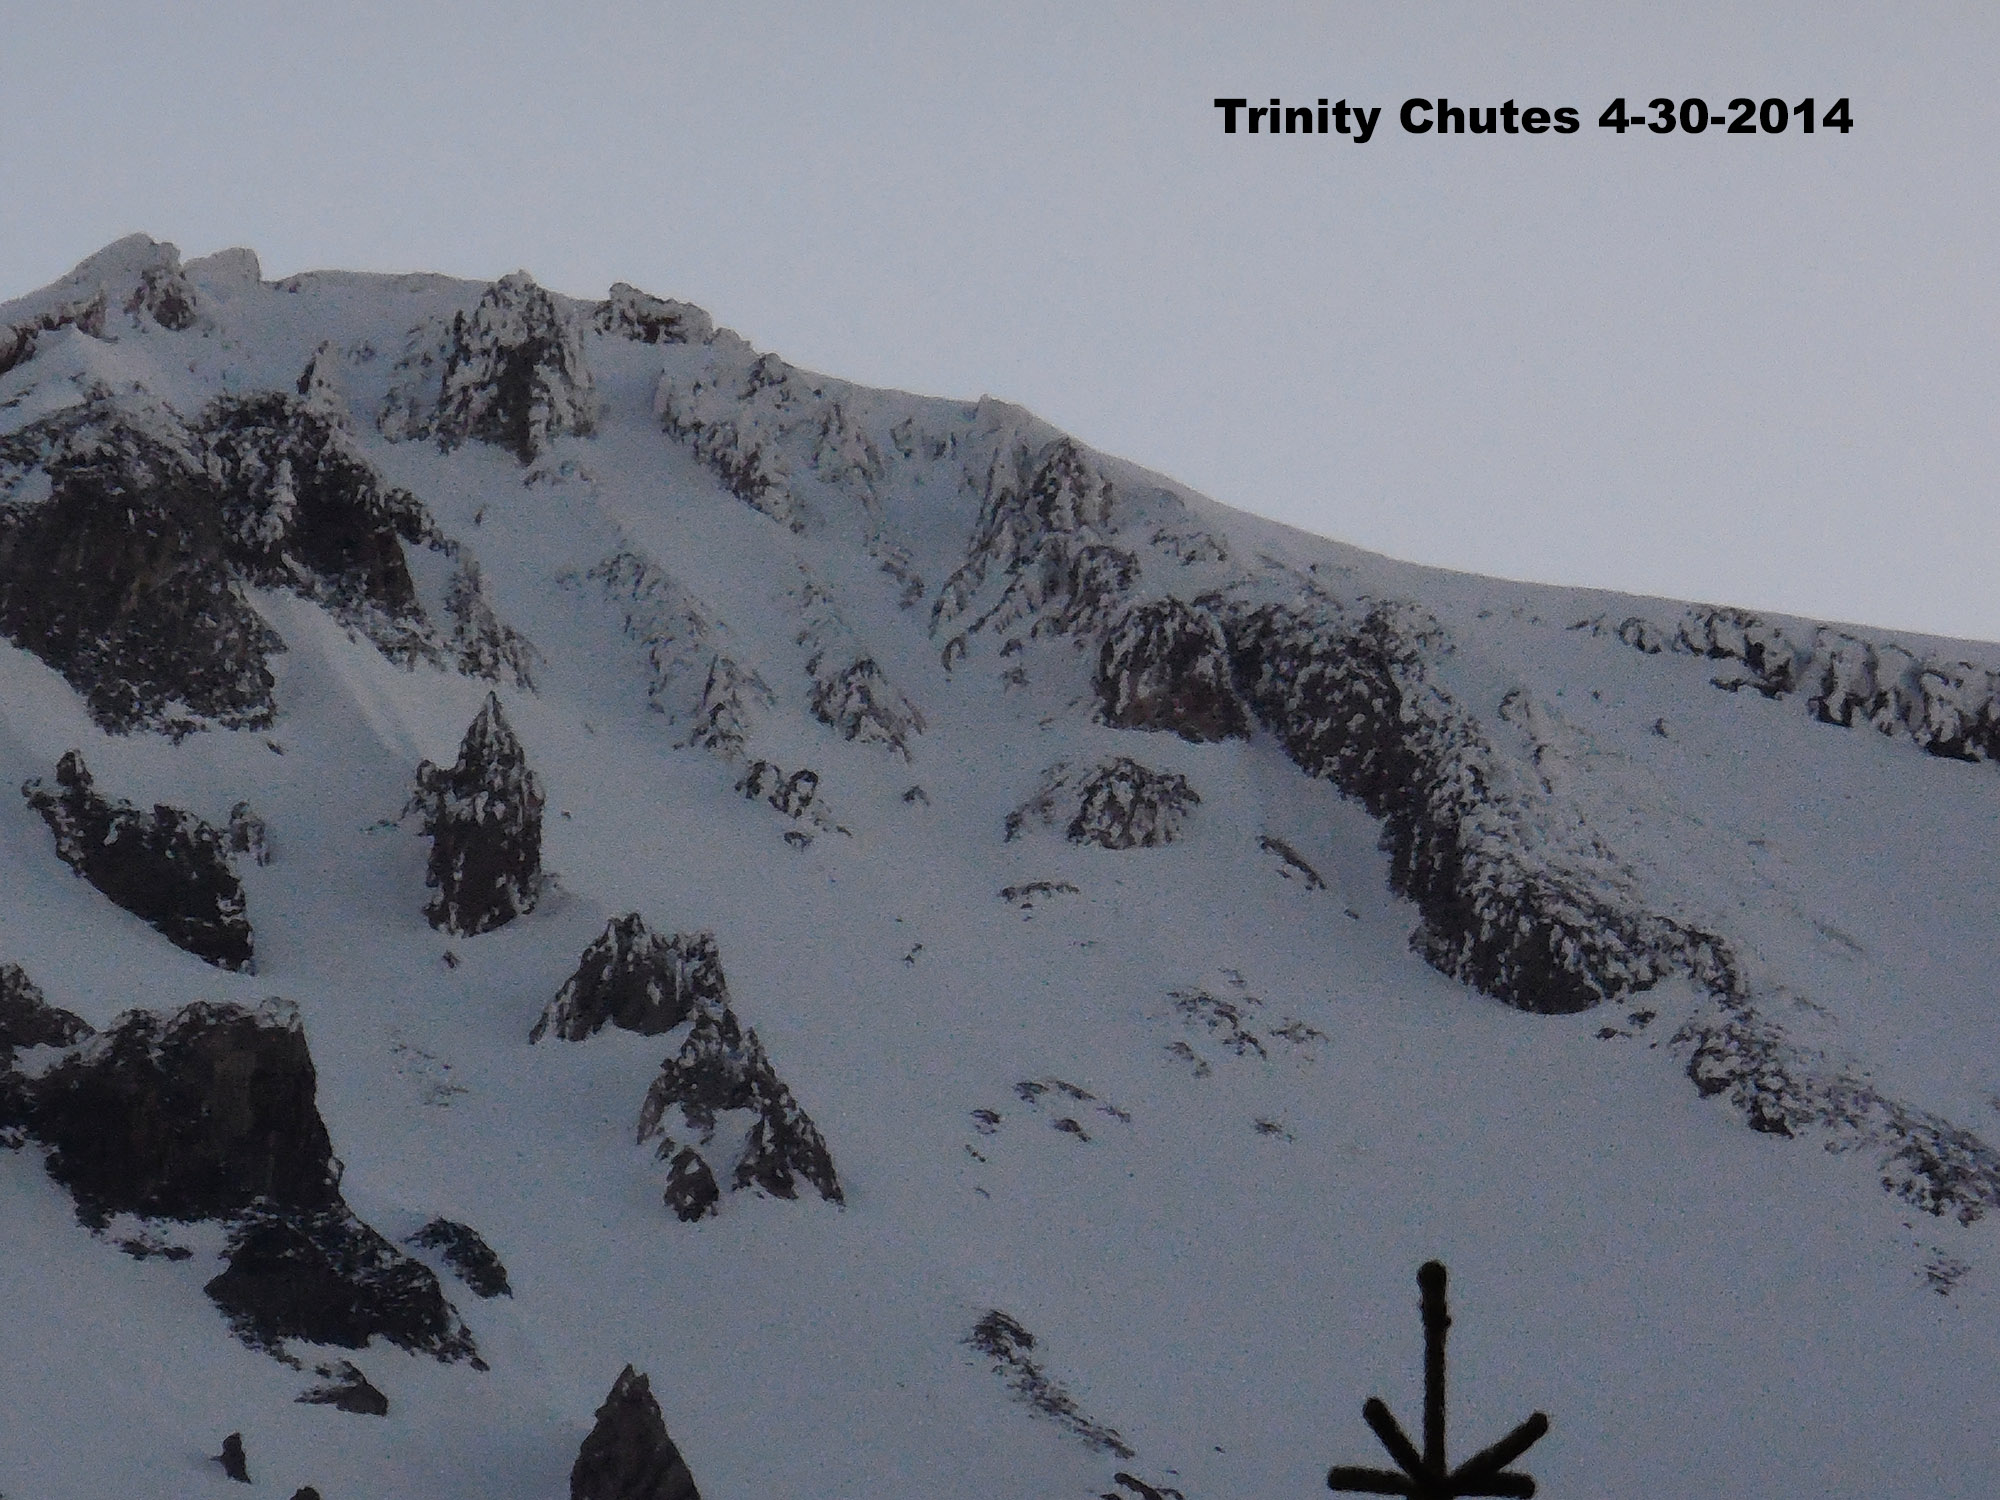
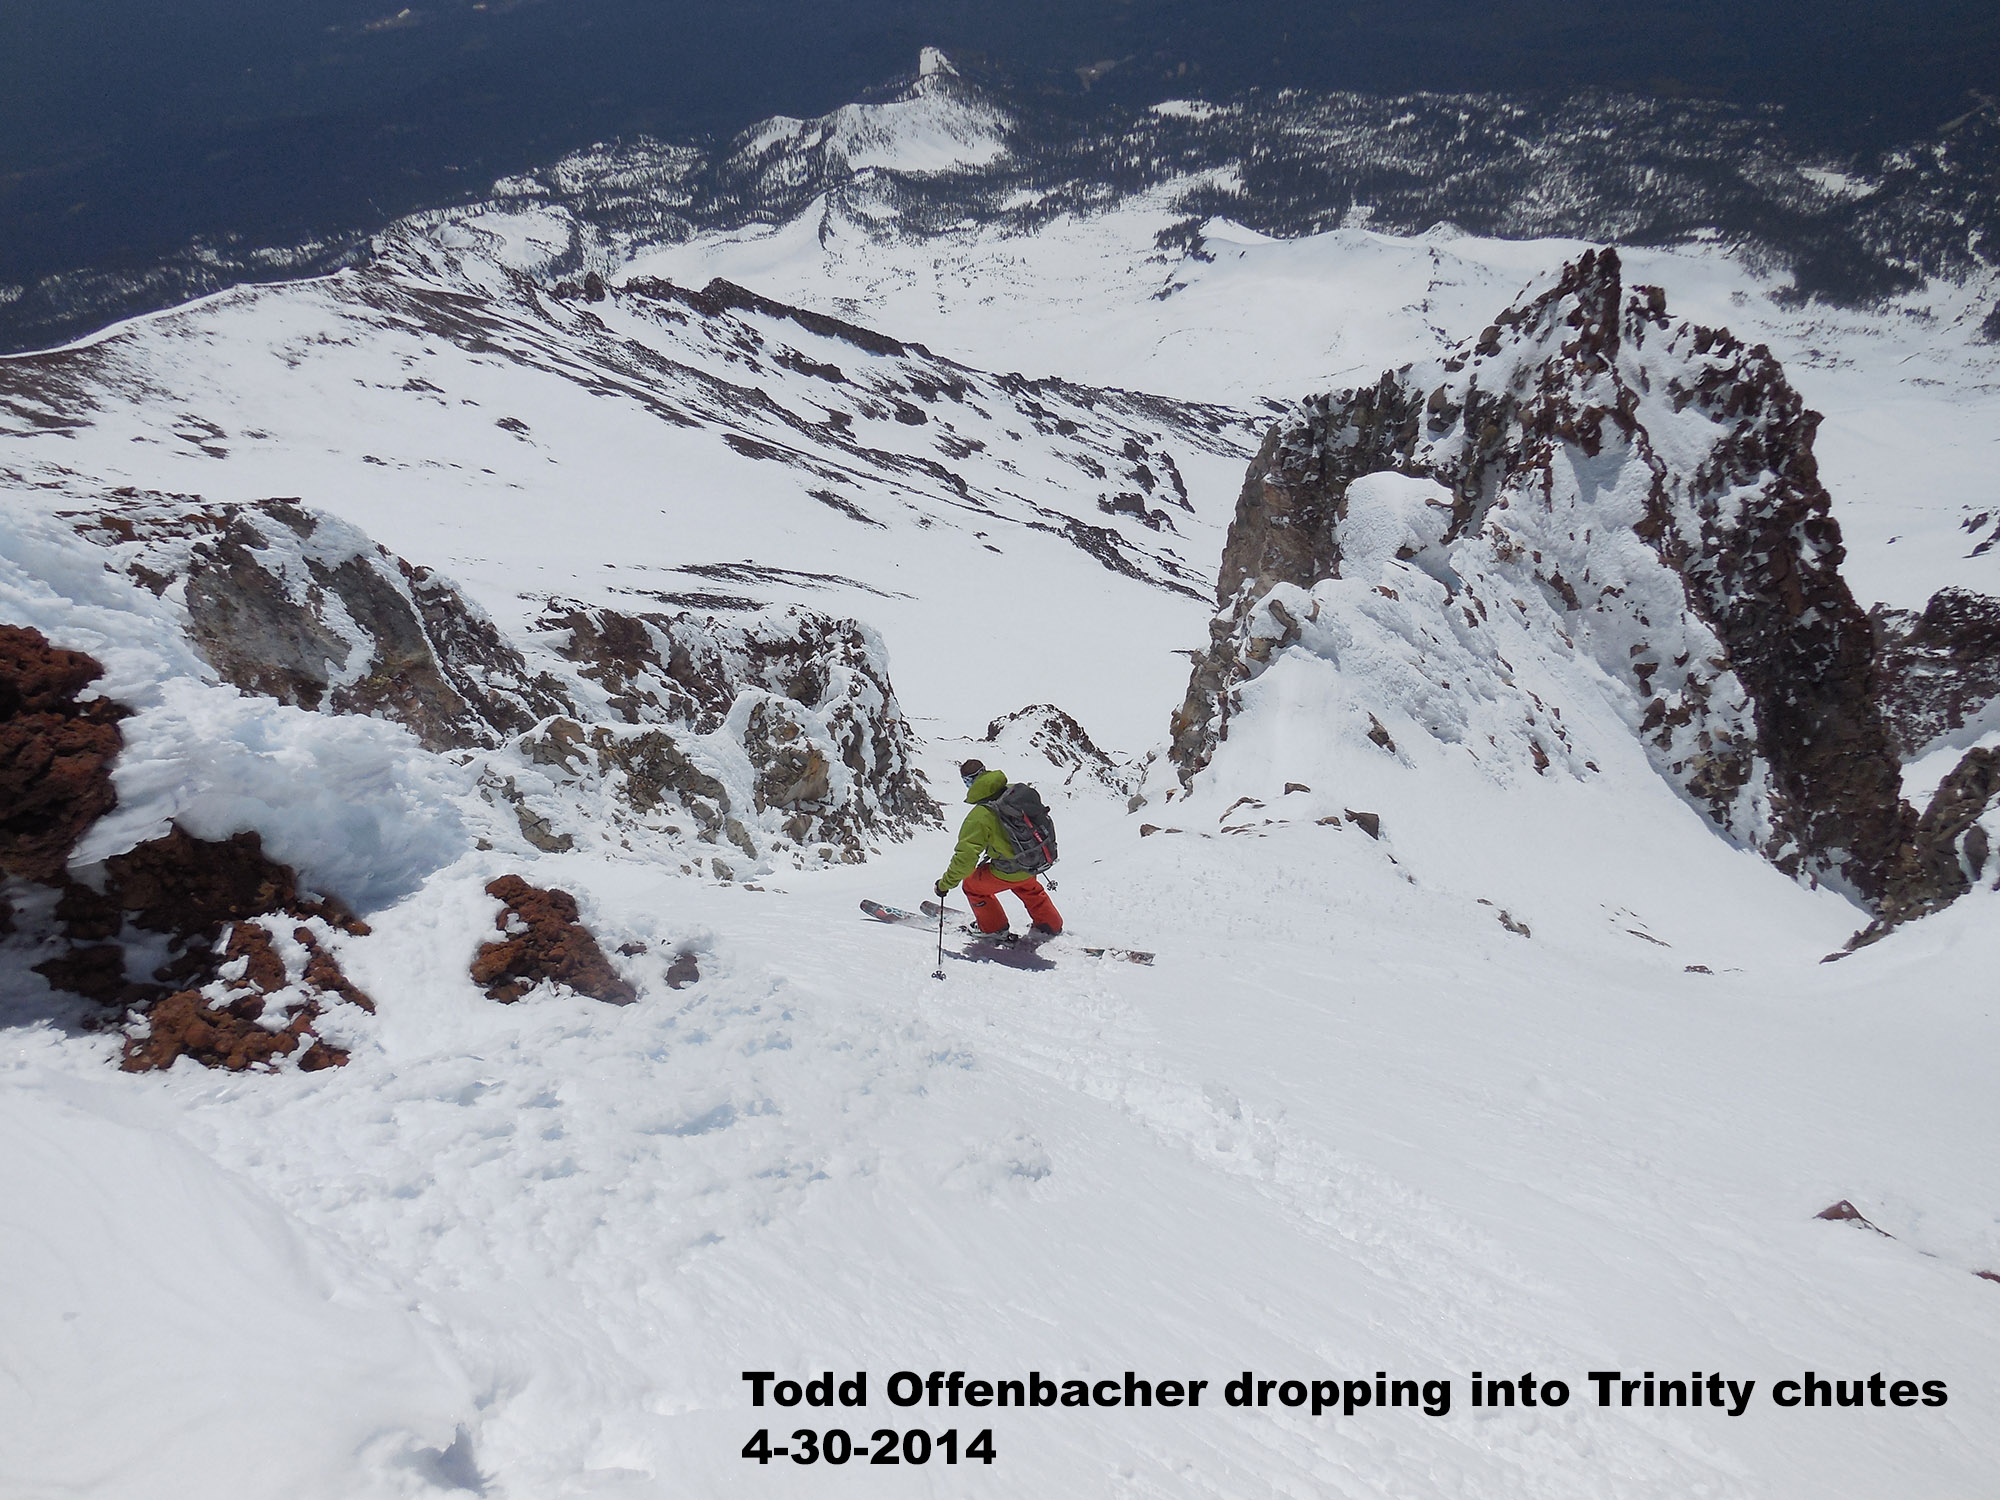
Like most people, I go for corn snow in the spring on Mt. Shasta. I rarely hear of skiers getting near the summit with cold winter conditions and powder snow. It’s hard to forecast avalanche danger as well in wide open bowls with high winds. People do enjoy the low to mid mountain regularly in Avy Gulch in winter, however. The road is called Everett Memorial Highway, and it is not always plowed. Look into that at www.shastaavalanche.org. April and May are best to ski the South Side. In late May the snow starts to get pretty sun cupped. I have skied very smooth snow on the south side in June, however. I have also skied great corn from 13k all the way to the car in early February. If you want smoother snow and less people, traverse left as you leave Bunny Flat Parking and ski the West Face above Hidden Valley. You can also ski the cool center south chute below Mt. Shastina’s summit from Bunny Flat. The real tick list ski descent of the south side on Mt. Shasta is the Trinity Chutes, which drop 3000′ to Helen Lake, and hold a 40 degree angle the whole way. .
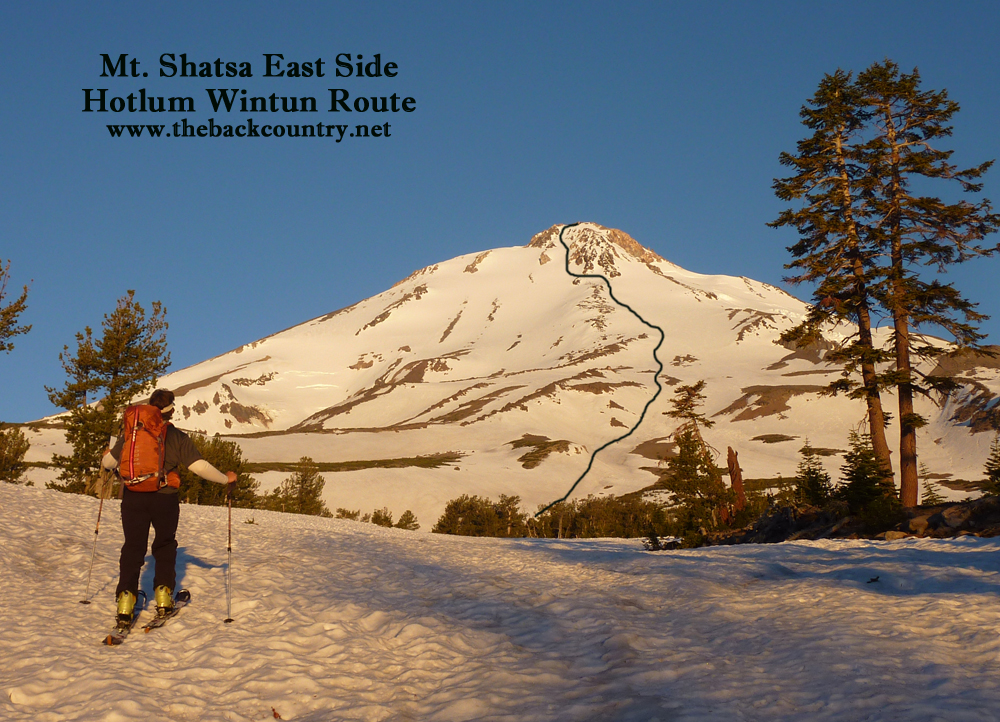
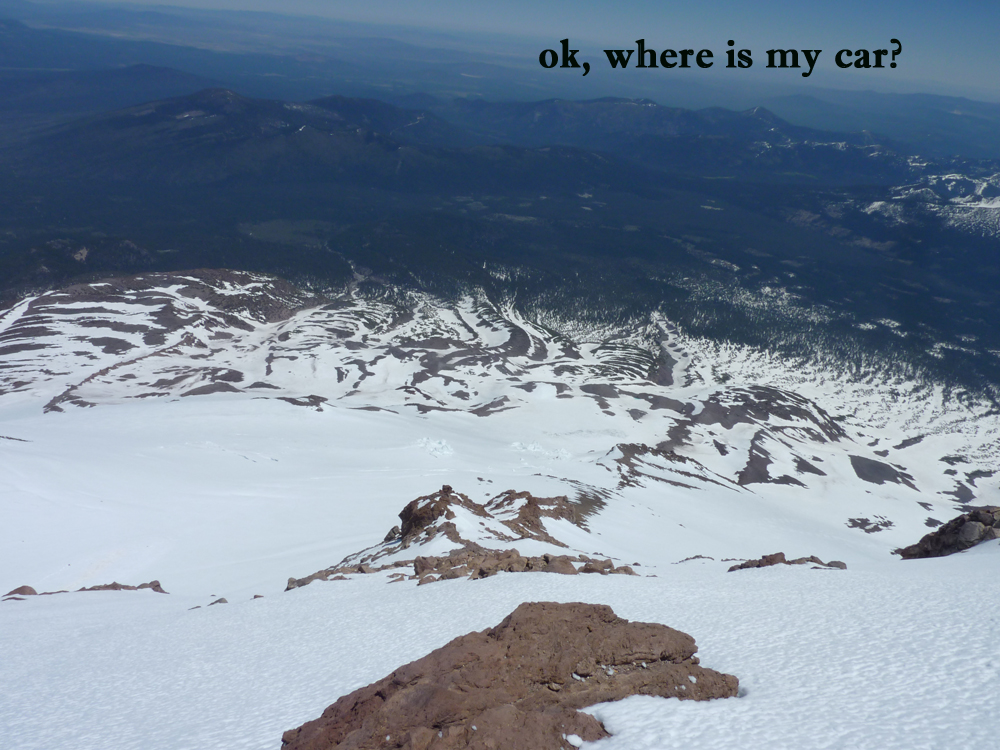
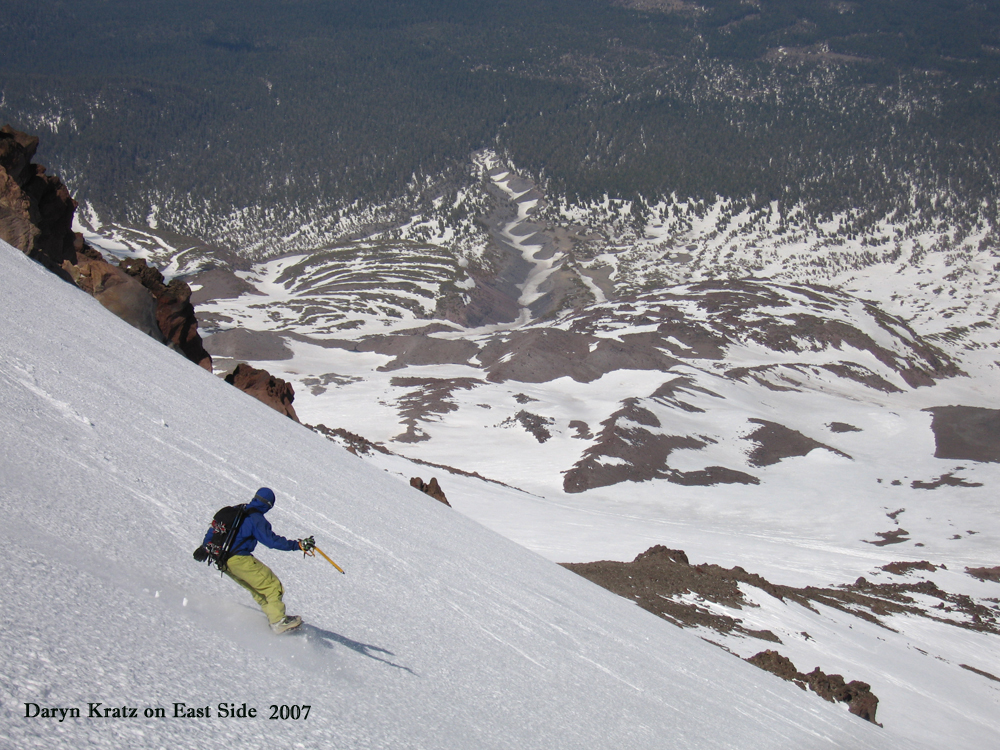
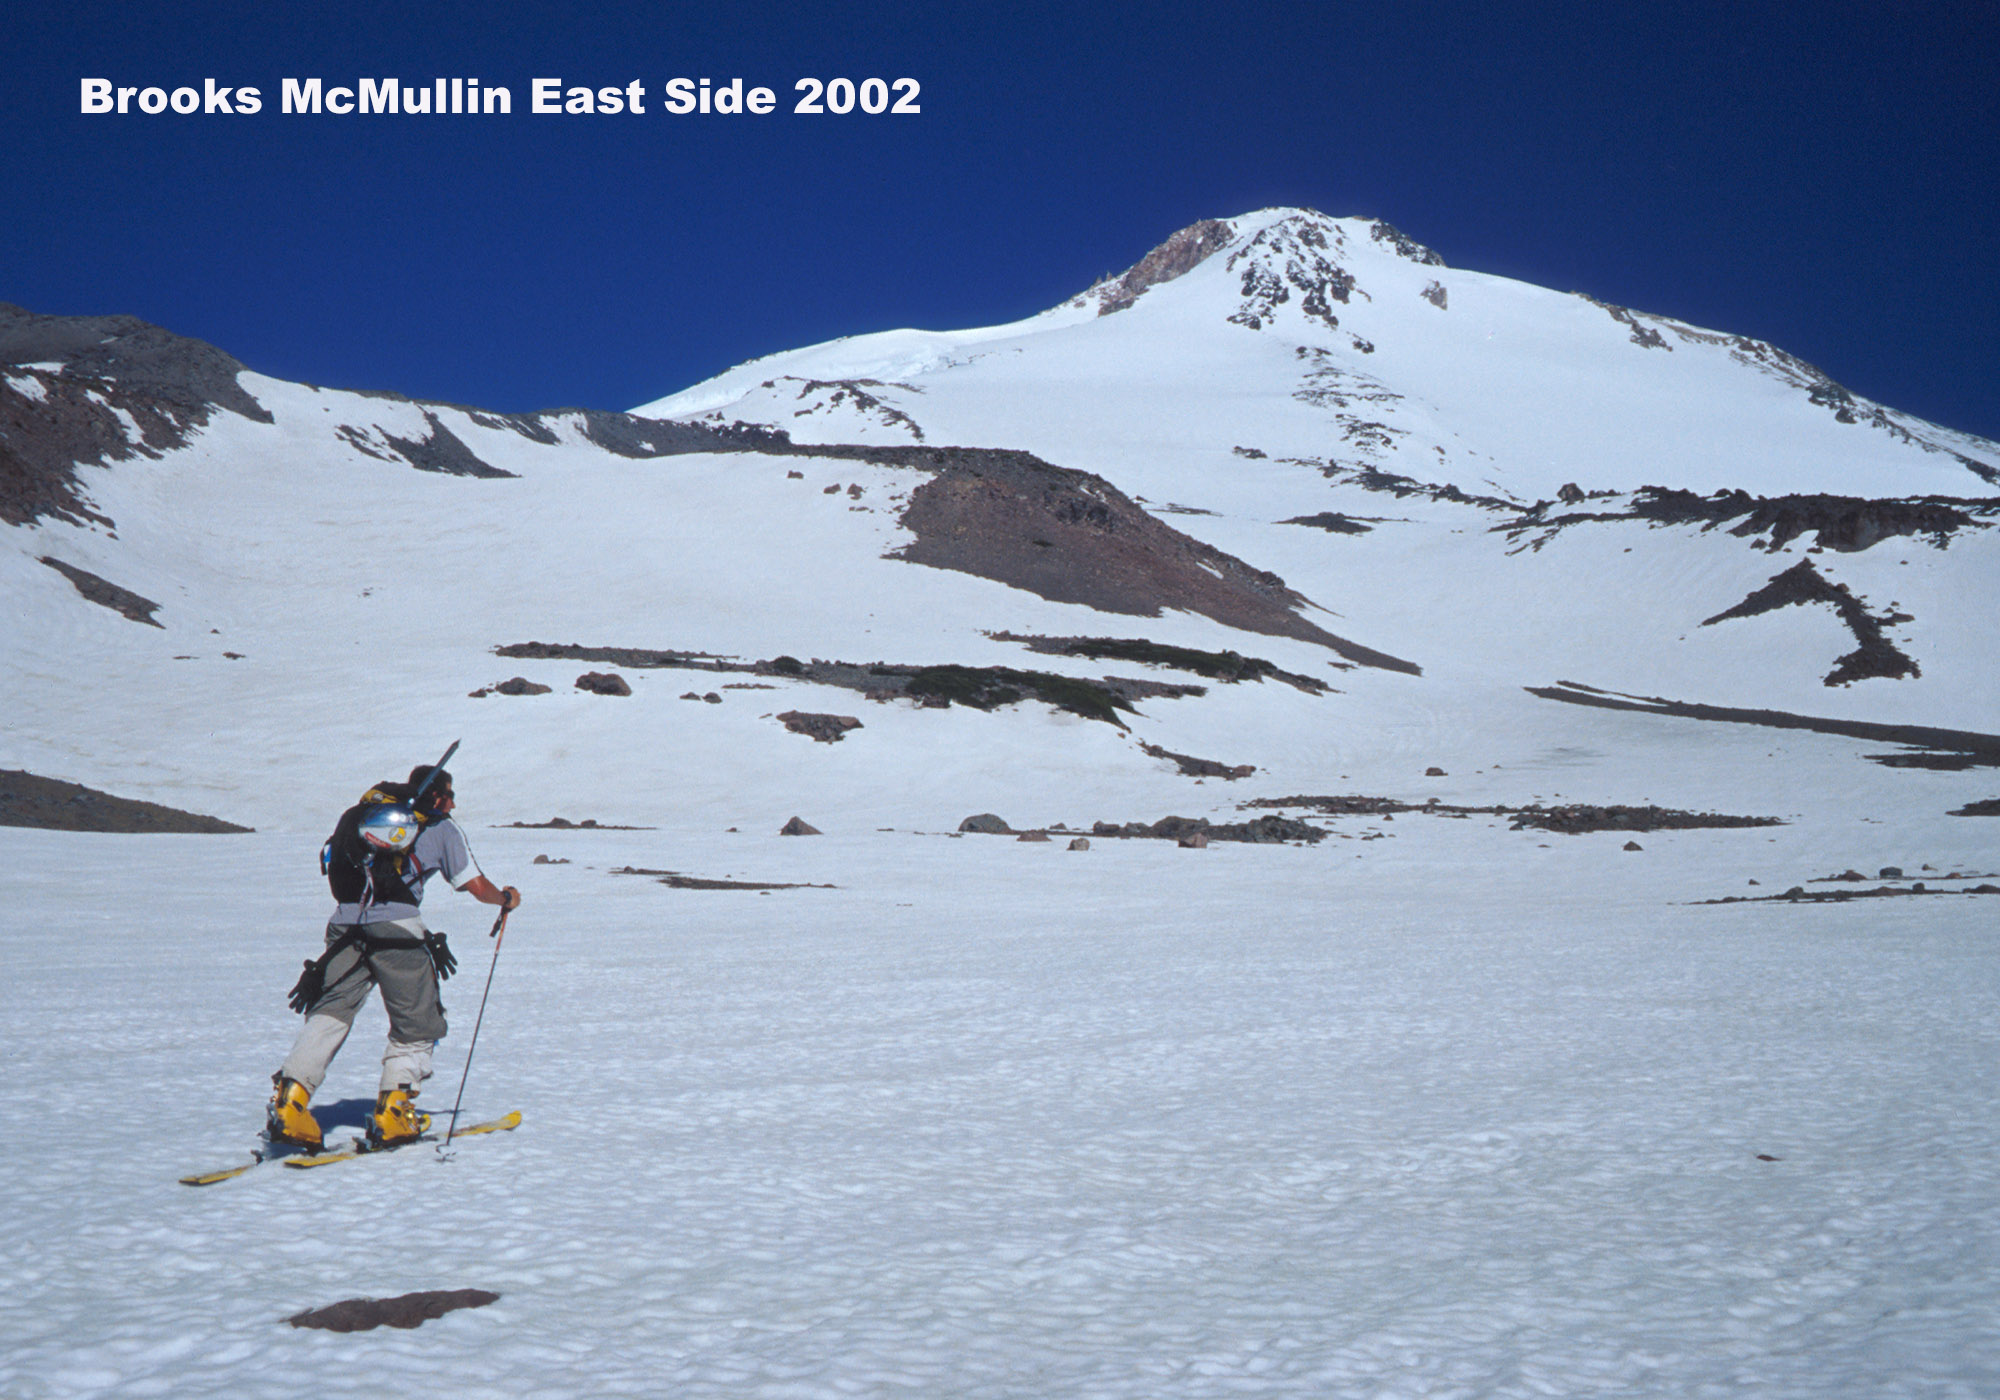
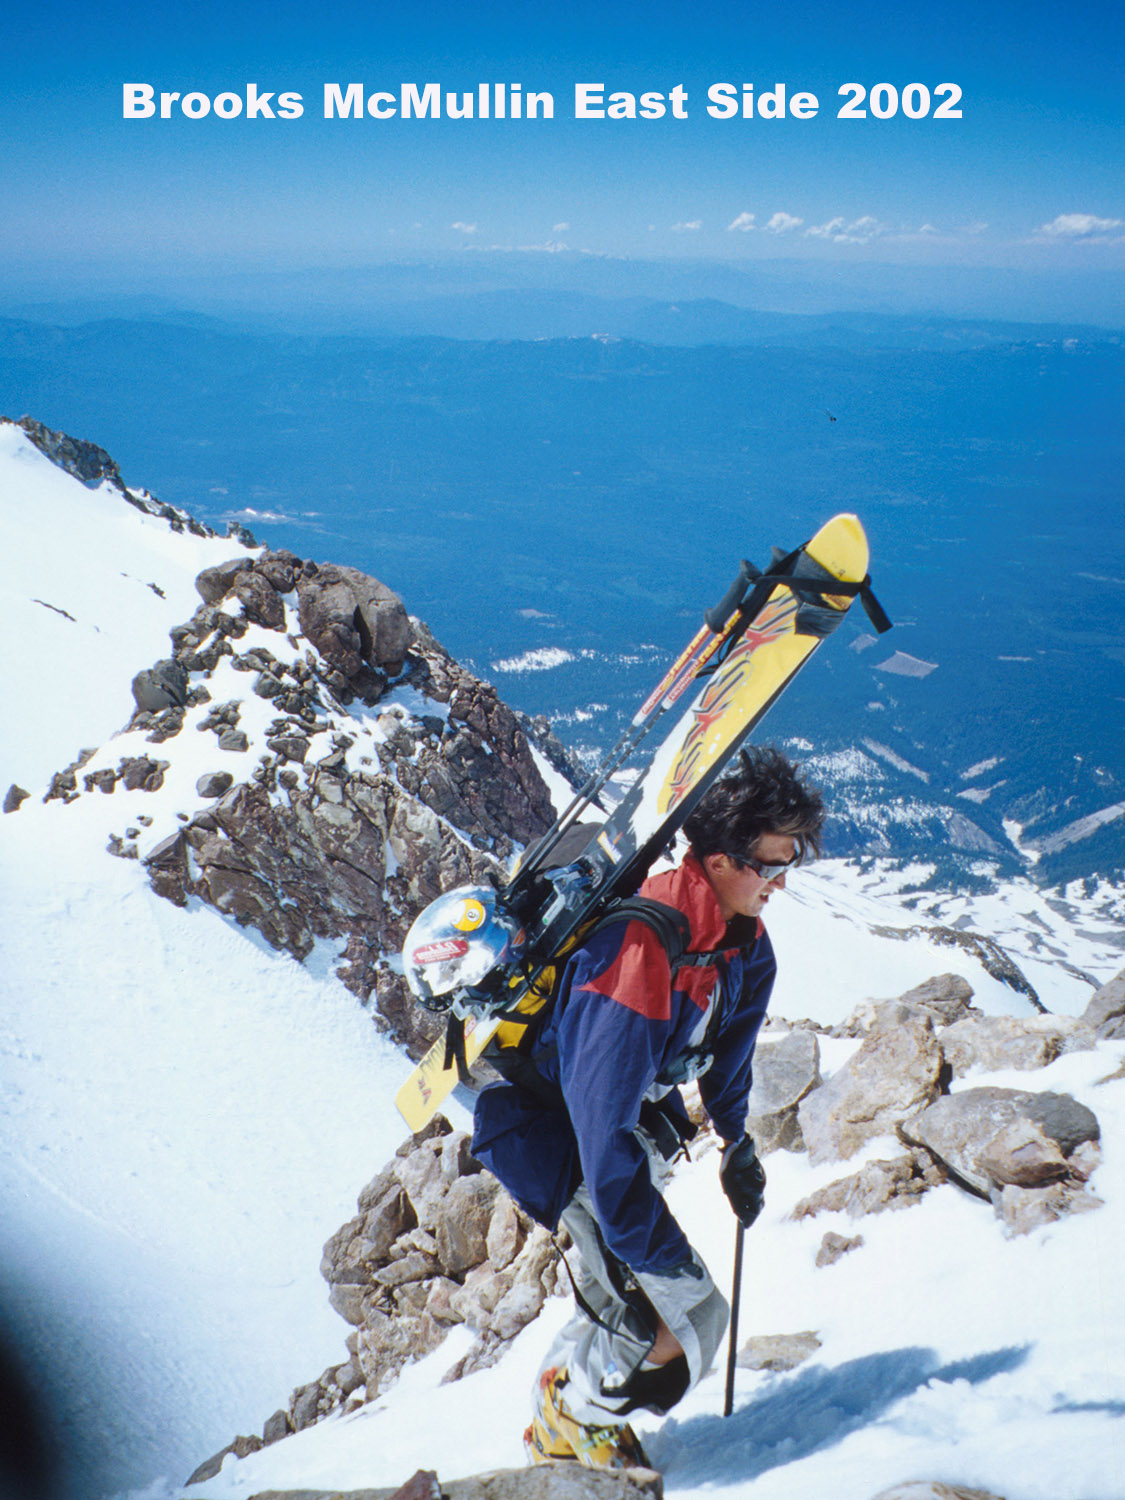
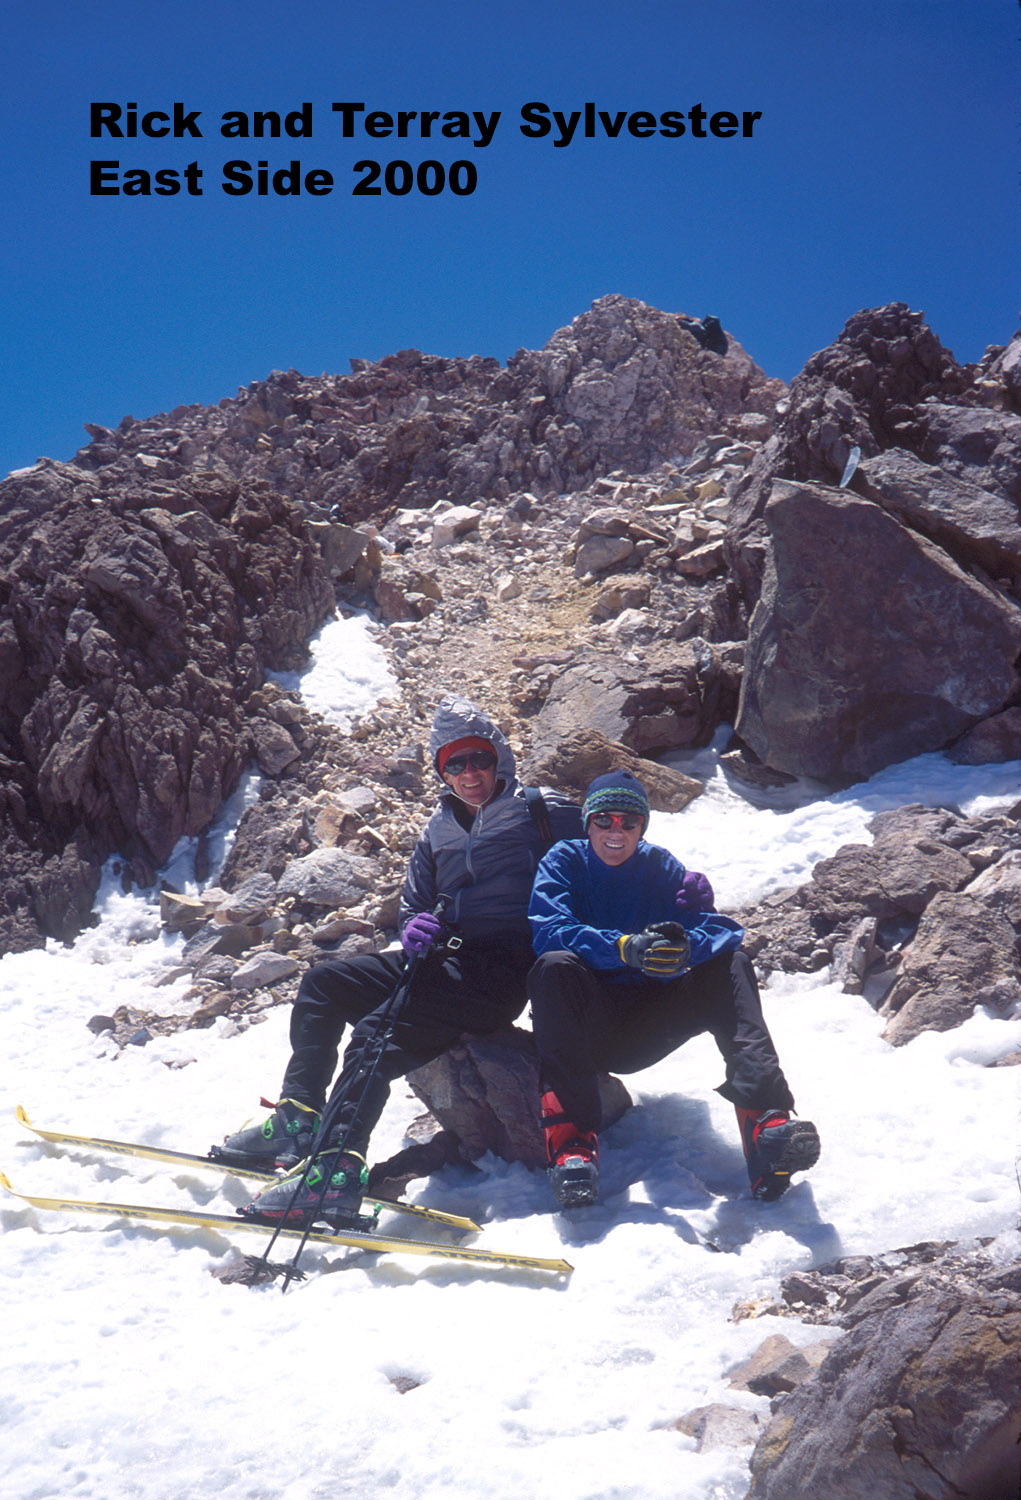
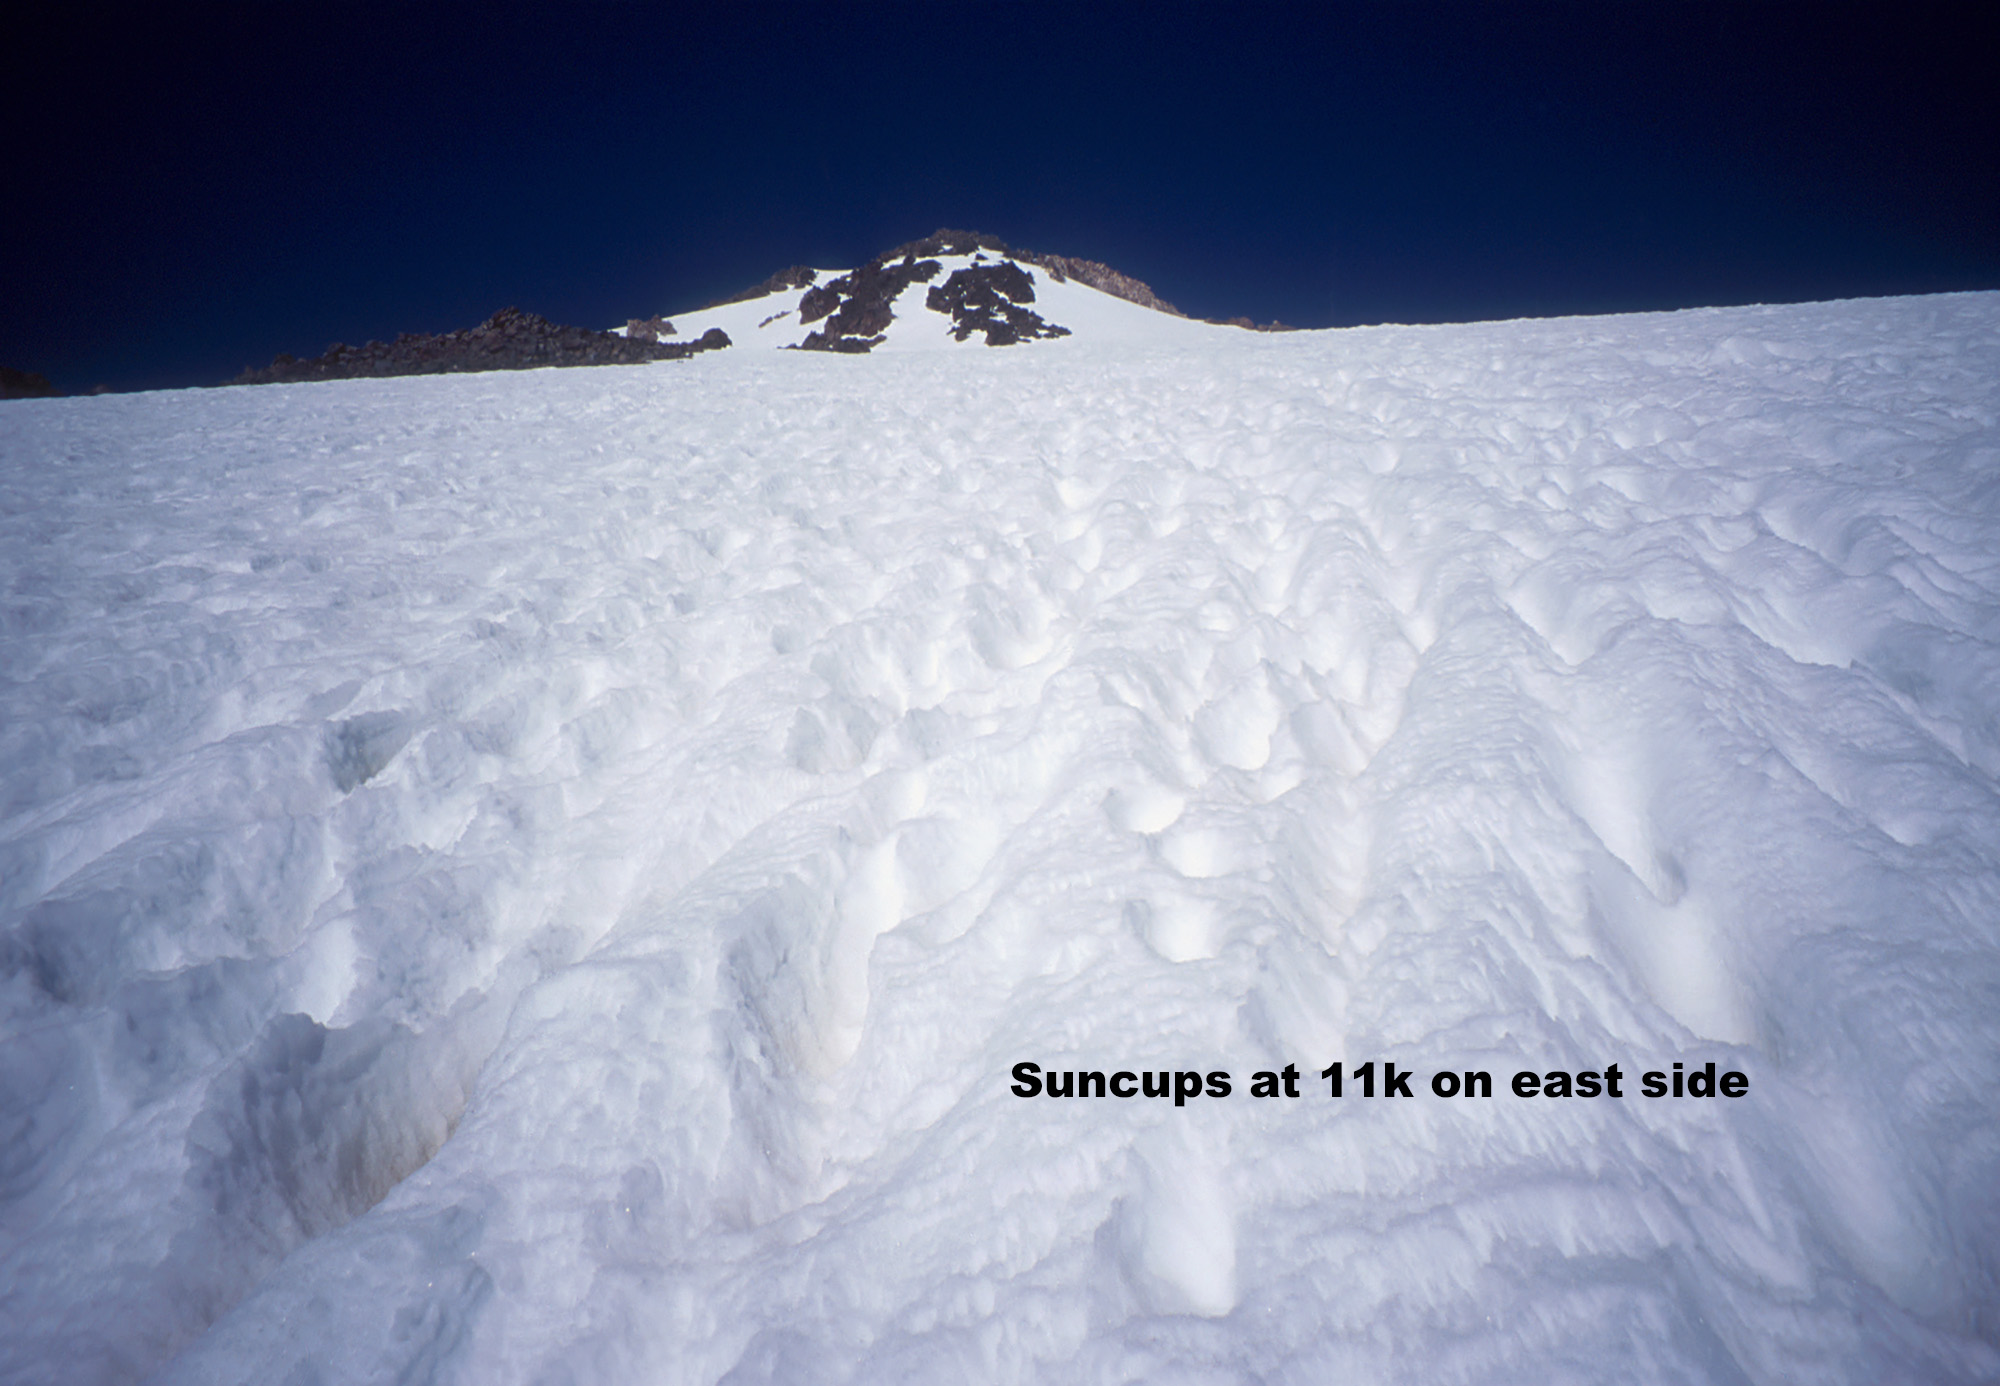
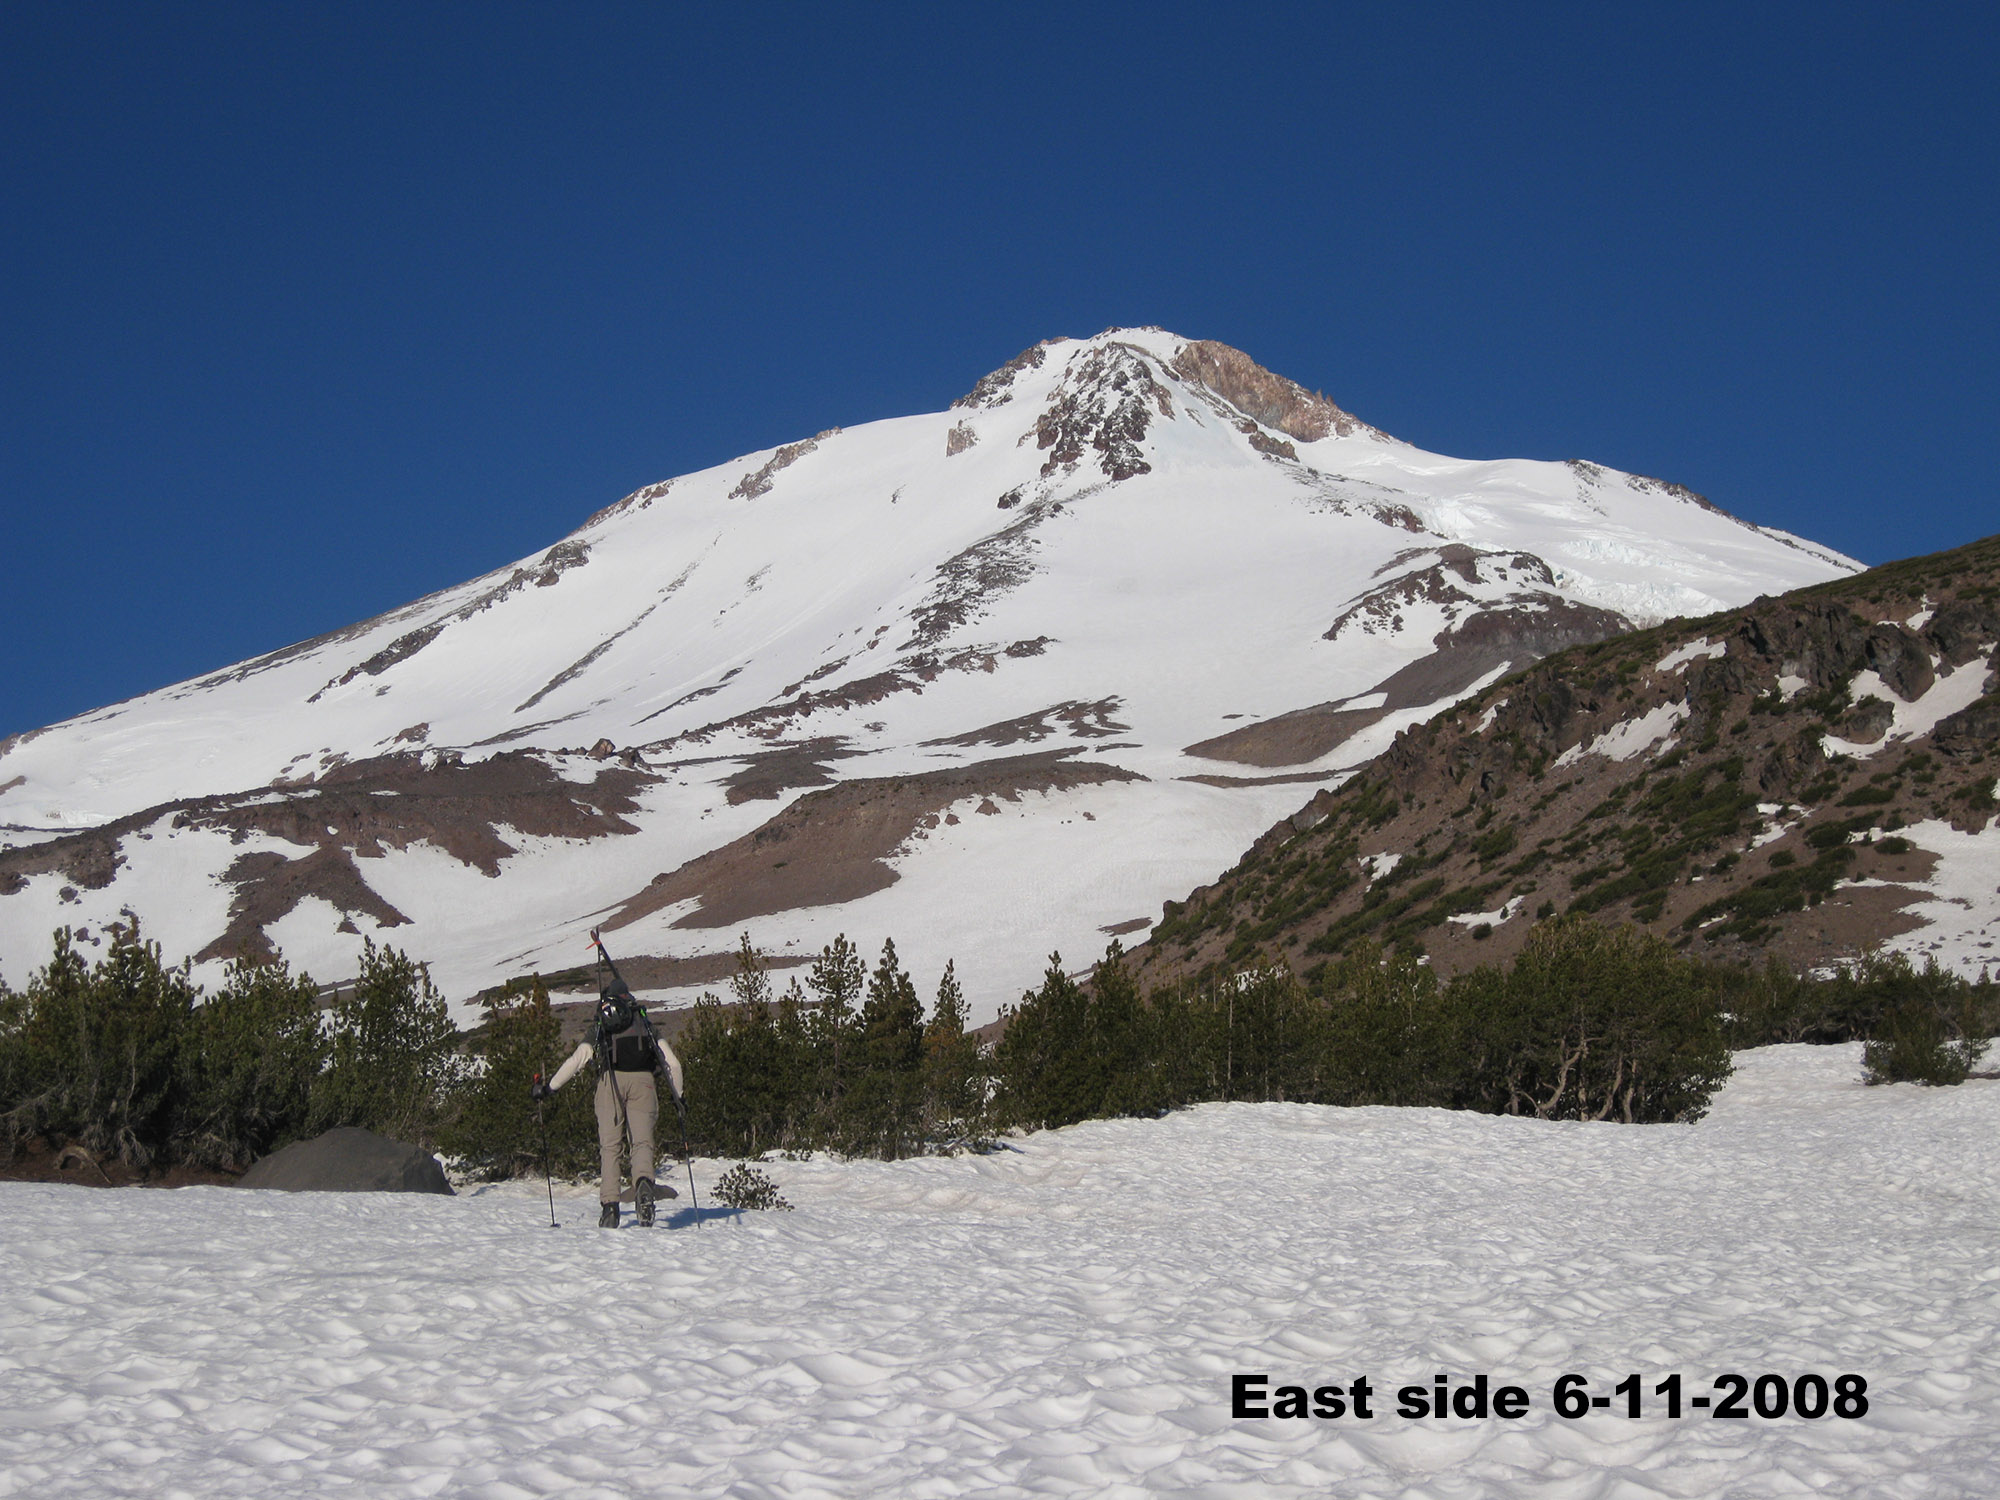
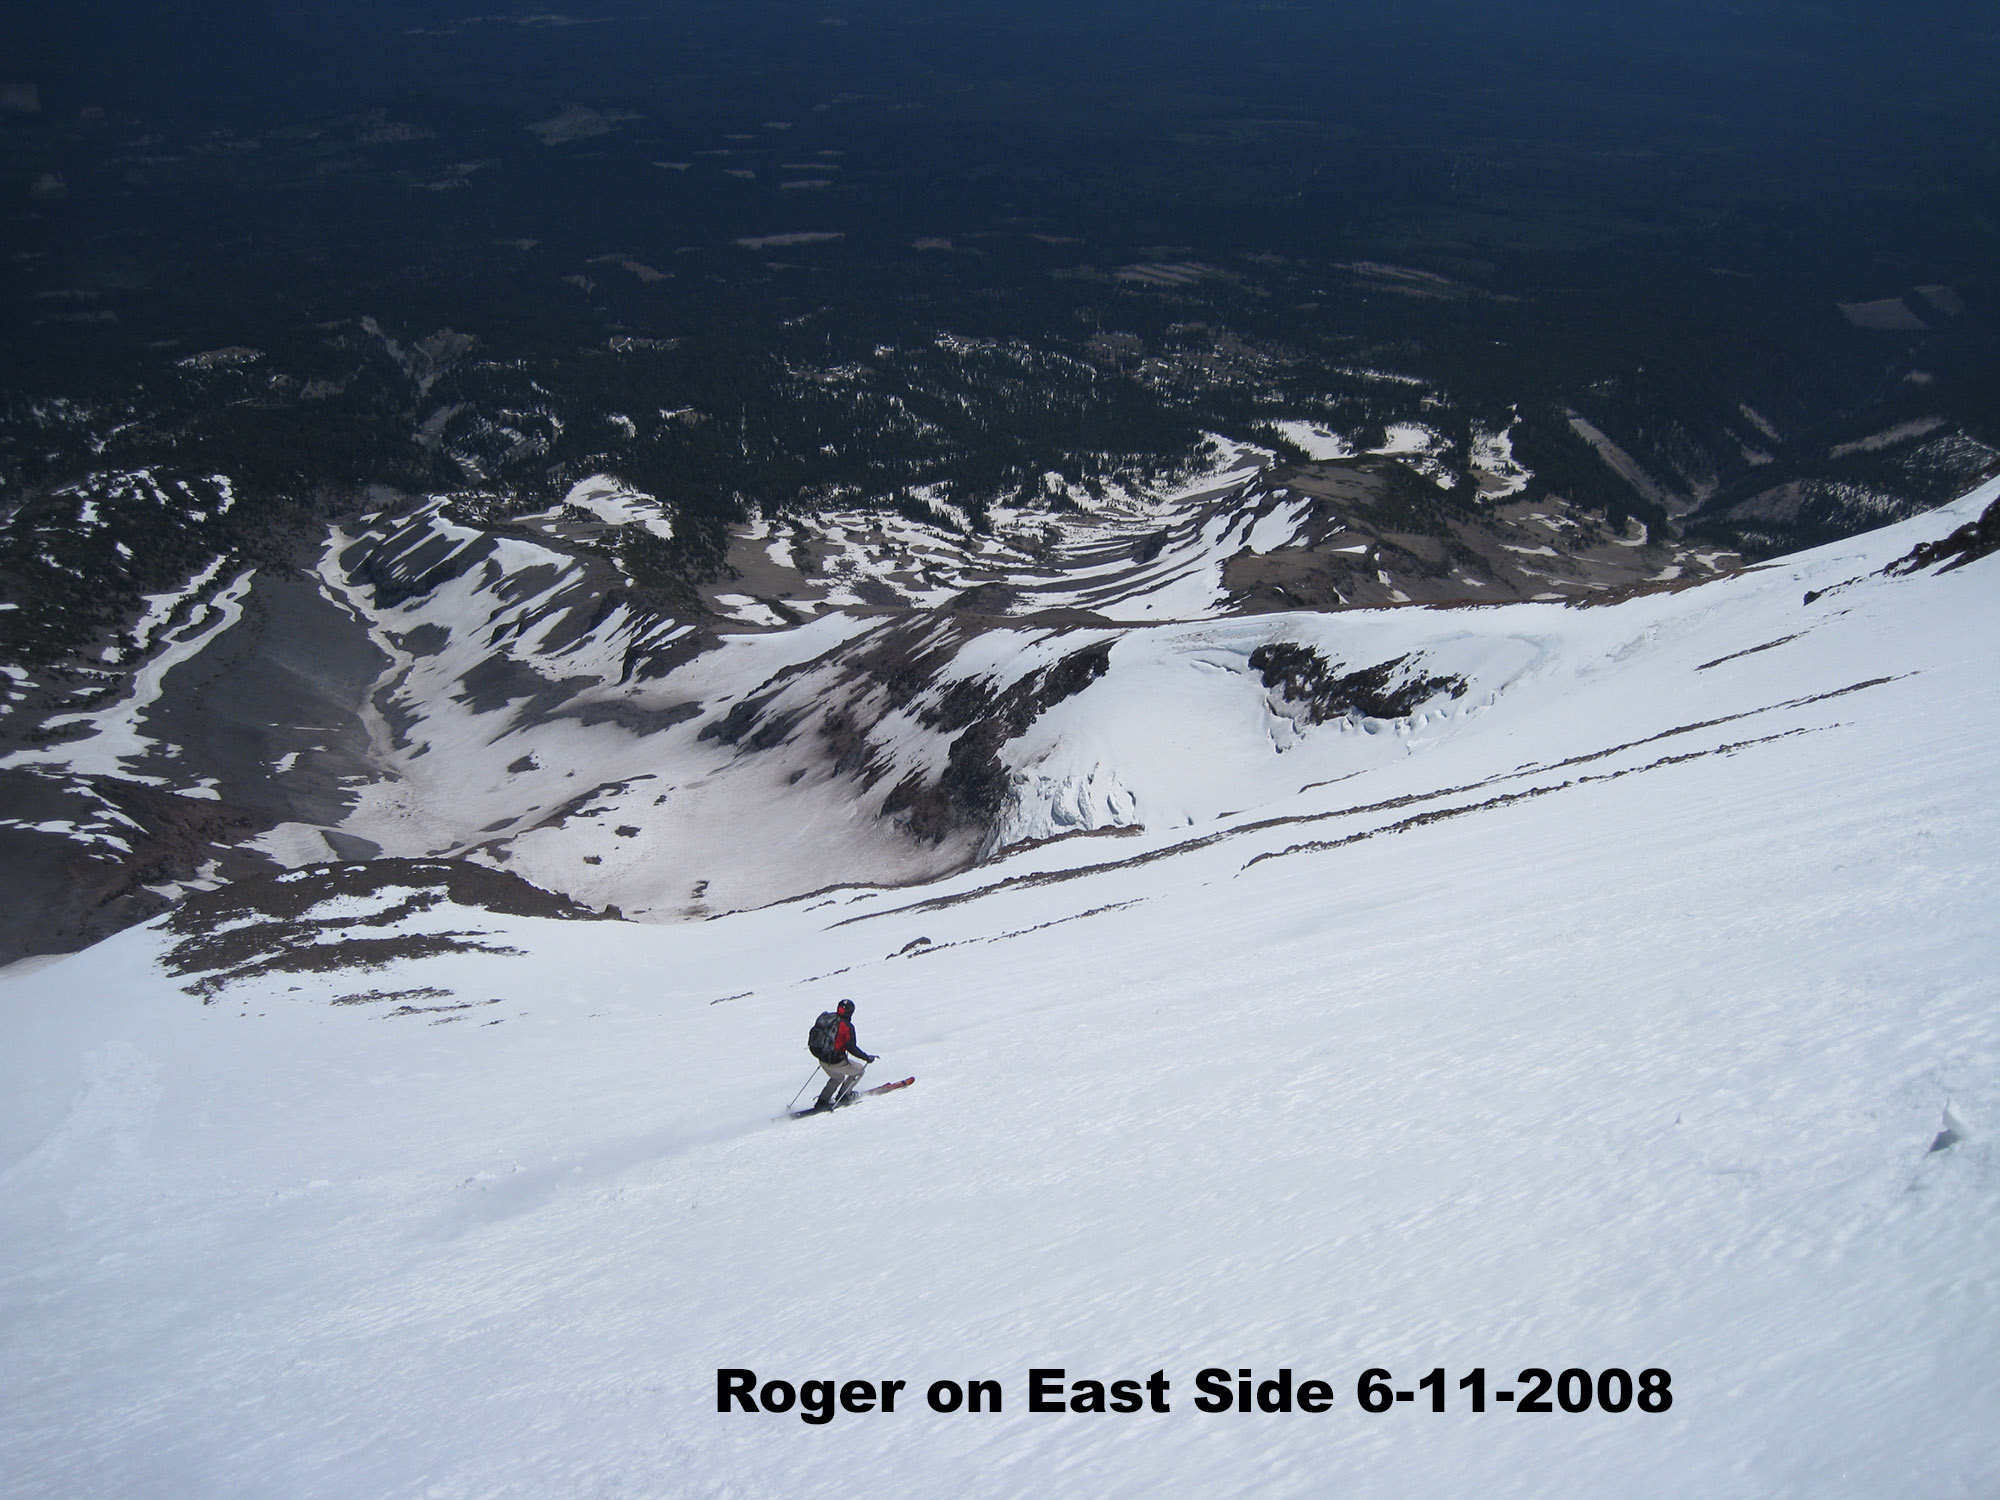
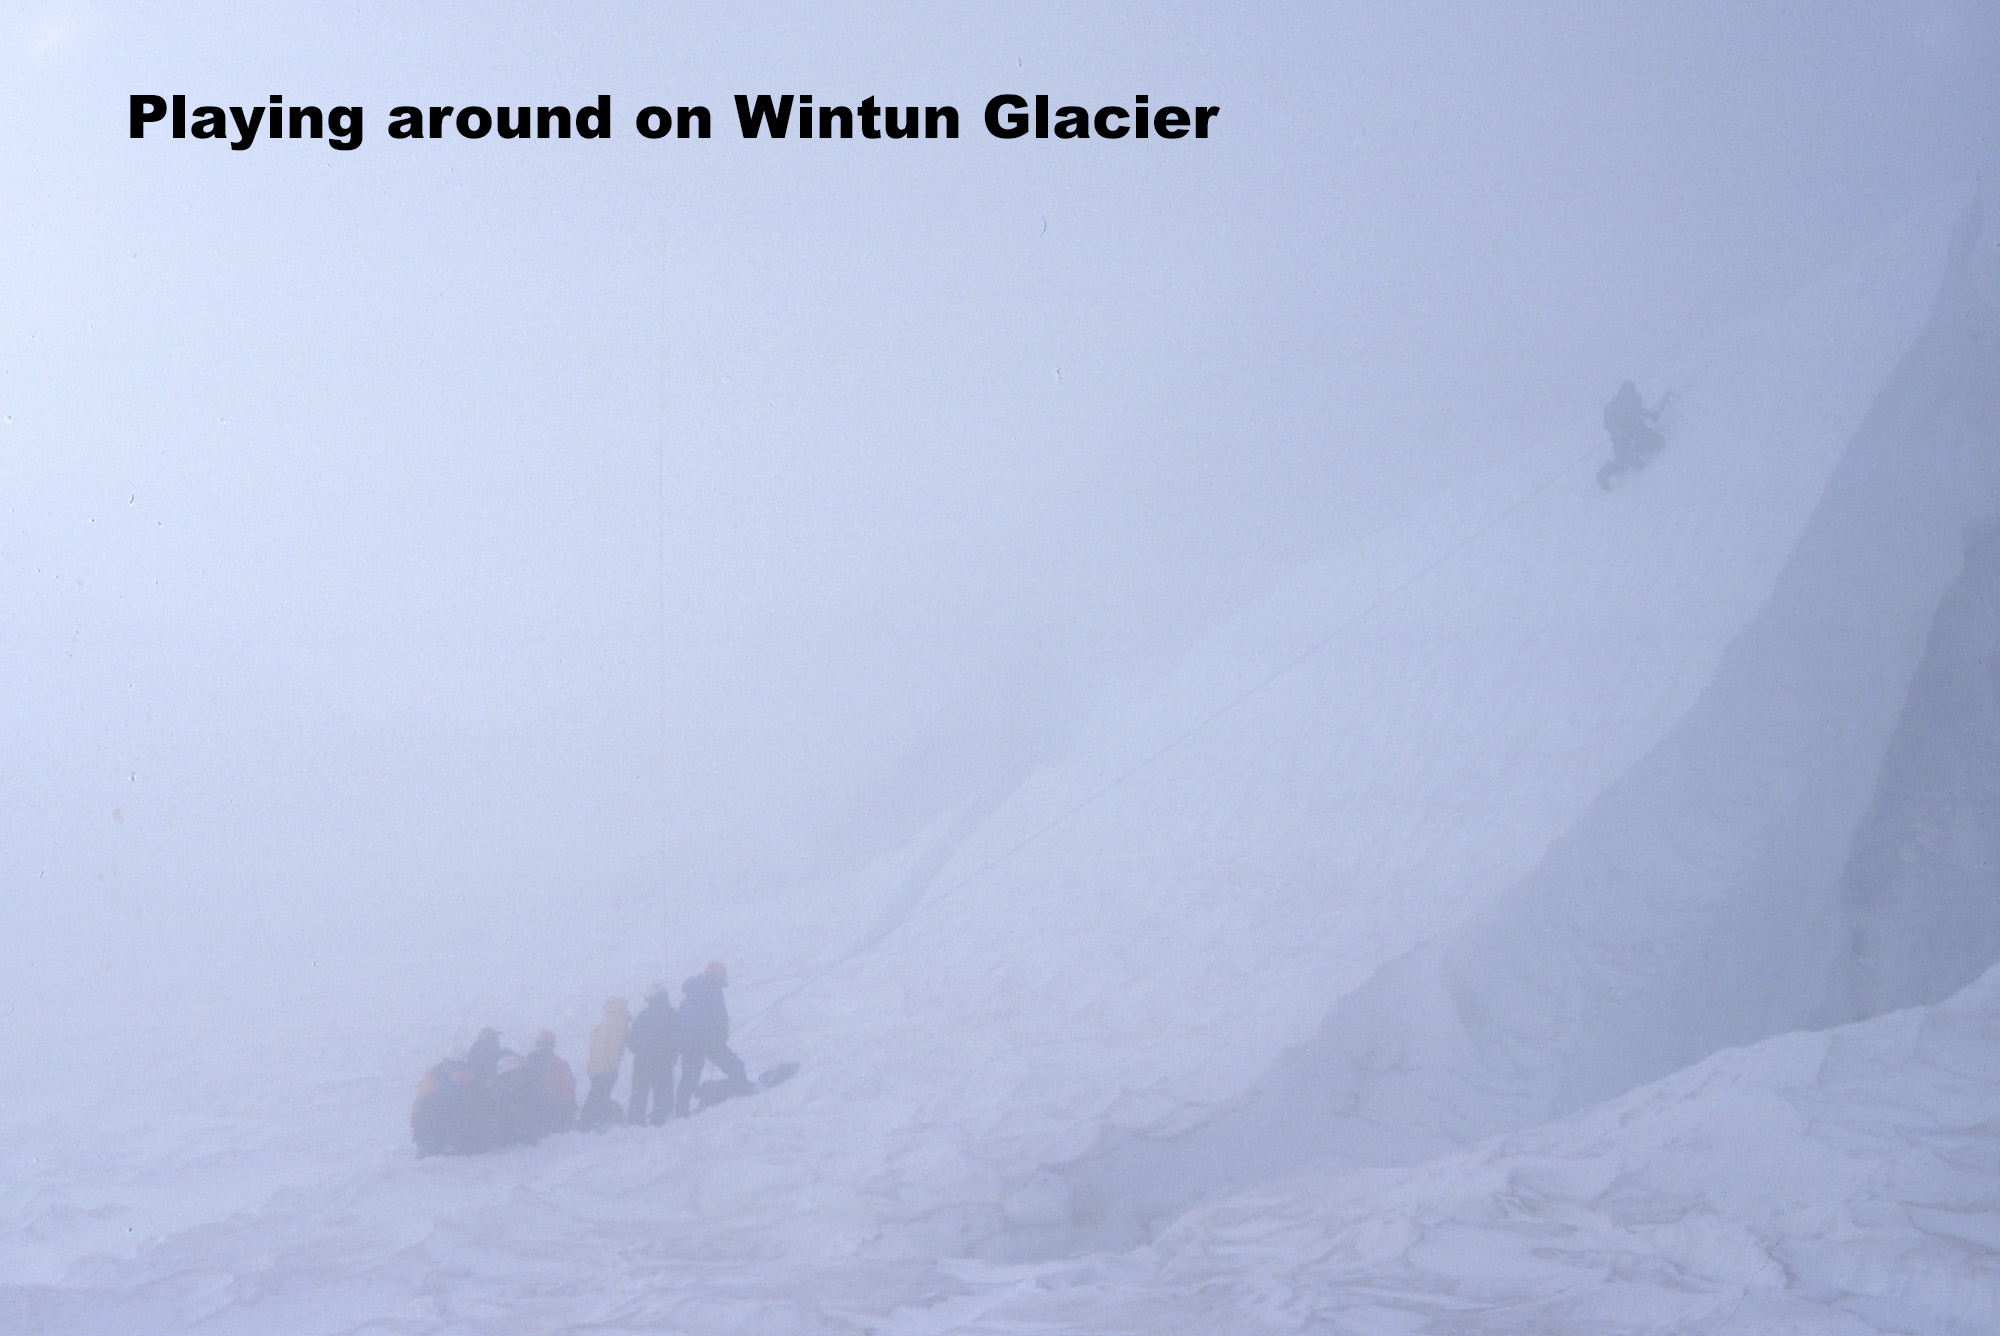
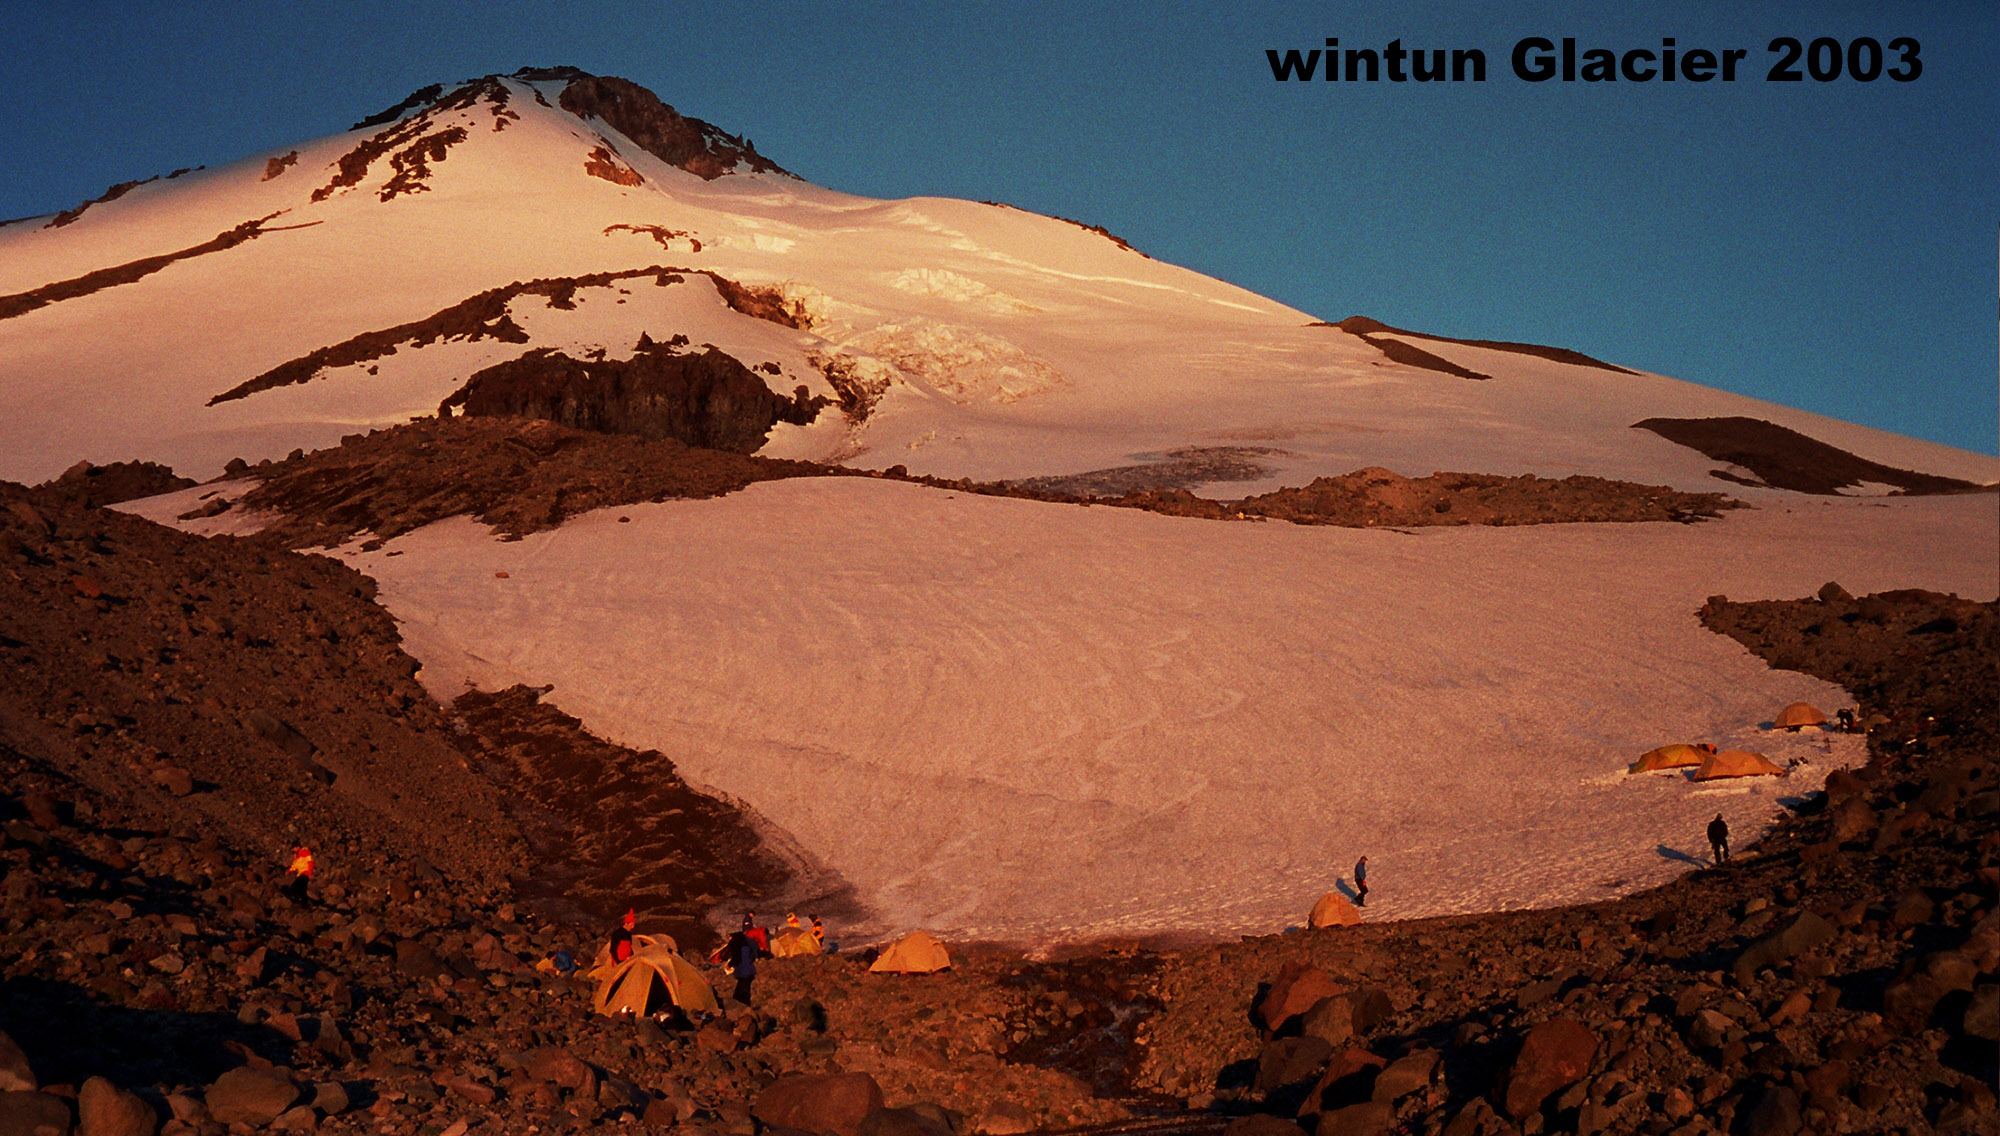
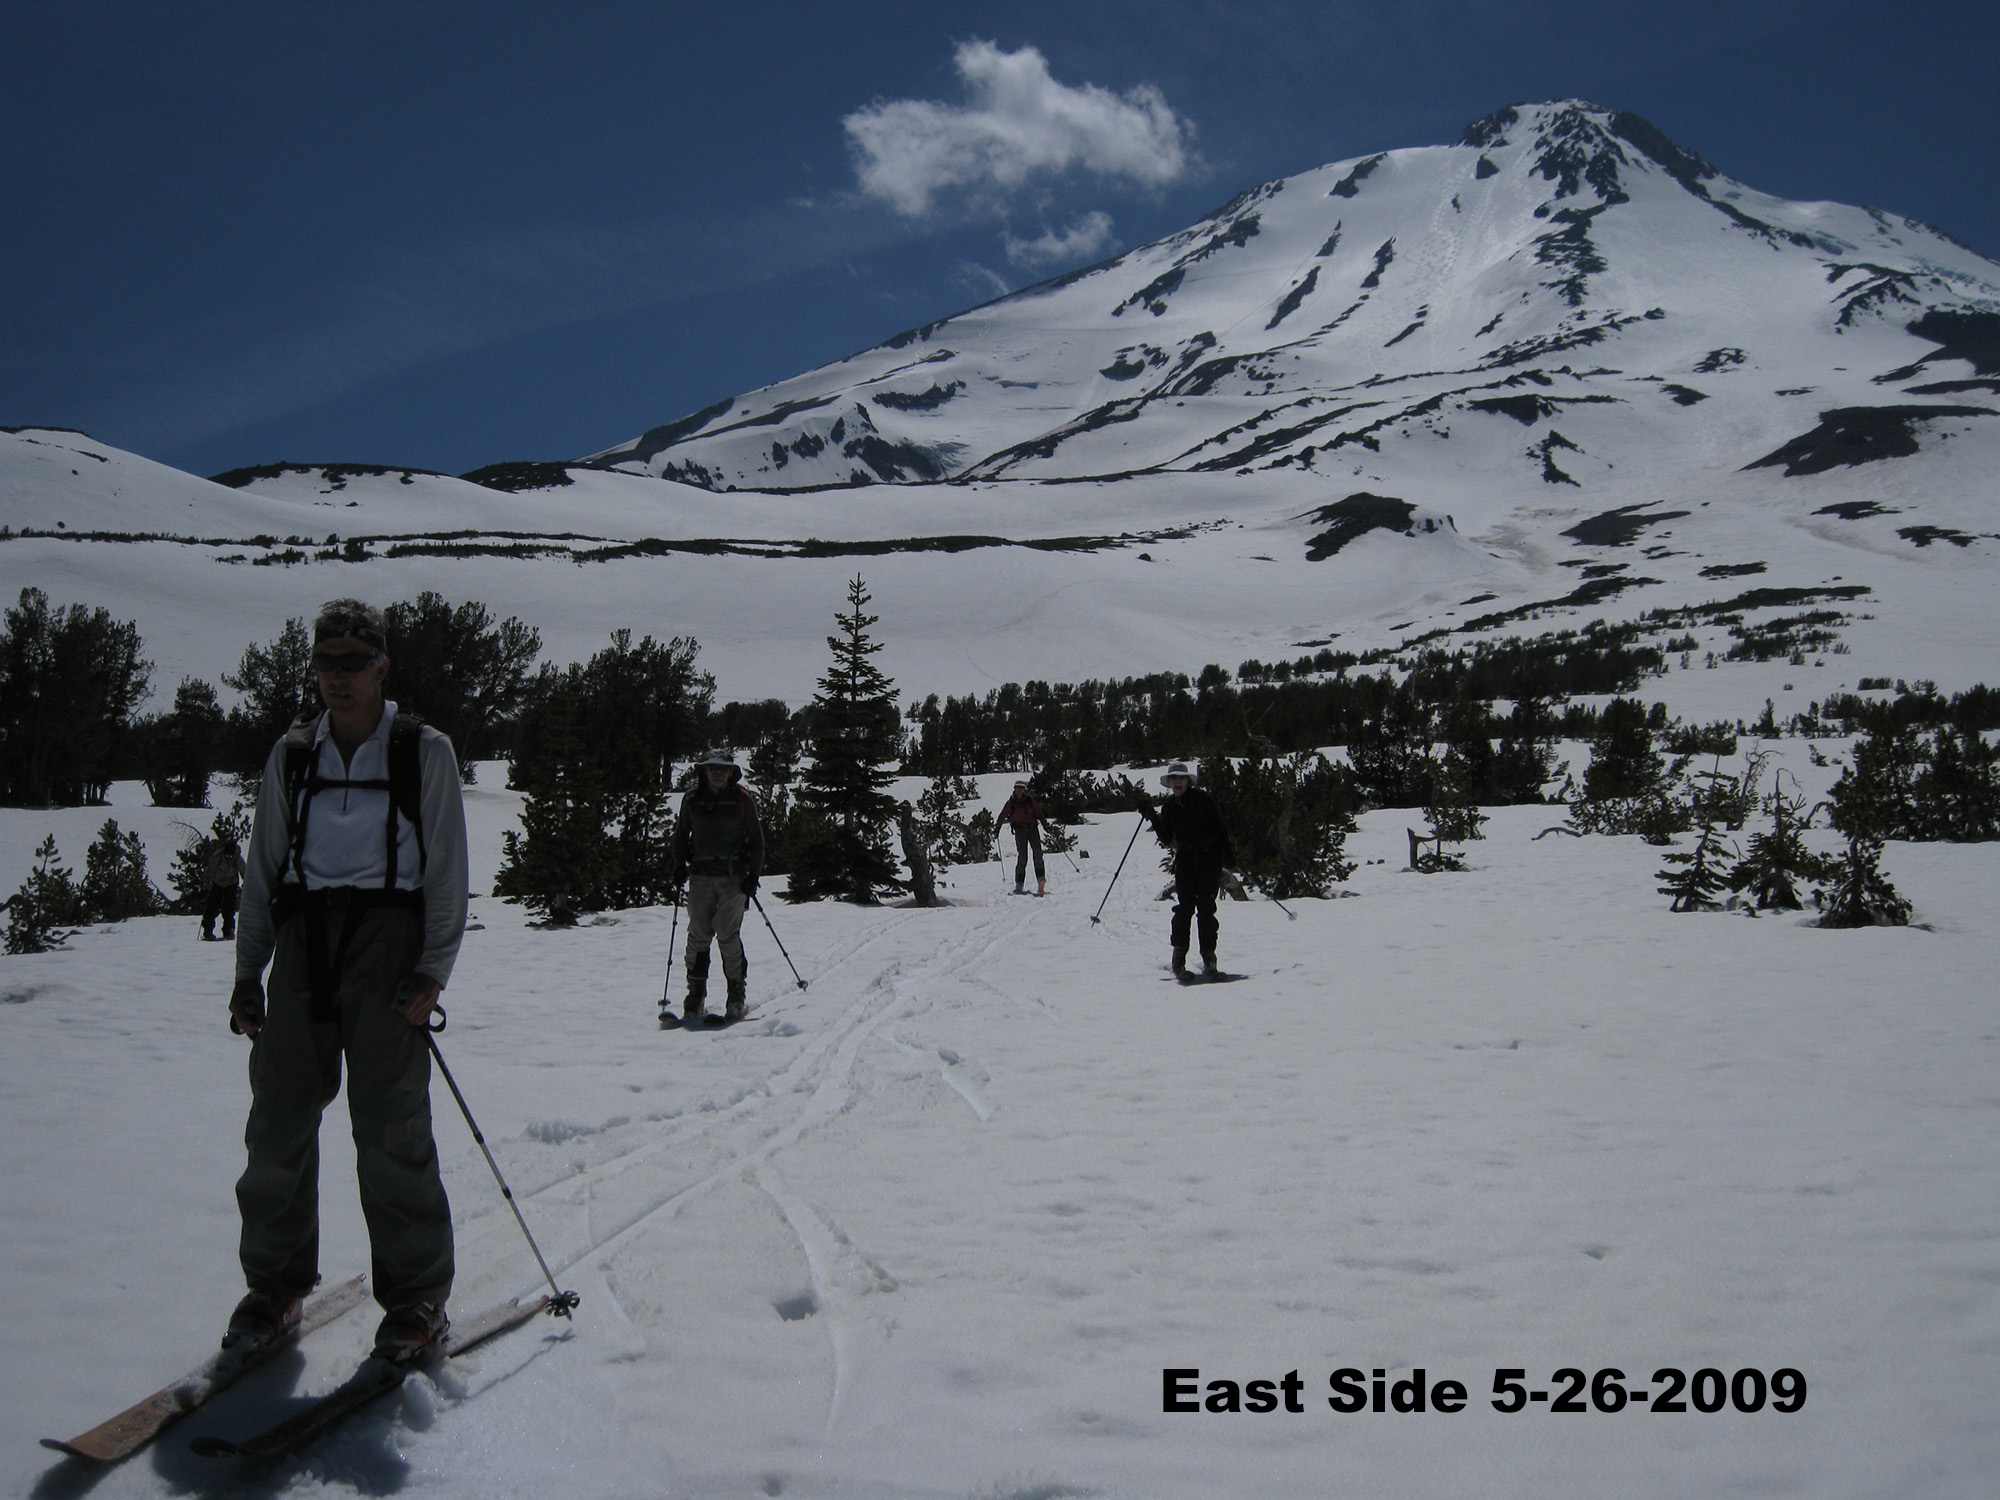
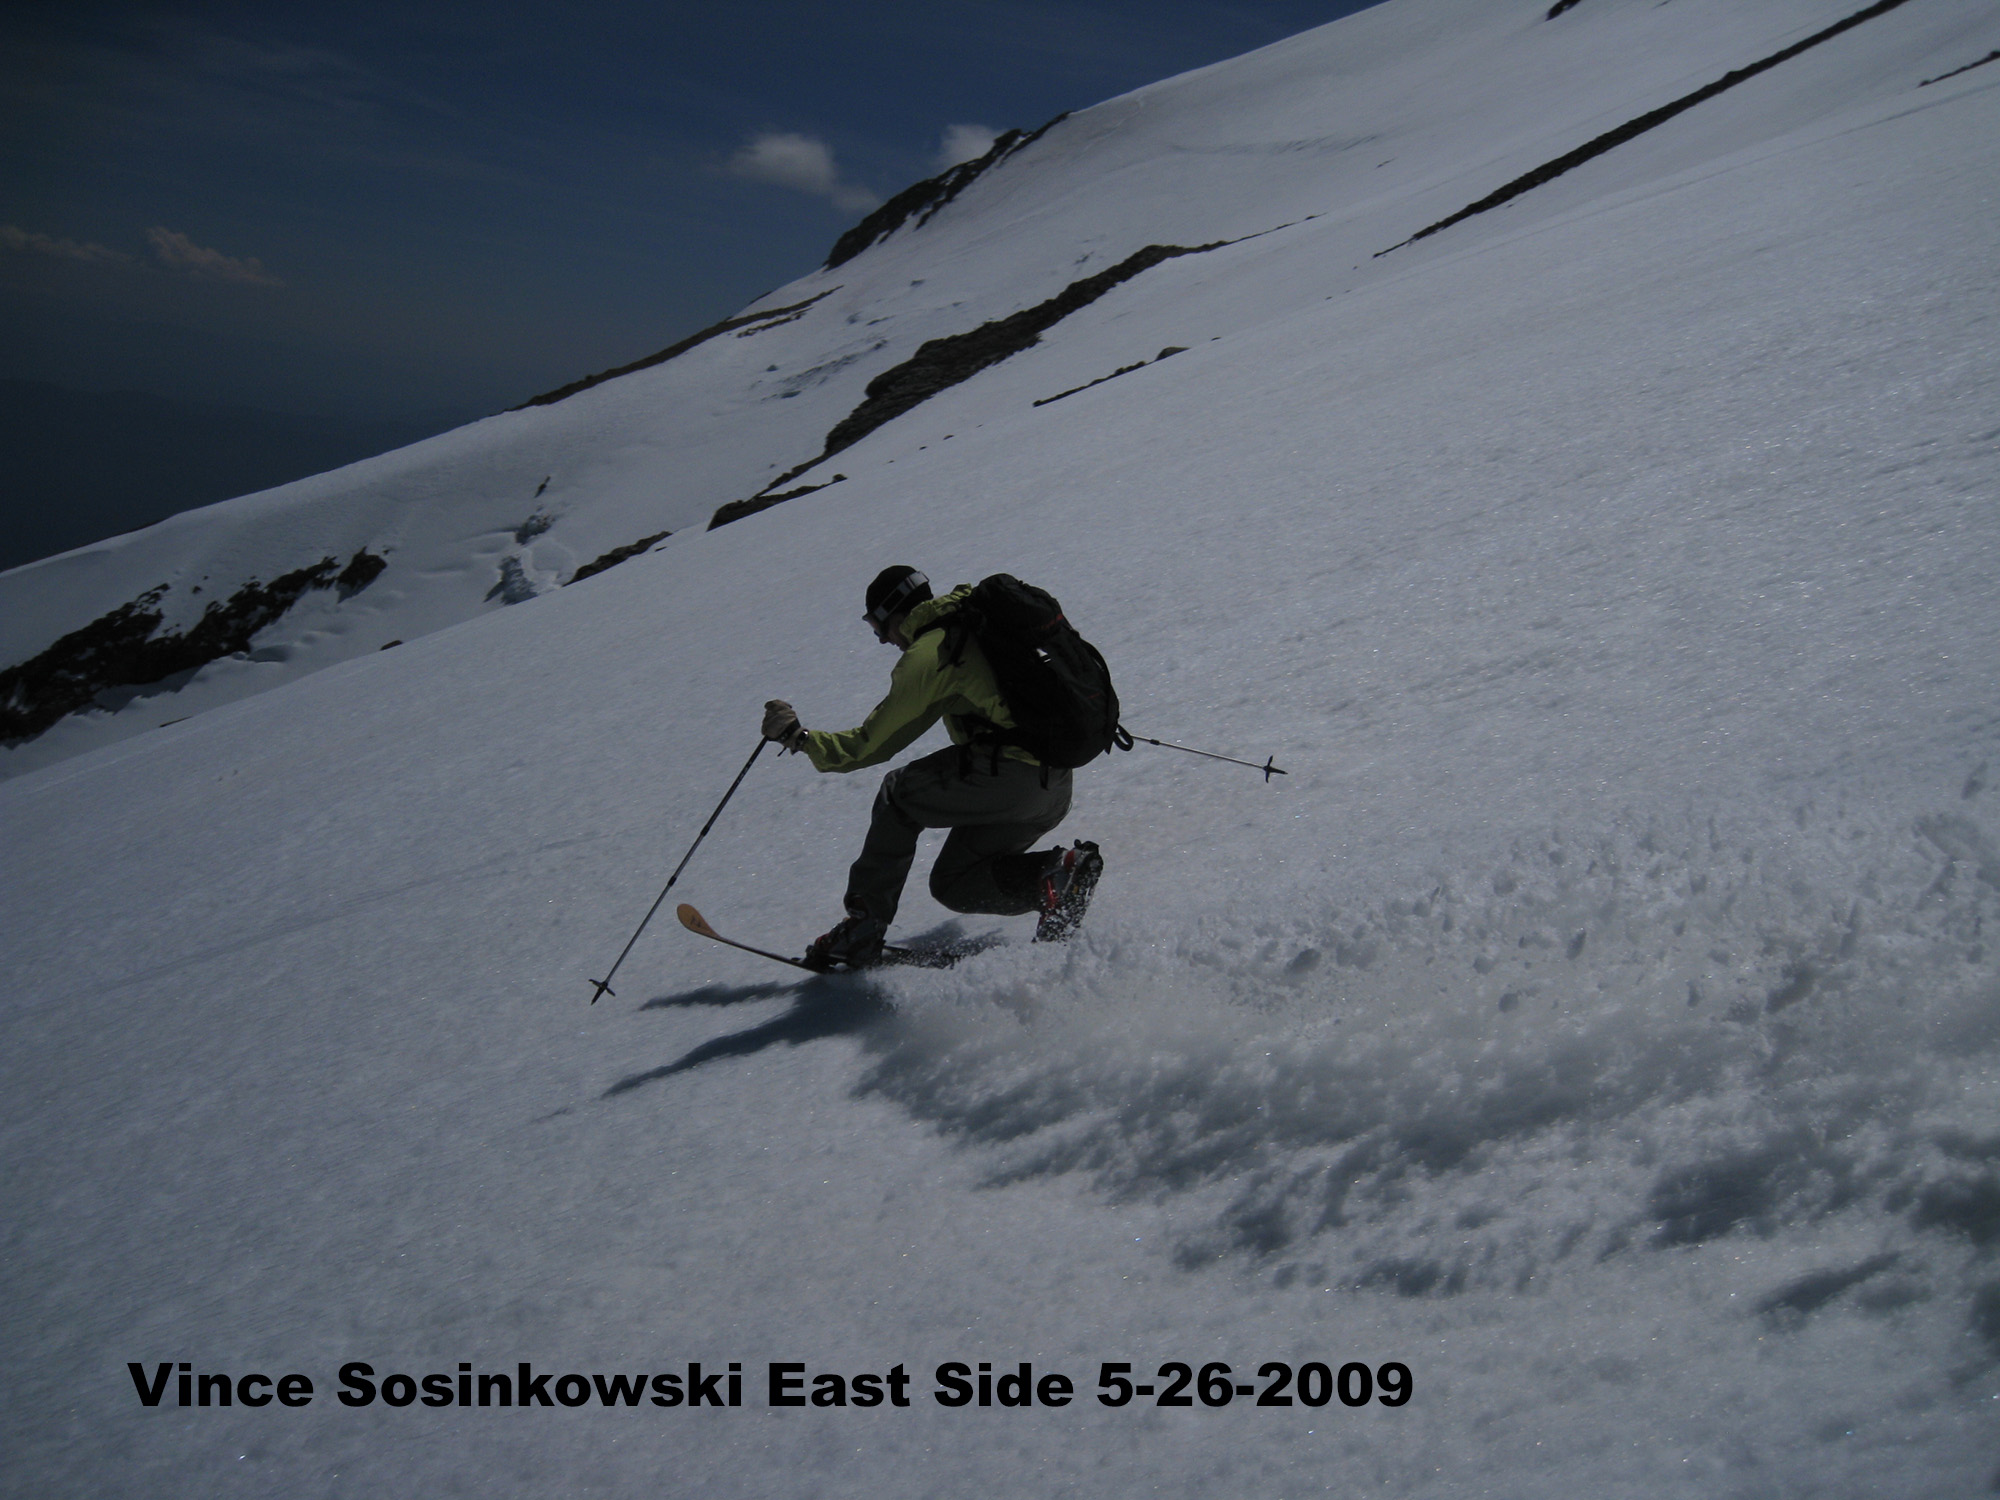
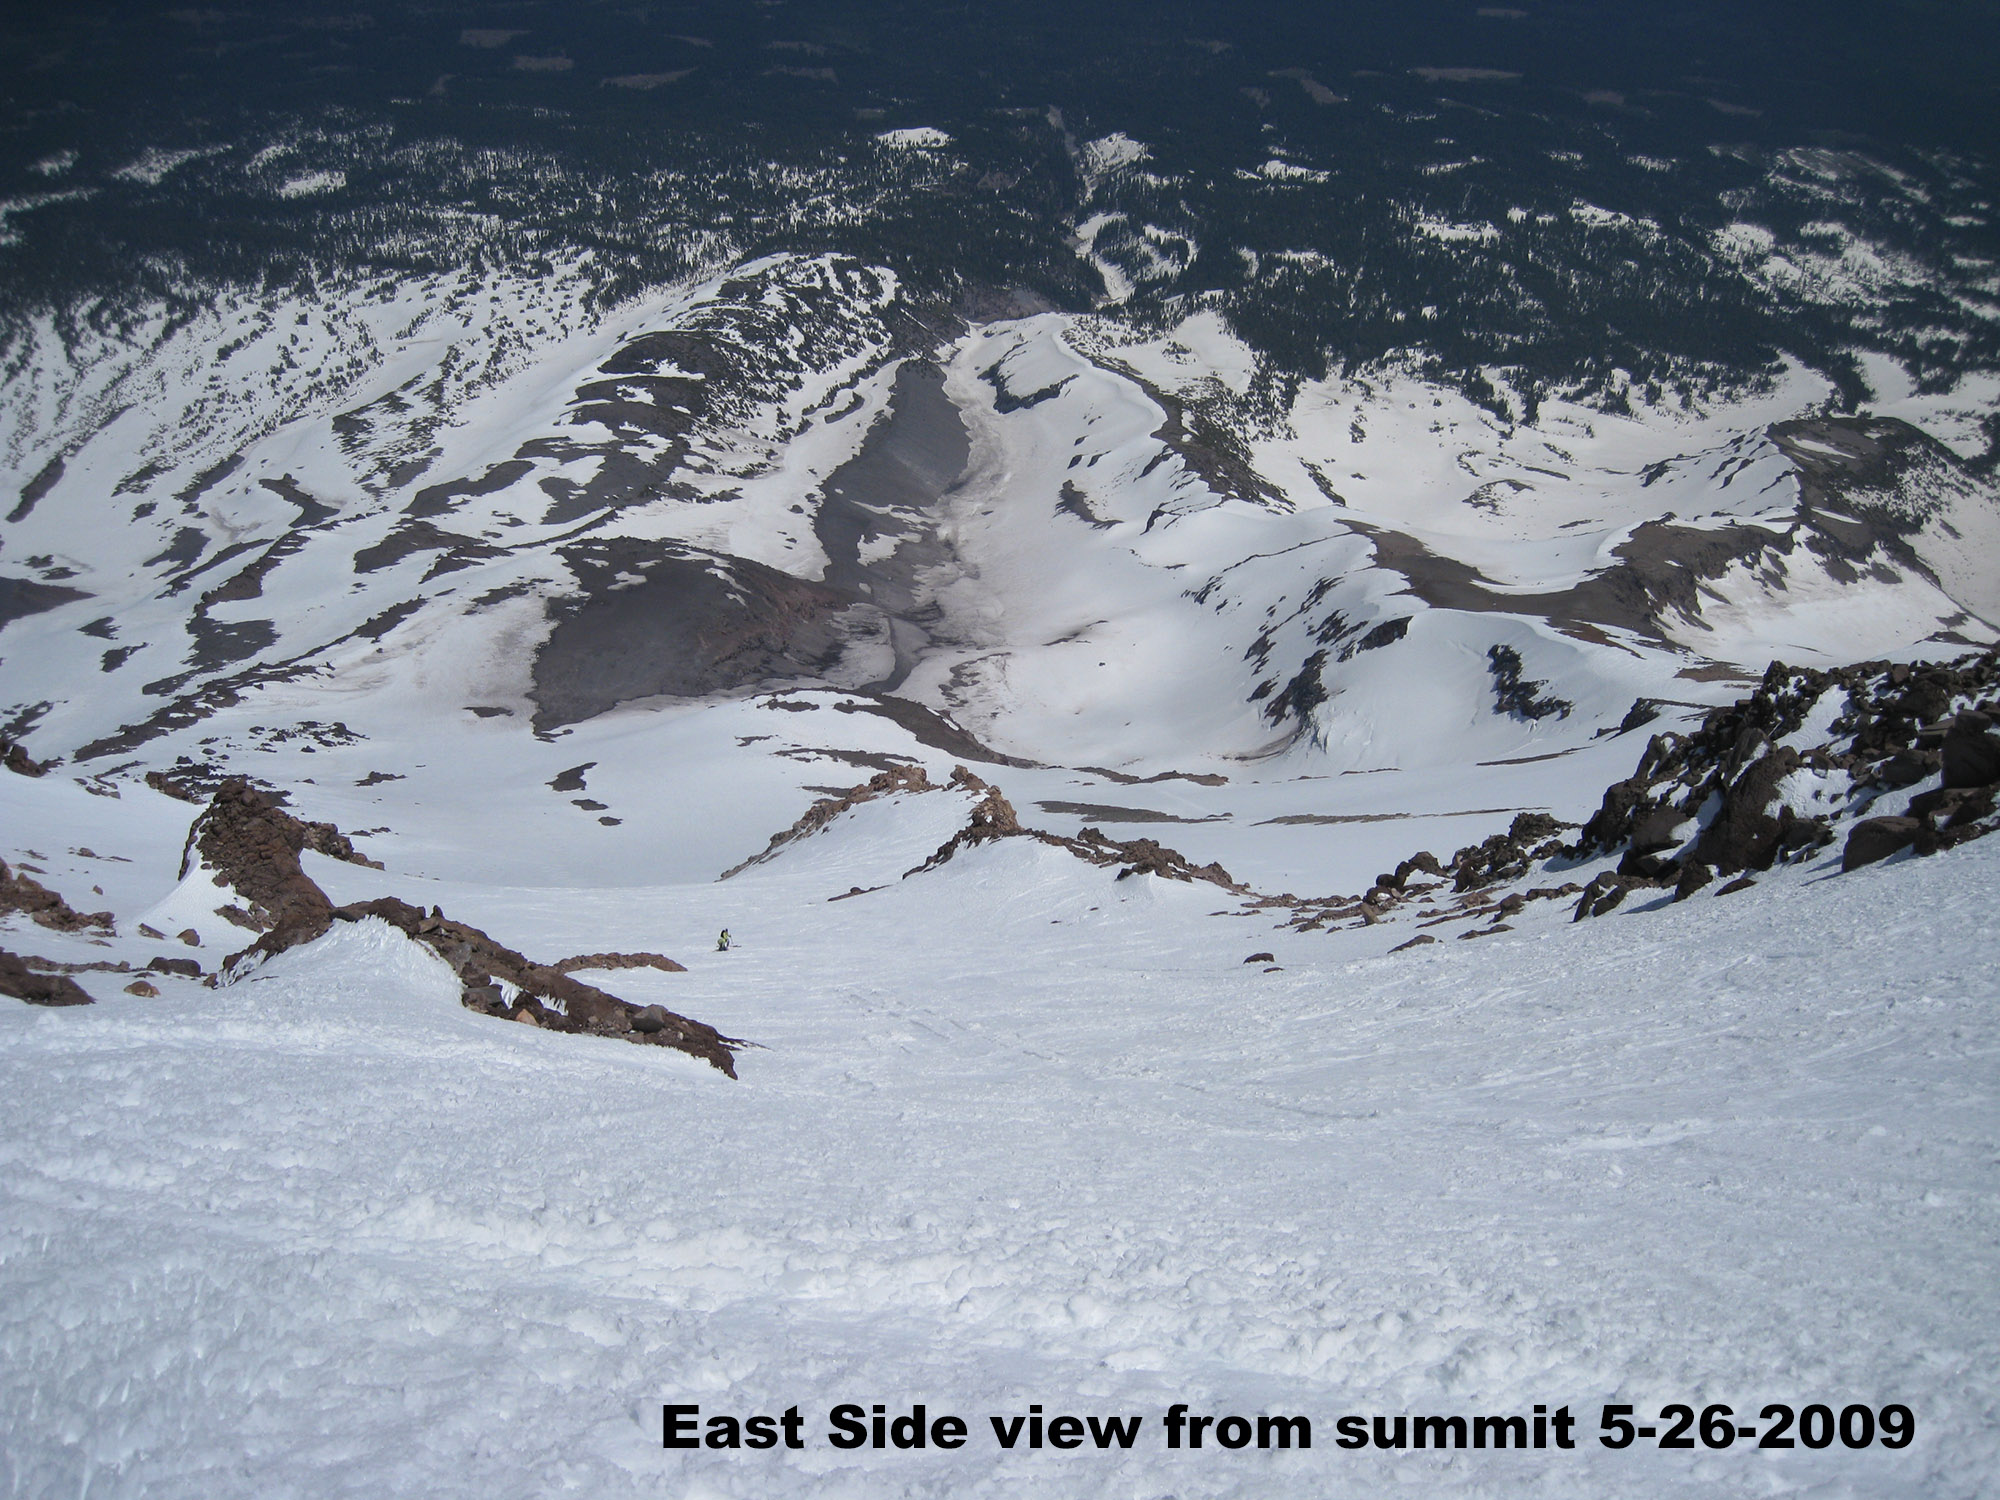
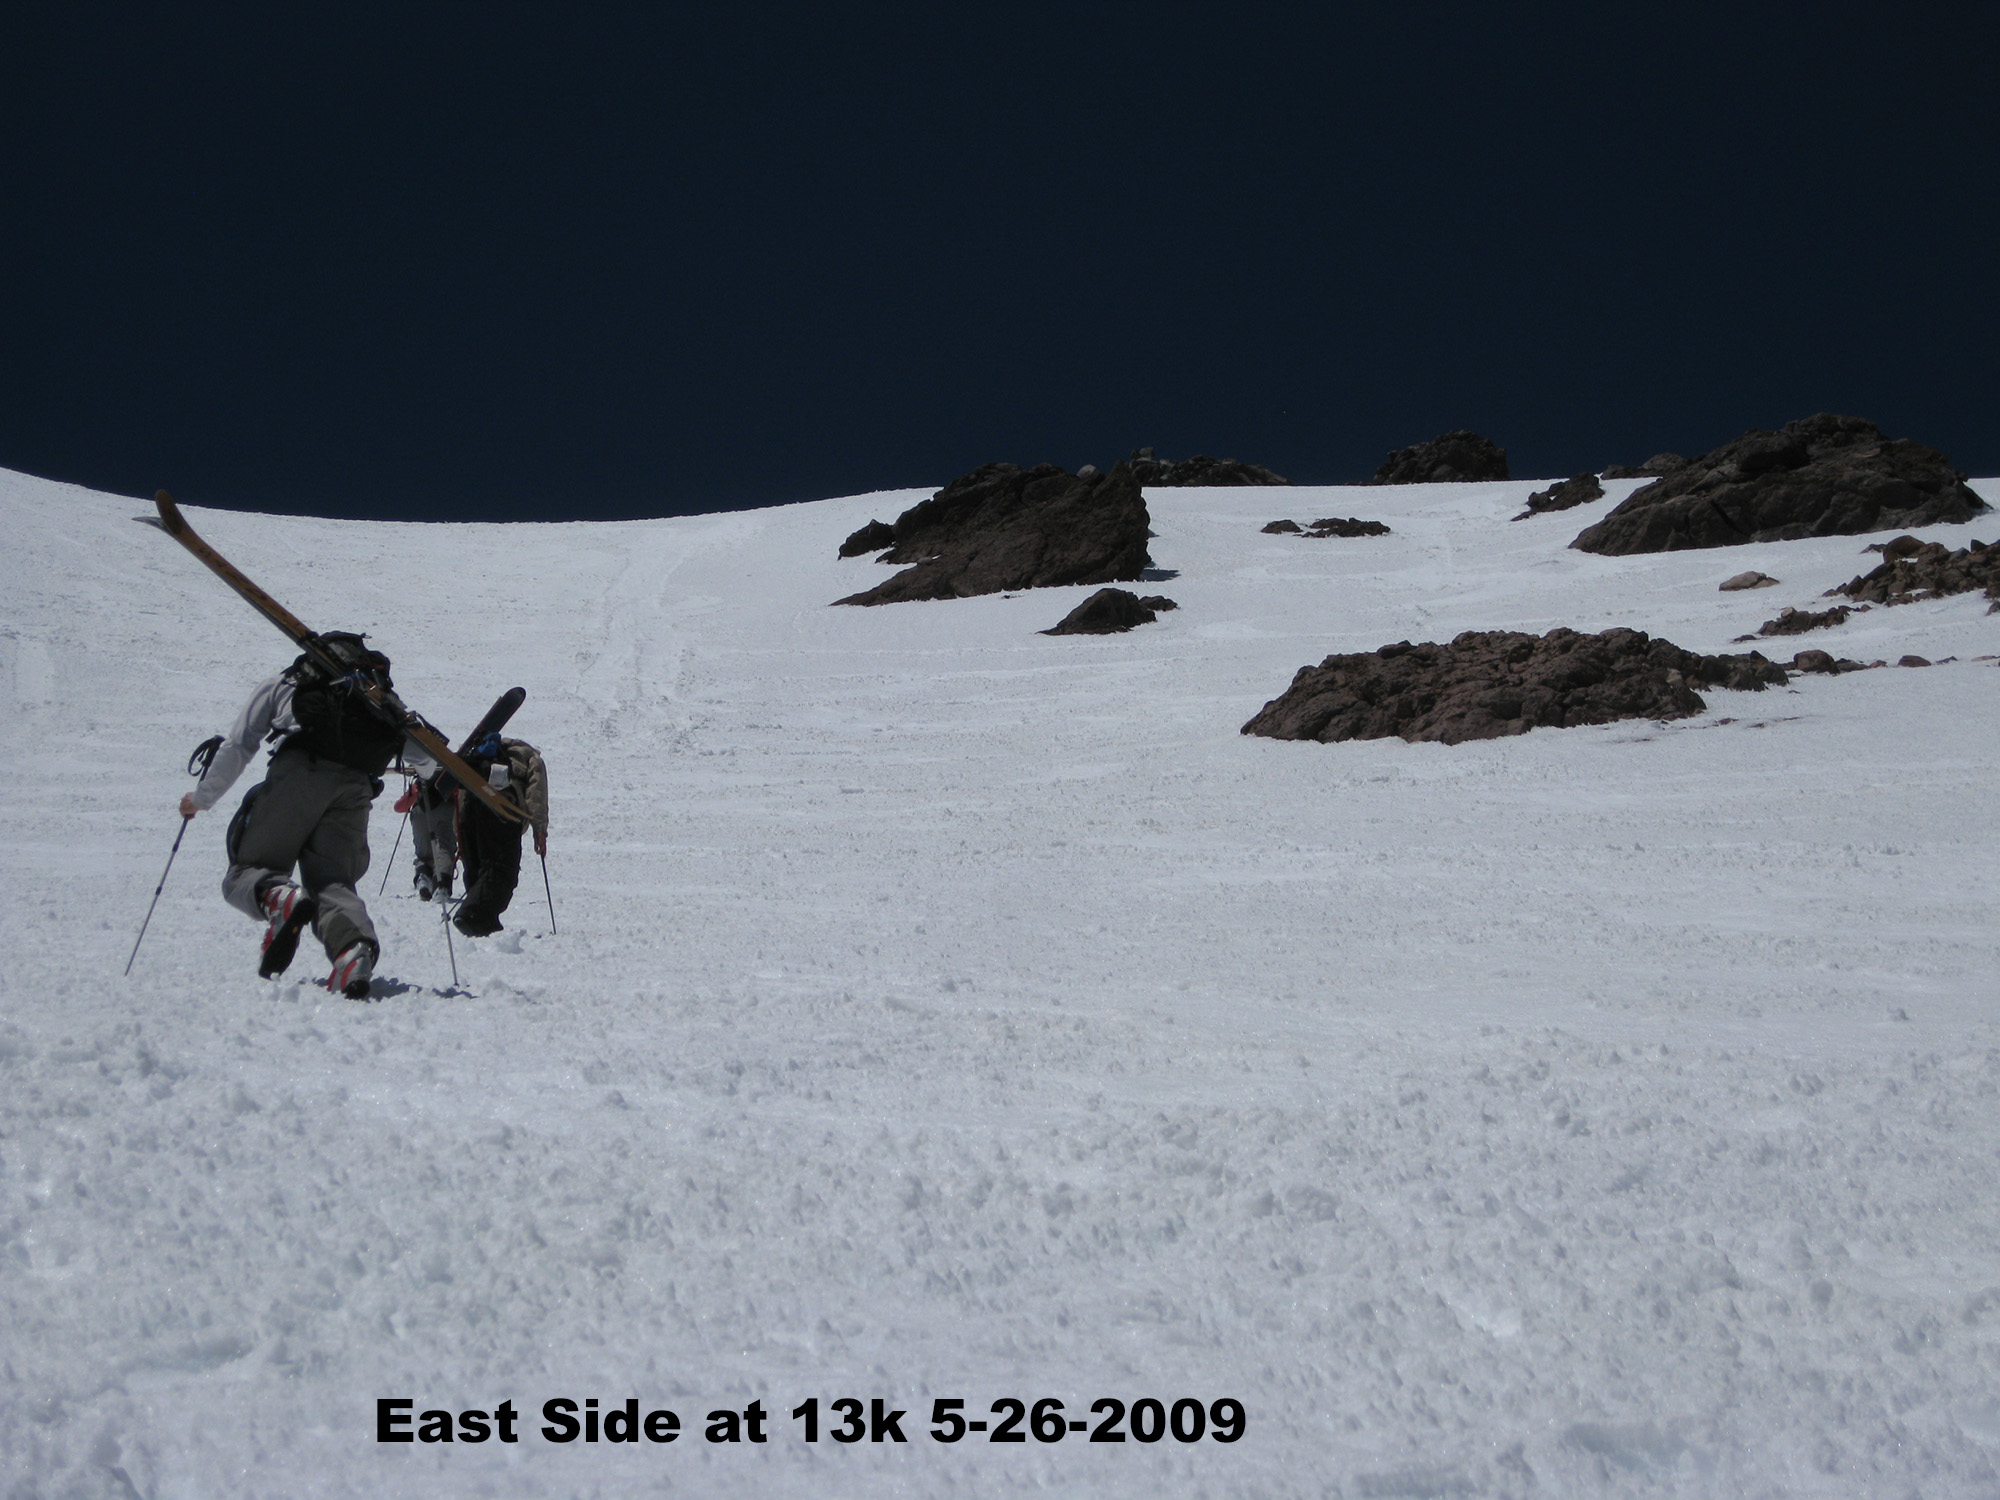
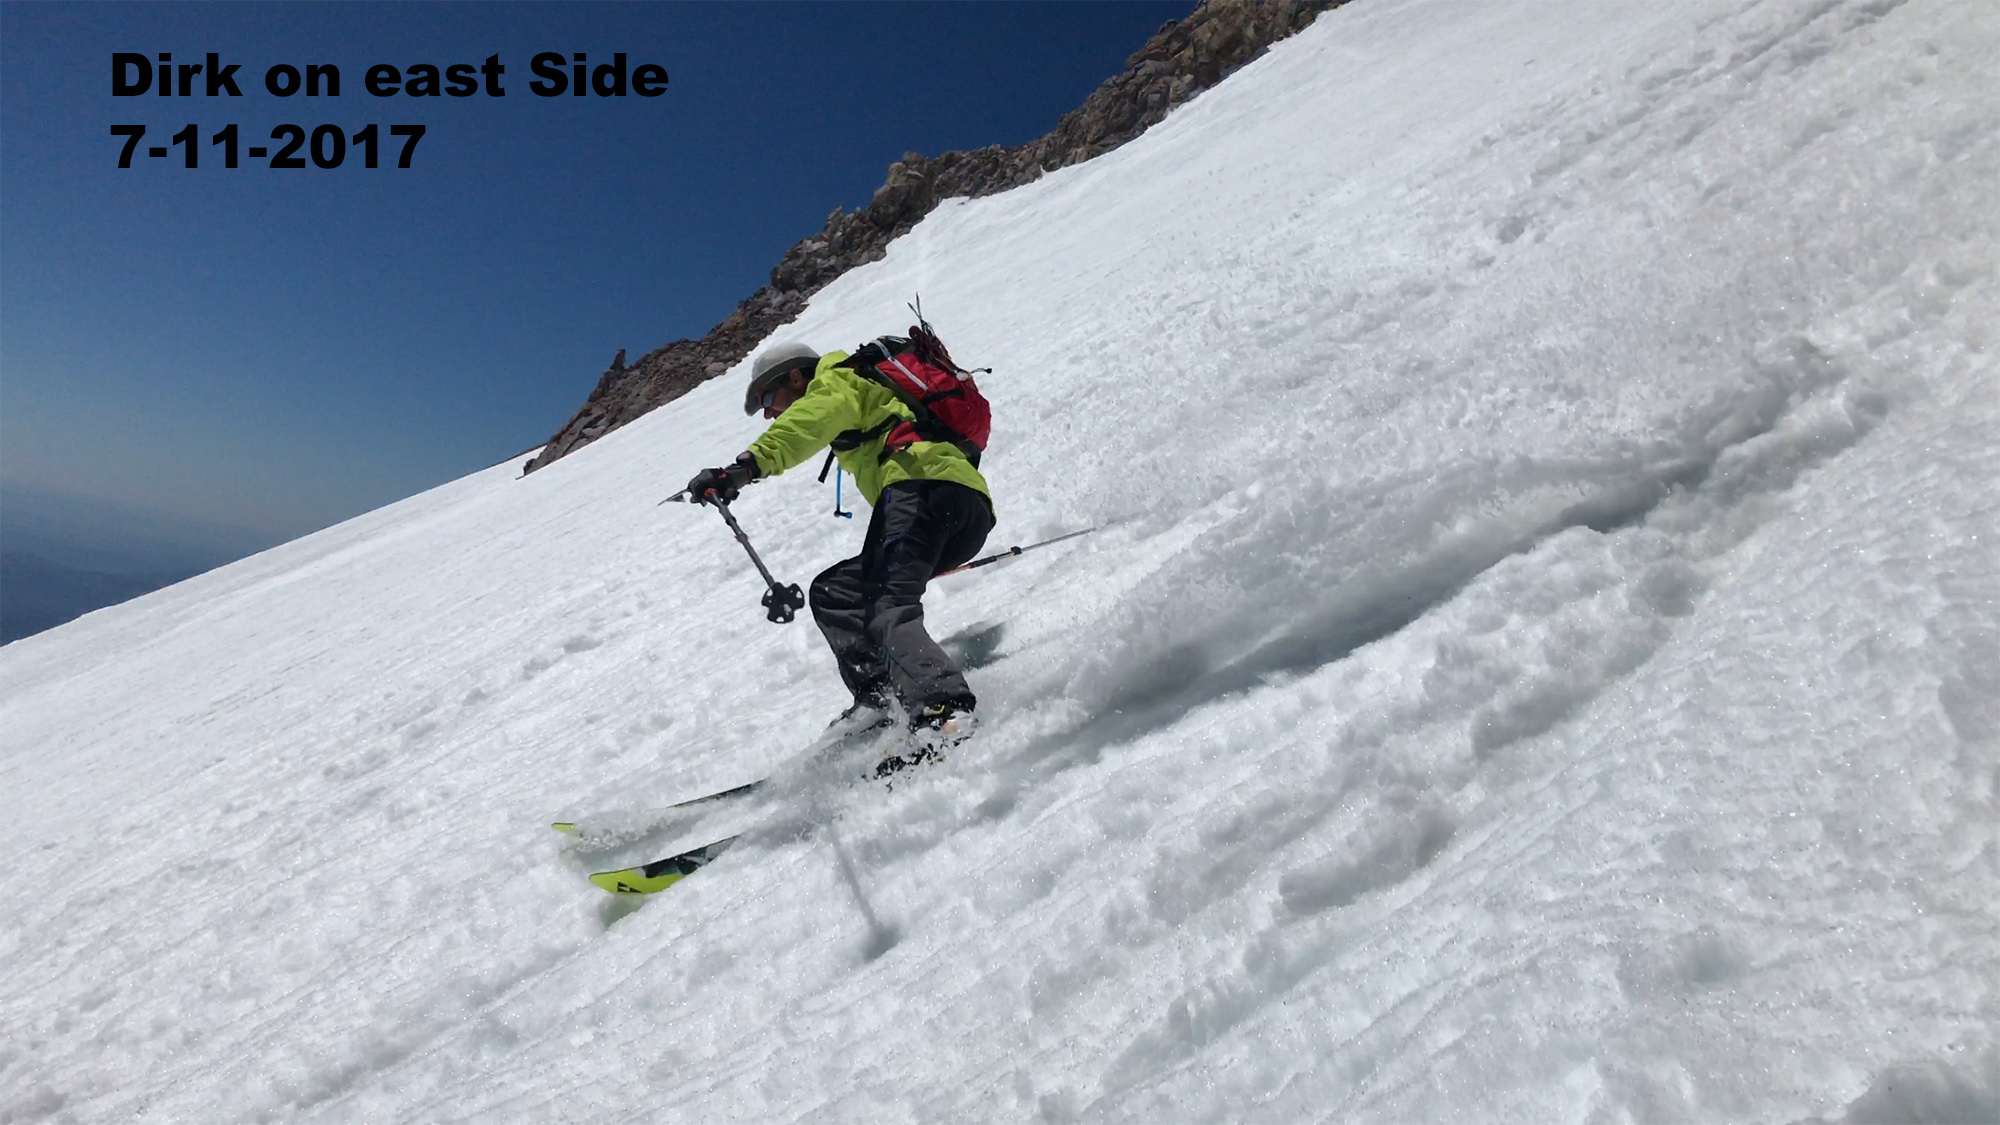
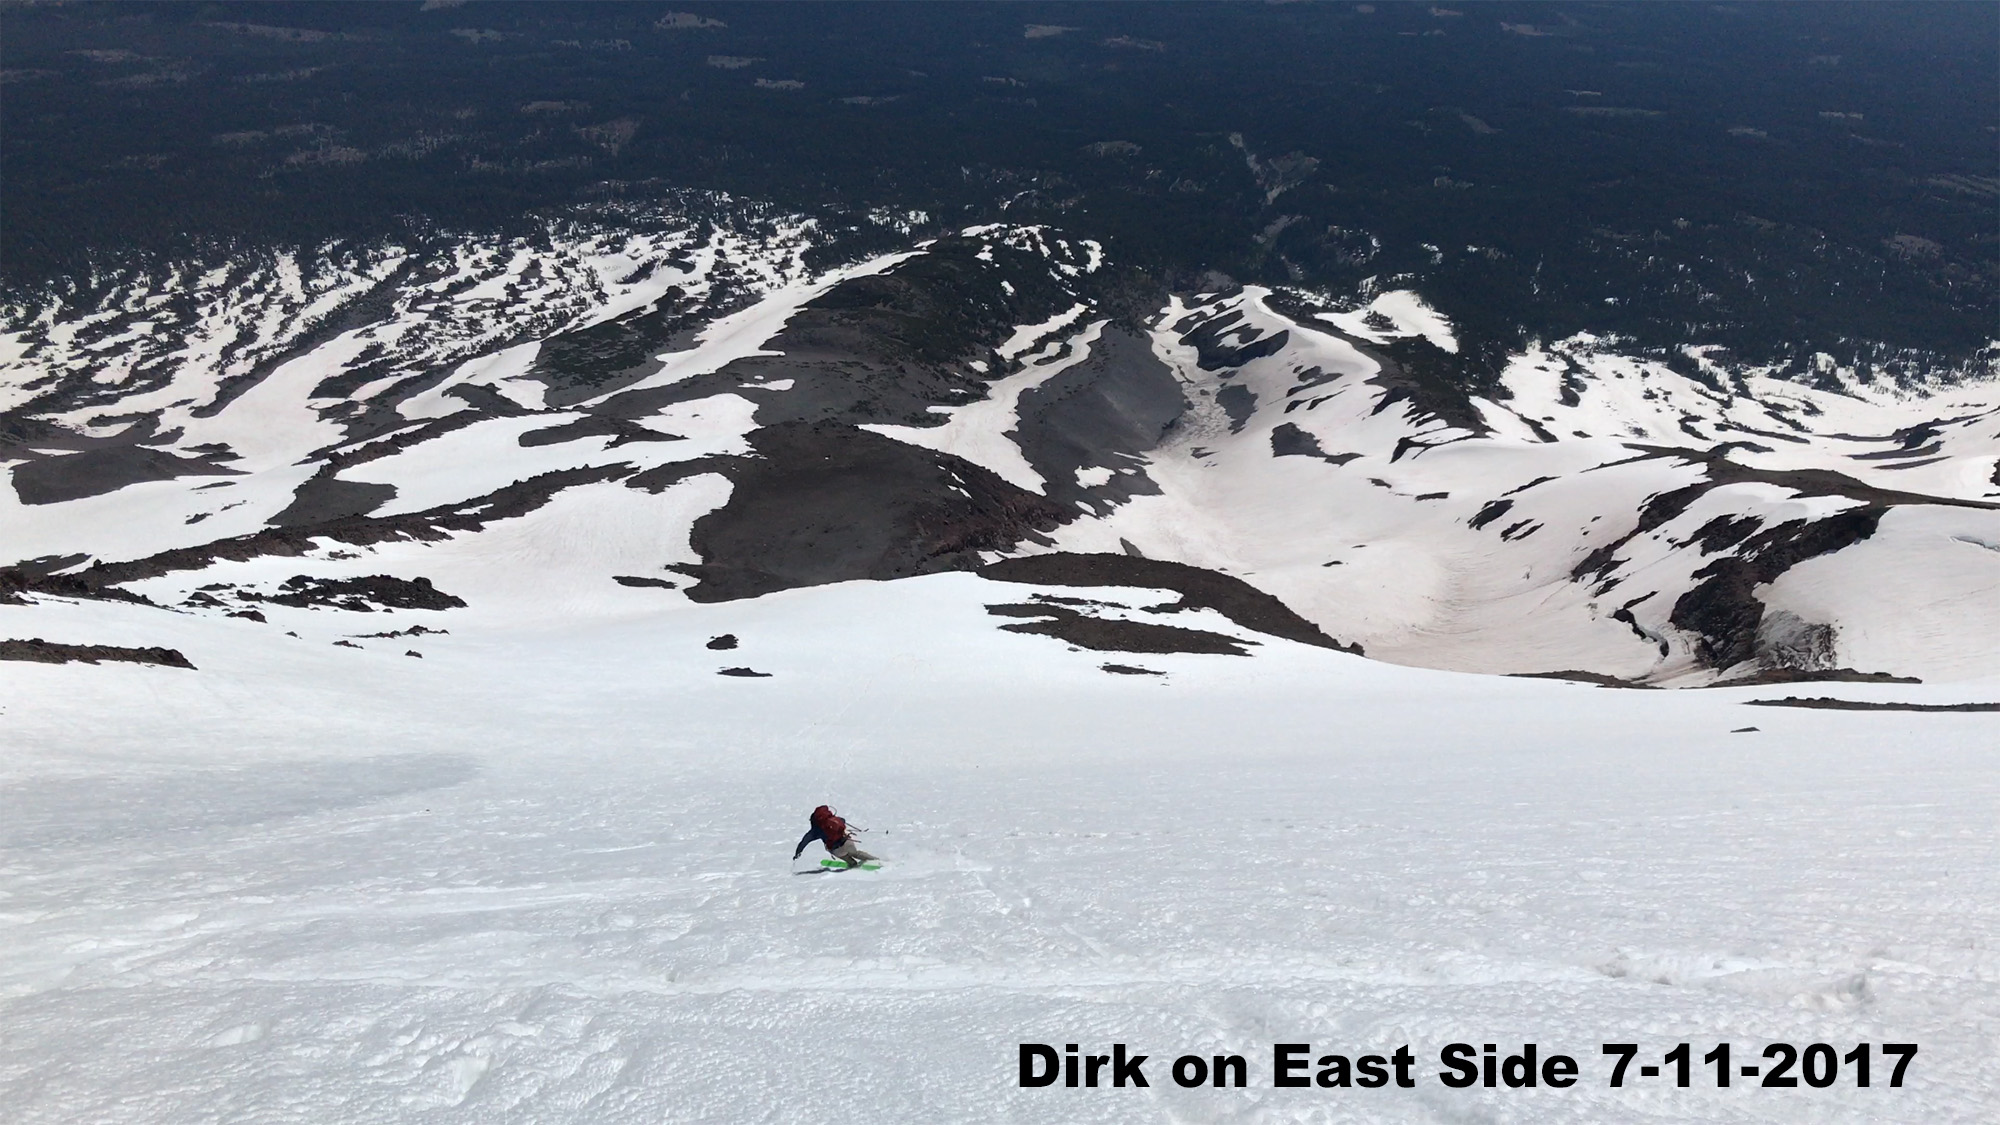
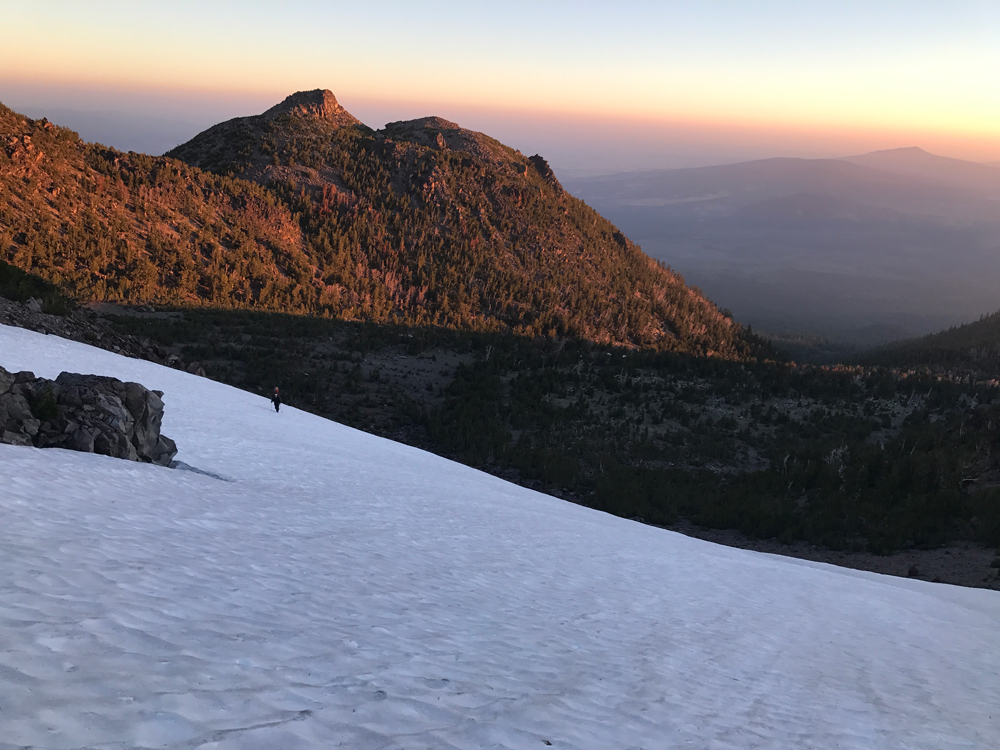
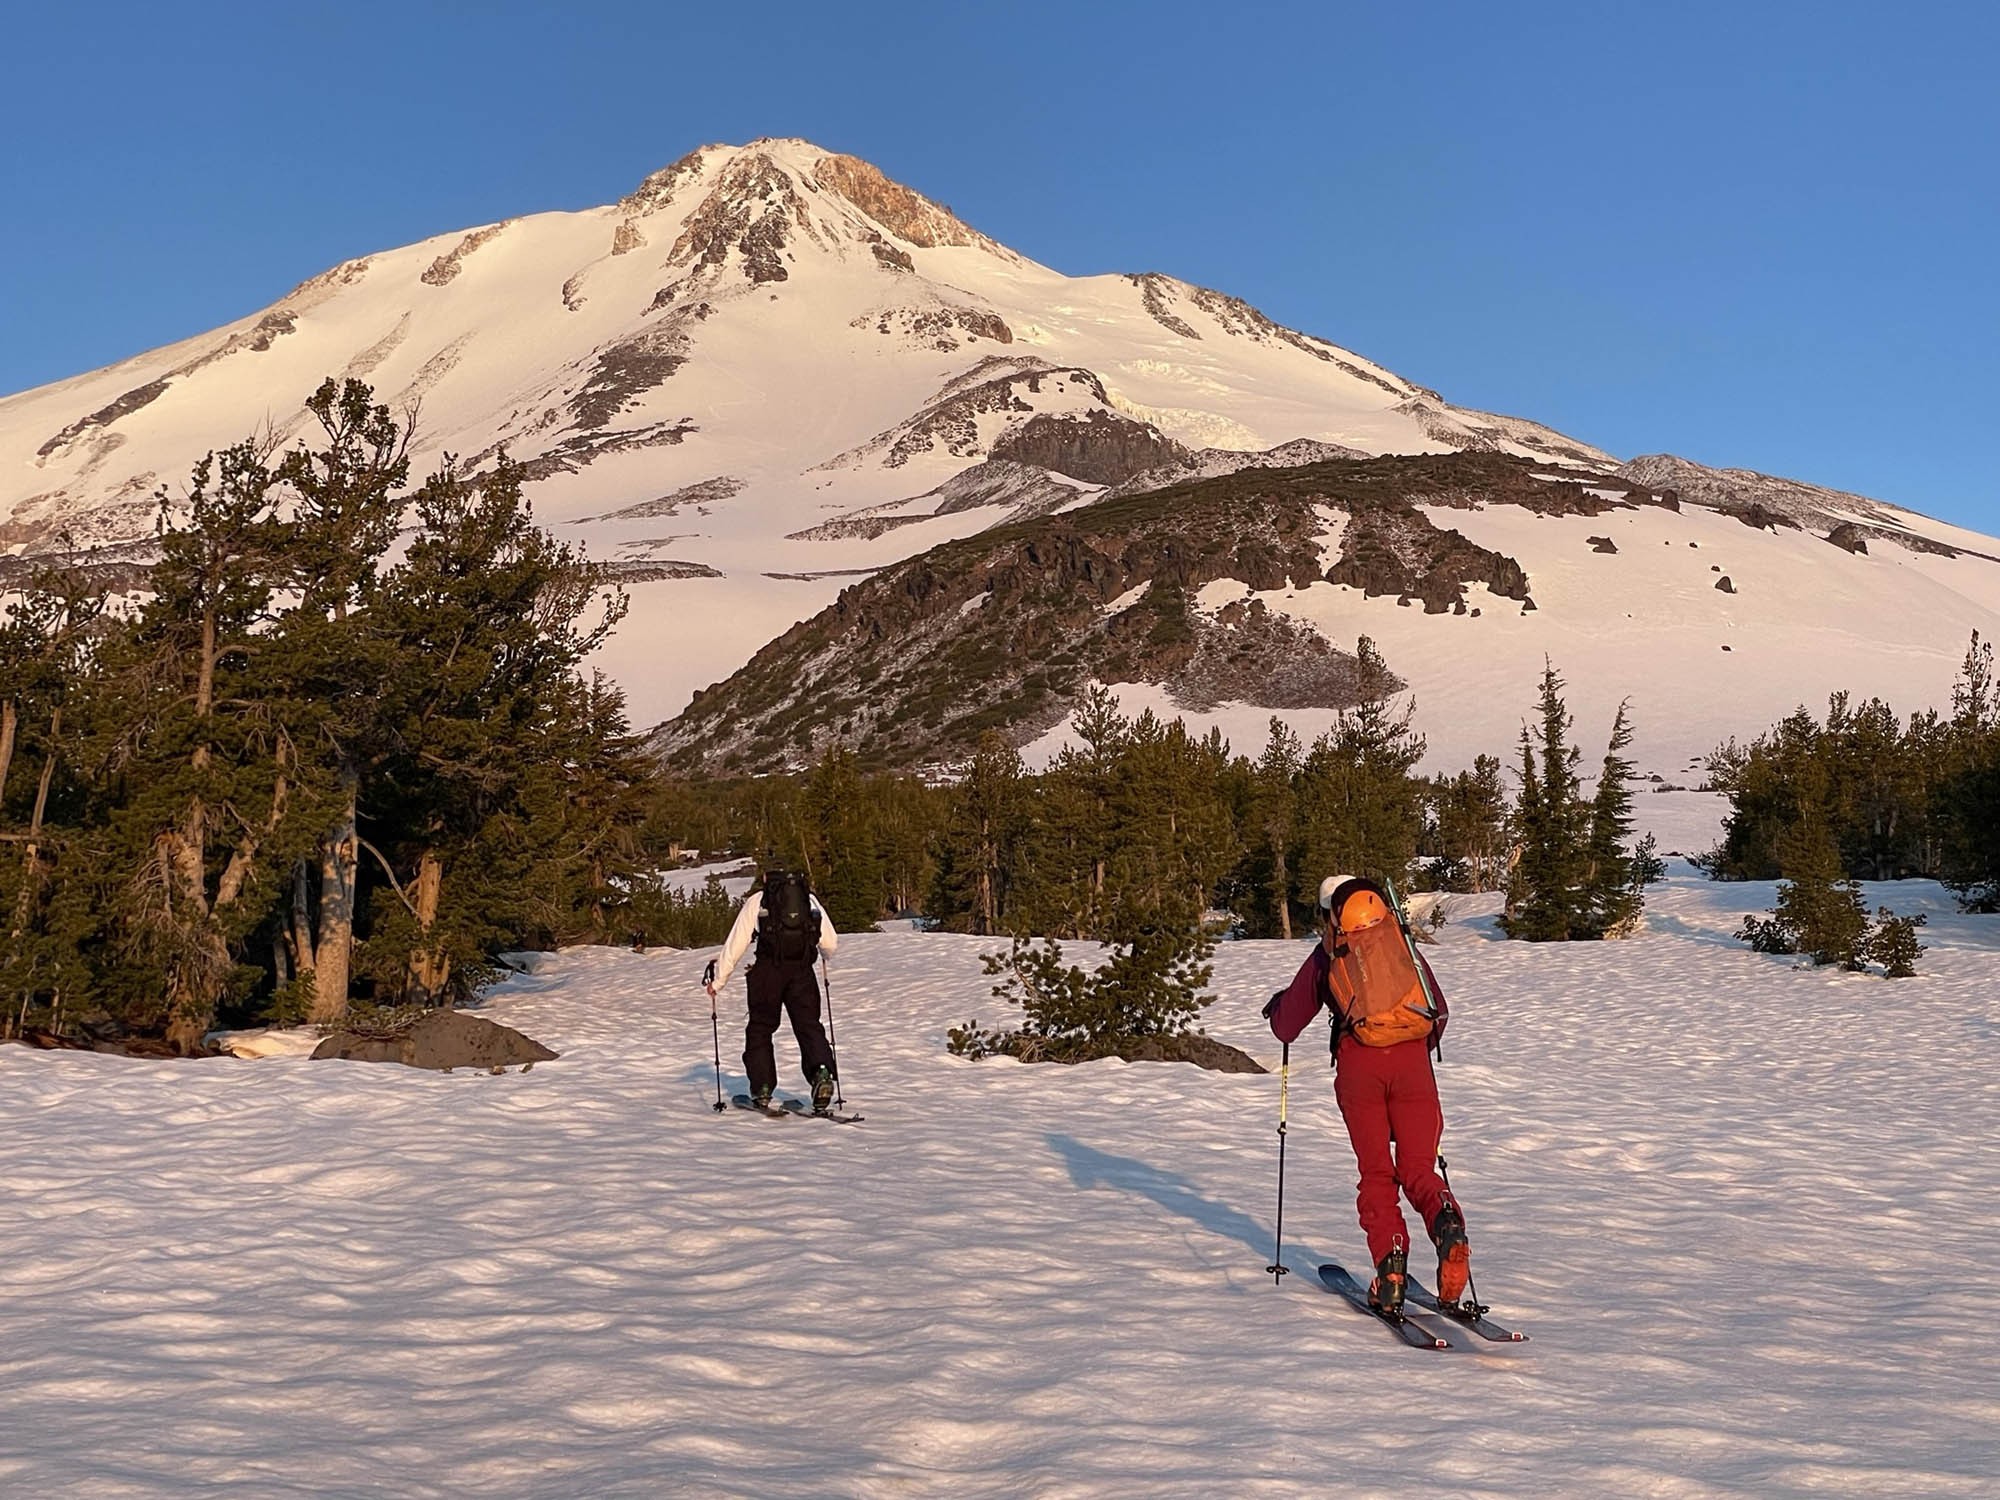
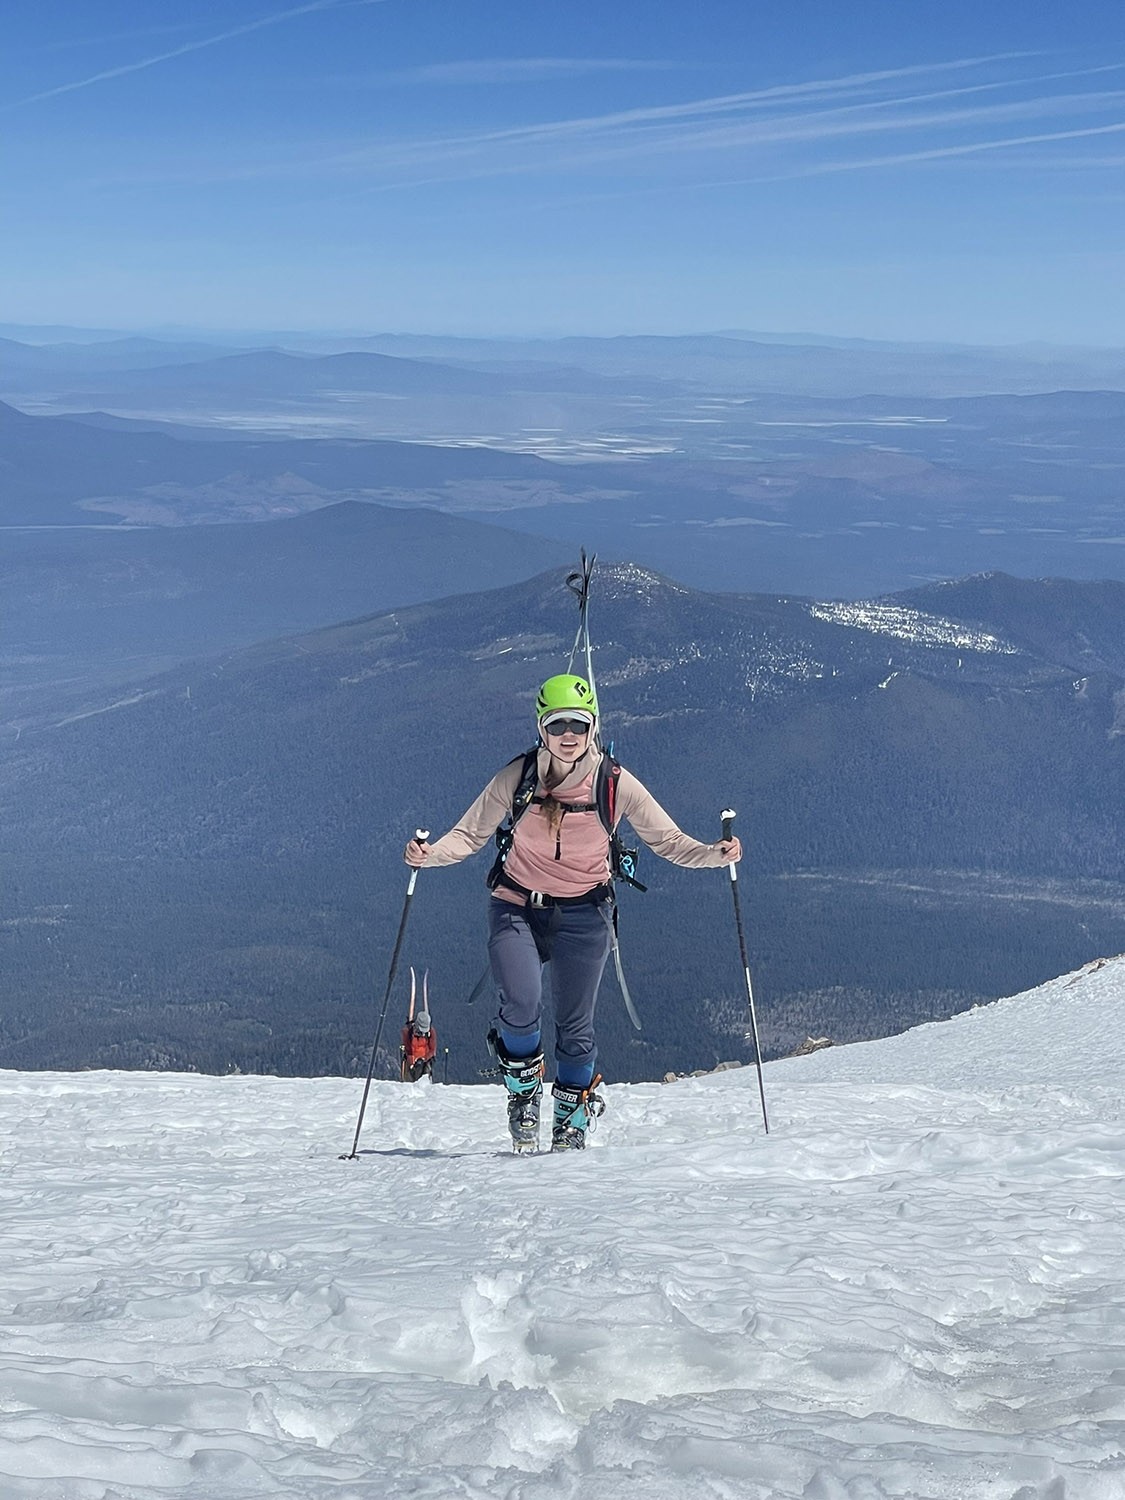
EAST SIDE – The Brewer Creek Trailhead provides the best ski descent, where you literally start making turns from the very summit at 14,179′ and glide all the way to your car if you find the right gully in the woods. I have heard this route is called the longest ski descent in North America, at around 8000’. You’ll need to wait until the Brewer Creek Trailhead is reported to be accessible by at least 5 miles out. This is usually in late April but sometimes not until late May. If you wait until the trailhead is officially reachable by car, the lower half of the mountain will likely be pretty sun cupped. So, I am willing to go as soon as they say 5 miles out. This adds an extra hour. Ideally, I will I go when the trailhead is inaccessible from snow drifts for only about 2-3 miles. the road has switchbacks in the last 5 miles, so you don’t need to walk all of those miles if you cut straight through the woods towards the mountain. Use a phone app to find your car like Gaia. I also play a game where I descend towards the car and visually line up the funny sole little tree covered broken top peak in the distance in front of me, and keep the Shasta Summit behind me. Track in-between them on your way down and you will hit your car. This is obviously a super low tech, but it has worked for me every time. The upper part of the route splits both the Hotlum and Wintun Glaciers, with plenty of room to relax and ski crevasse free. Go check out those glaciers at the edges. There are some spicy chutes to play near the summit if you want. A high clearance vehicle with 4×4 like Subaru outback would make it to the trailhead, but nothing lower. Mosquitos are often an issue so prepare for that. And don’t run out of gas. This trailhead is remote and there is no cell service. My phone works on Mt. Shasta when I break out of the tree line. I also bring a backup communicator device called Zoleo, which we sell at the shop. This is inexpensive and has the realistic features you need. You can pair it with your phone to text with anyone if there is no cell coverage.
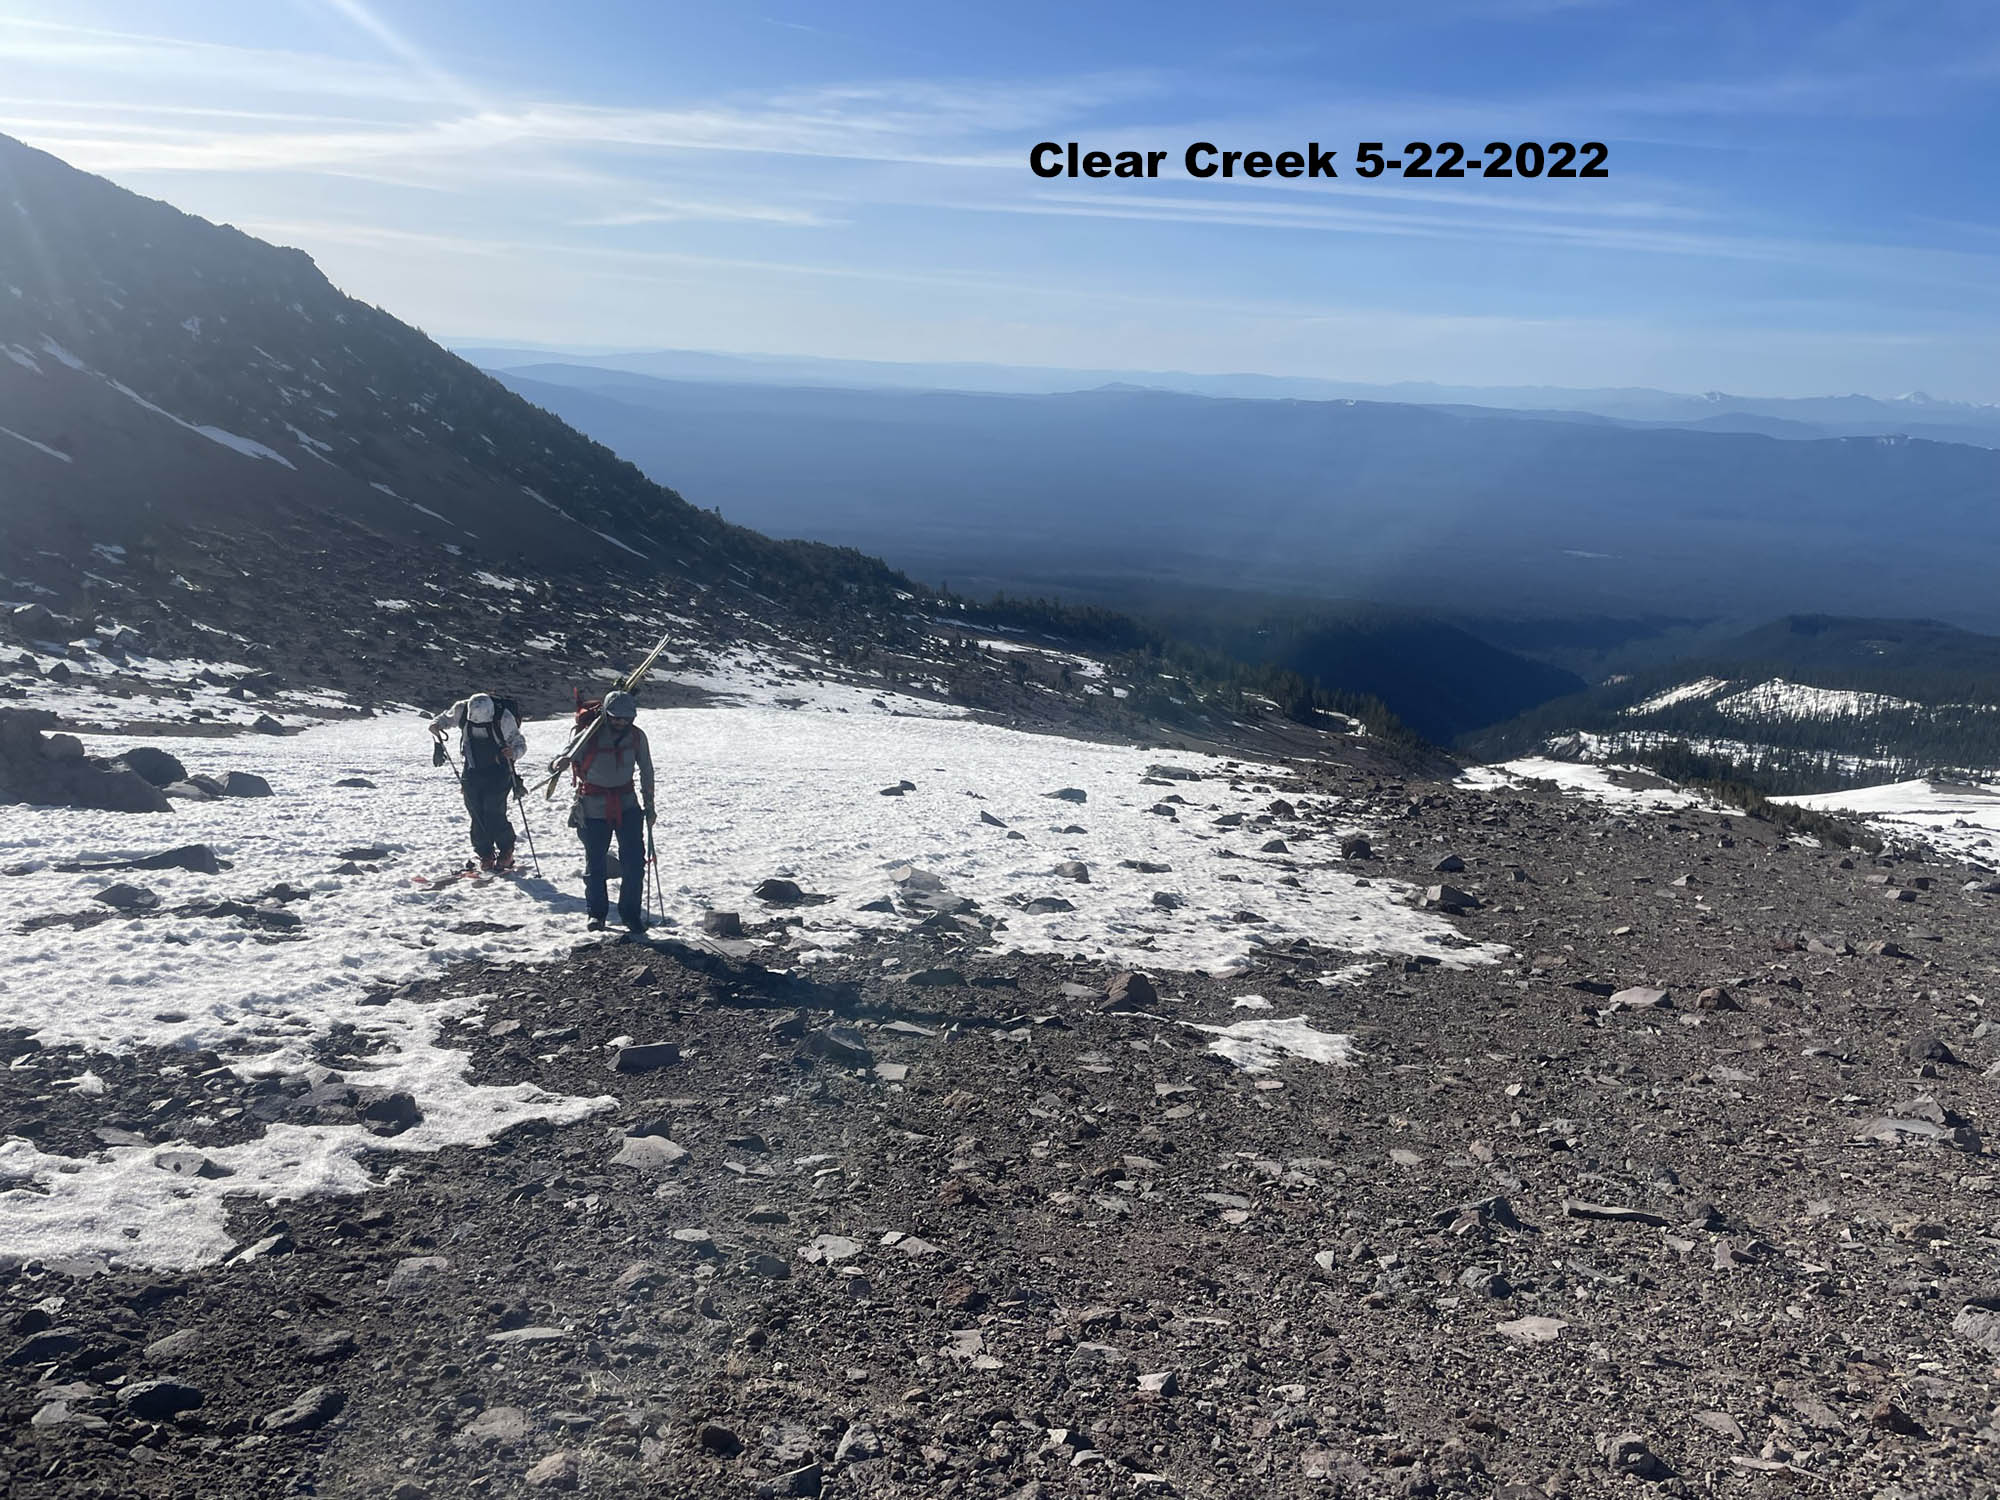
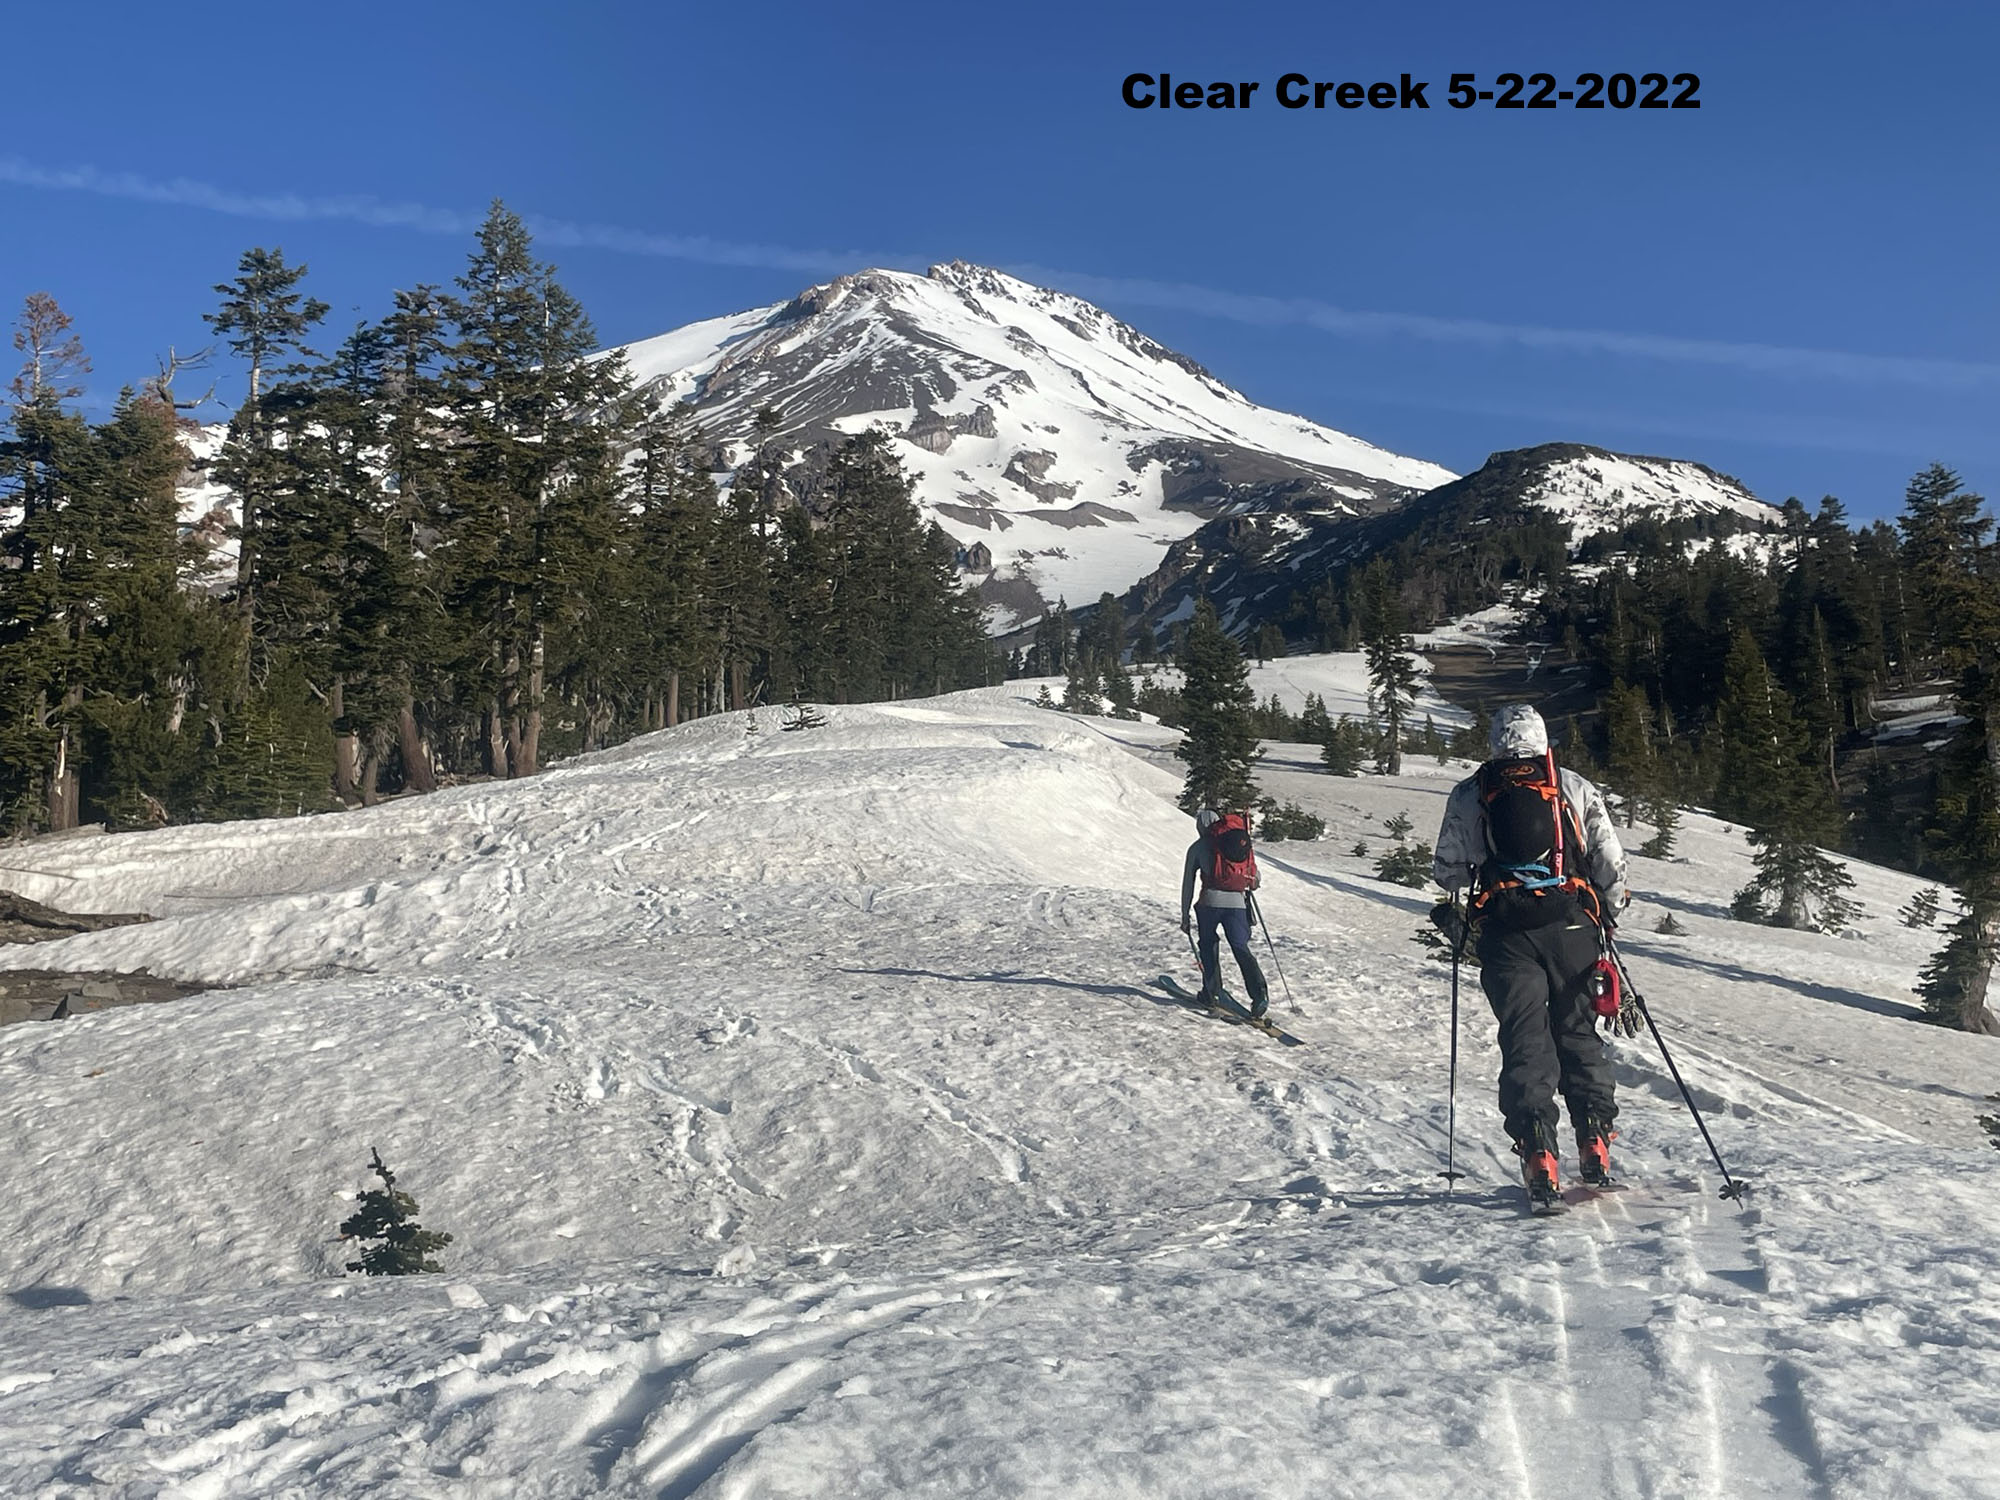
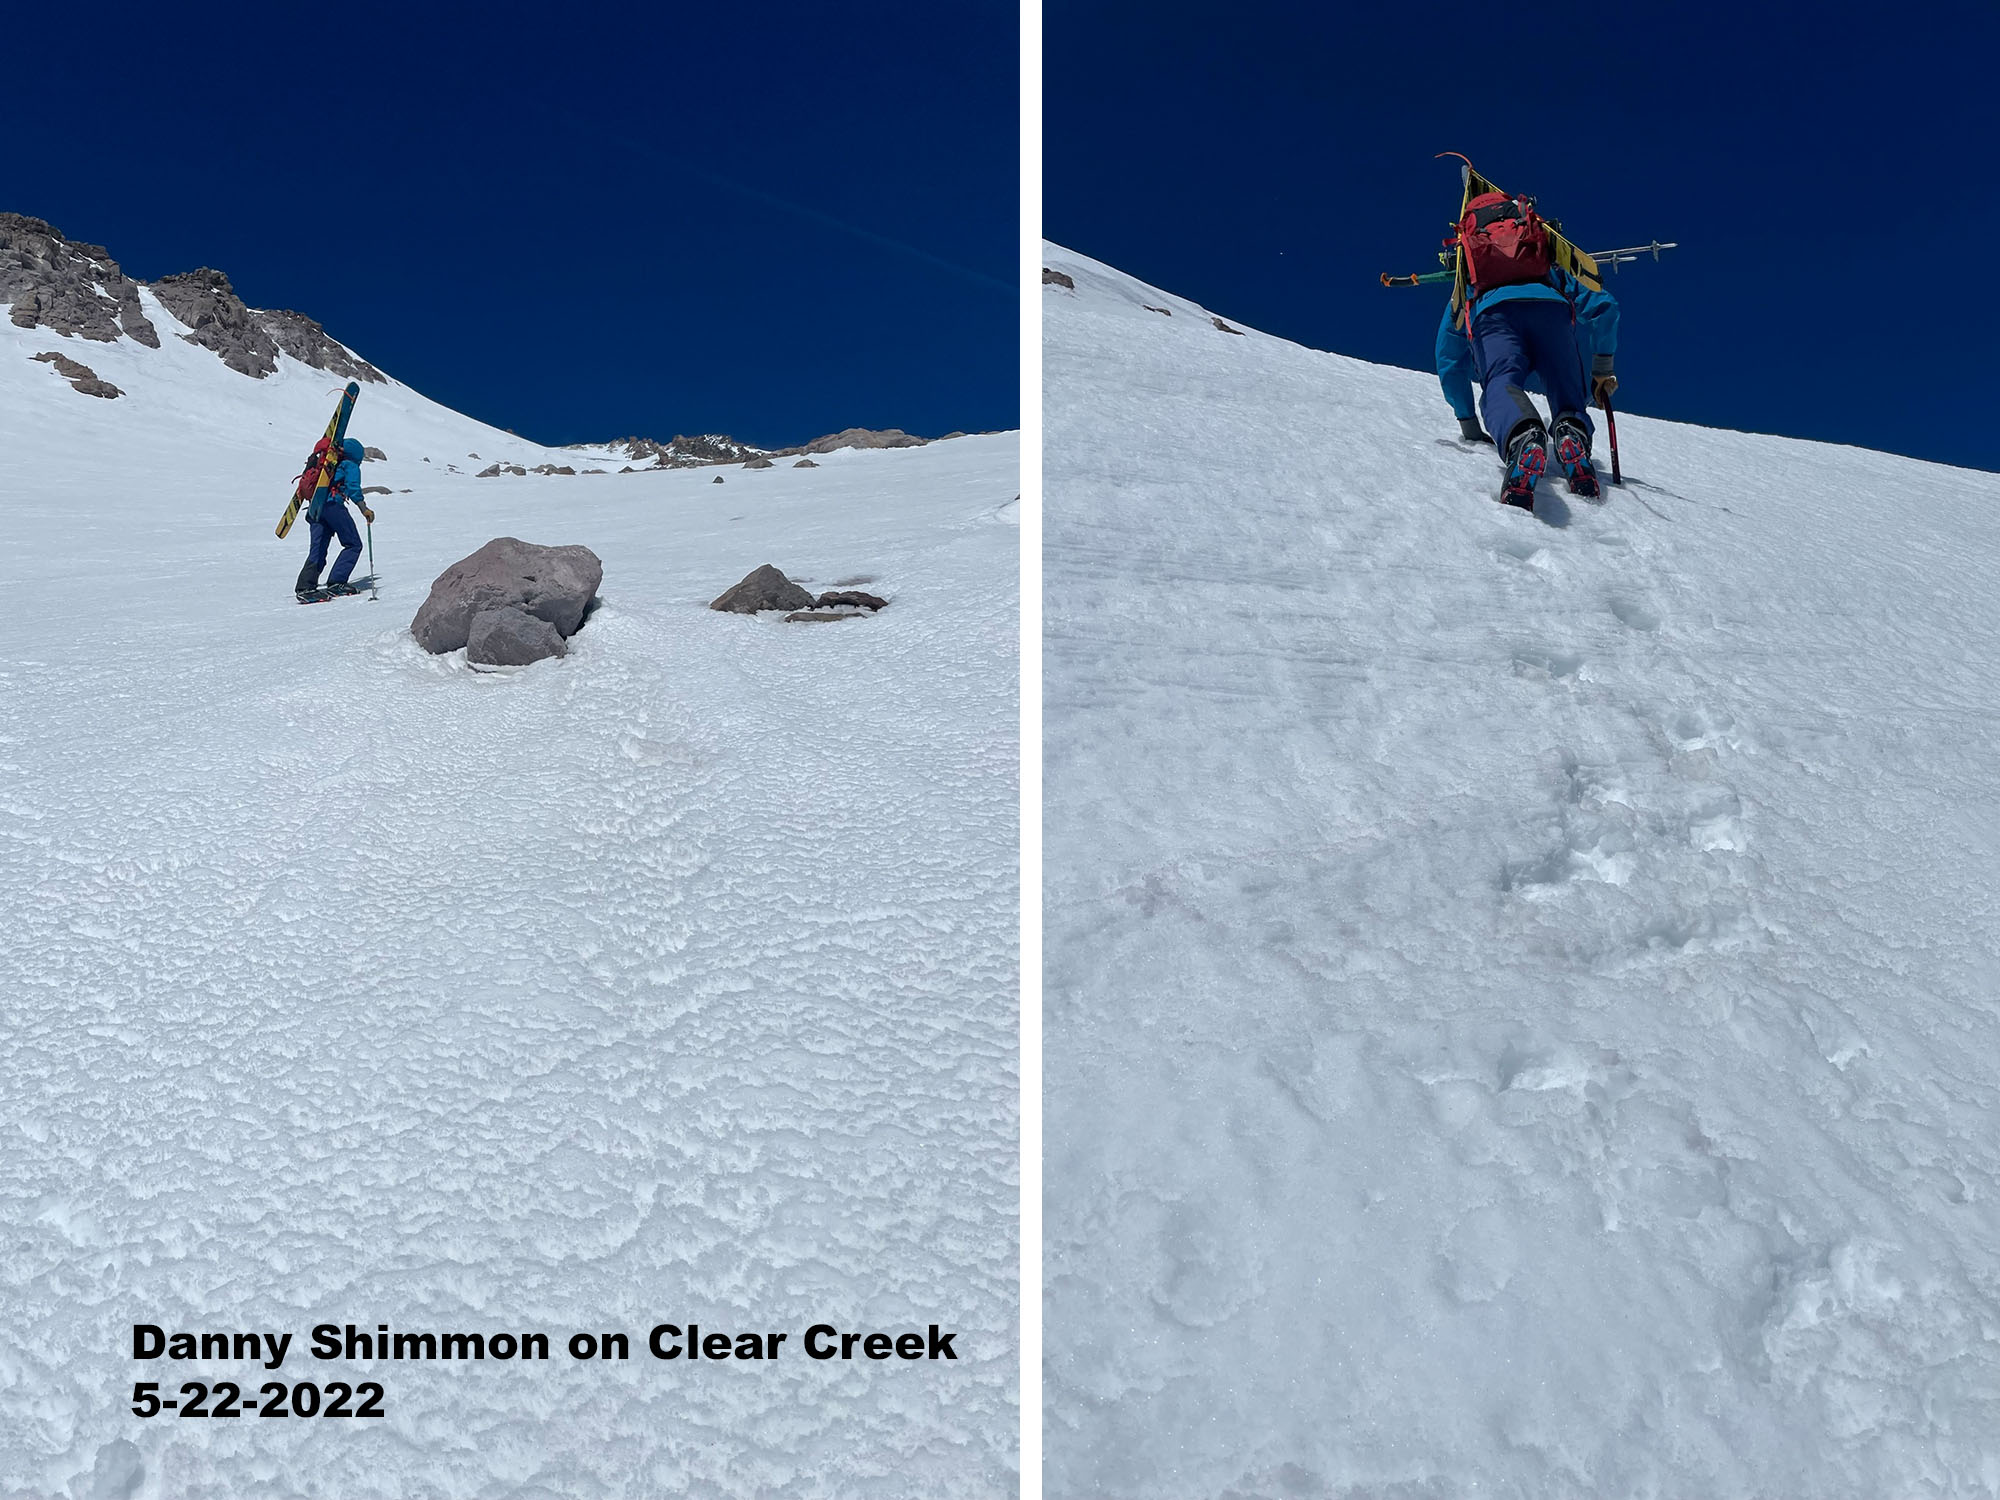
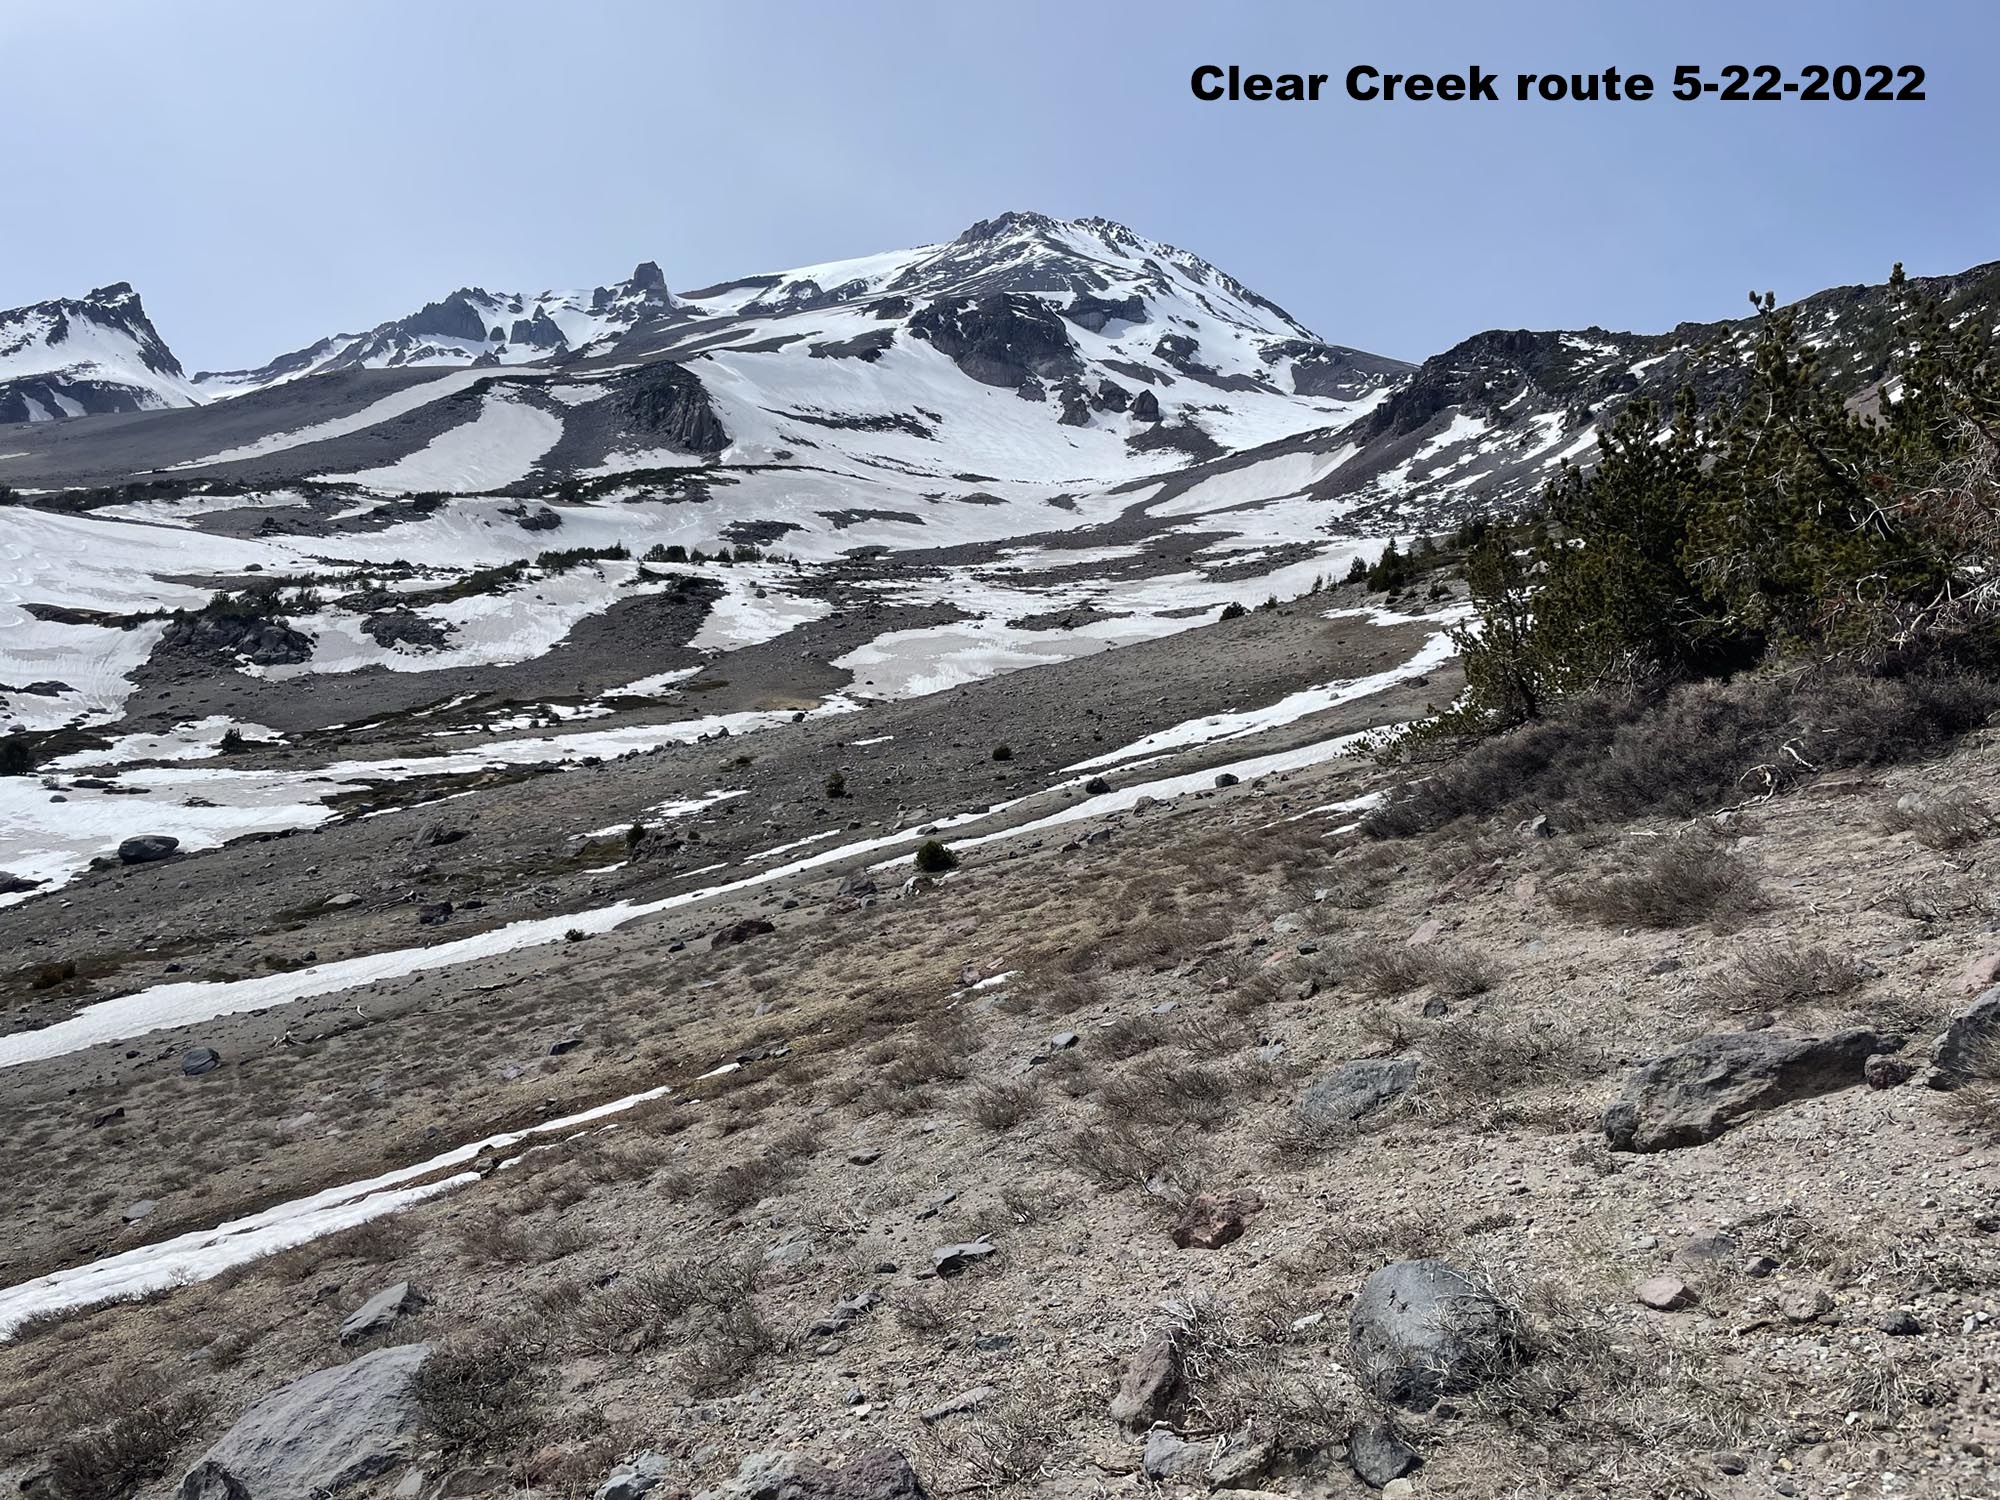
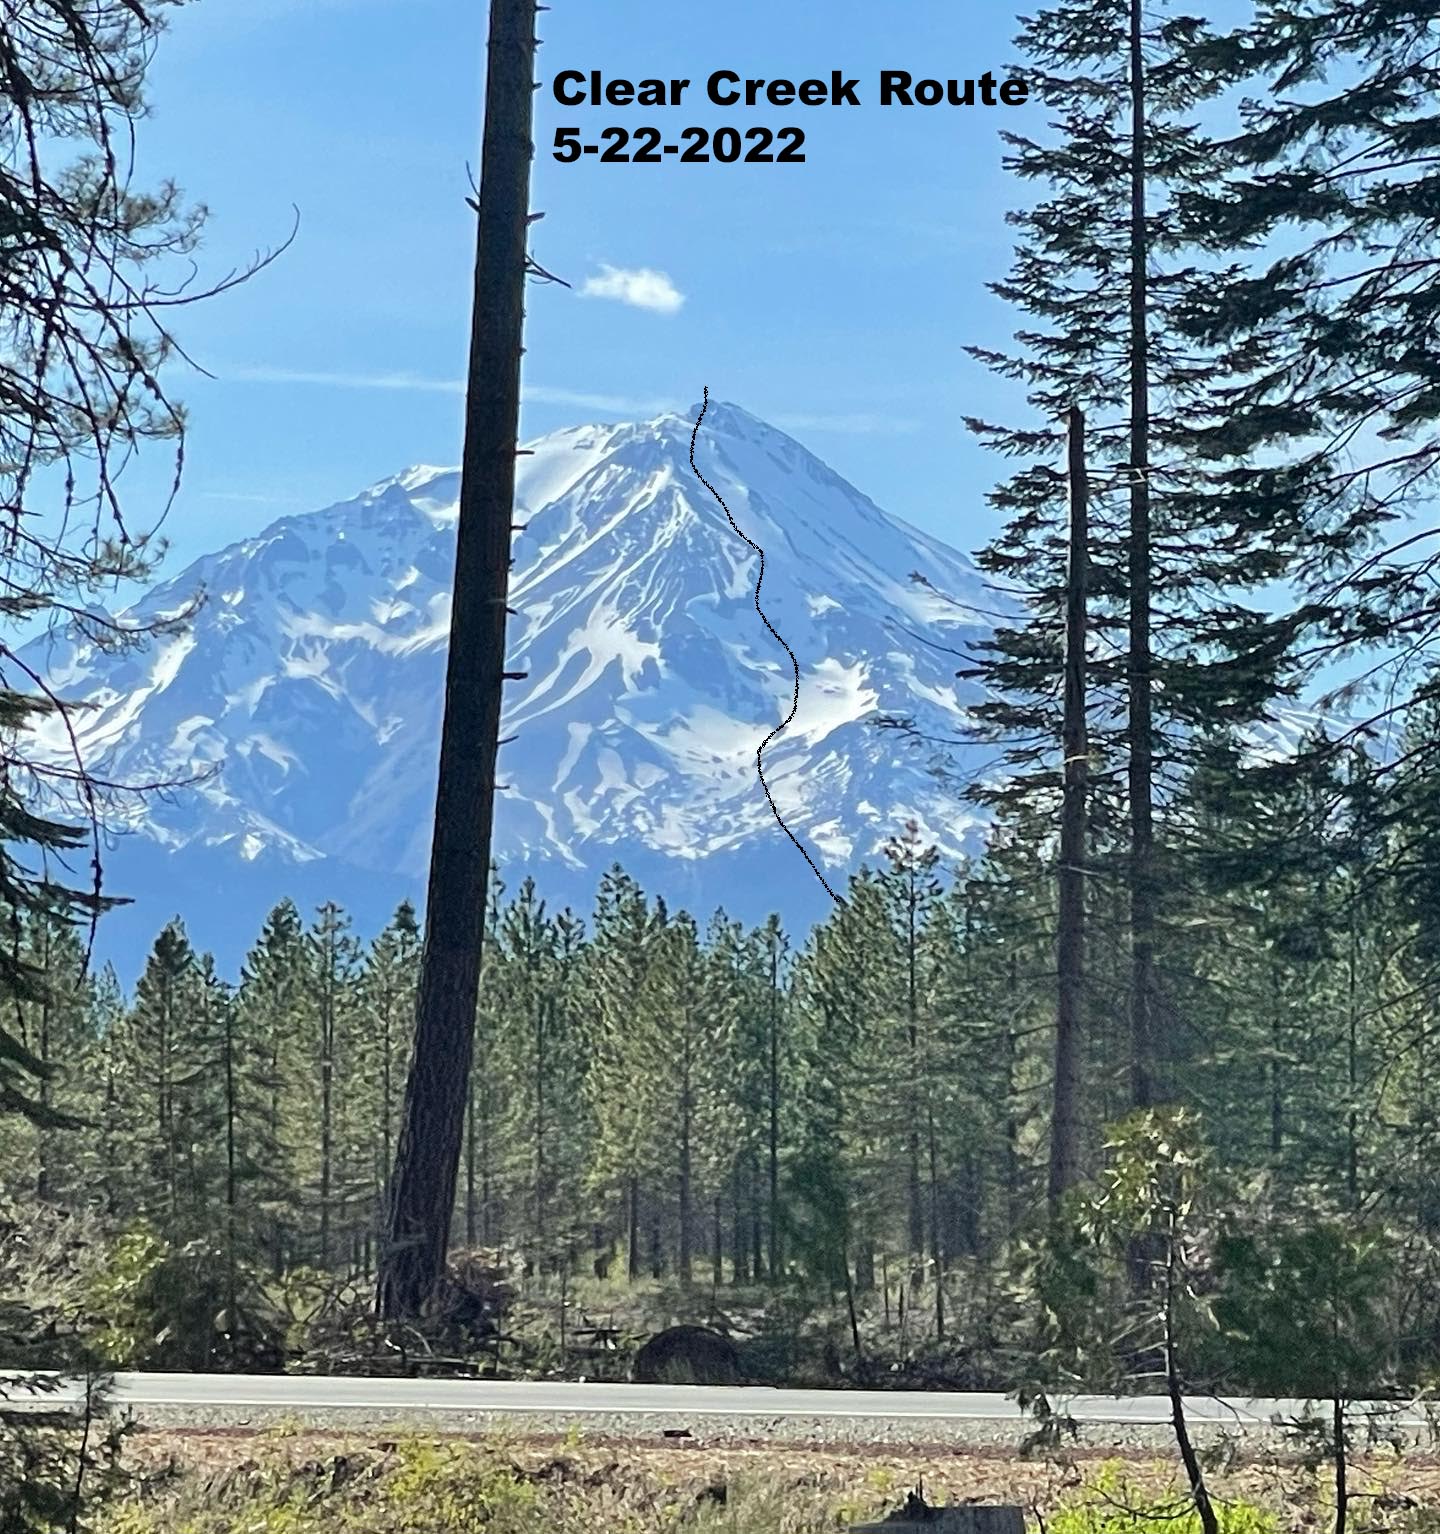
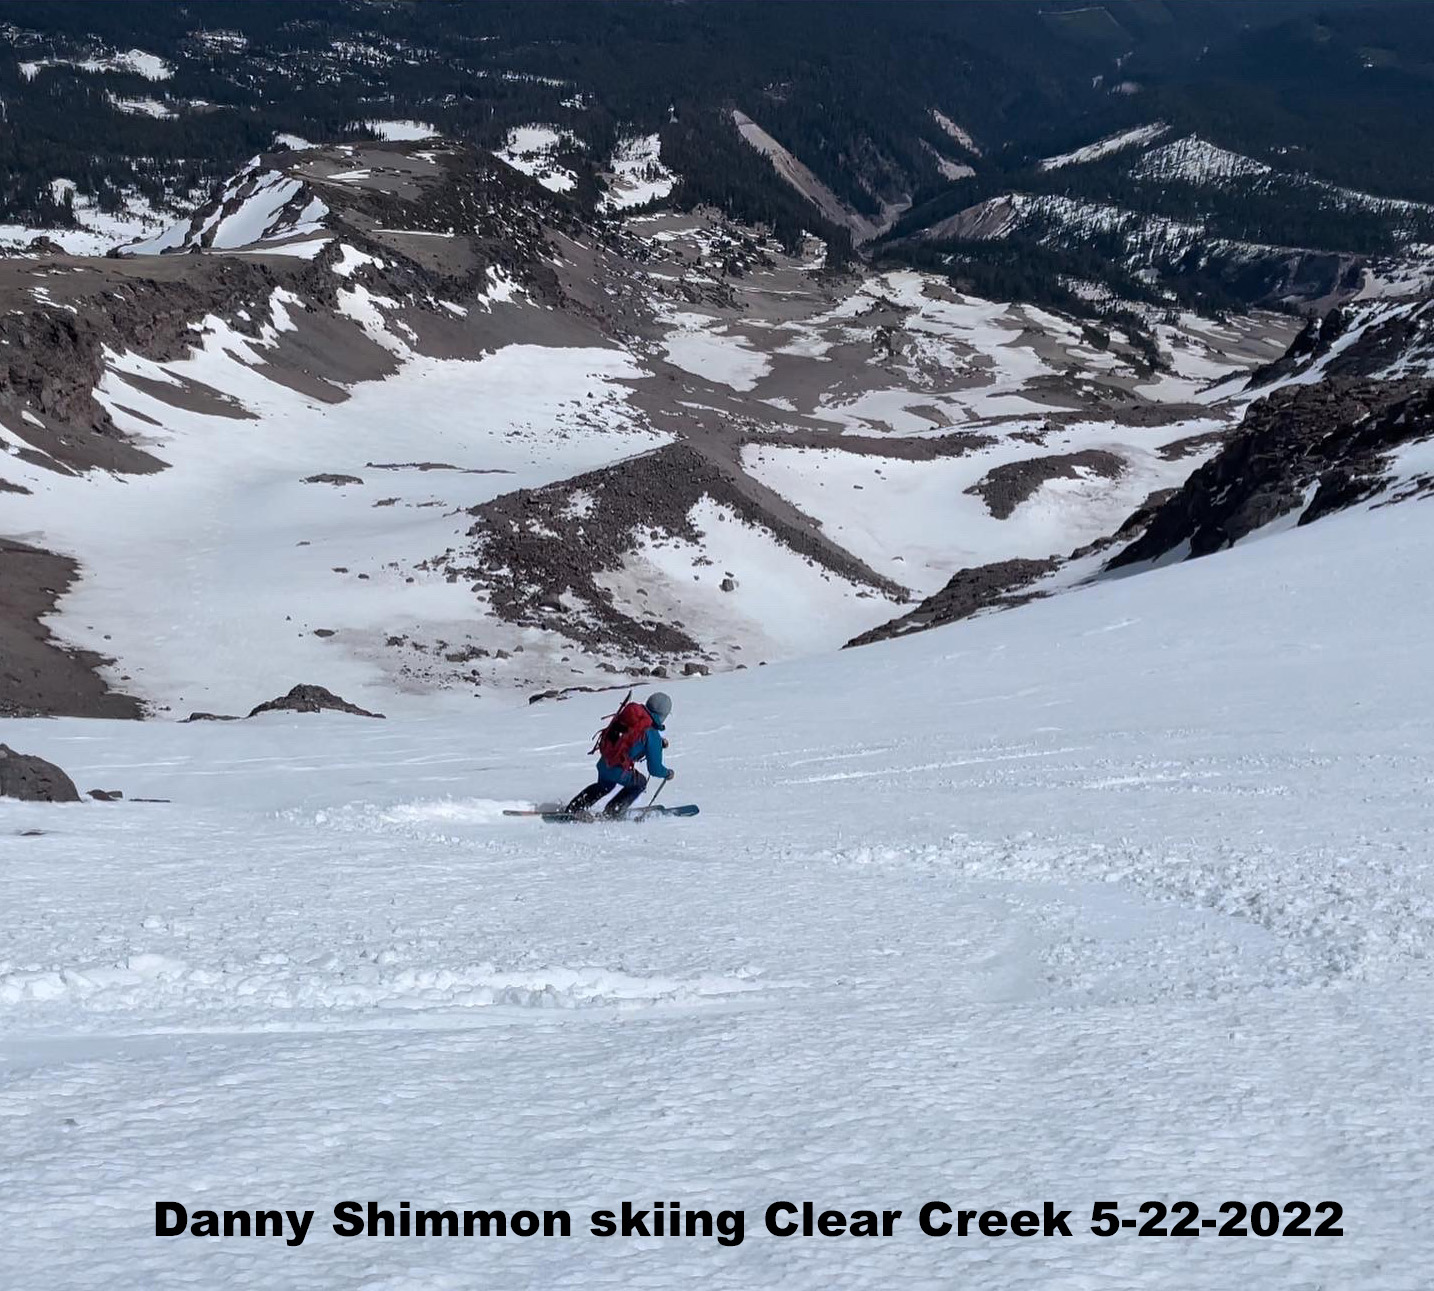
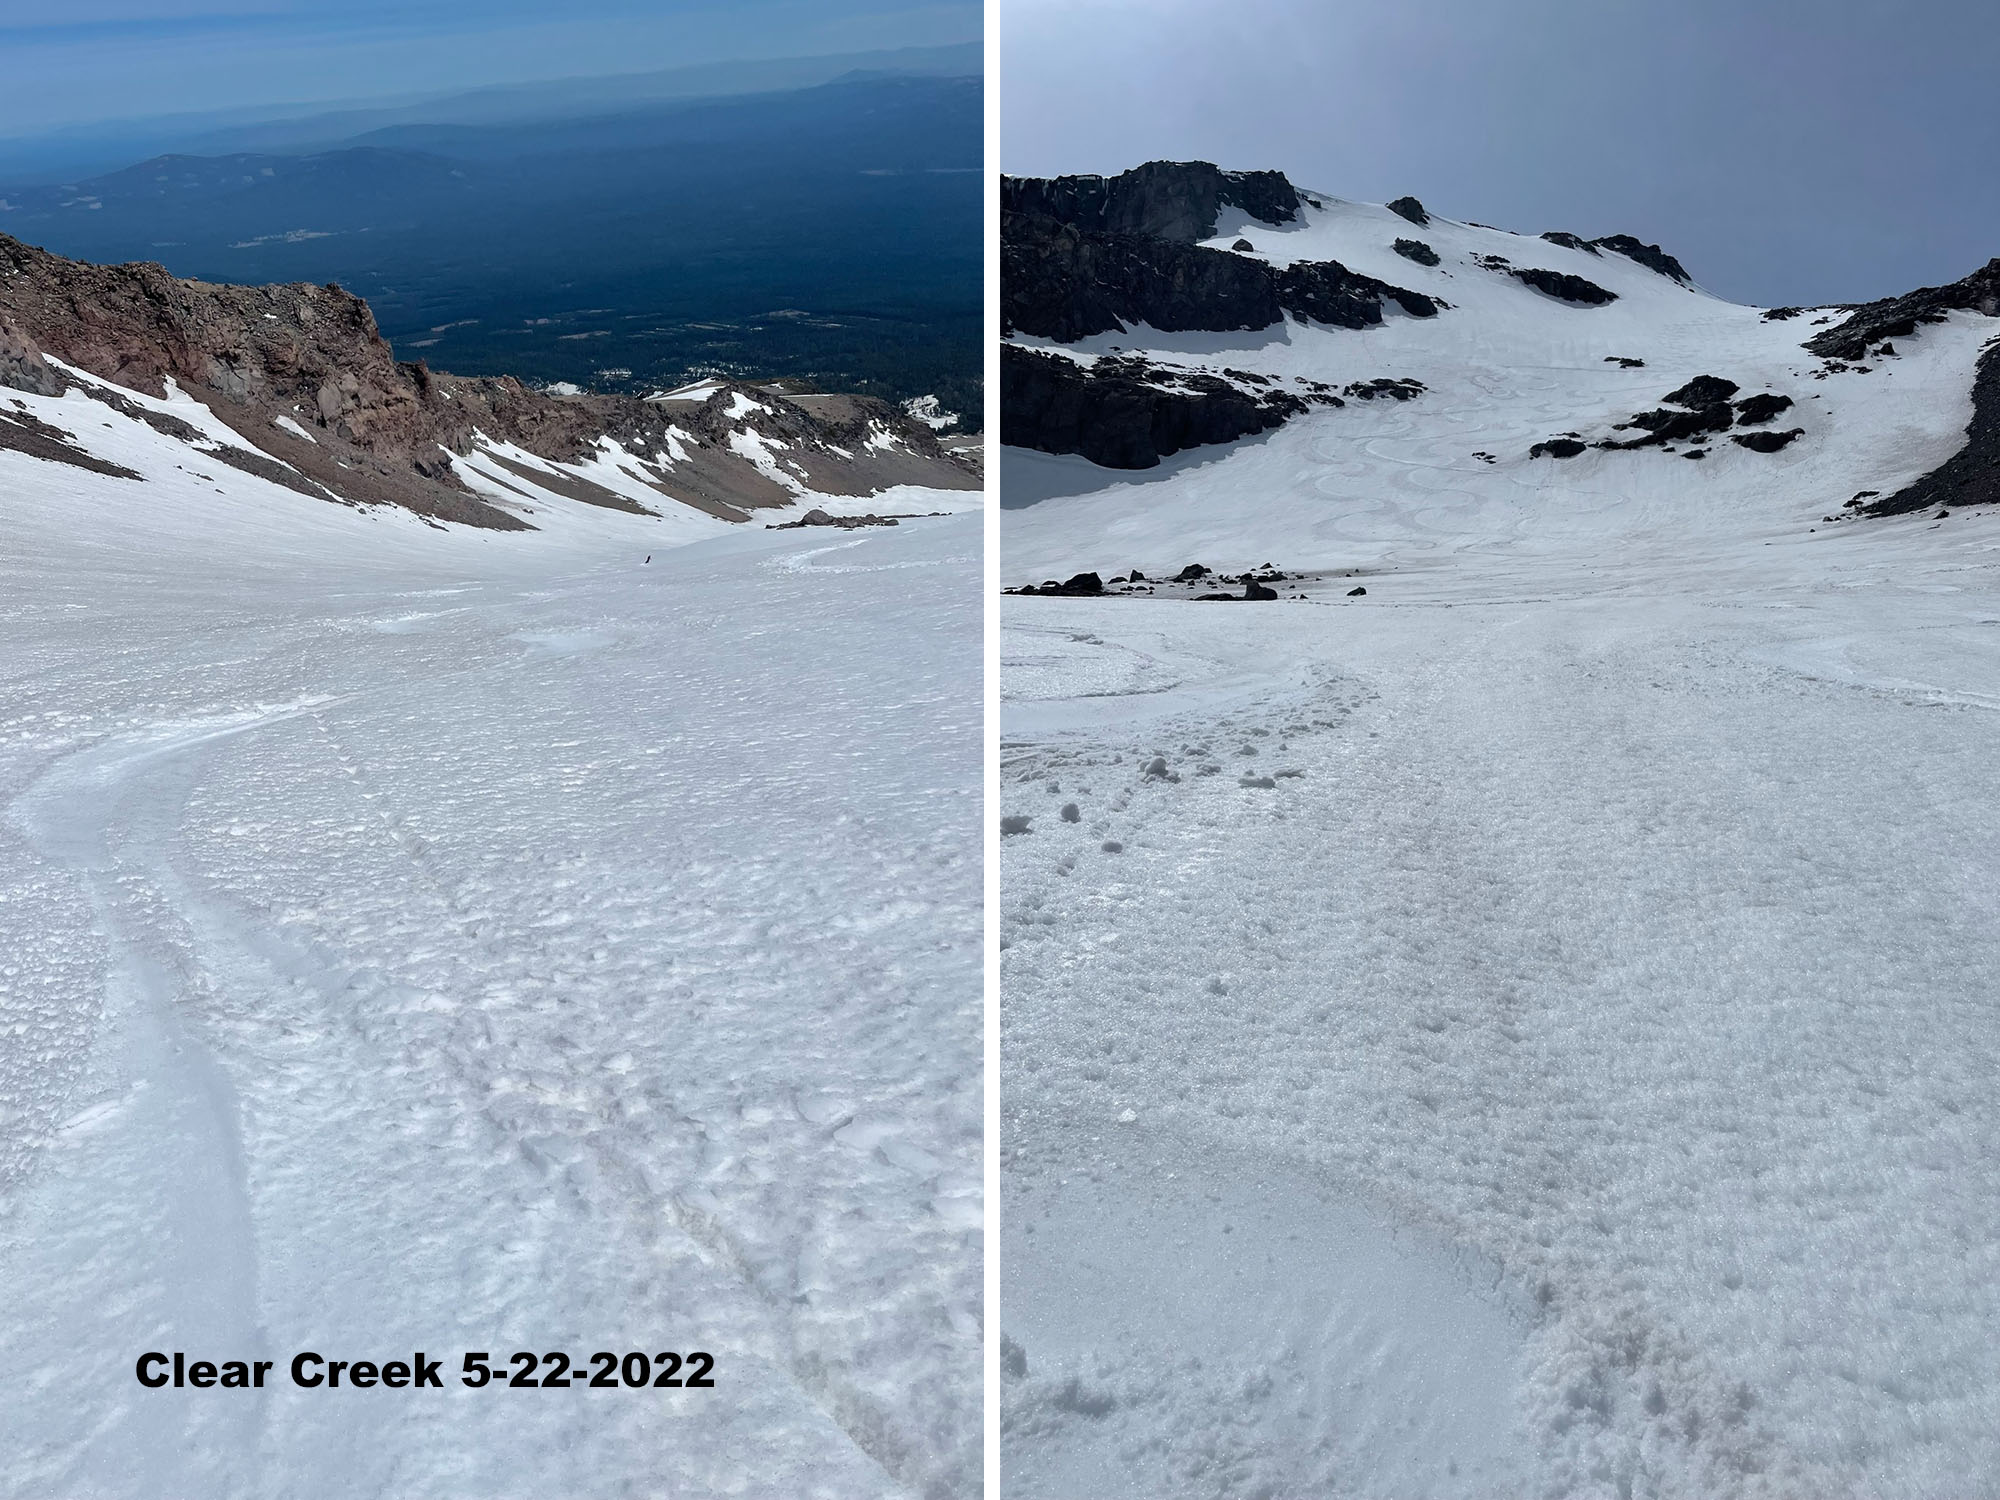
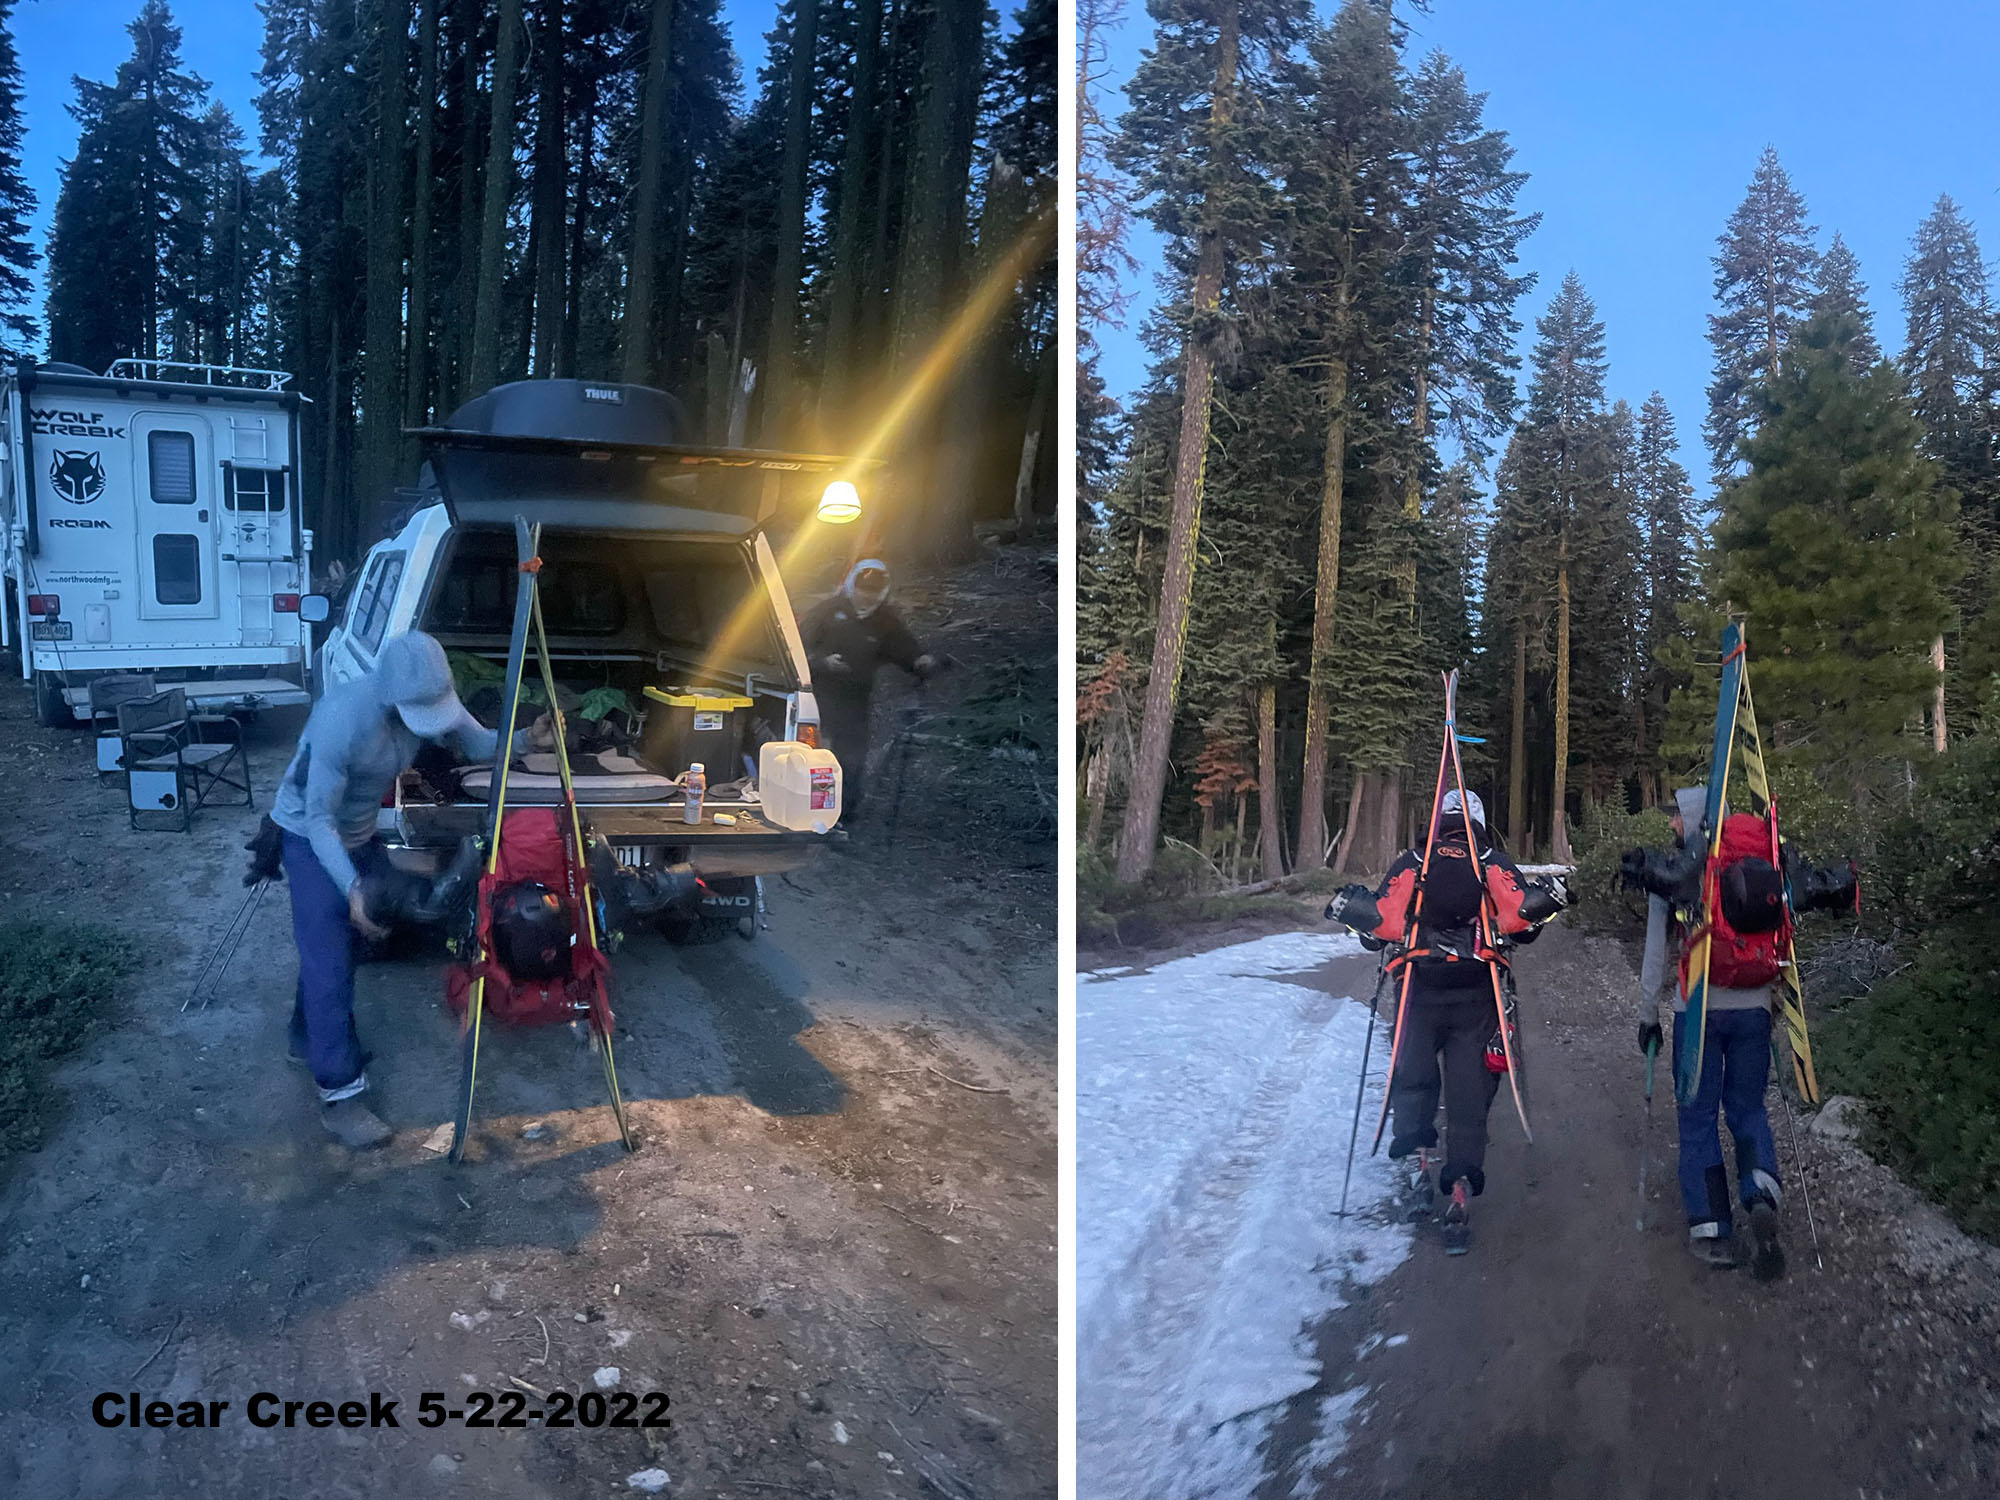
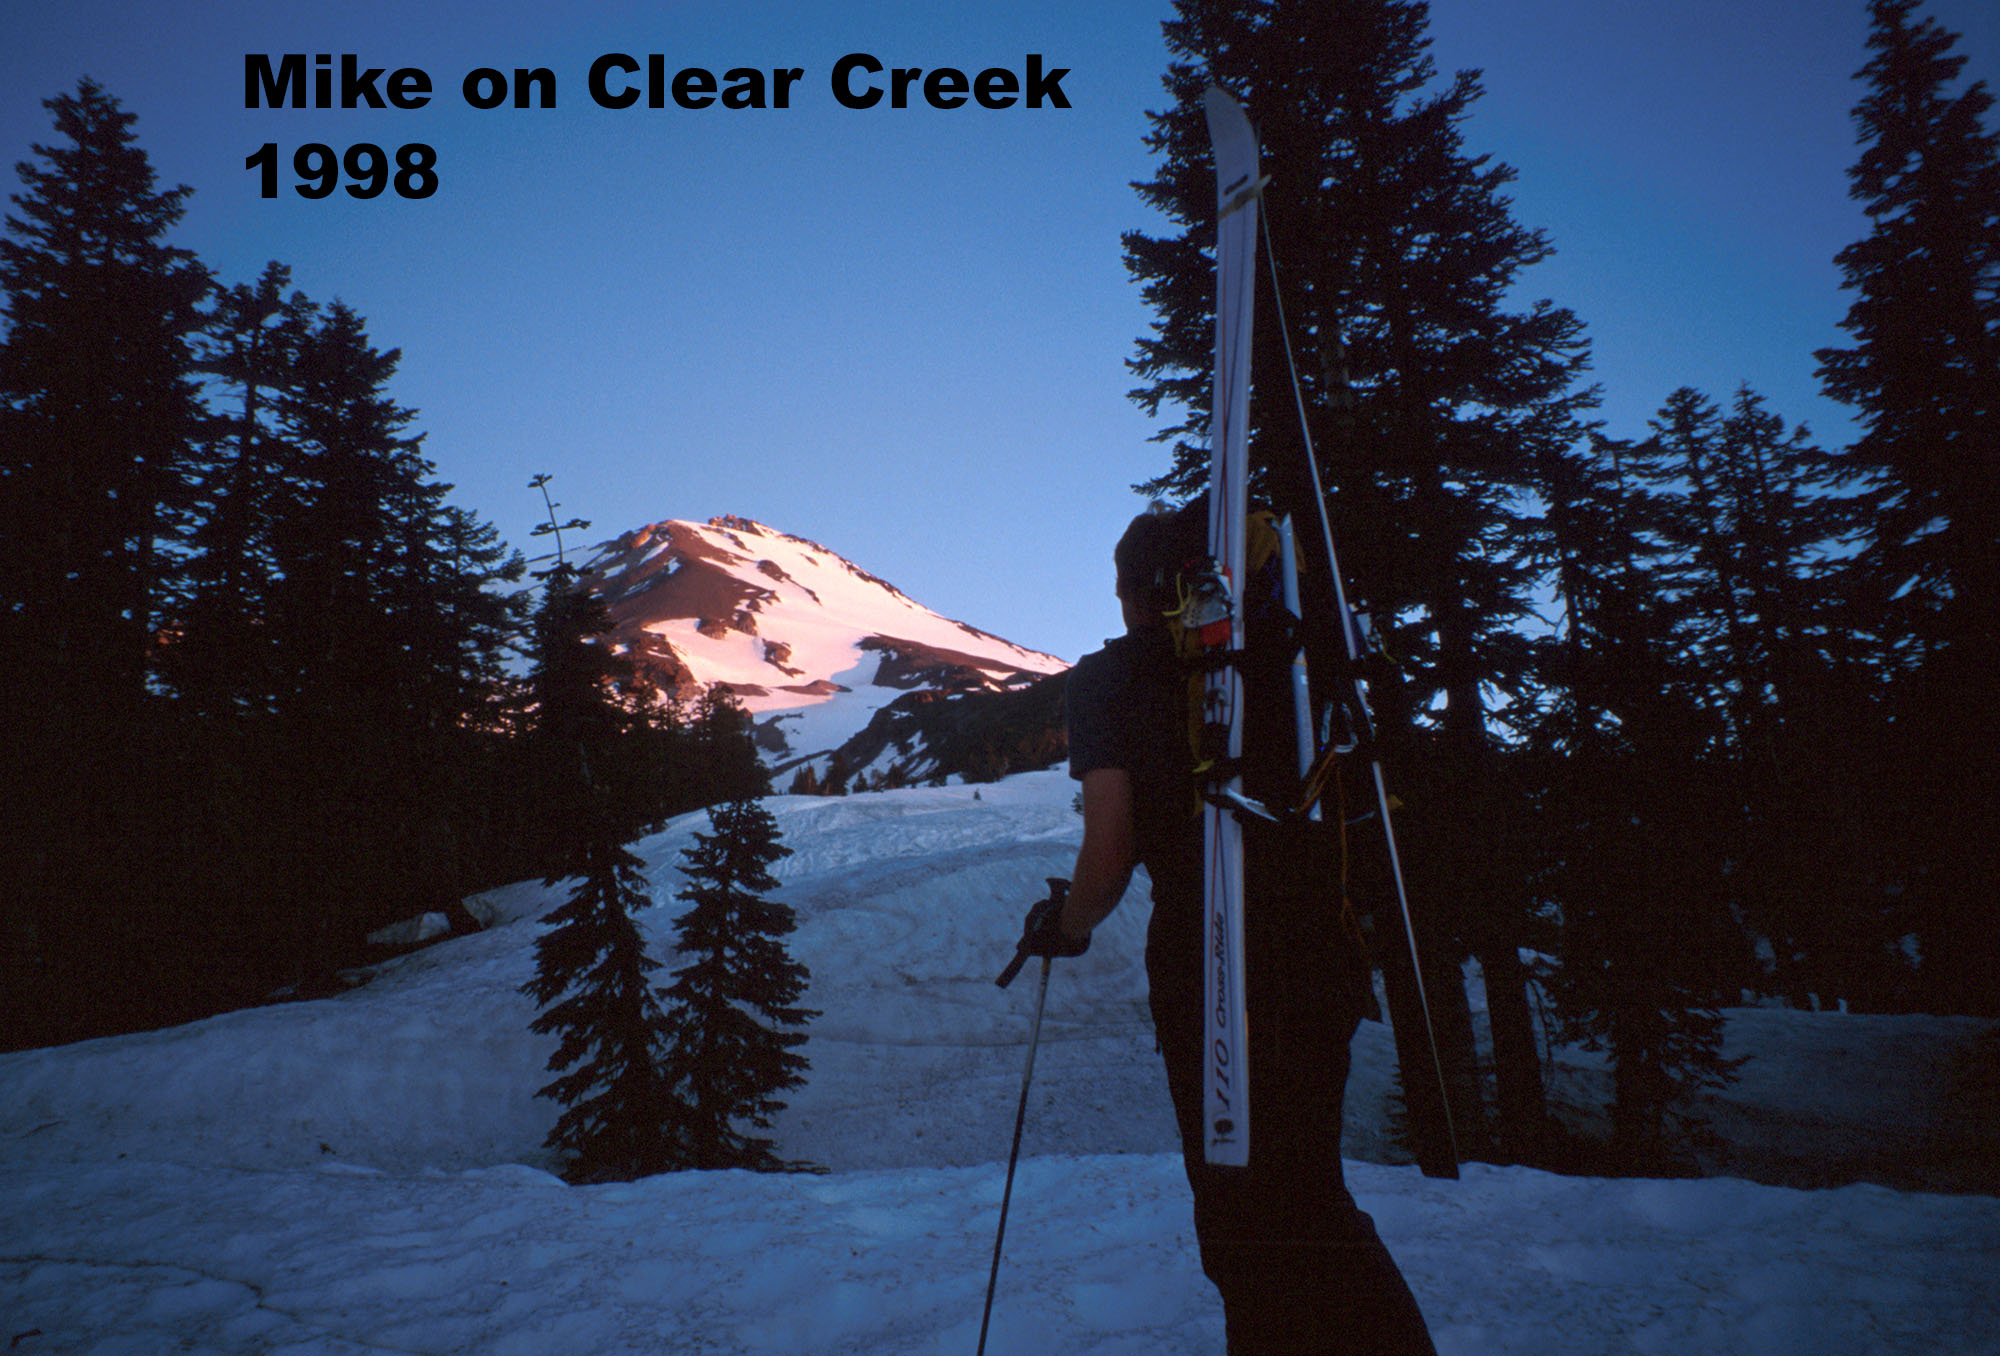
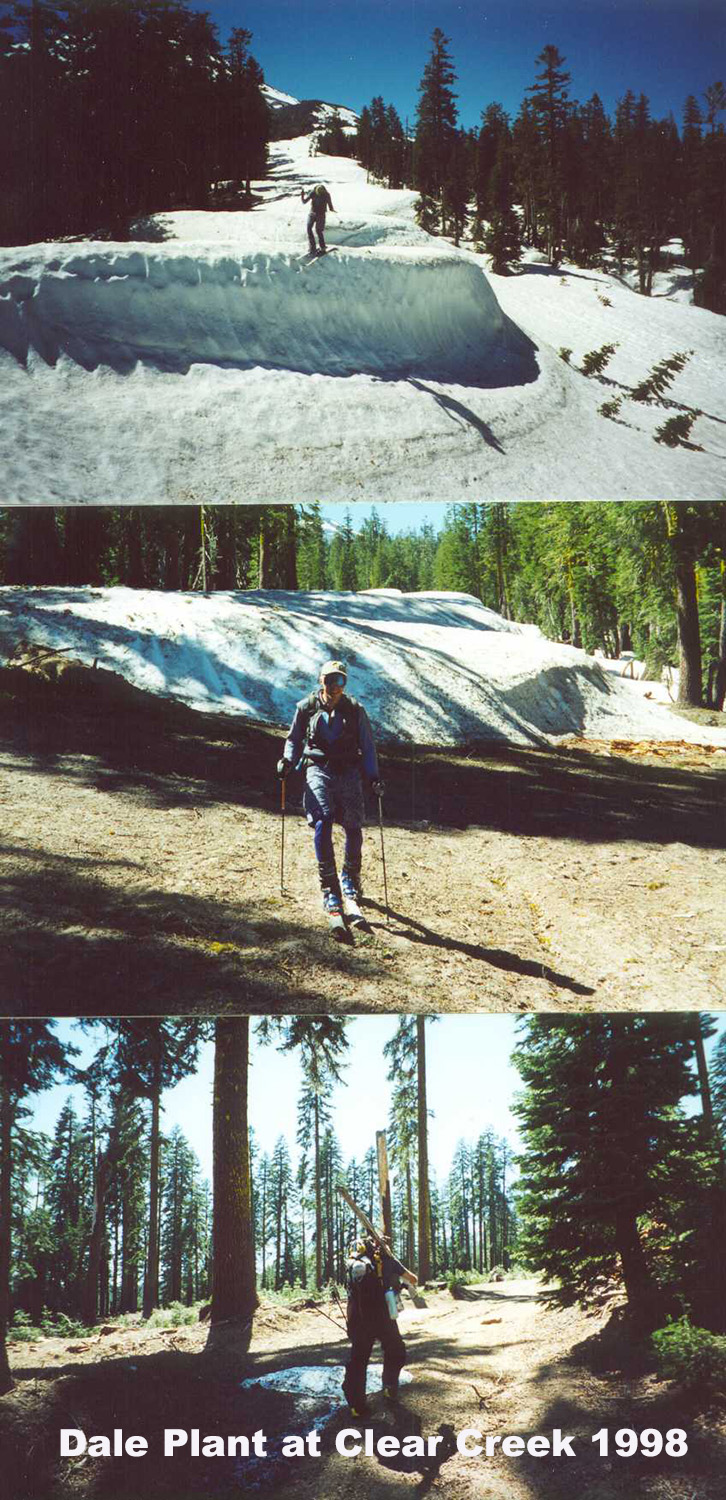
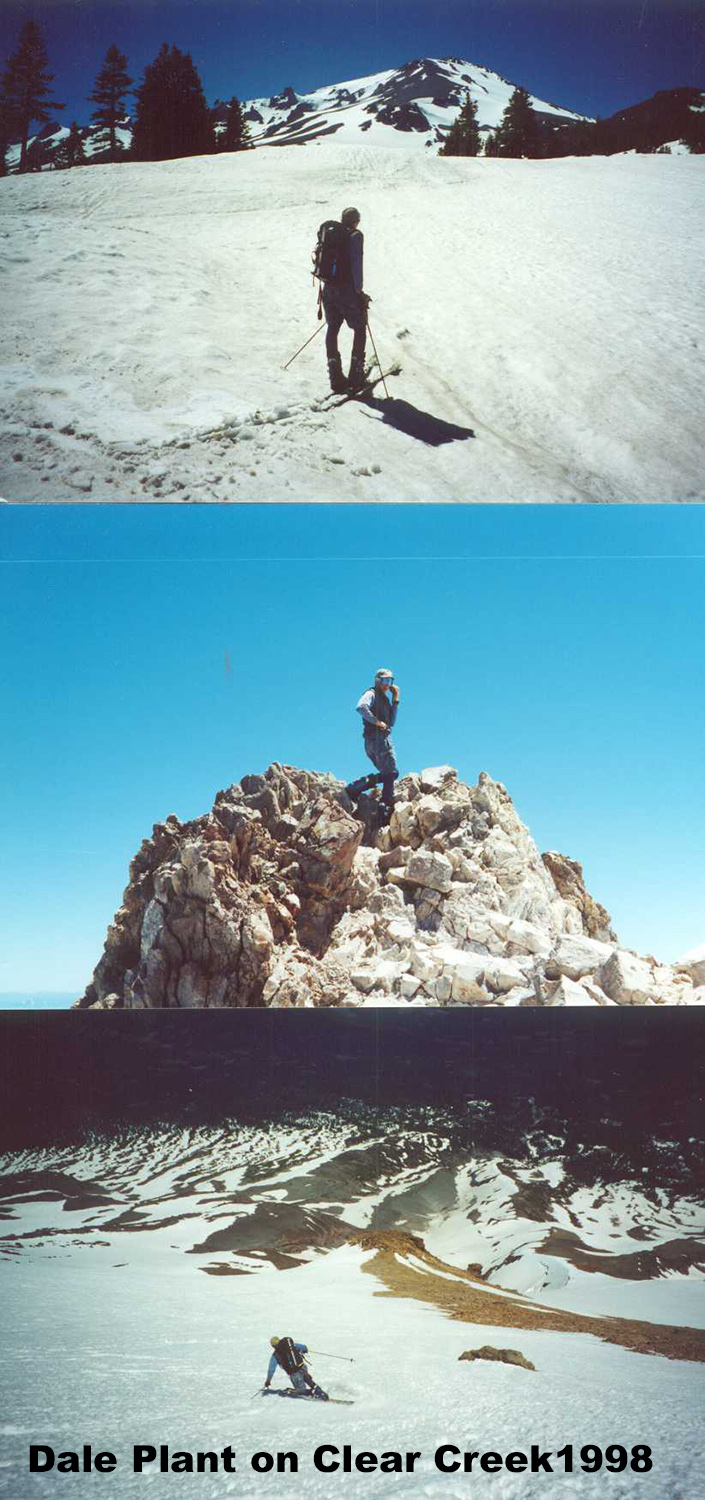
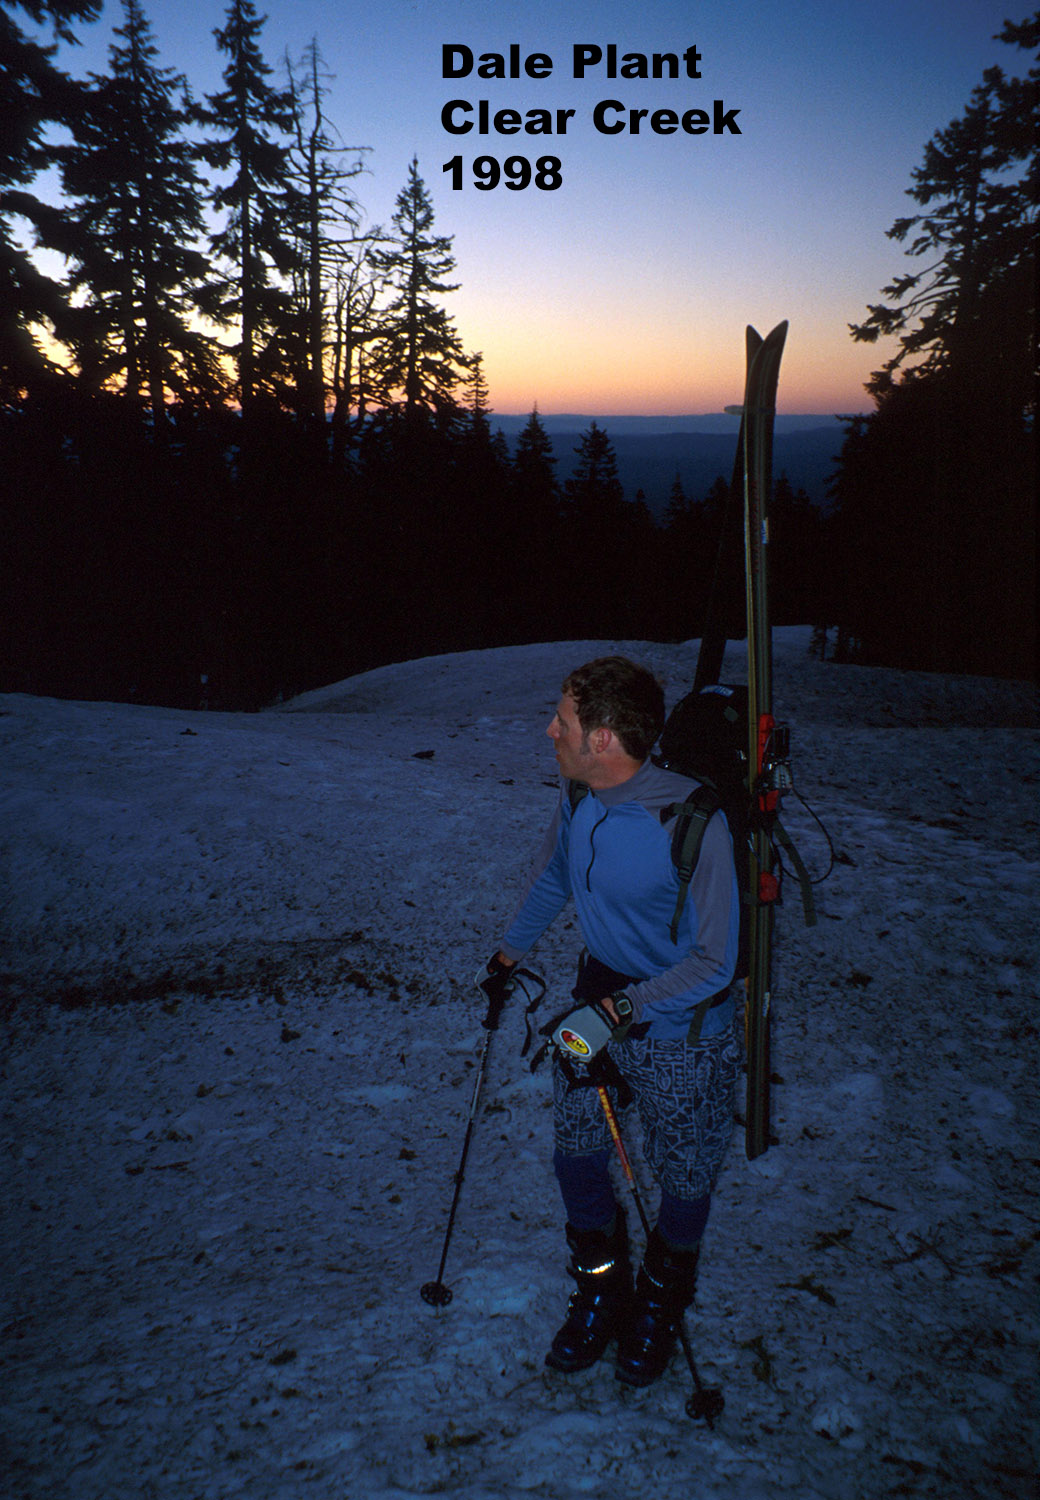
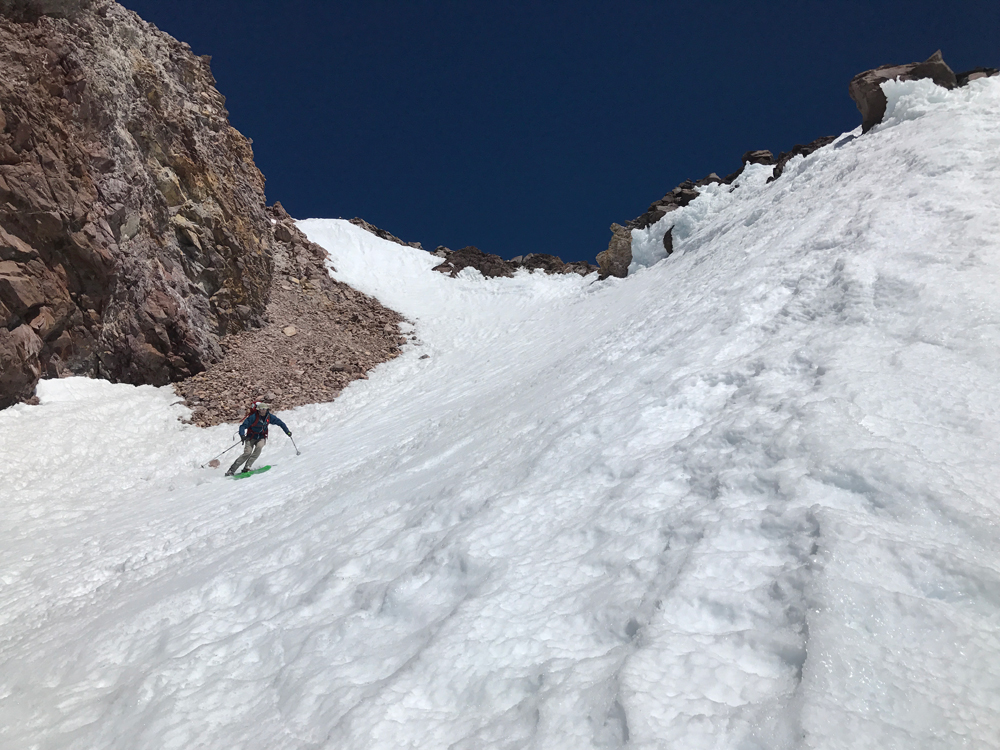
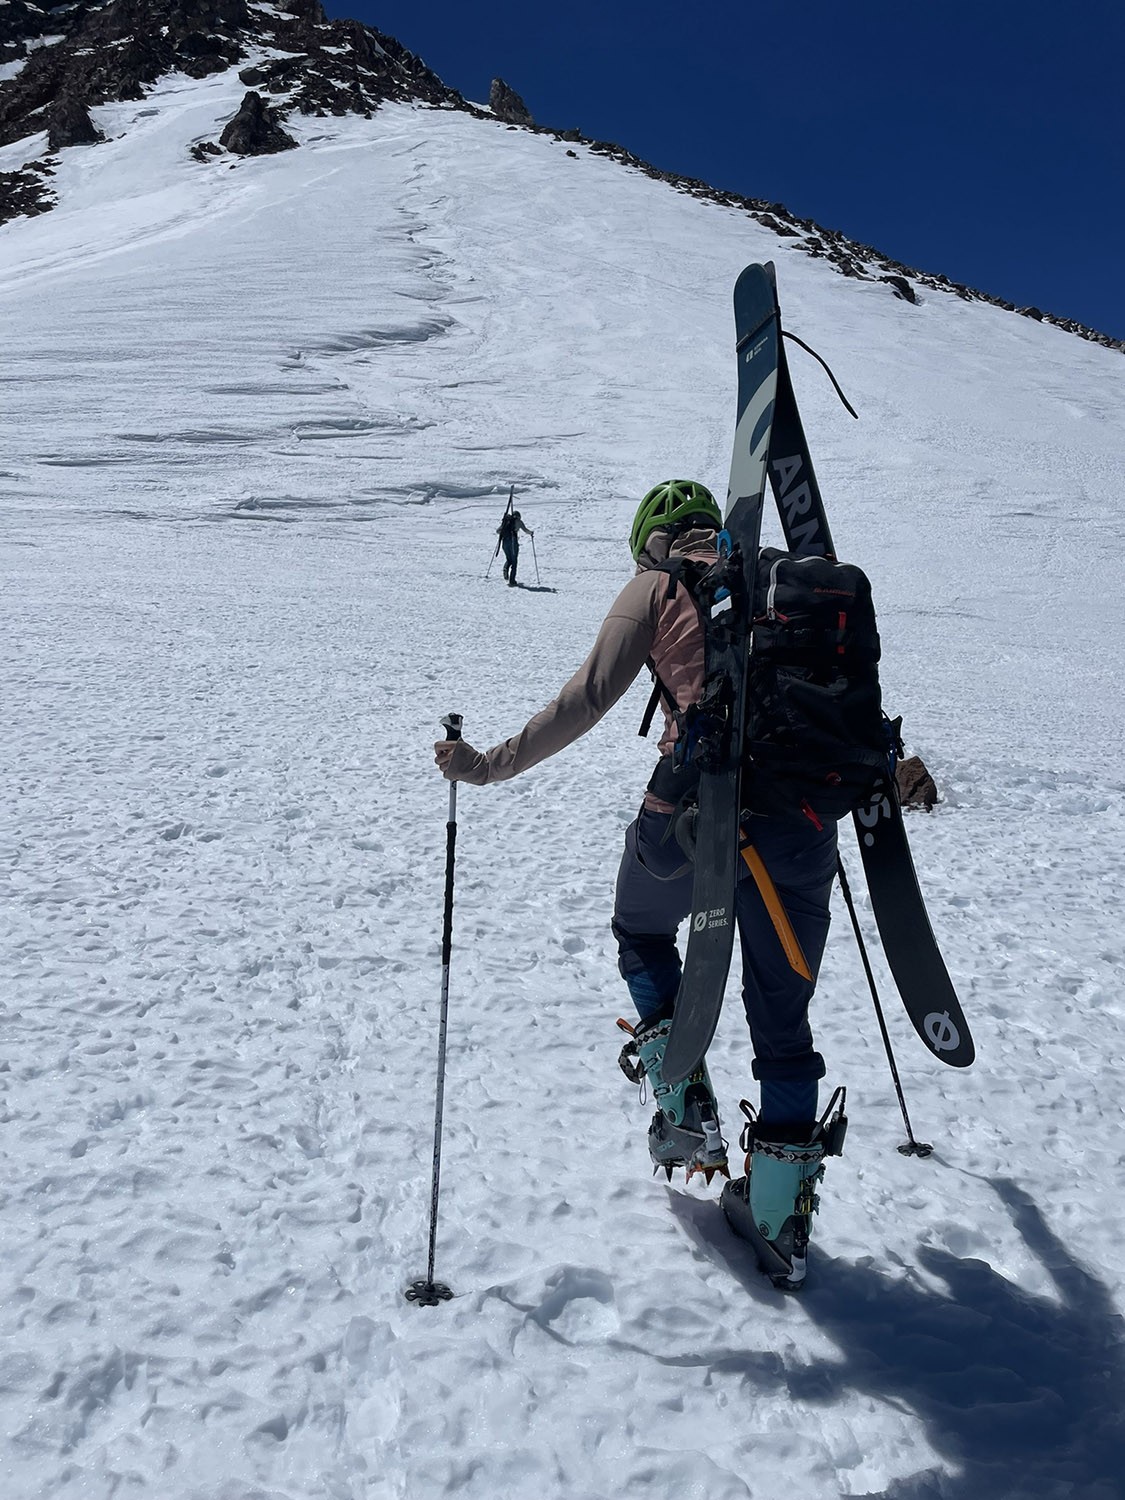
The Clear Creek route has its own trailhead, and usually melts out a little earlier than the Brewer Creek Trailhead. This route has the least amount of traffic yet offers about the same chance of good skiing quality. It is often possible to ski right off the summit and wrap back around to drop where you came from. I prefer to leave my skis at the plateau way up there and walk the last 15 minutes on the hiker’s track with my ski poles and no backpack. The Clear Creek route name actually refers to a late summer dirt and rock route, and the easiest way to the summit for a hiker. From a skier perspective, you are skinning, booting and skiing on both sides of the summer route. You will primarily travel on the steep slope in between the Clear Creek Route and the scary looking Mud Creek Headwall. You will definitely want to bring boot crampons and axe. I leave ski crampons behind on all Mt.Shasta ski routes. Ski crampons only help you on Mt. Shasta routes between 9 and 10k. Below that is easy, and above that would be too difficult for skinning. If you want the mountain to yourself, hit the Clear Creek Route any day of the year. A busy day would be one other party.
I have skied the Clear Creek Route 3 times now, including last year and this week 6-2-23. One time was seriously sketchy with typical late season spring high elevation bumpy crust The only snow route to ski down has many sections of steep off-camber slope which drains into the abyss of Mud Creek. You really need to make sure no one in the group catches an edge and starts sliding. I ski from safe spot to safe spot, which are easy to identify during your climb. I have found I can stay on snow for the entire descent, and even start near the summit. You may go up closer to the actual Clear Creek rock route, but you won’t want to cross all those bare scree fields on the way down with skis. Look around and you will see the potential. I posted more pics and beta from these two recent ski descents of Clear Creek on the reply board down below. It’s frieking awesome. This route is not steeper than 40 degrees anywhere, but it is quite serious between 11 and 12k where you cross the steepest and most off camber section. Perhaps you could cut way further south and get onto the safer slopes on the other side of the CC route, but that would take more time in the day. Best to ski over there without also summiting the mountain on the same day I would think.
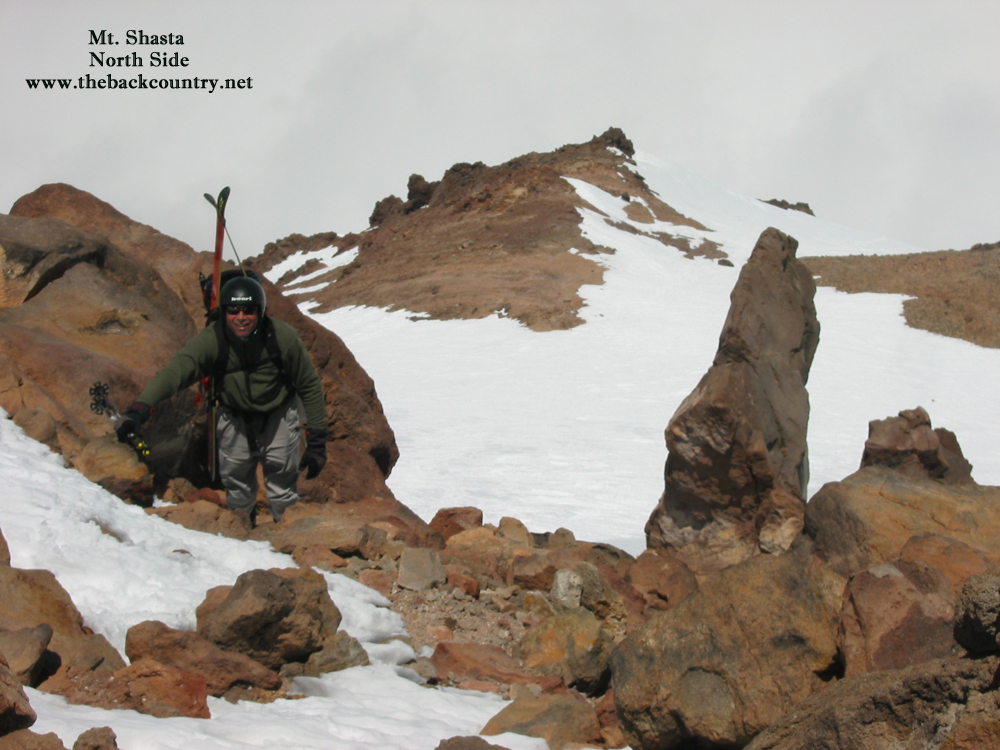
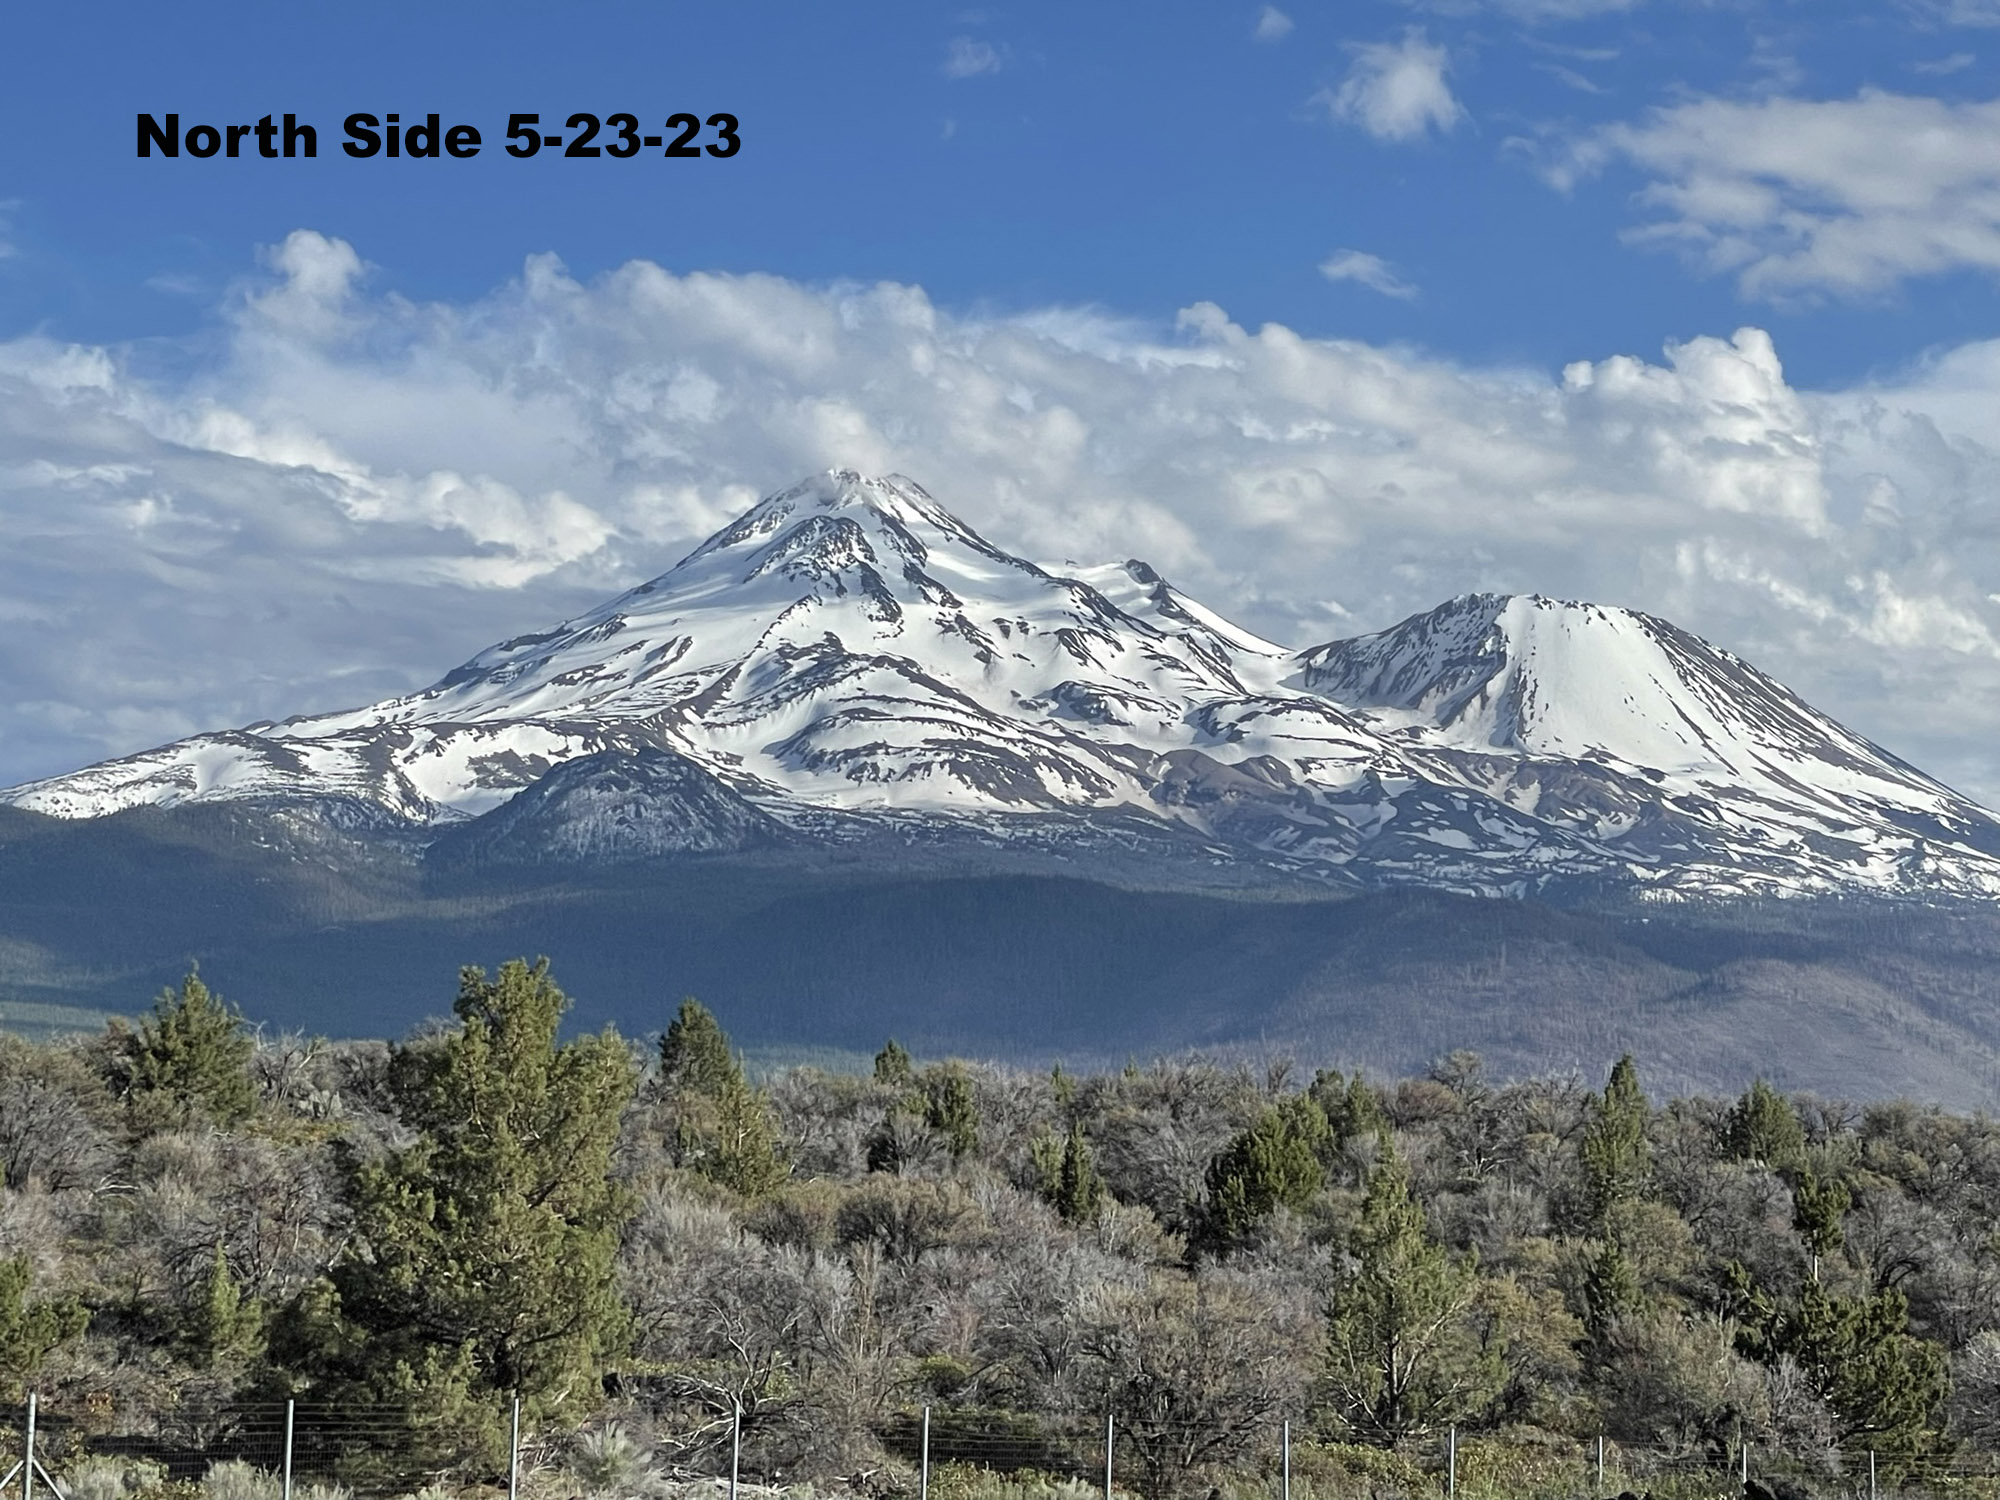
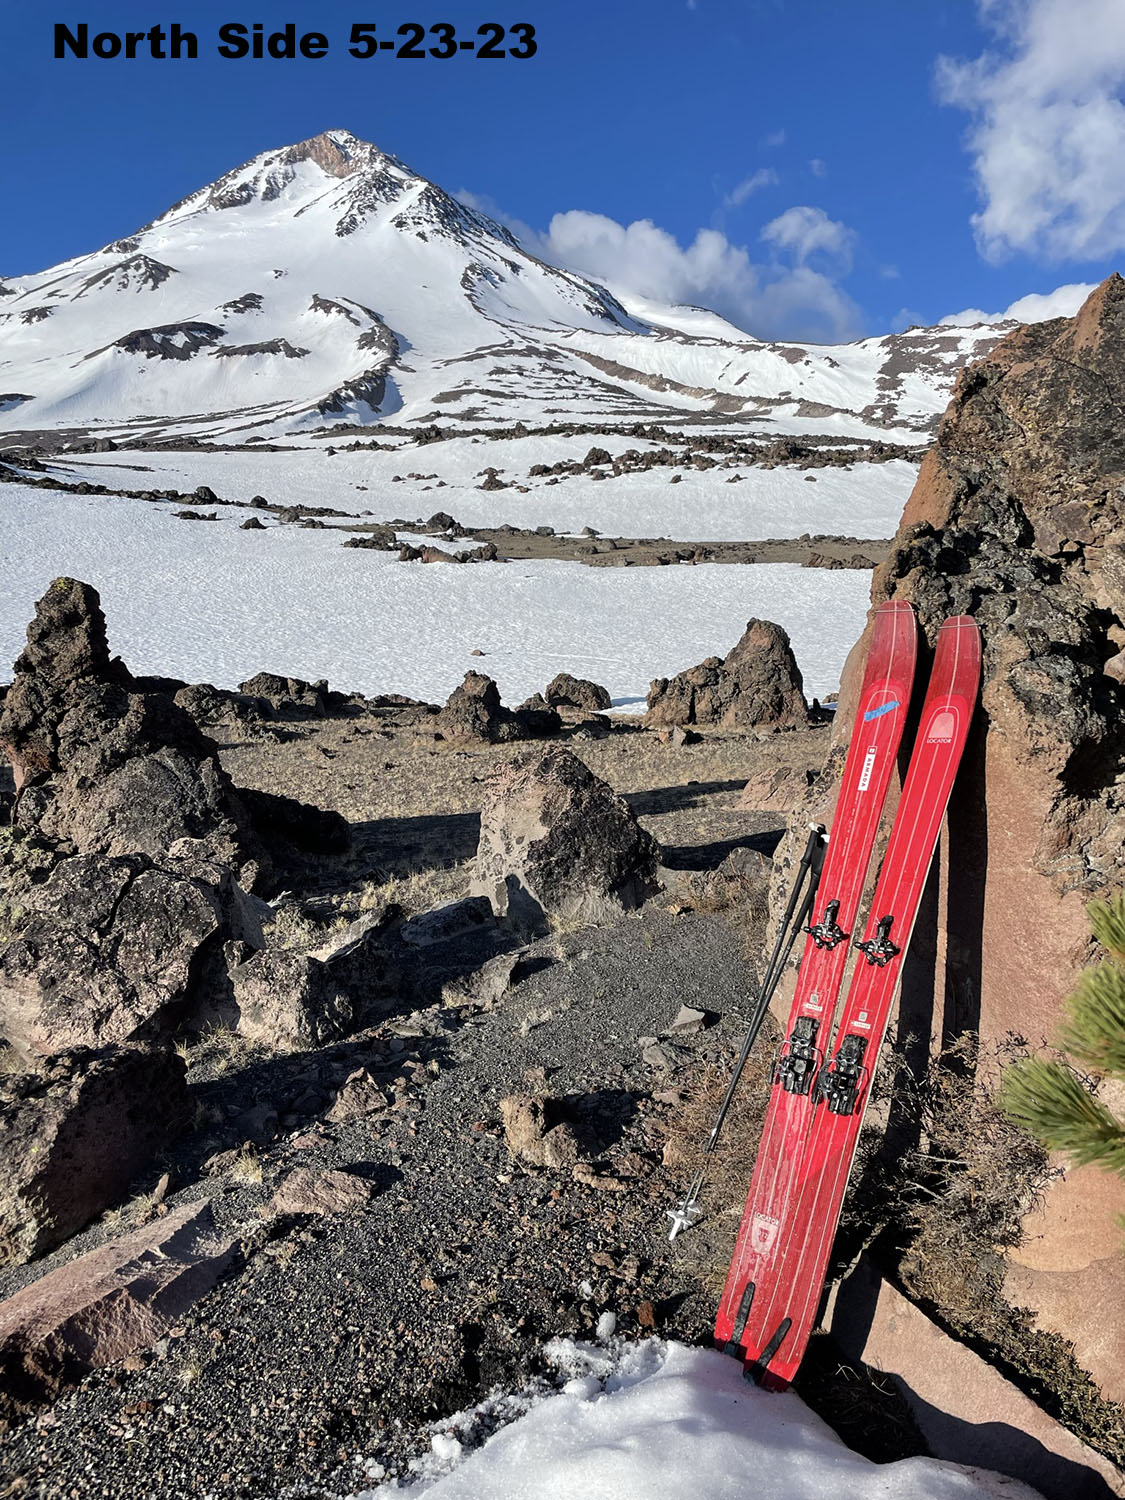
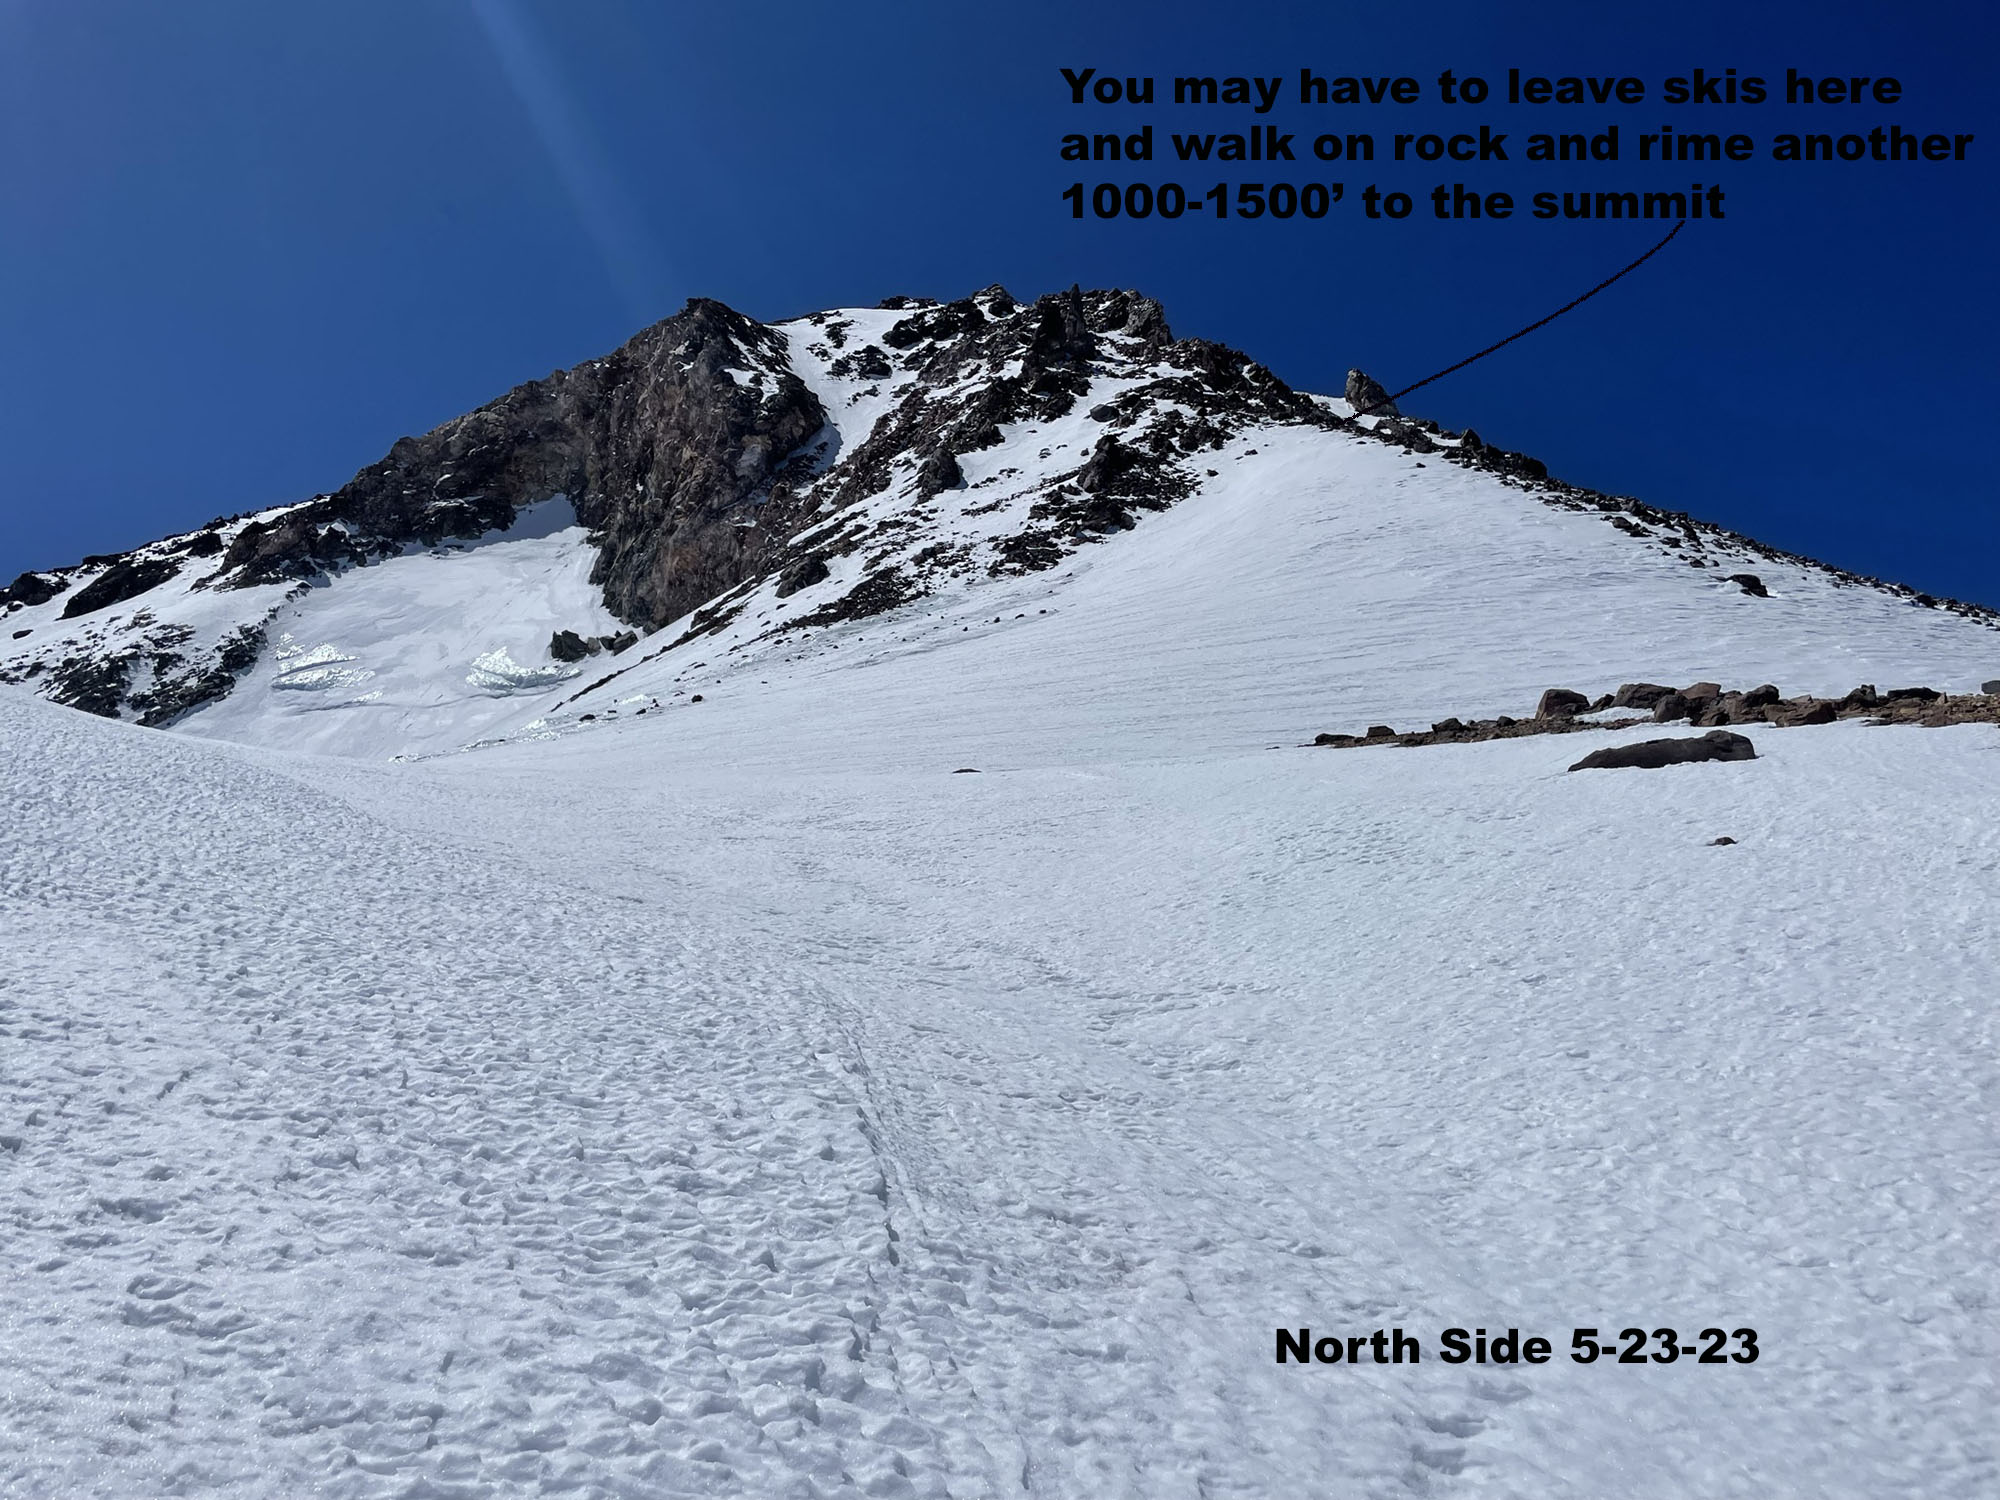
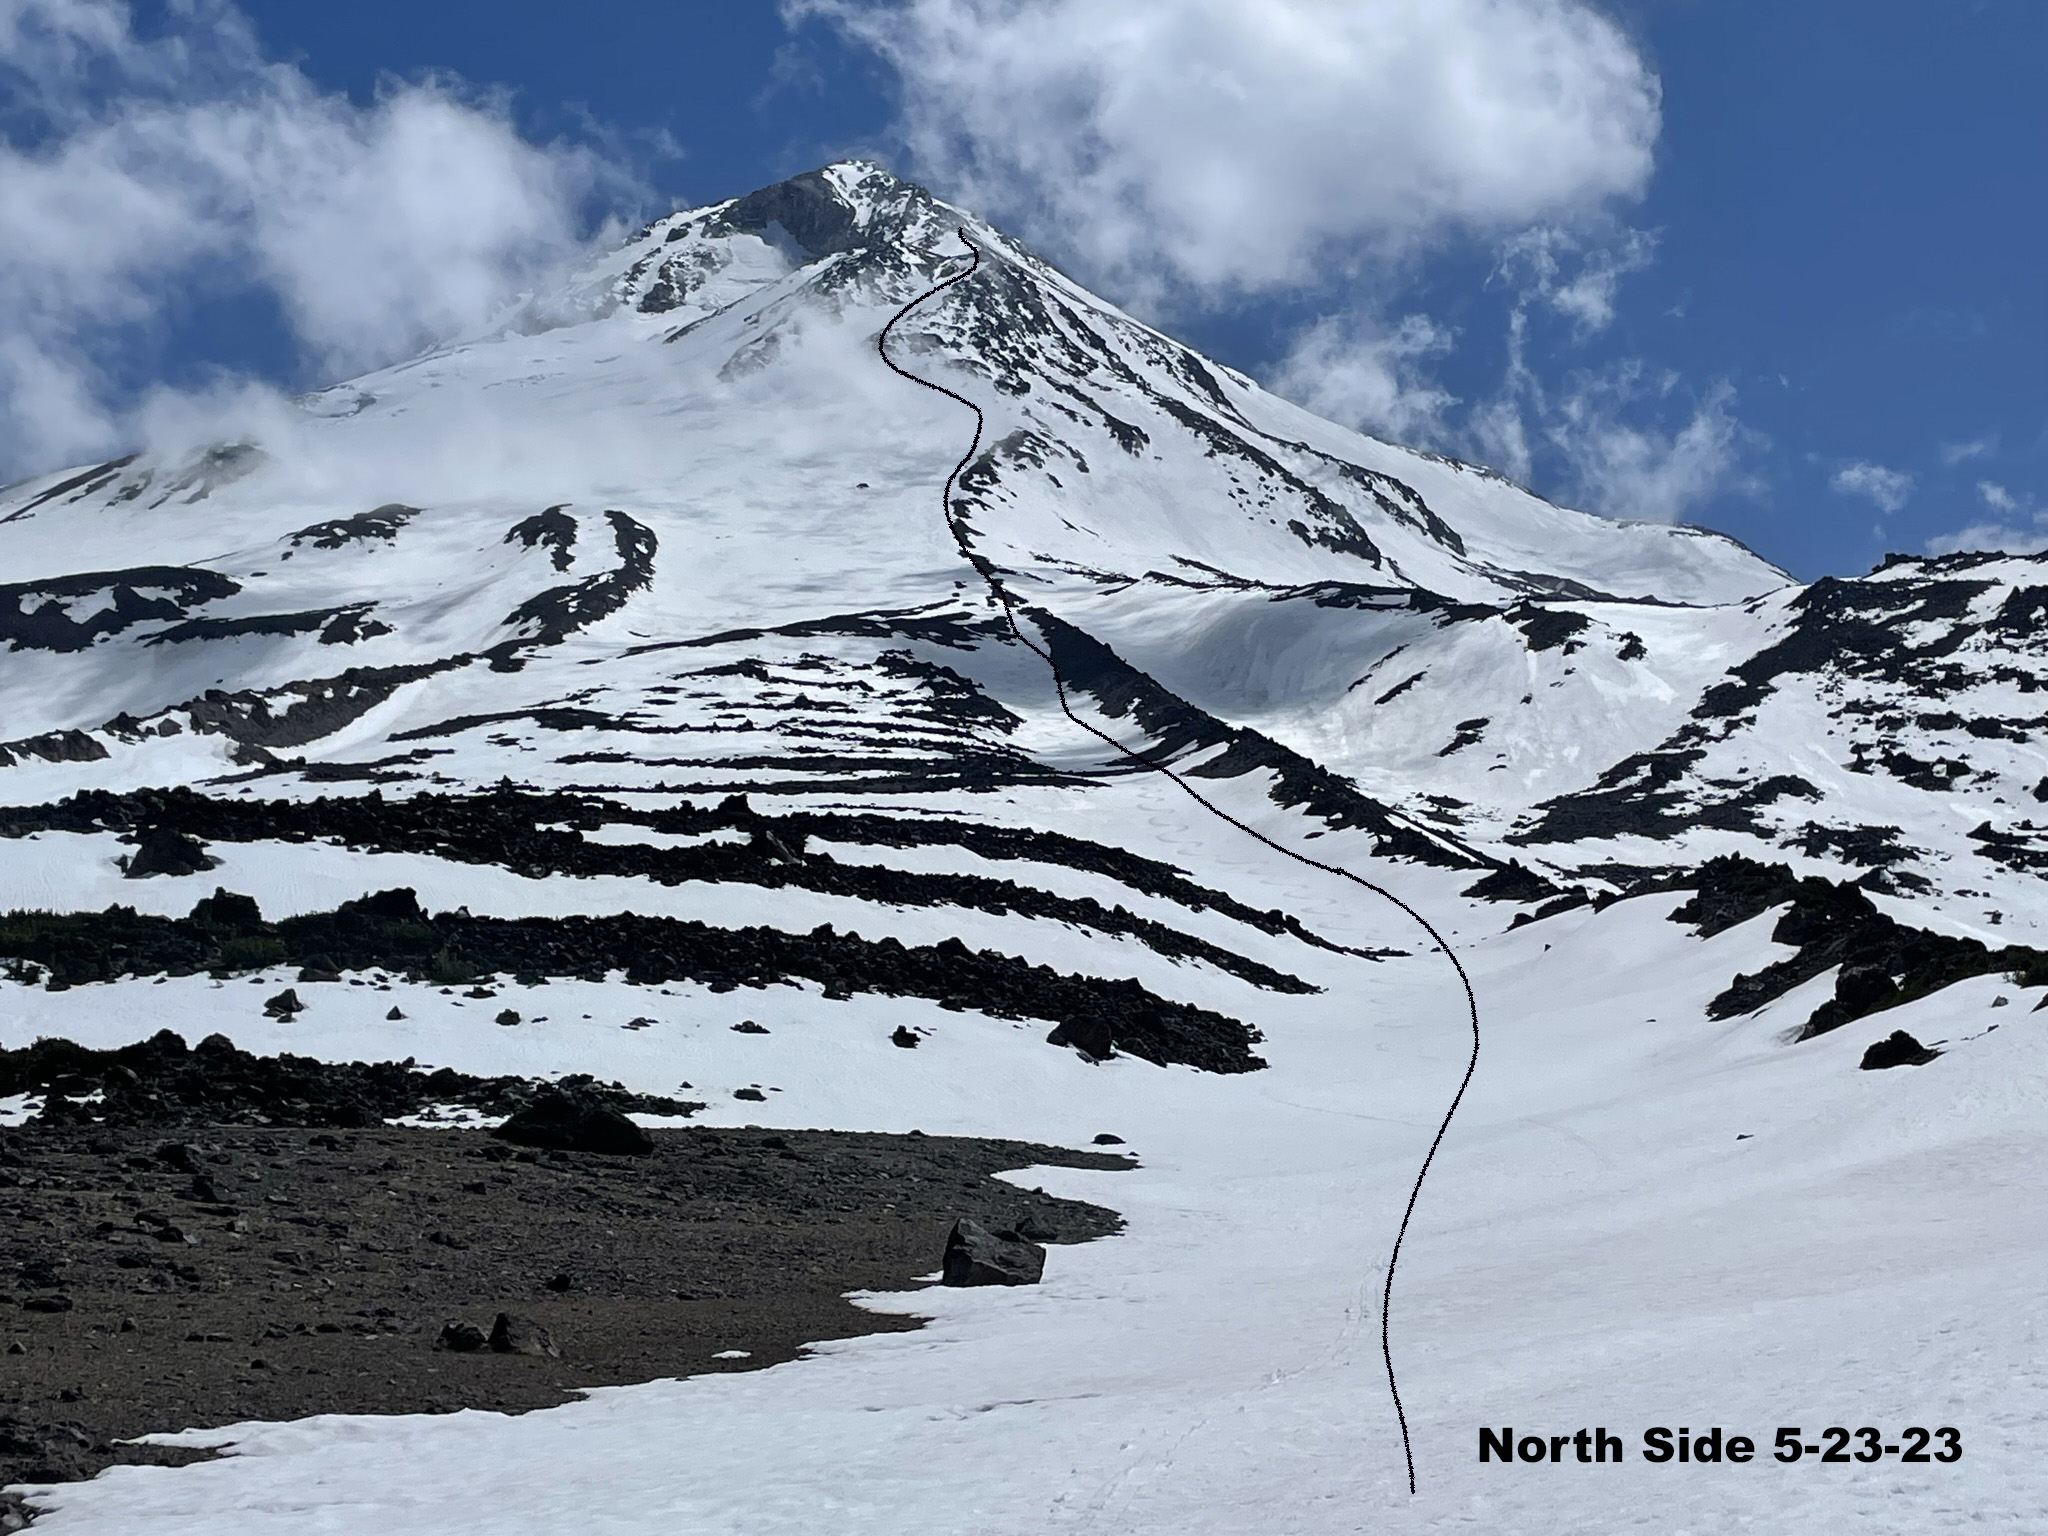
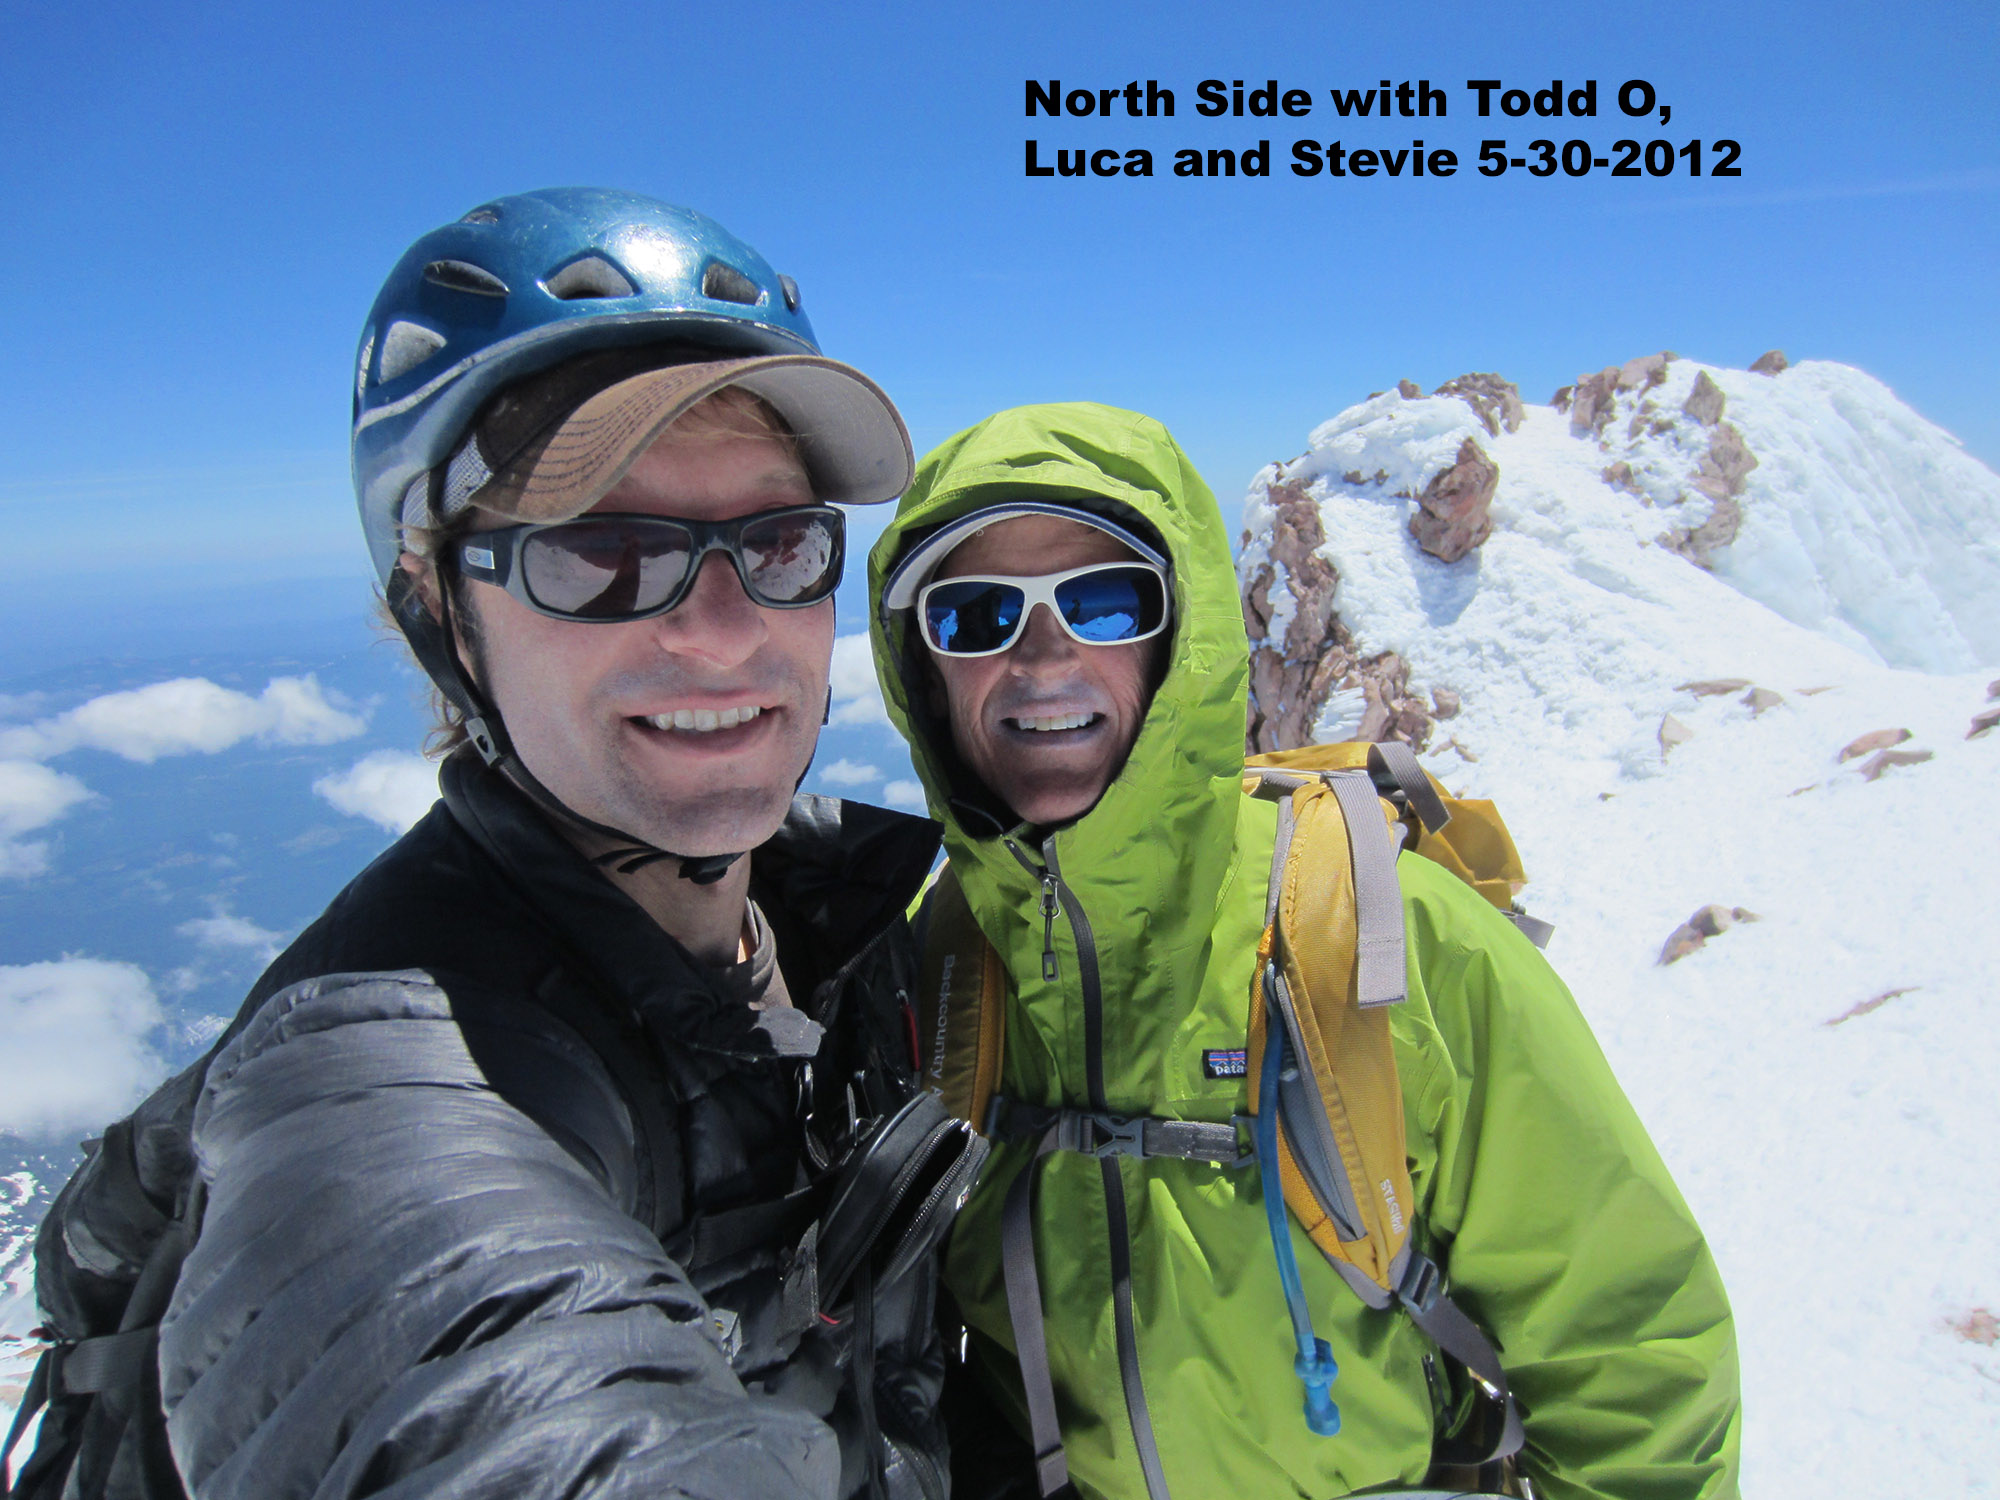
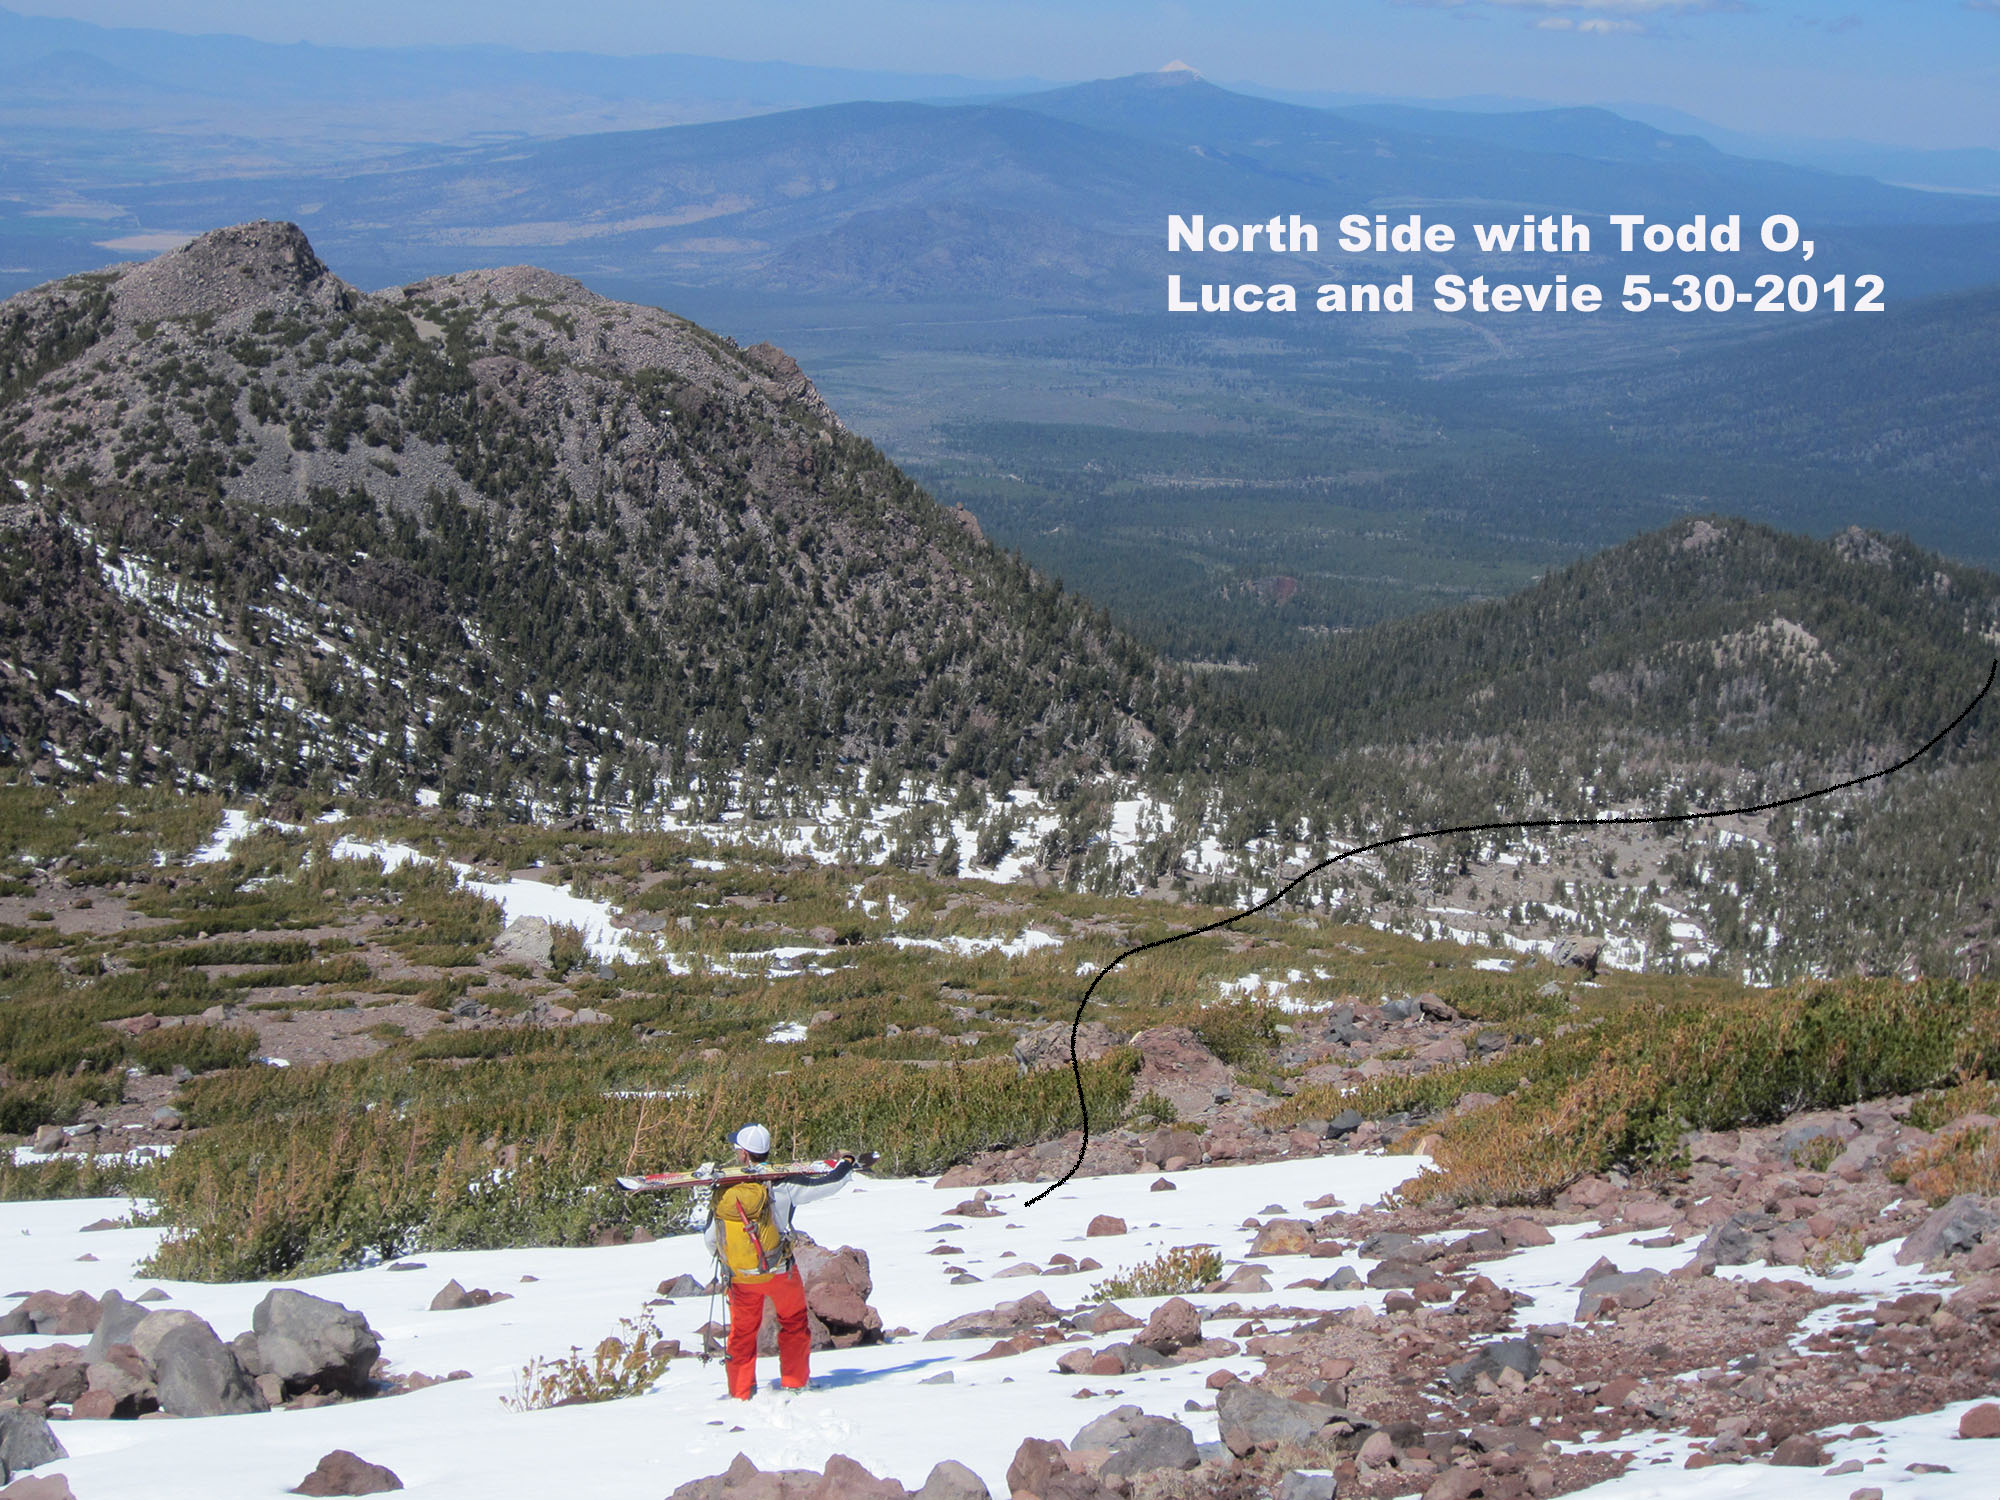
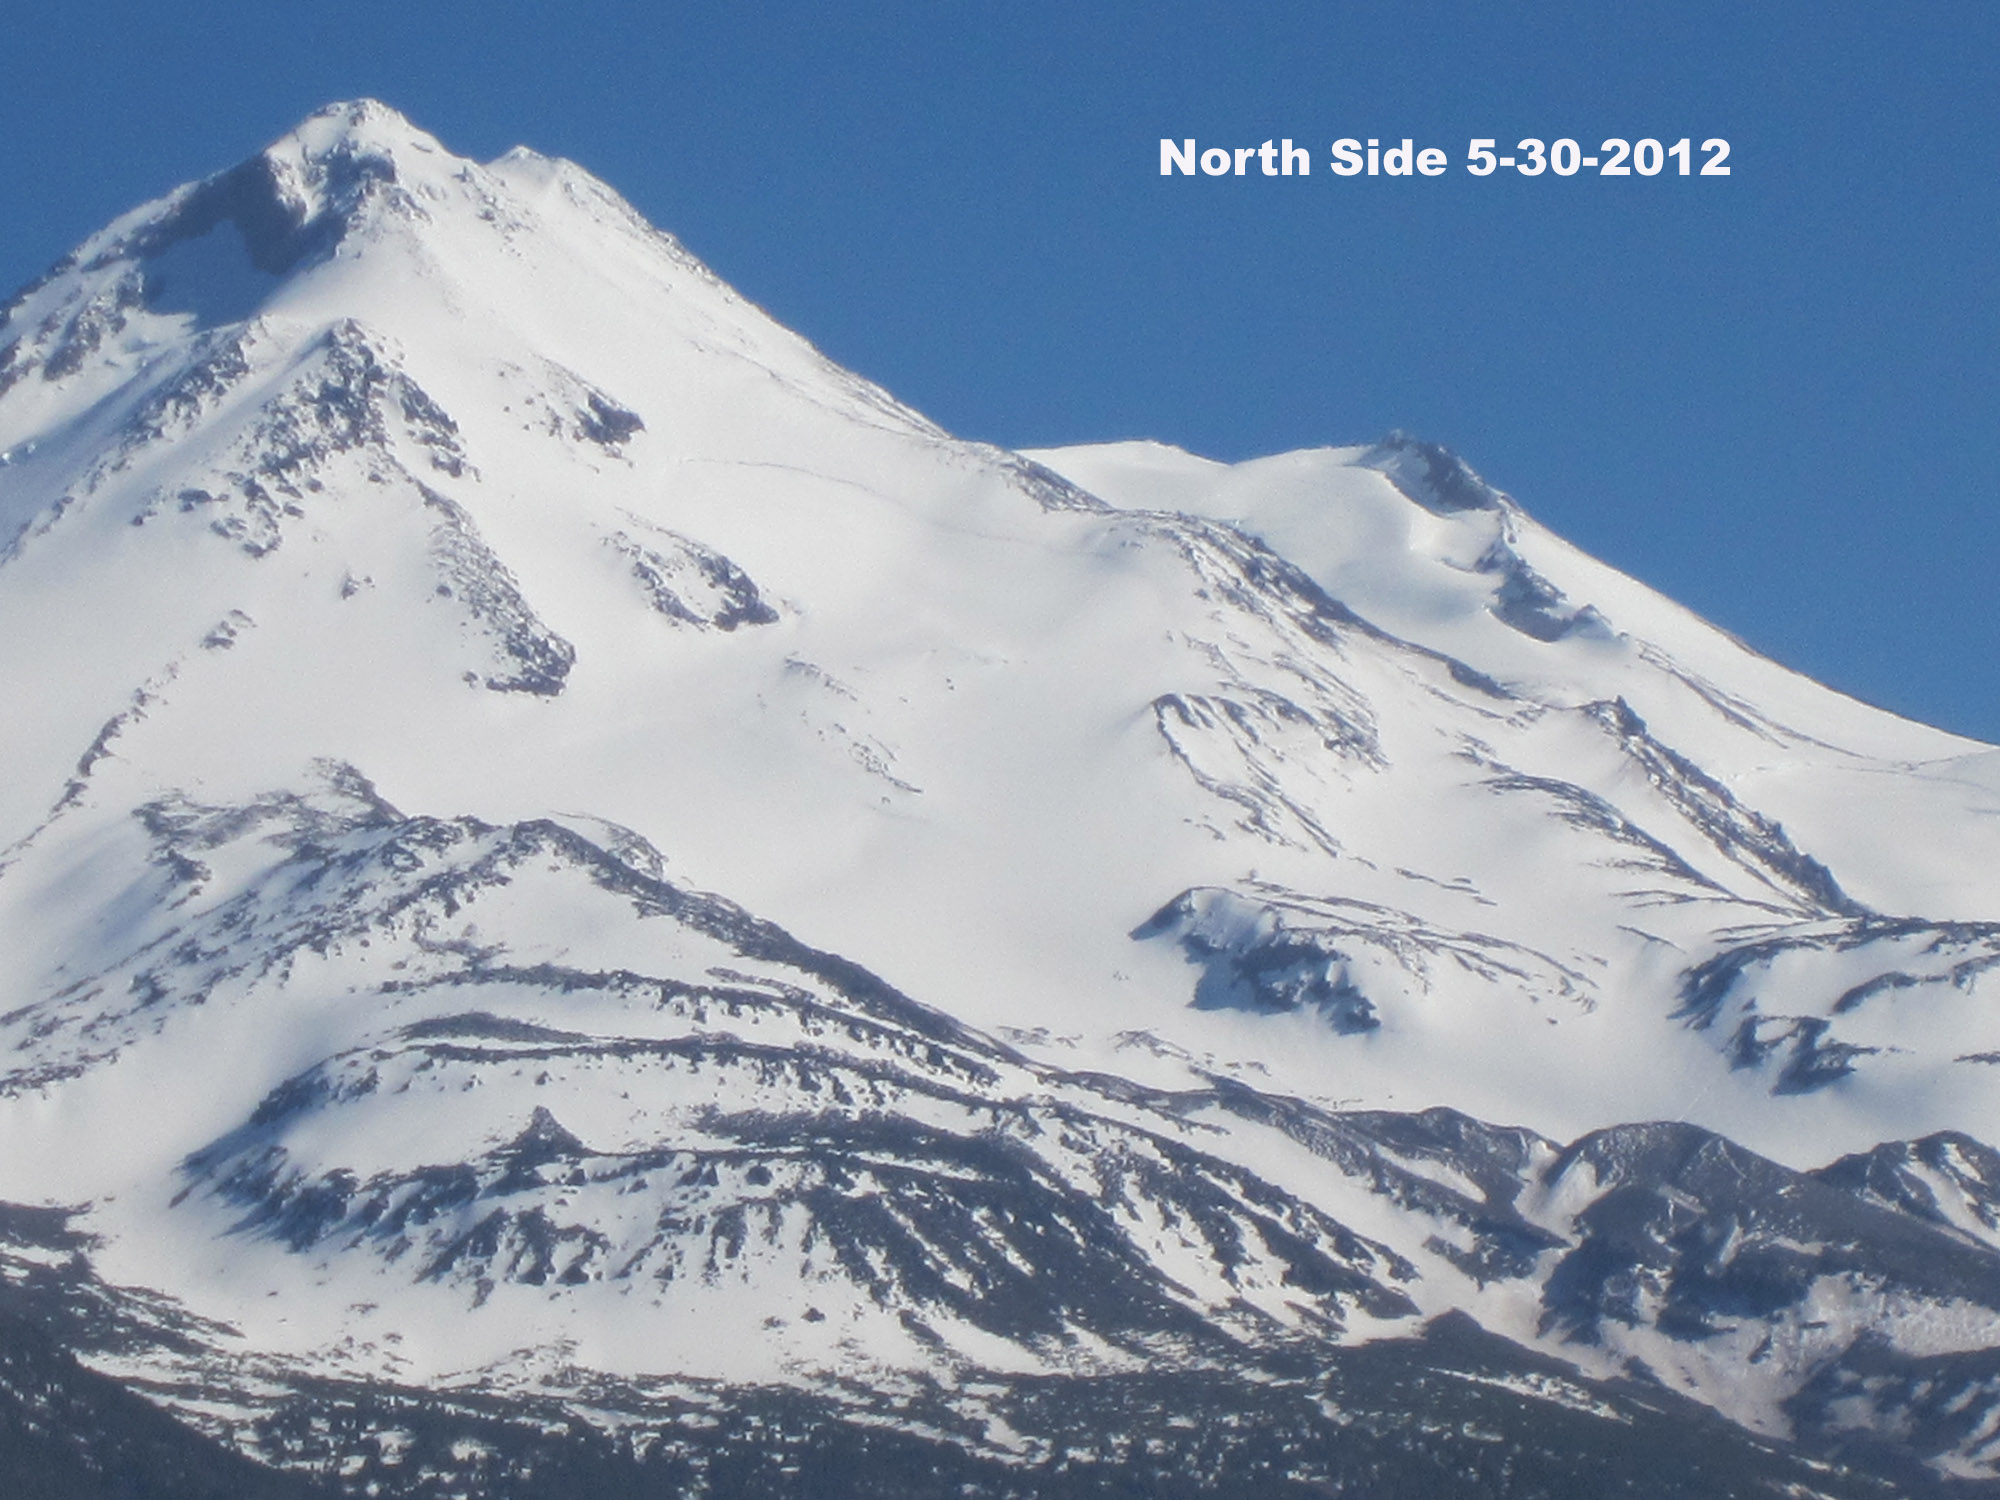
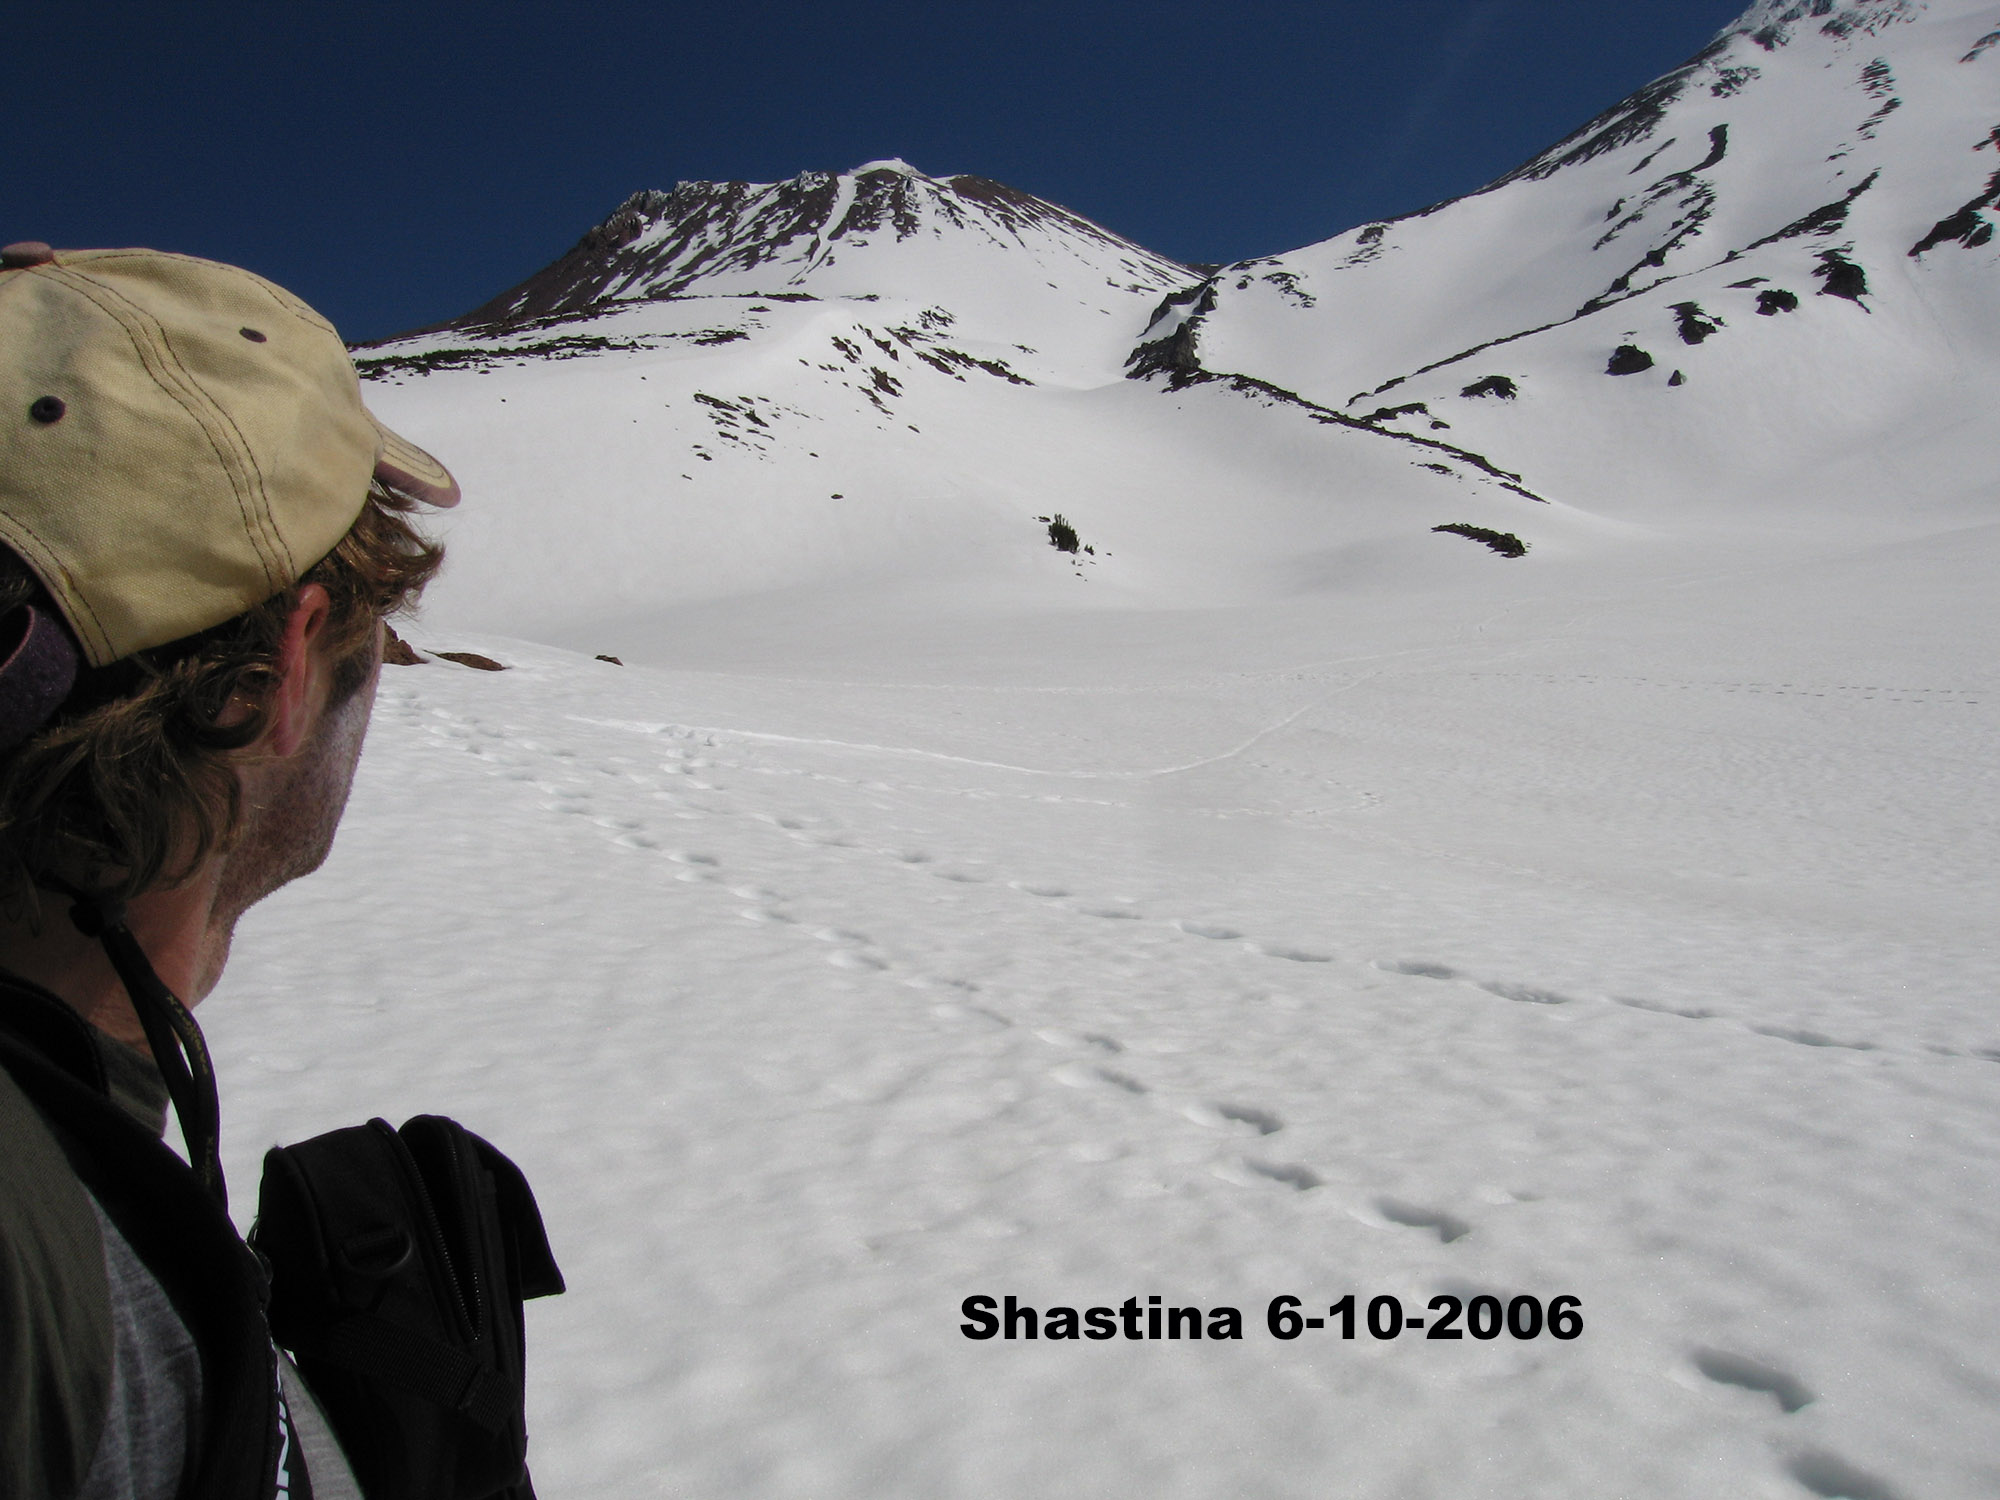
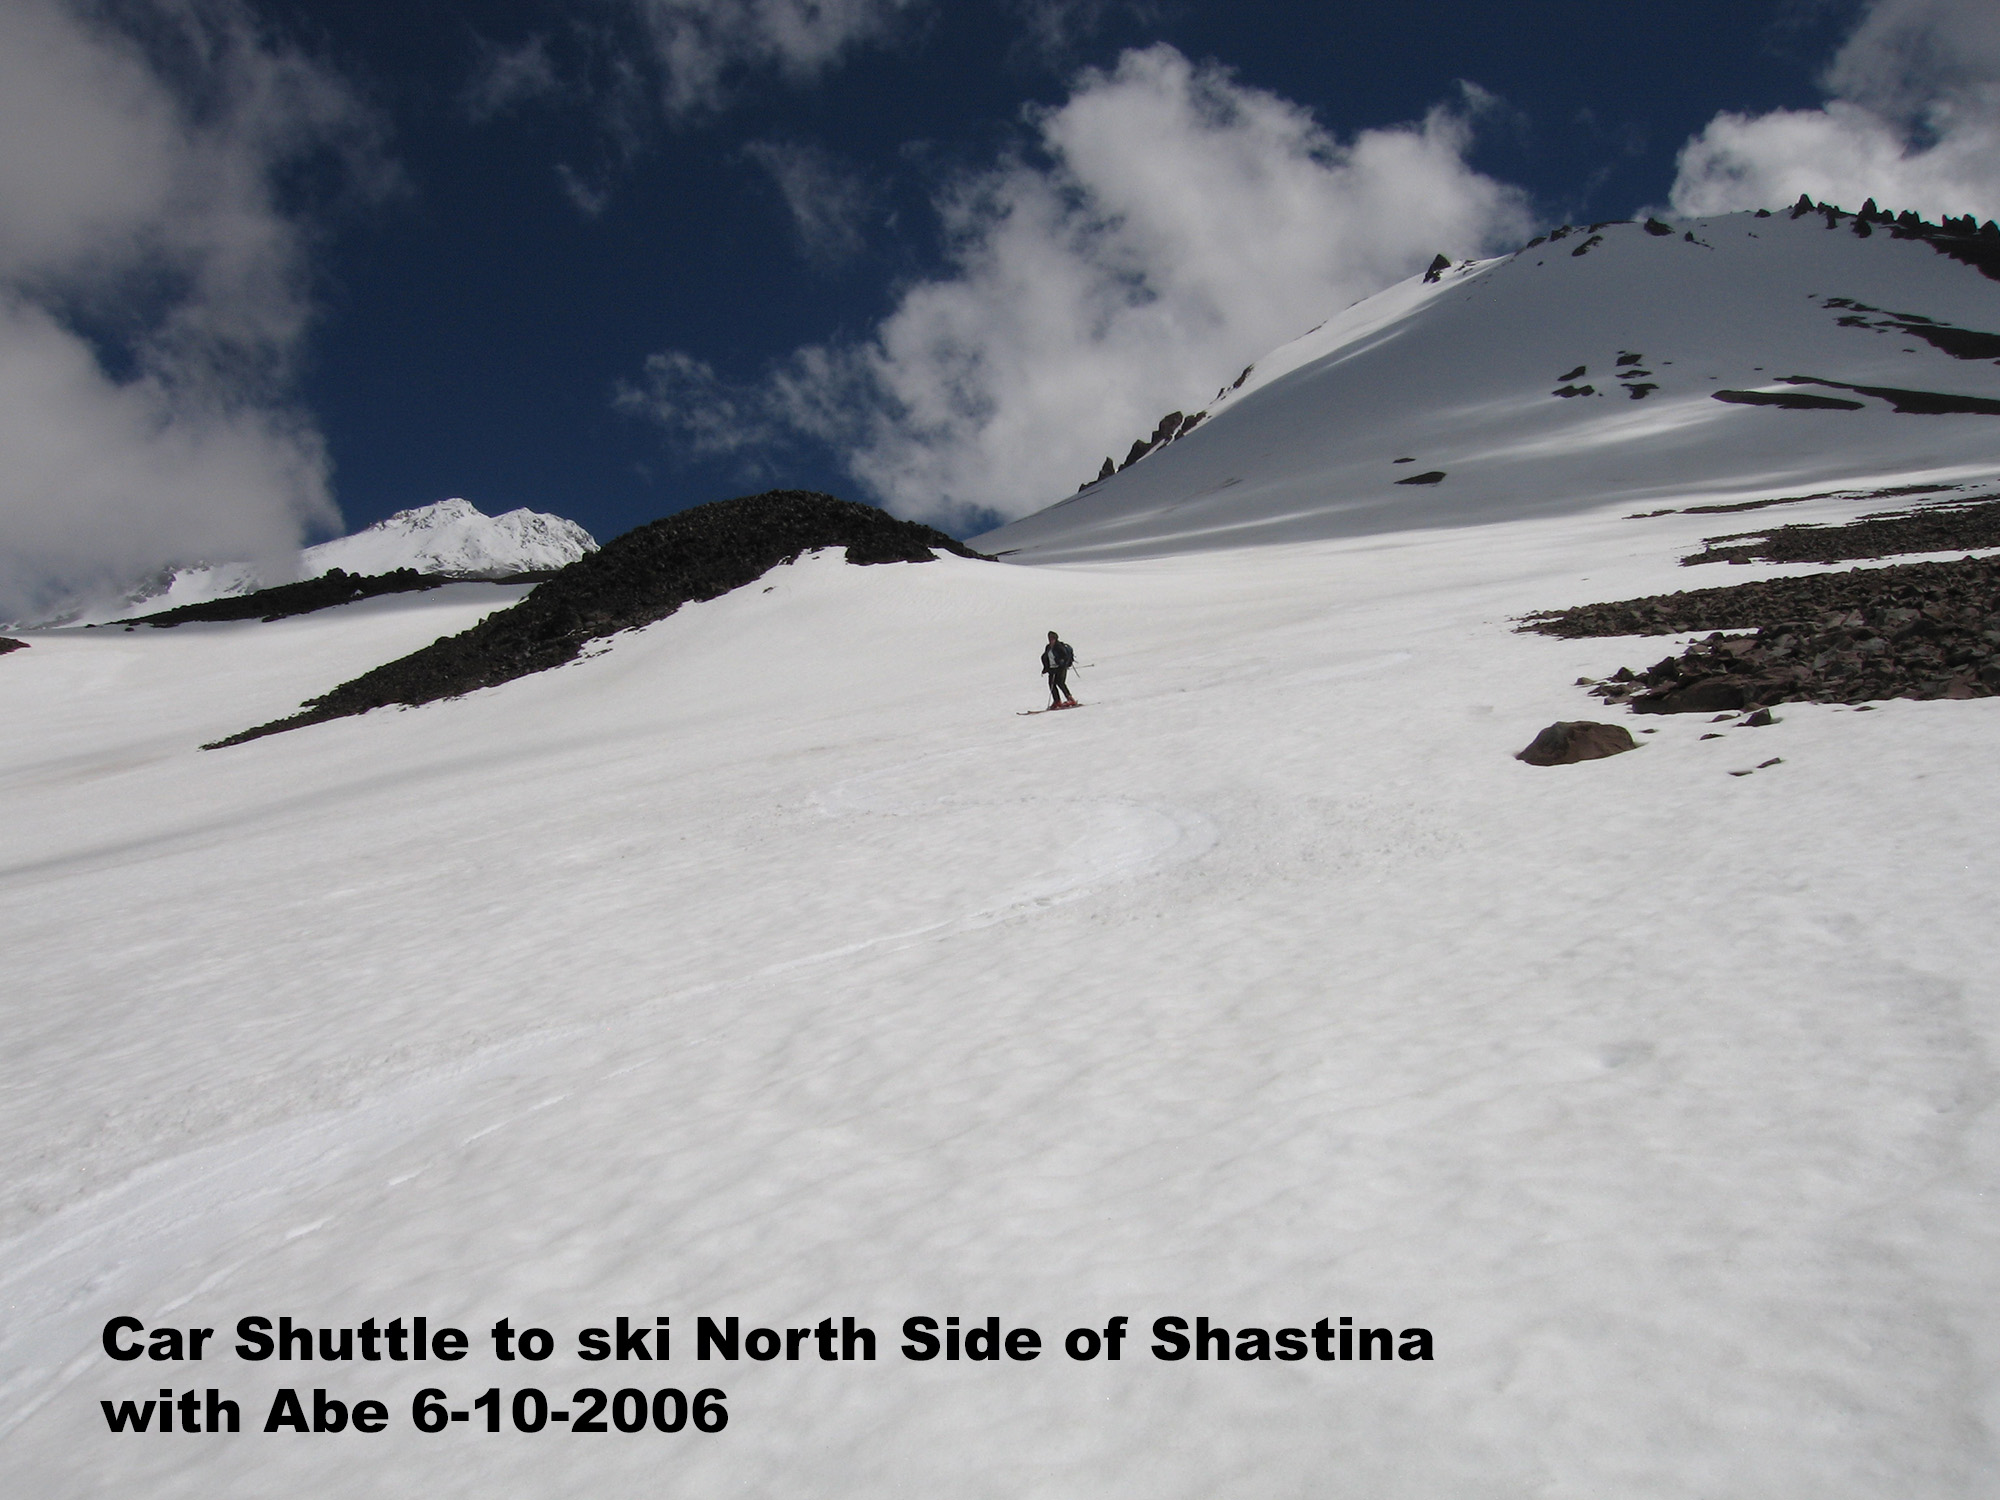
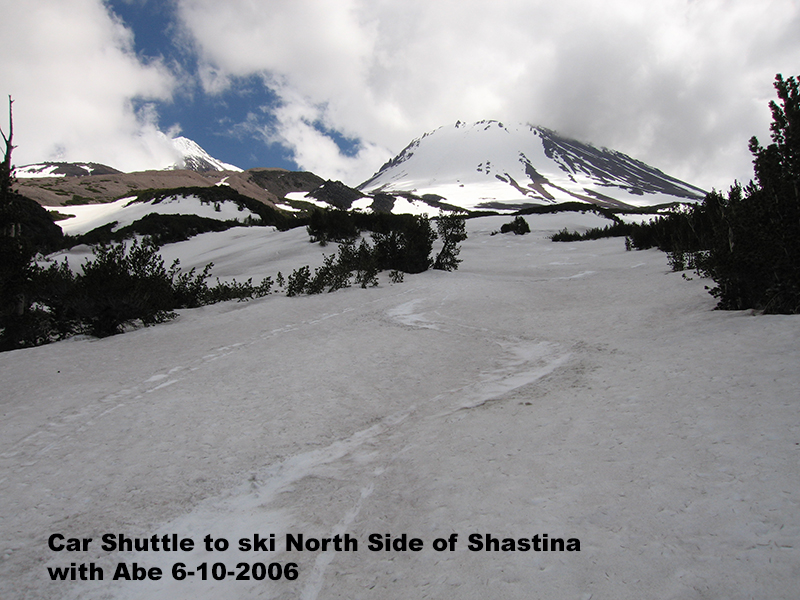
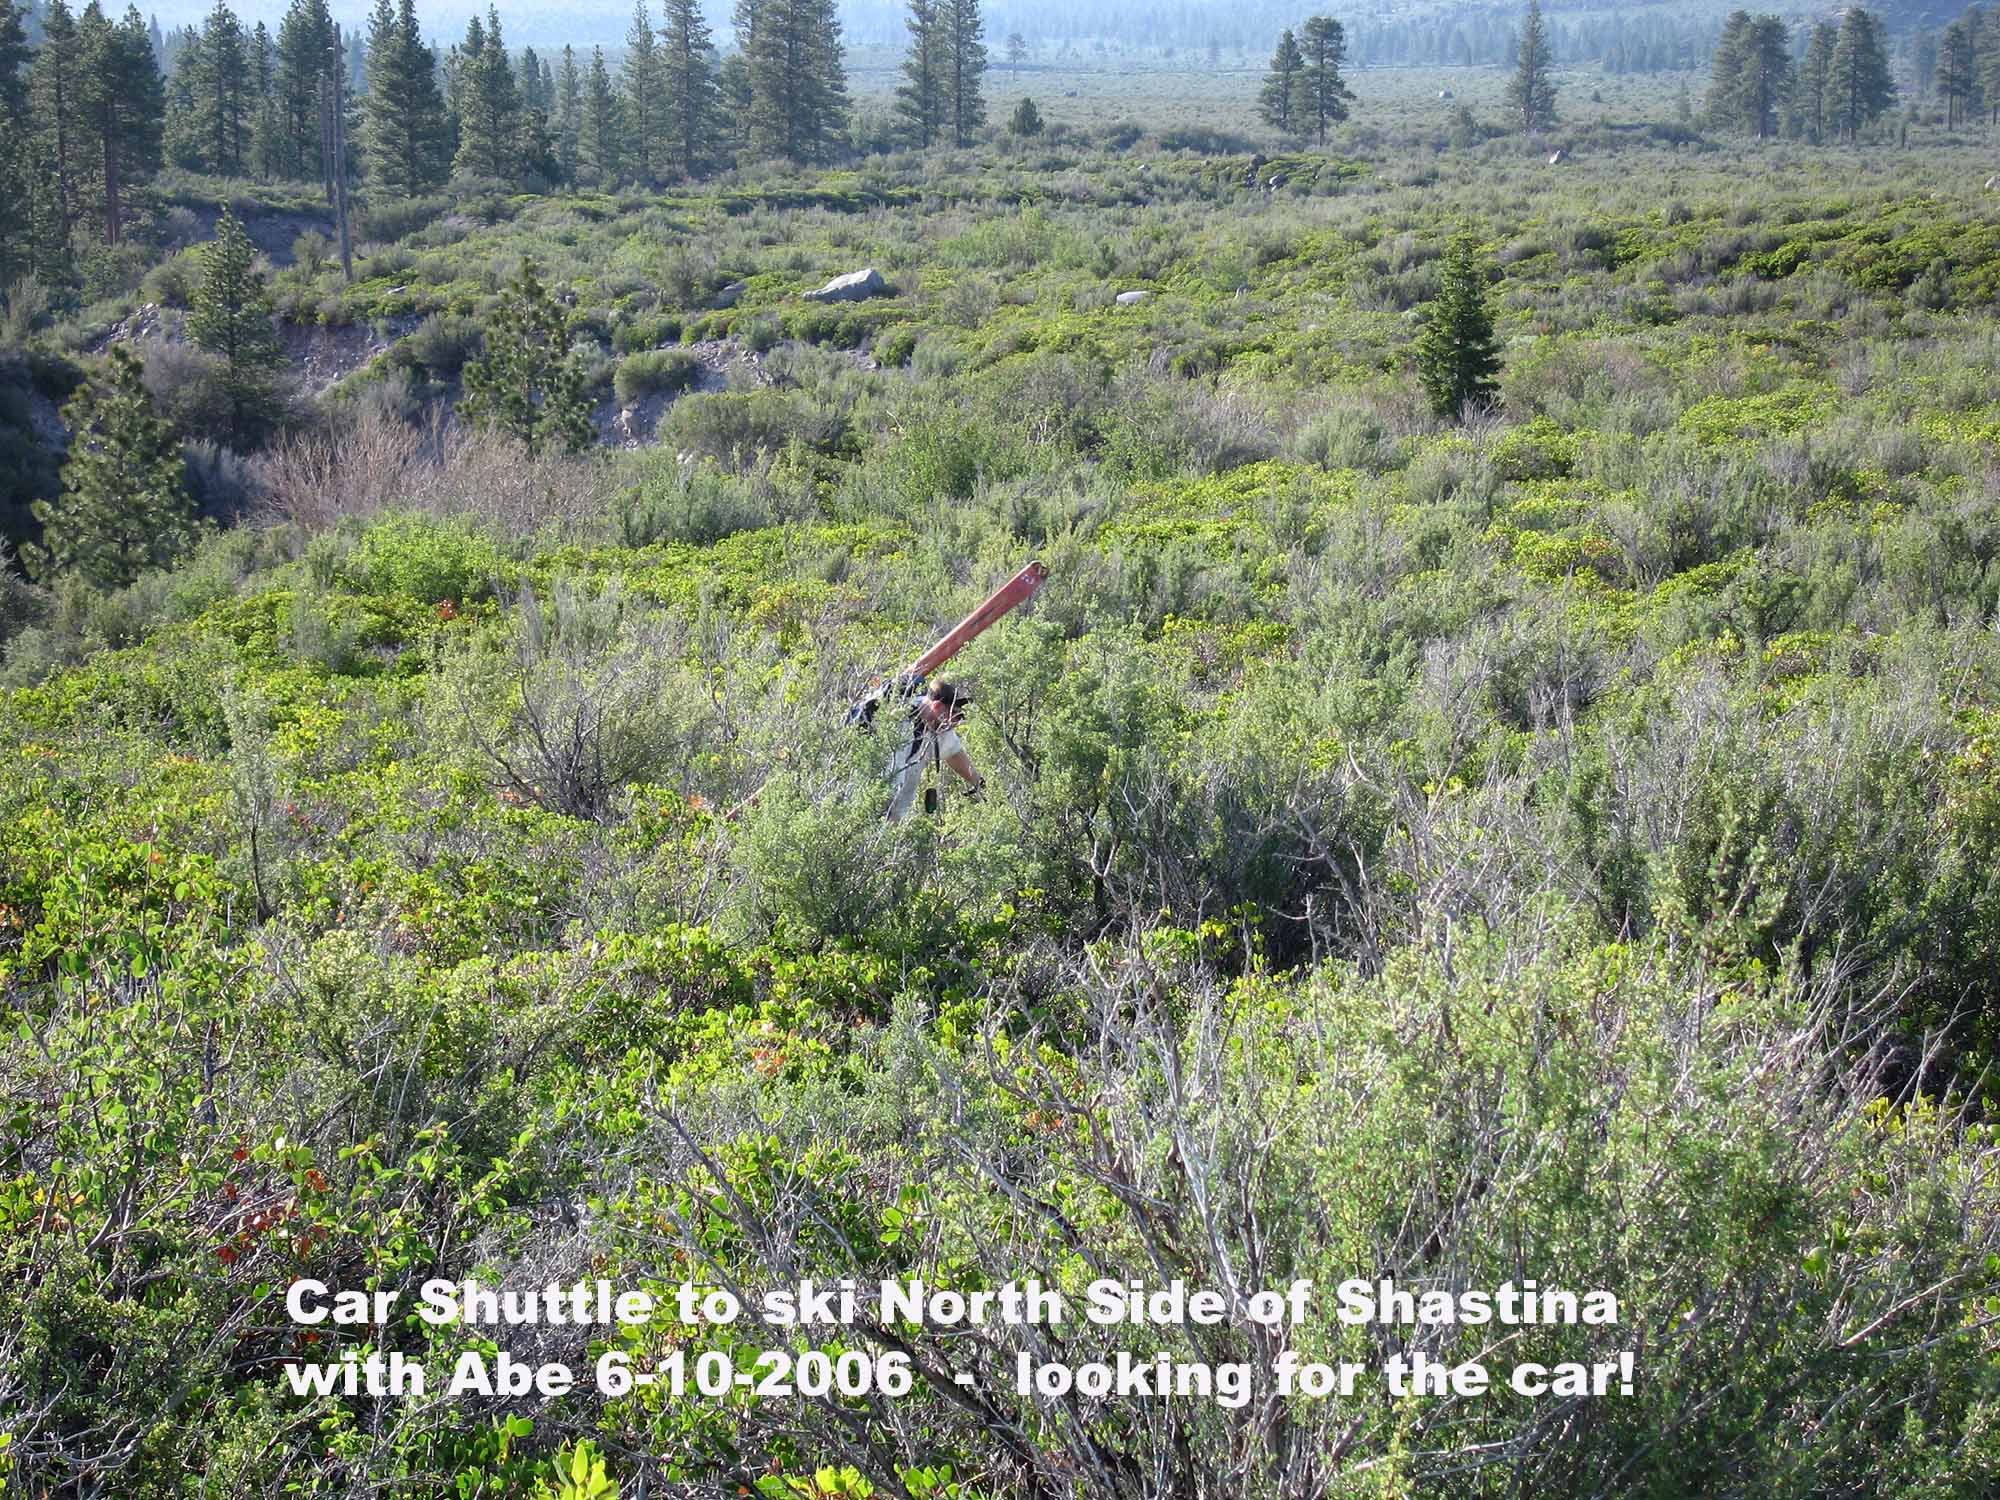
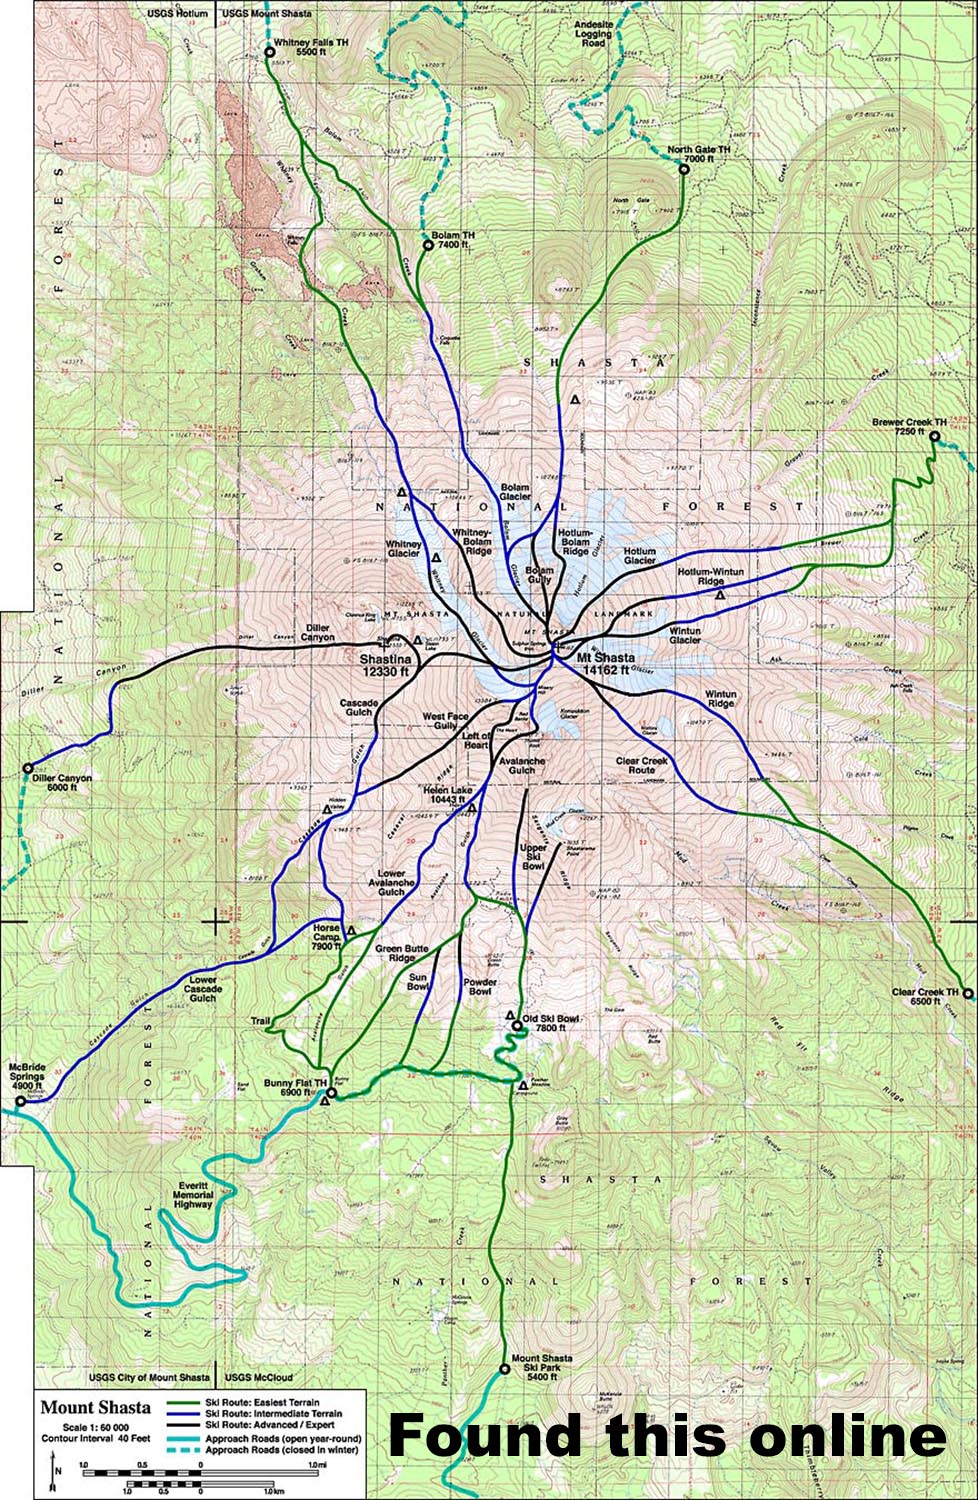
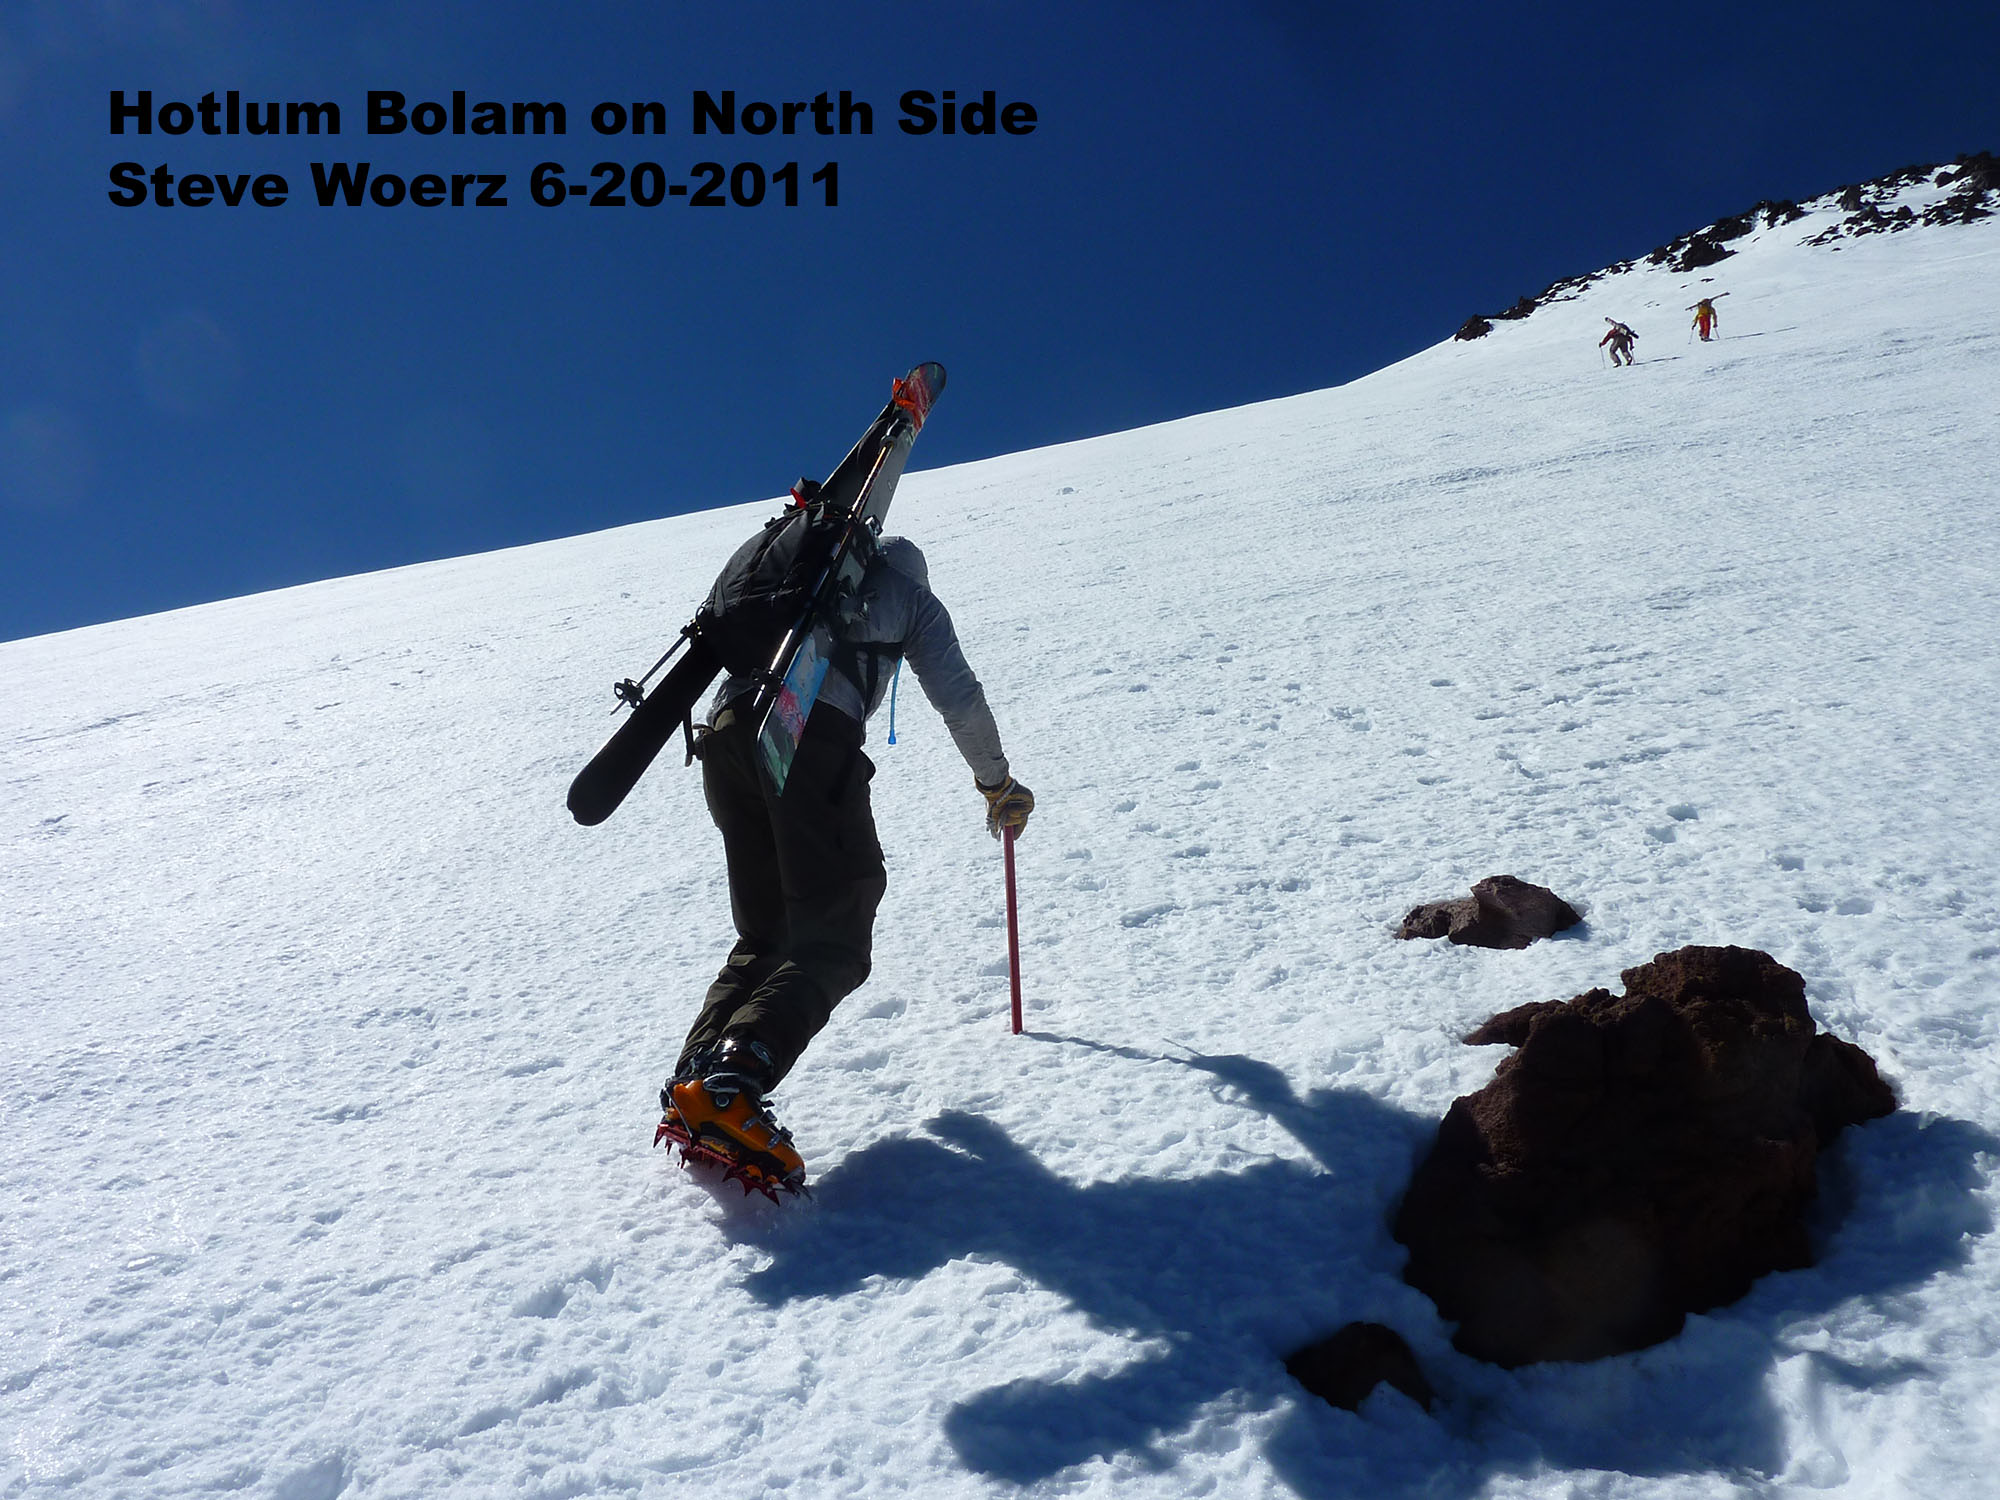
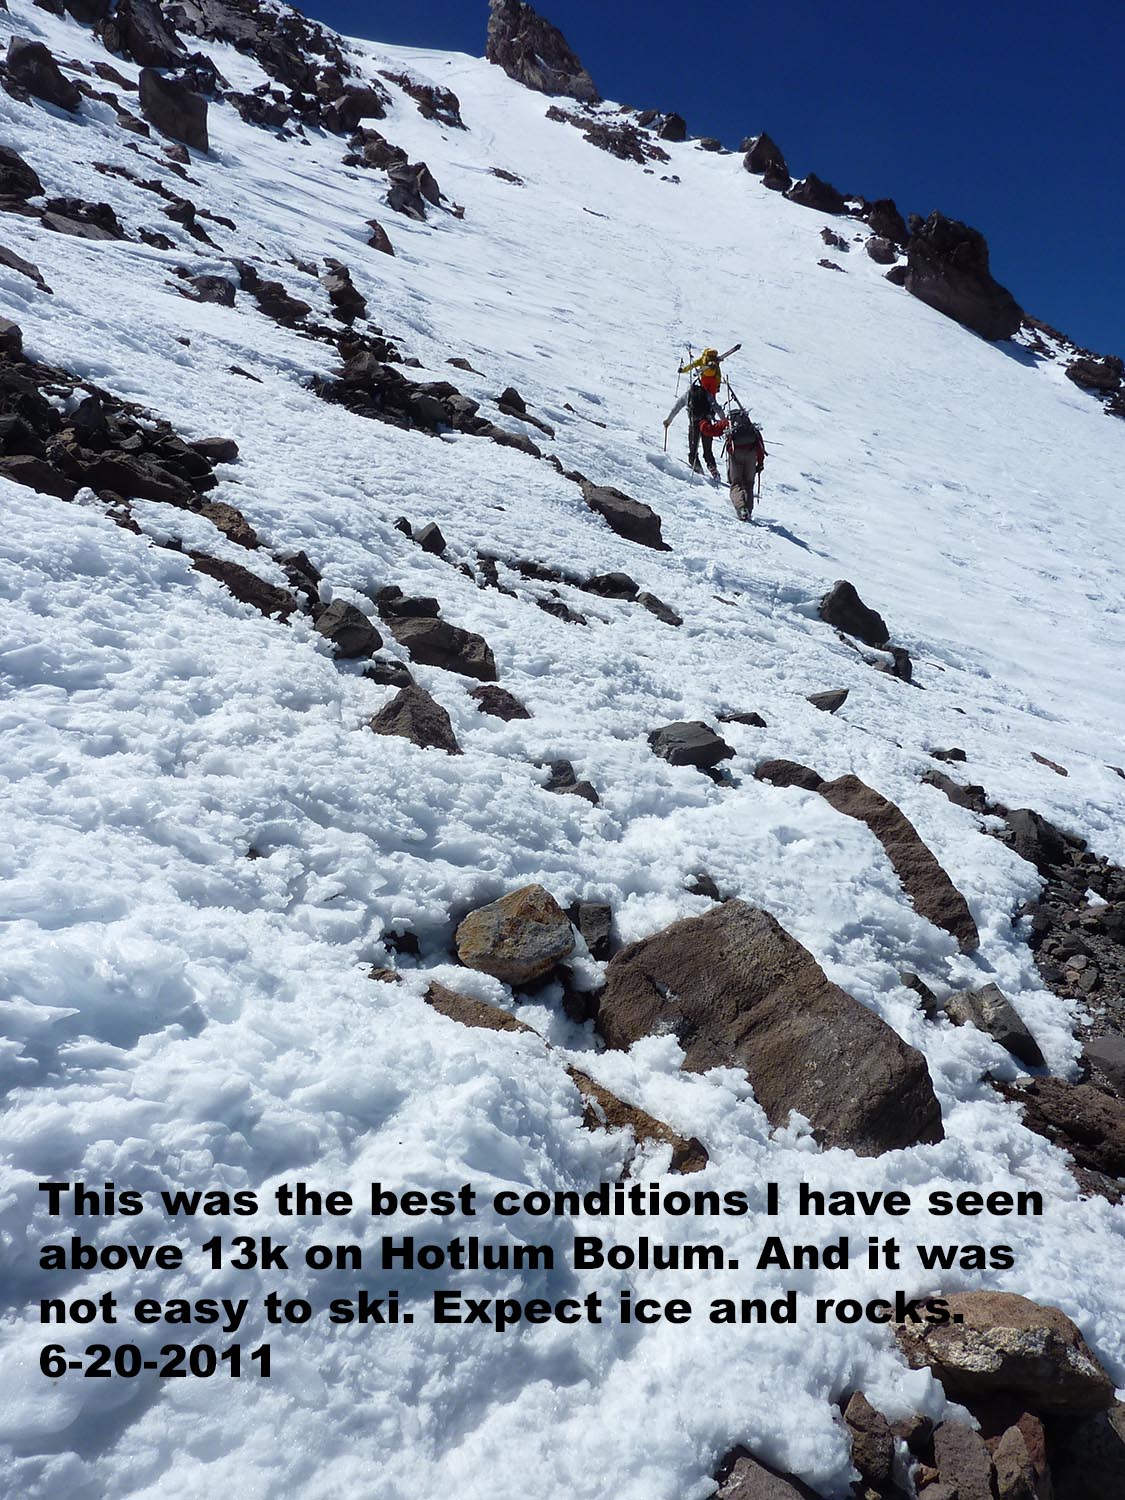
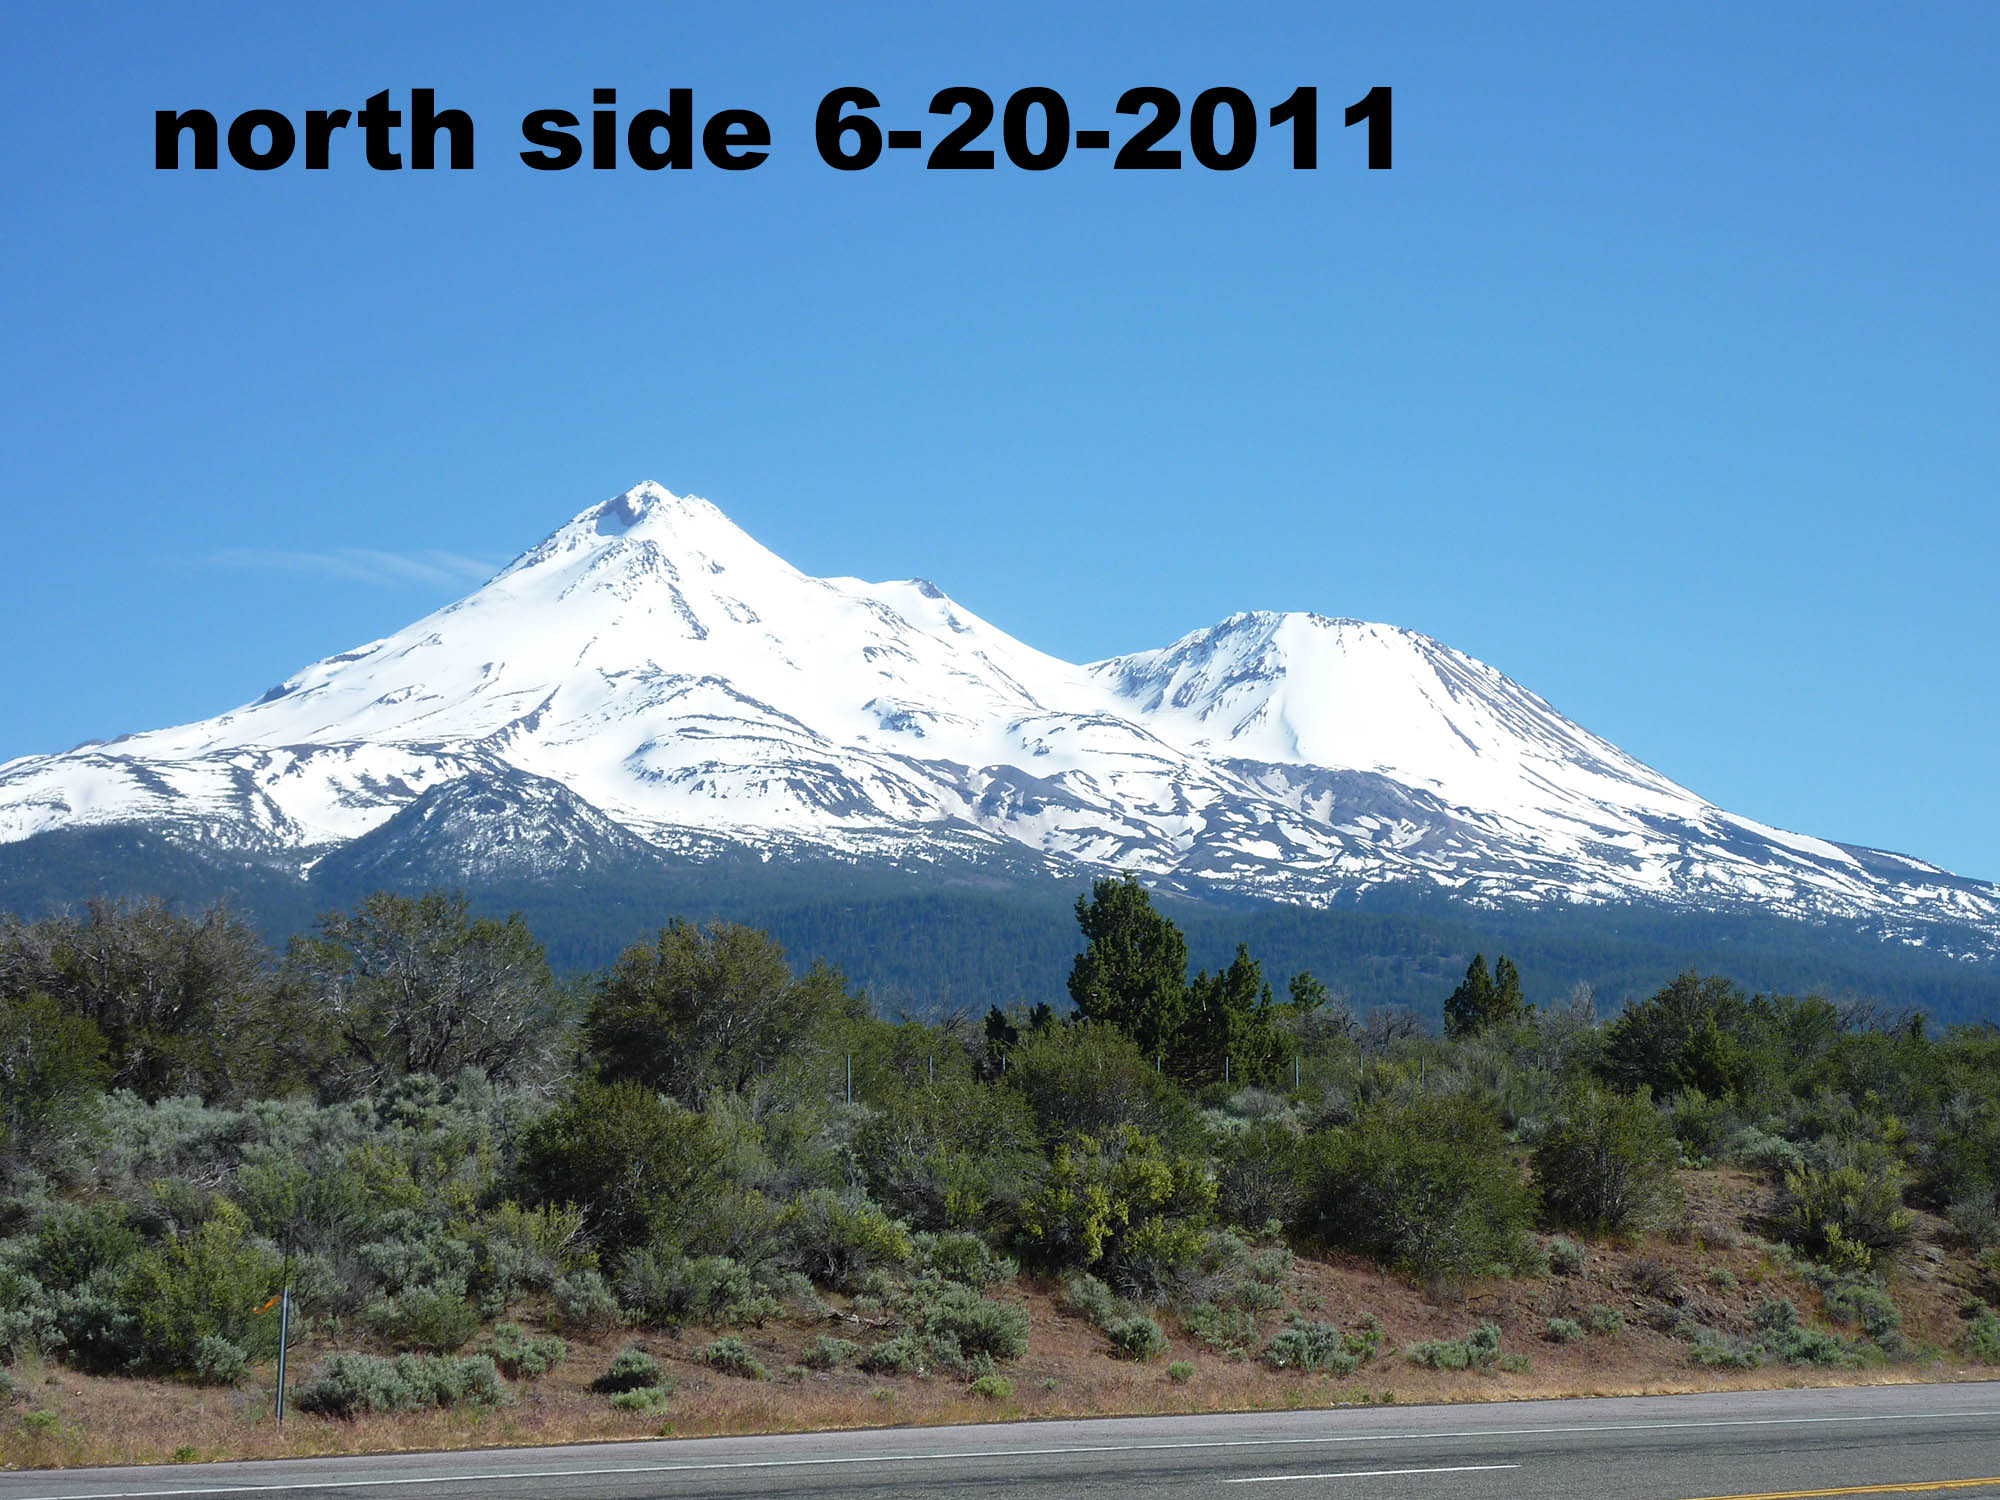
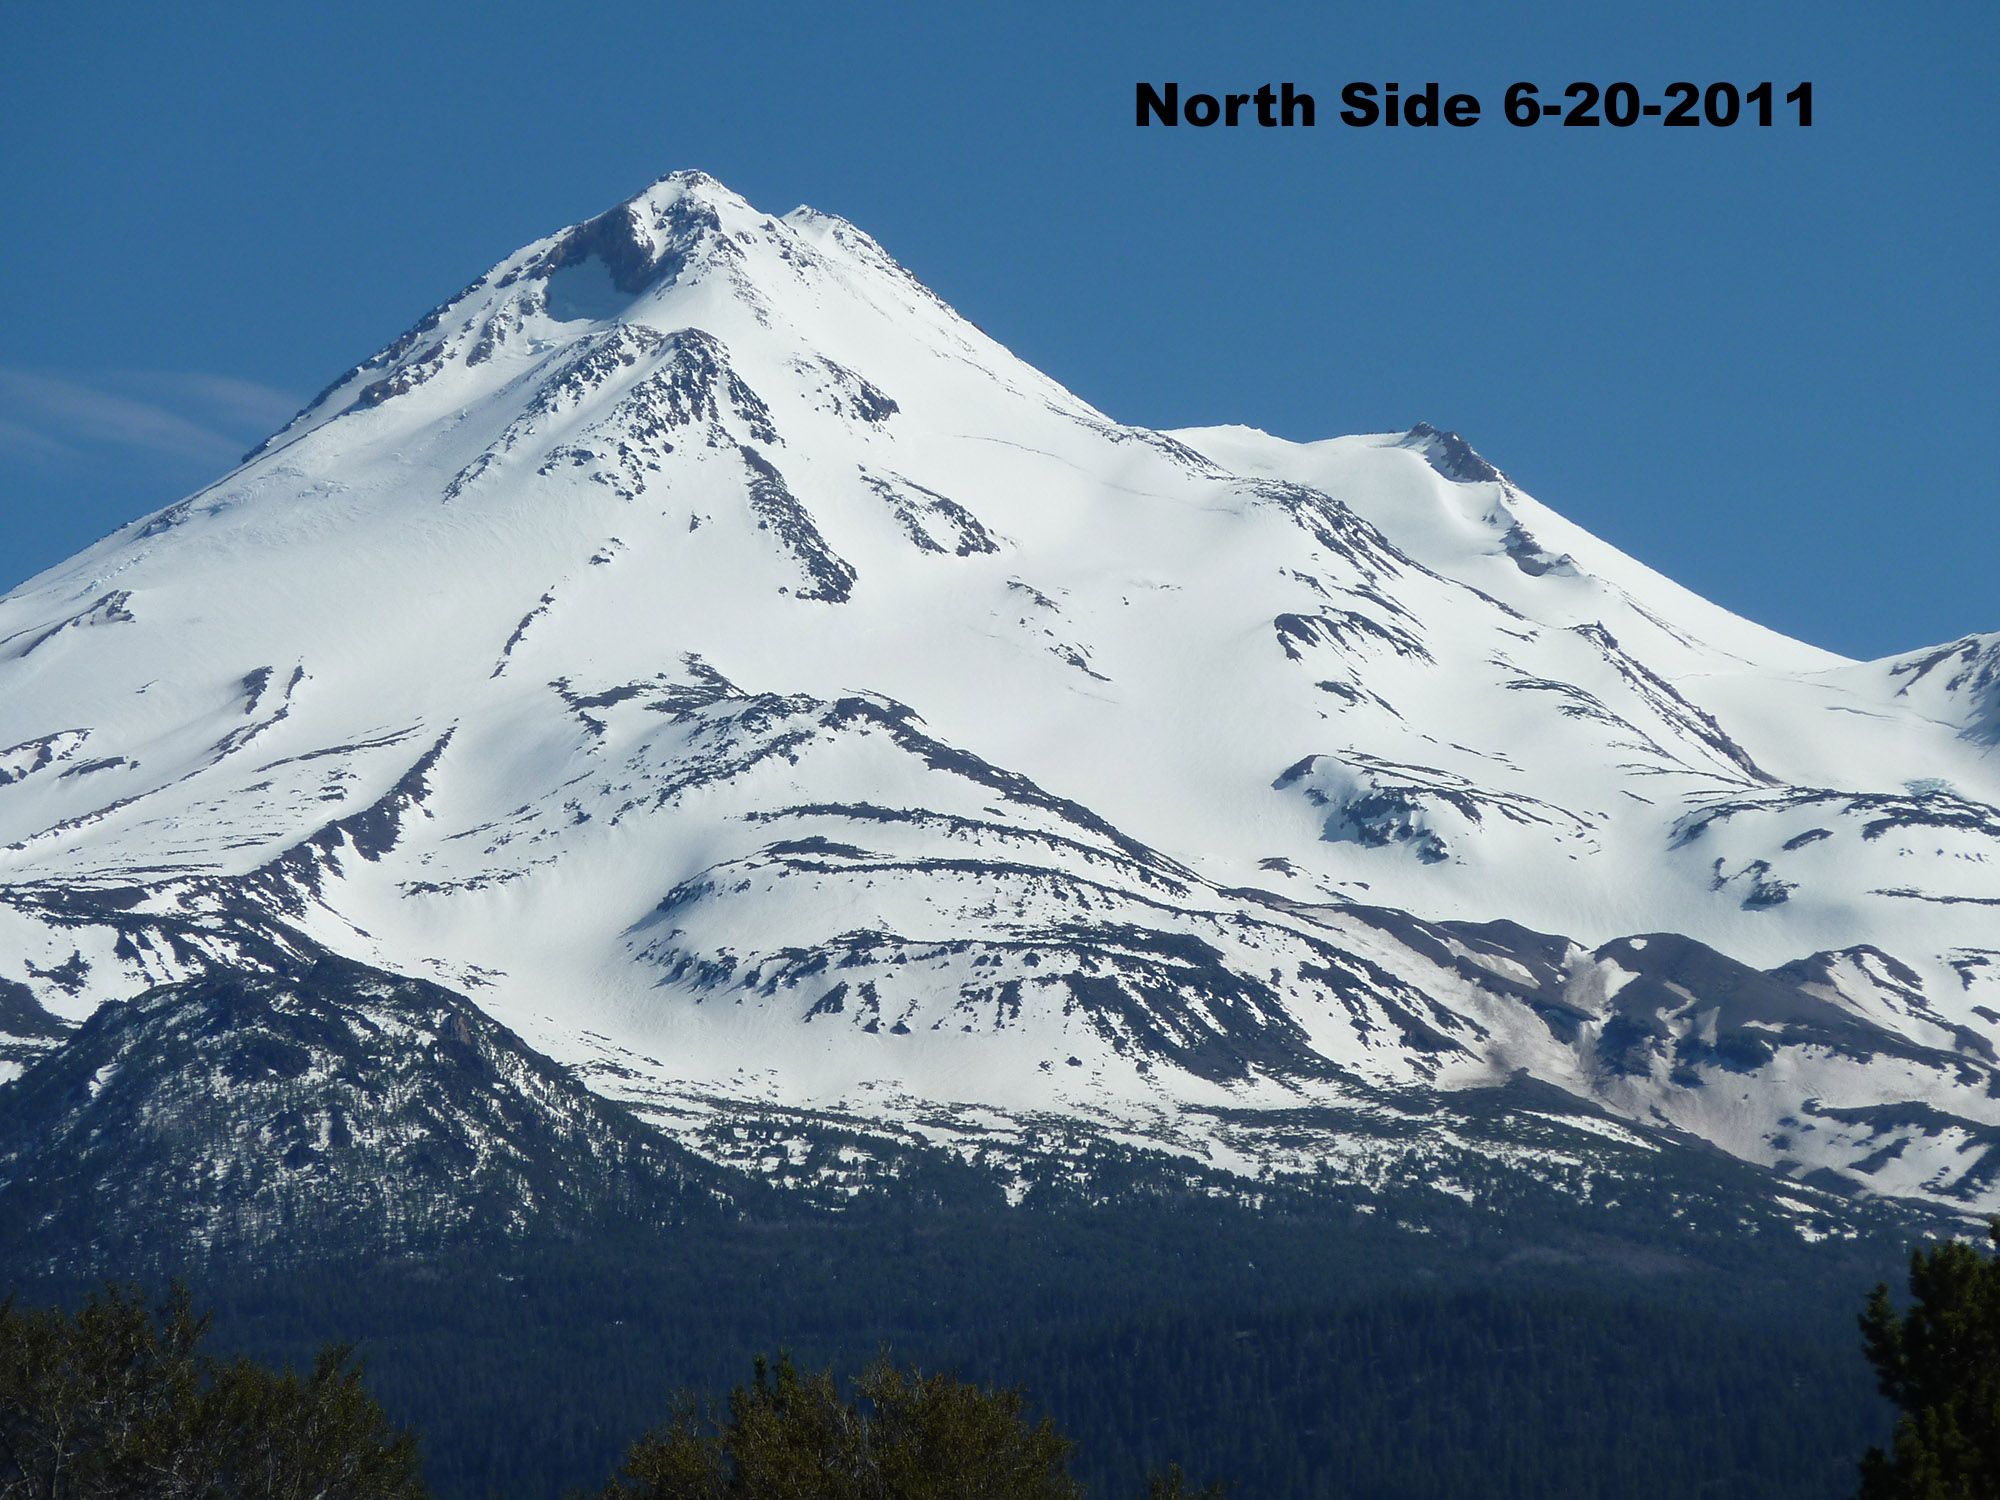
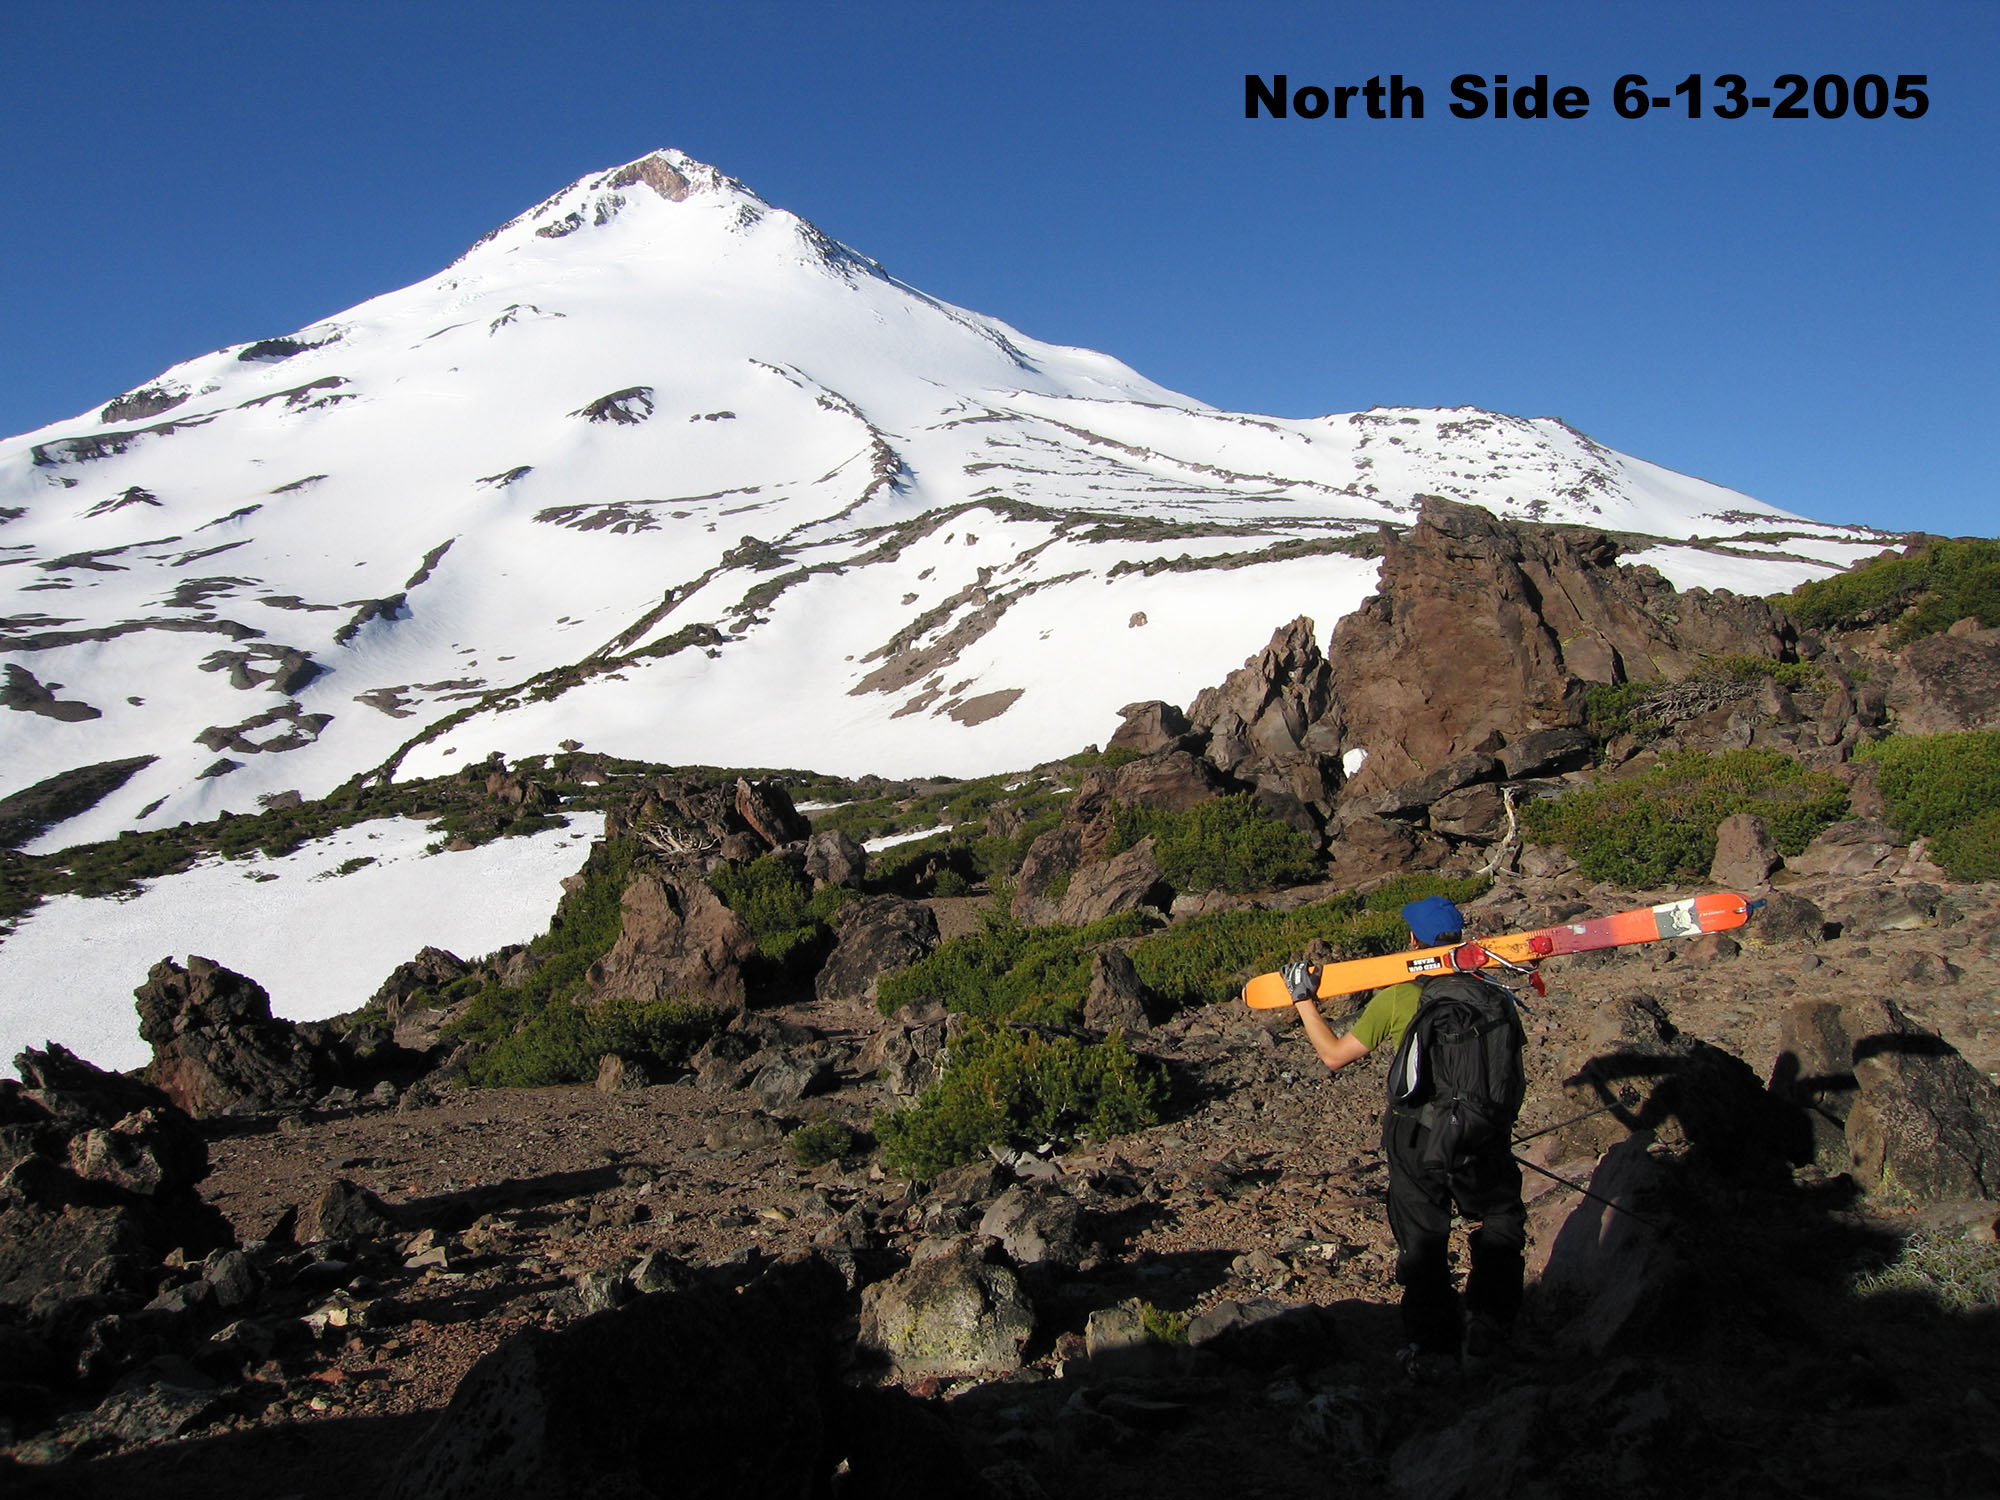
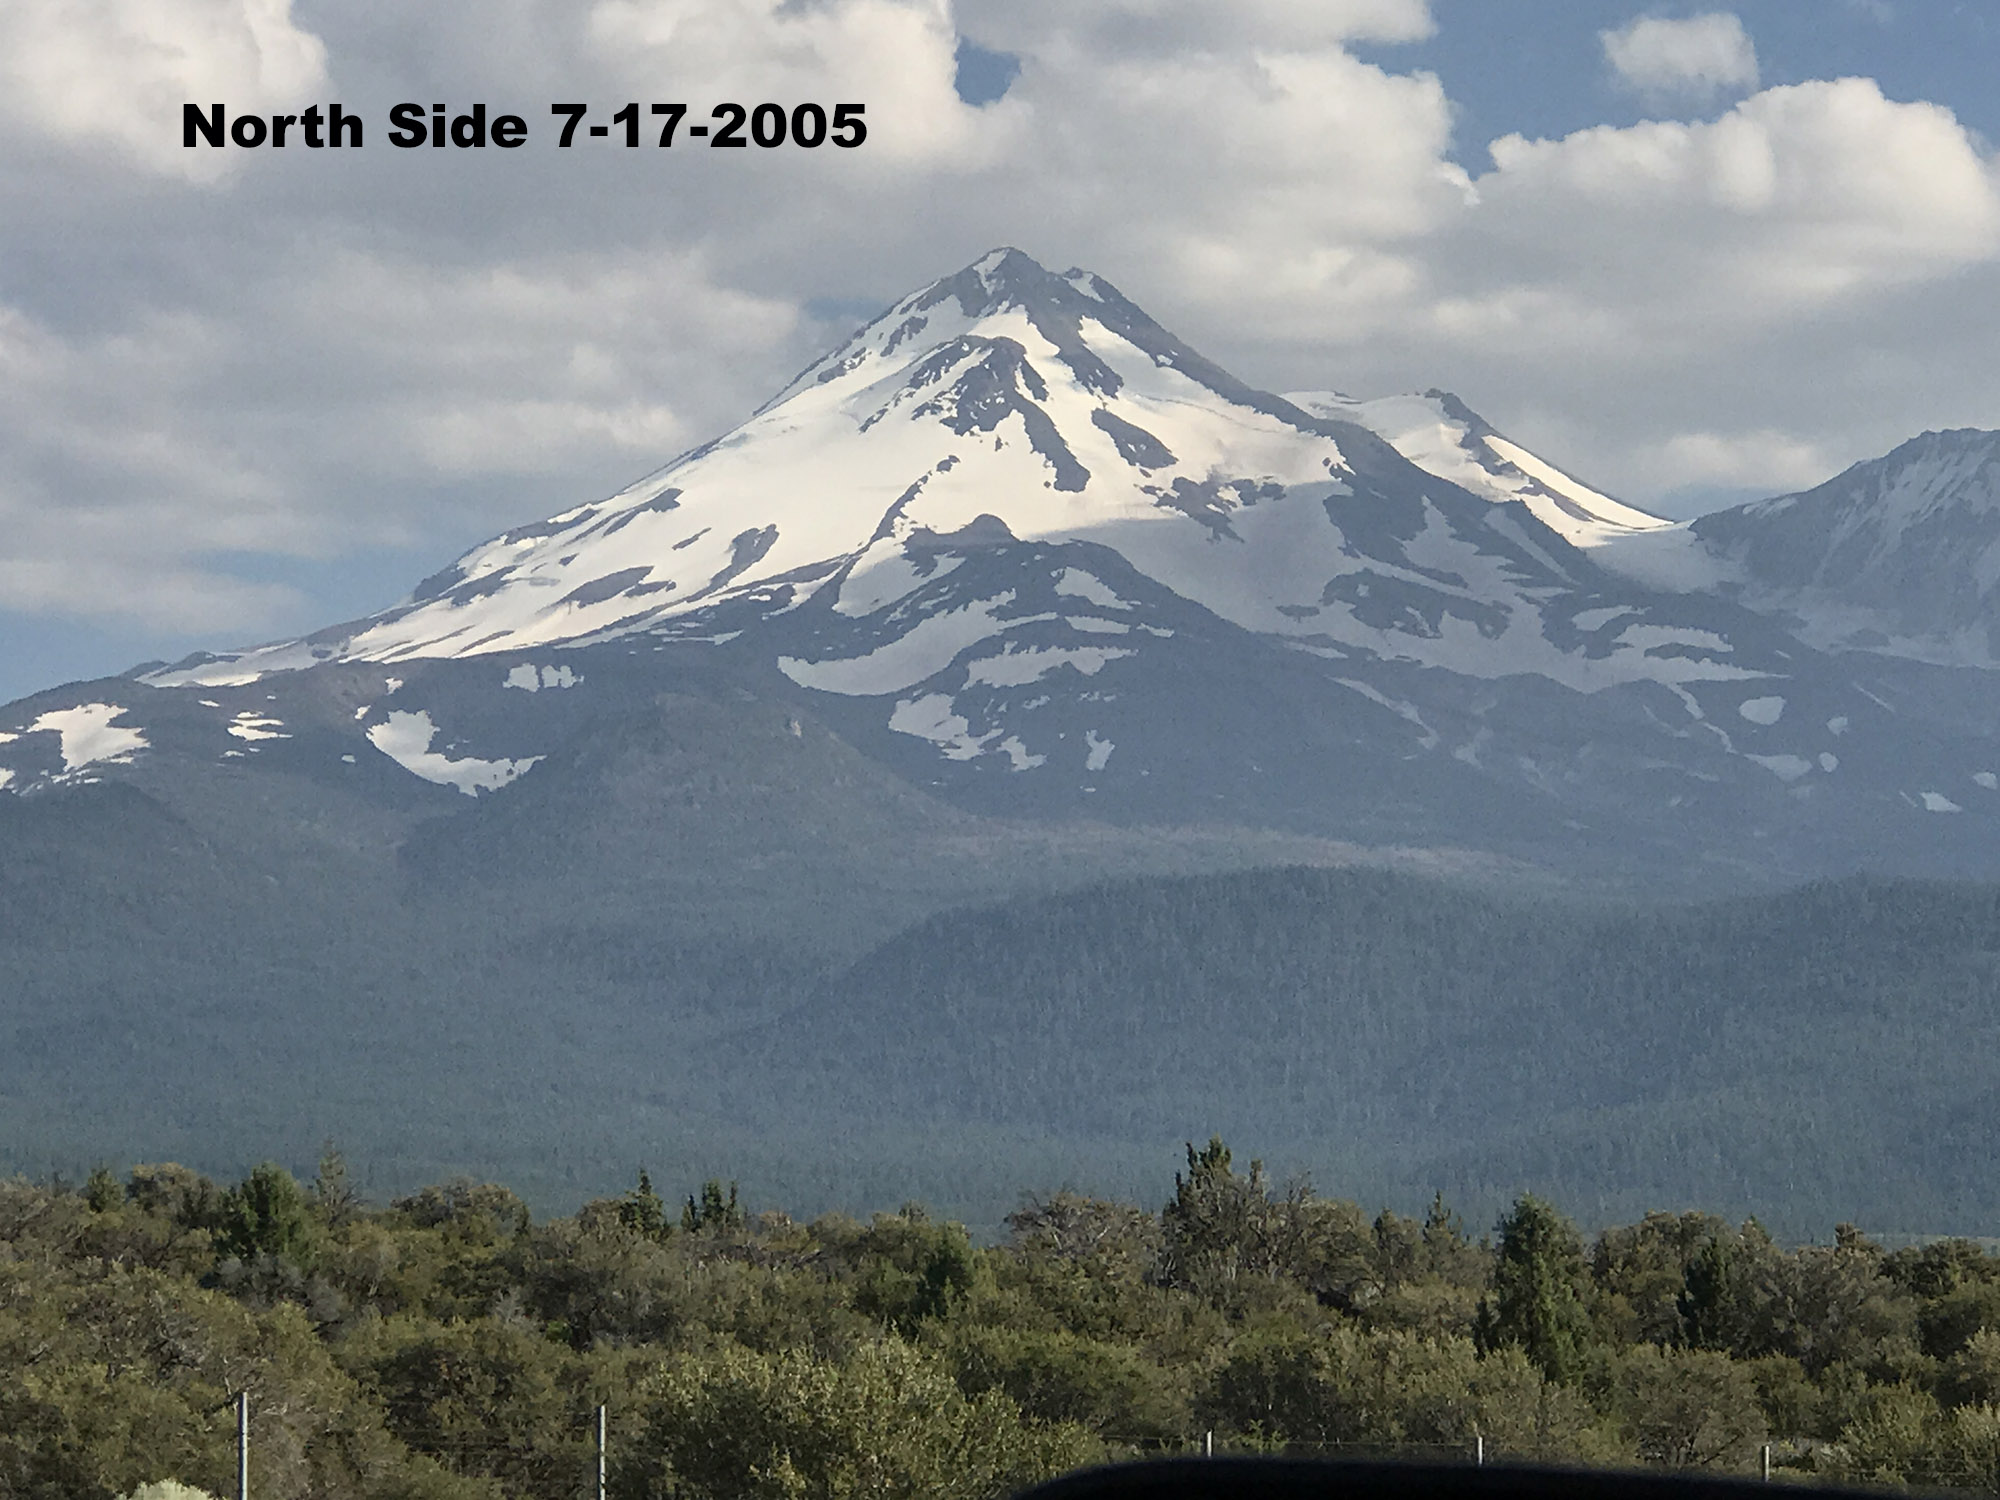
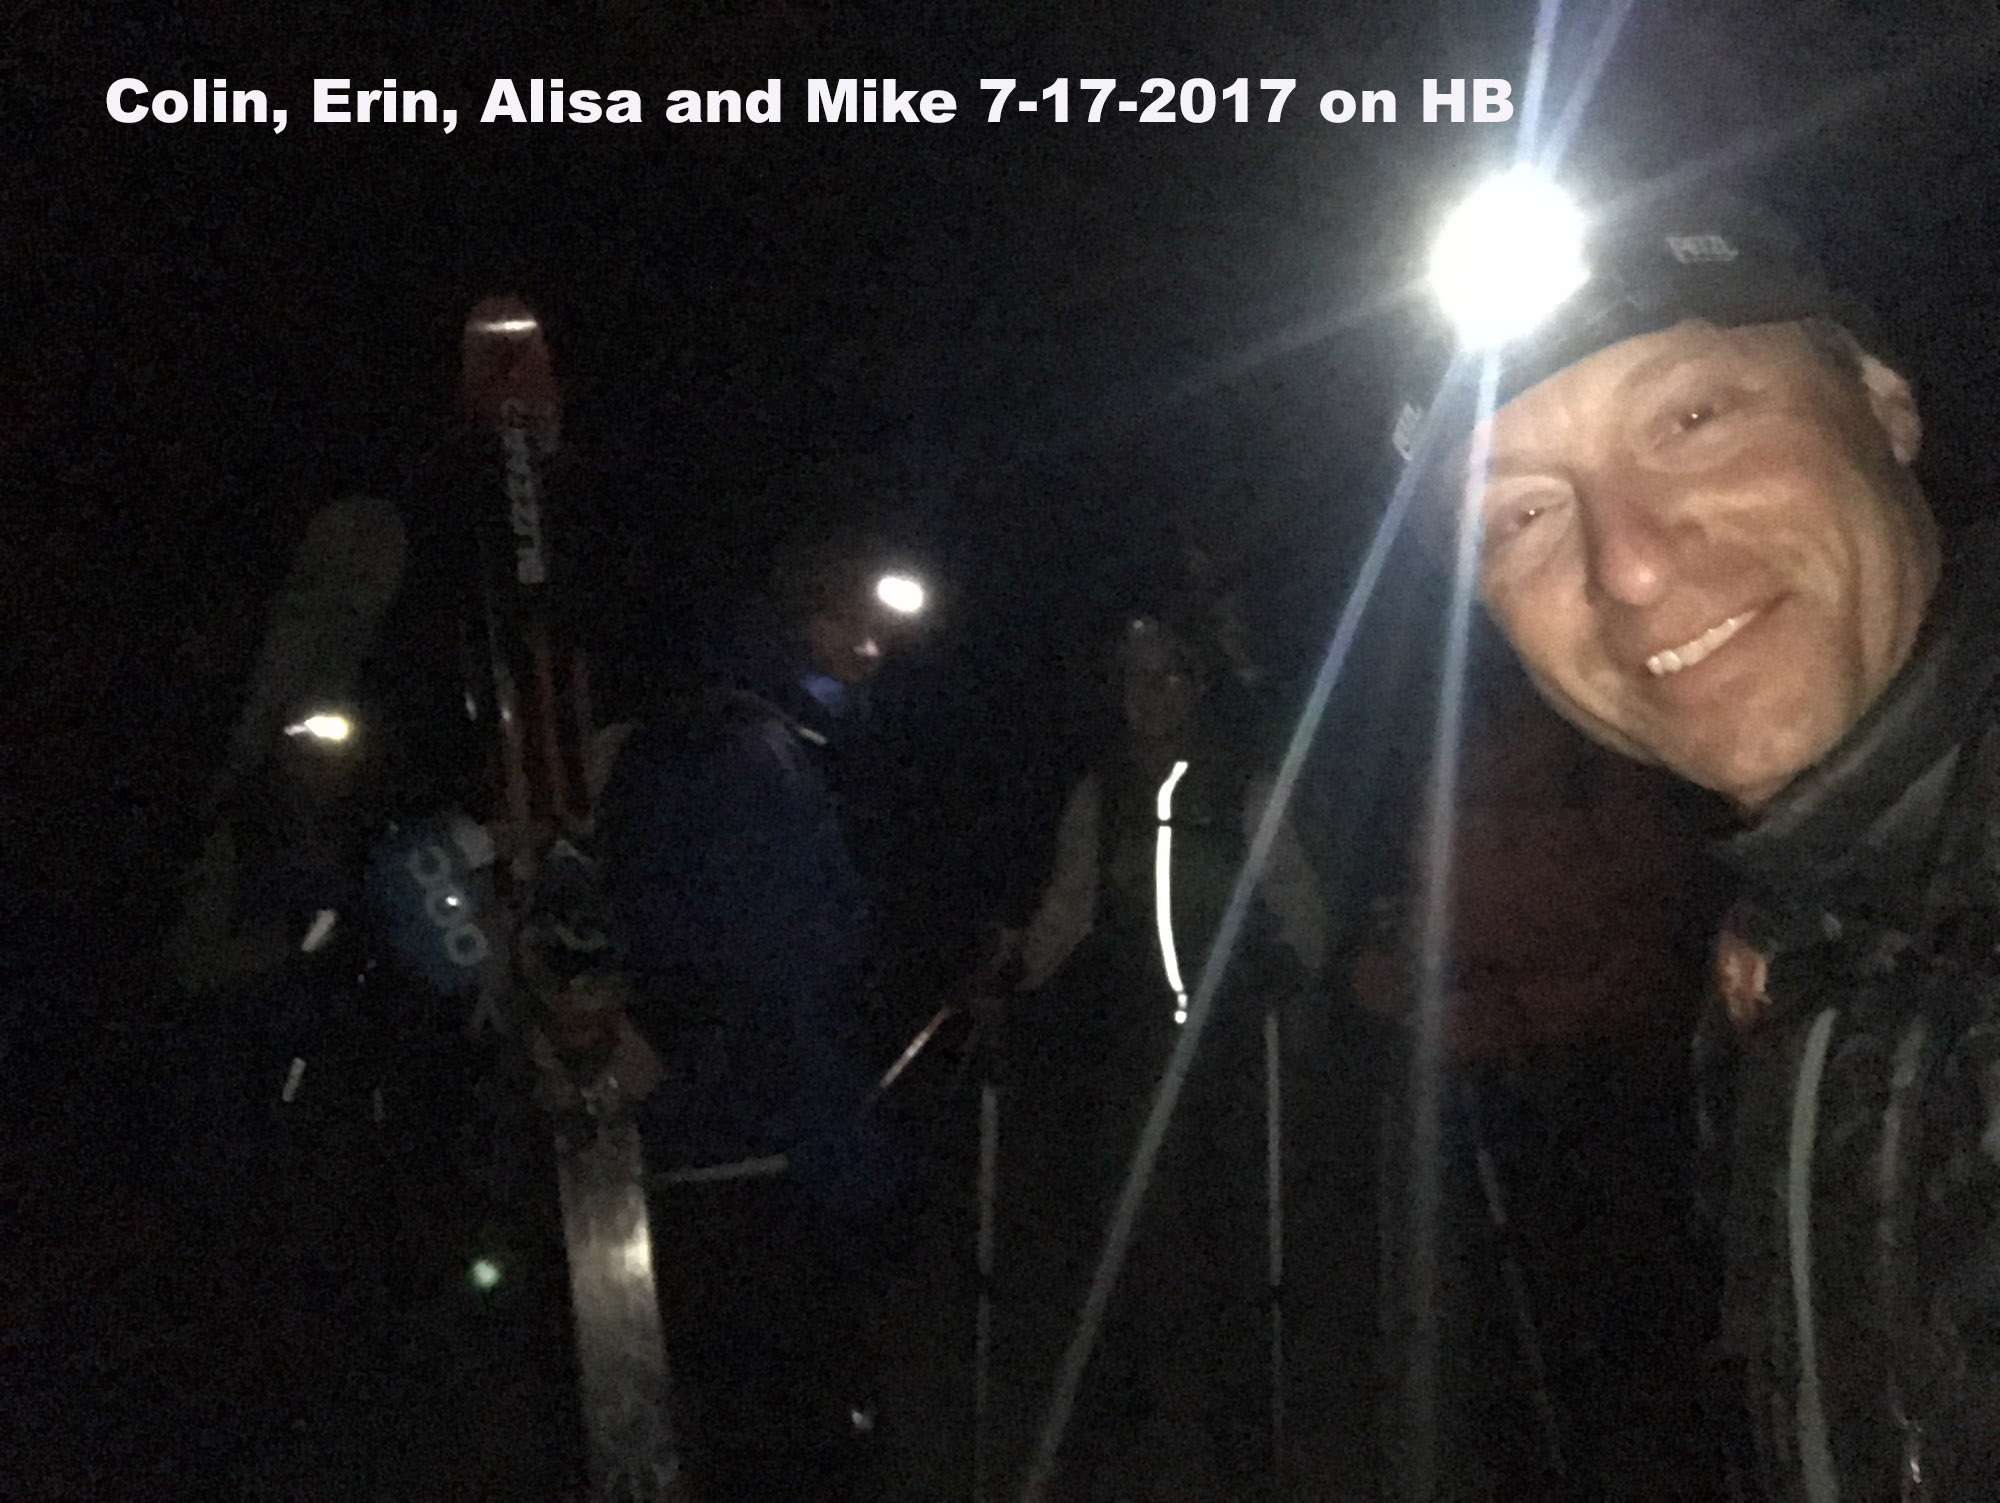
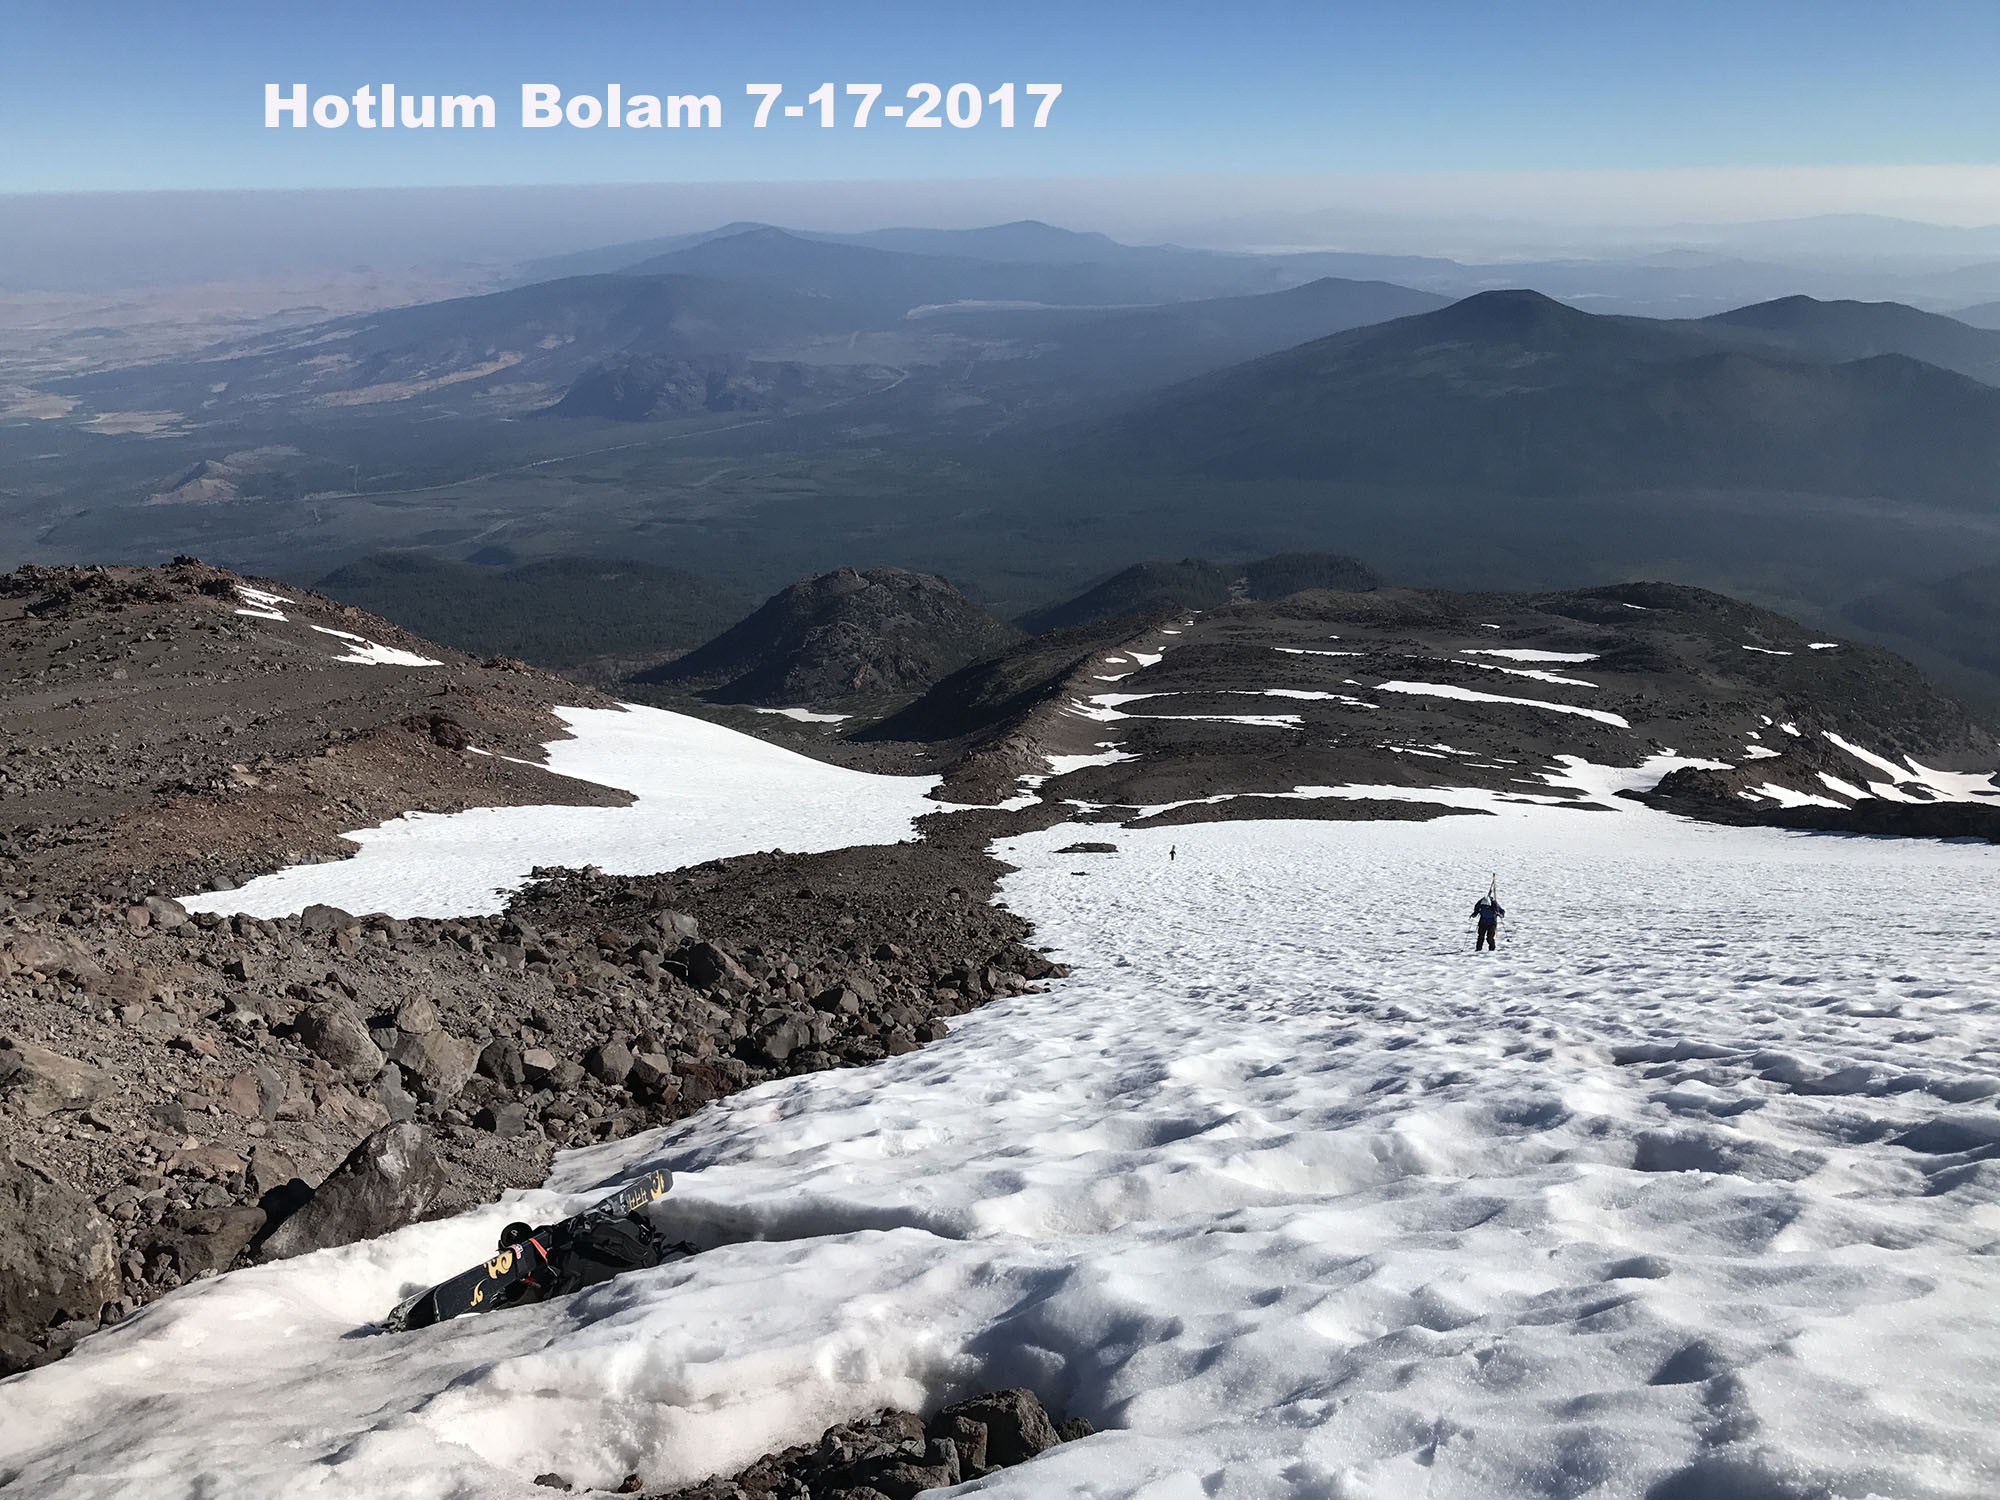
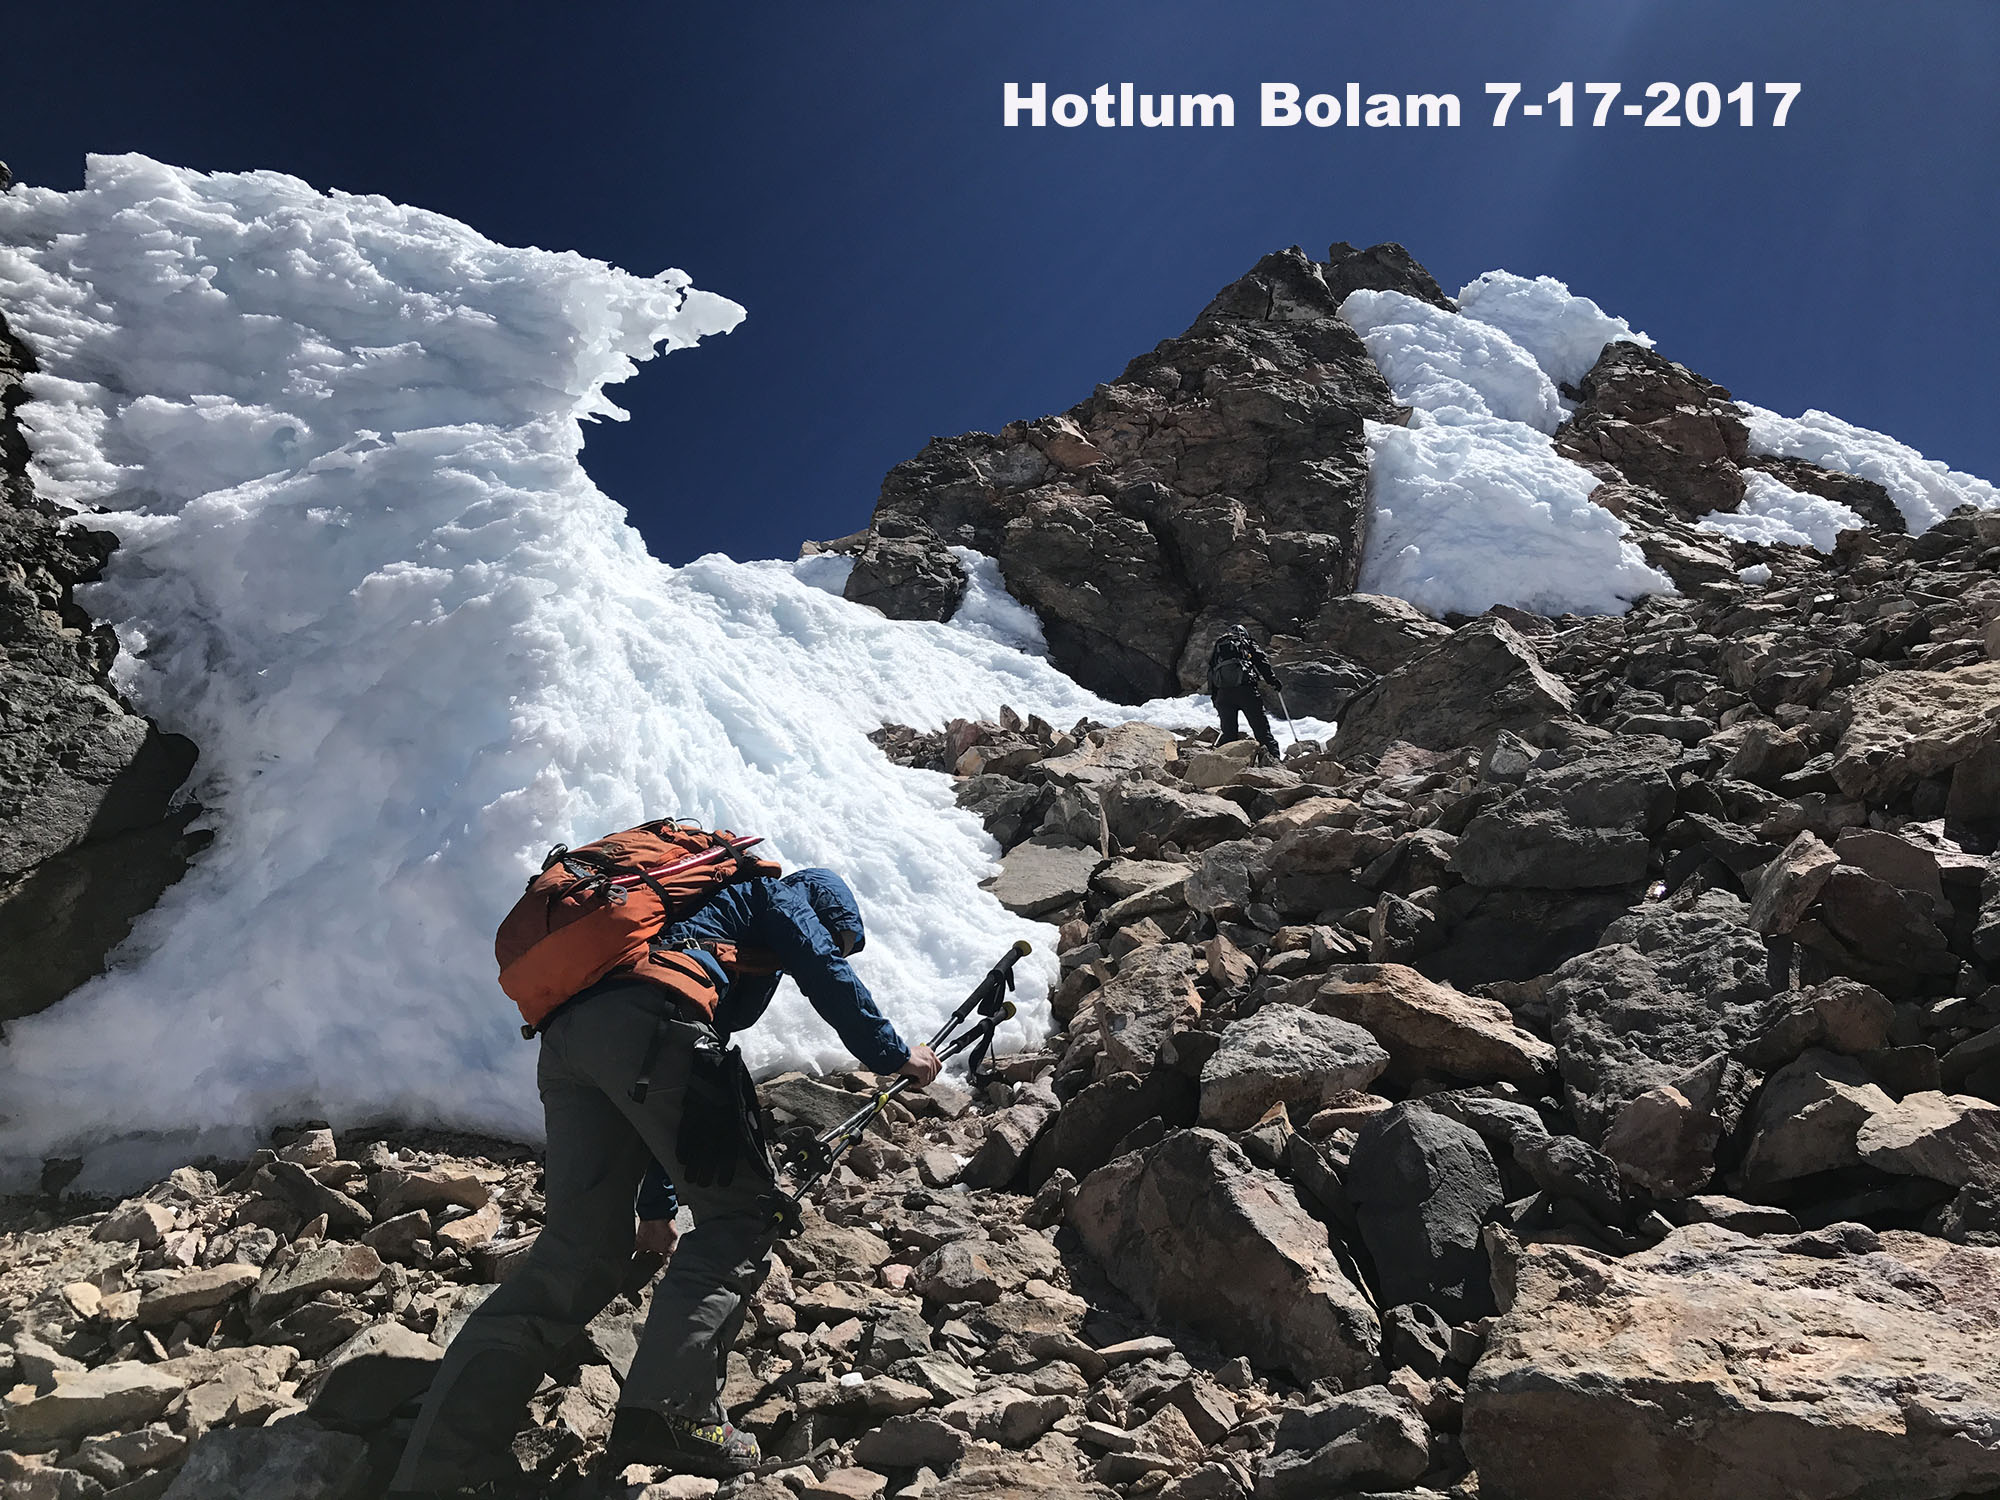
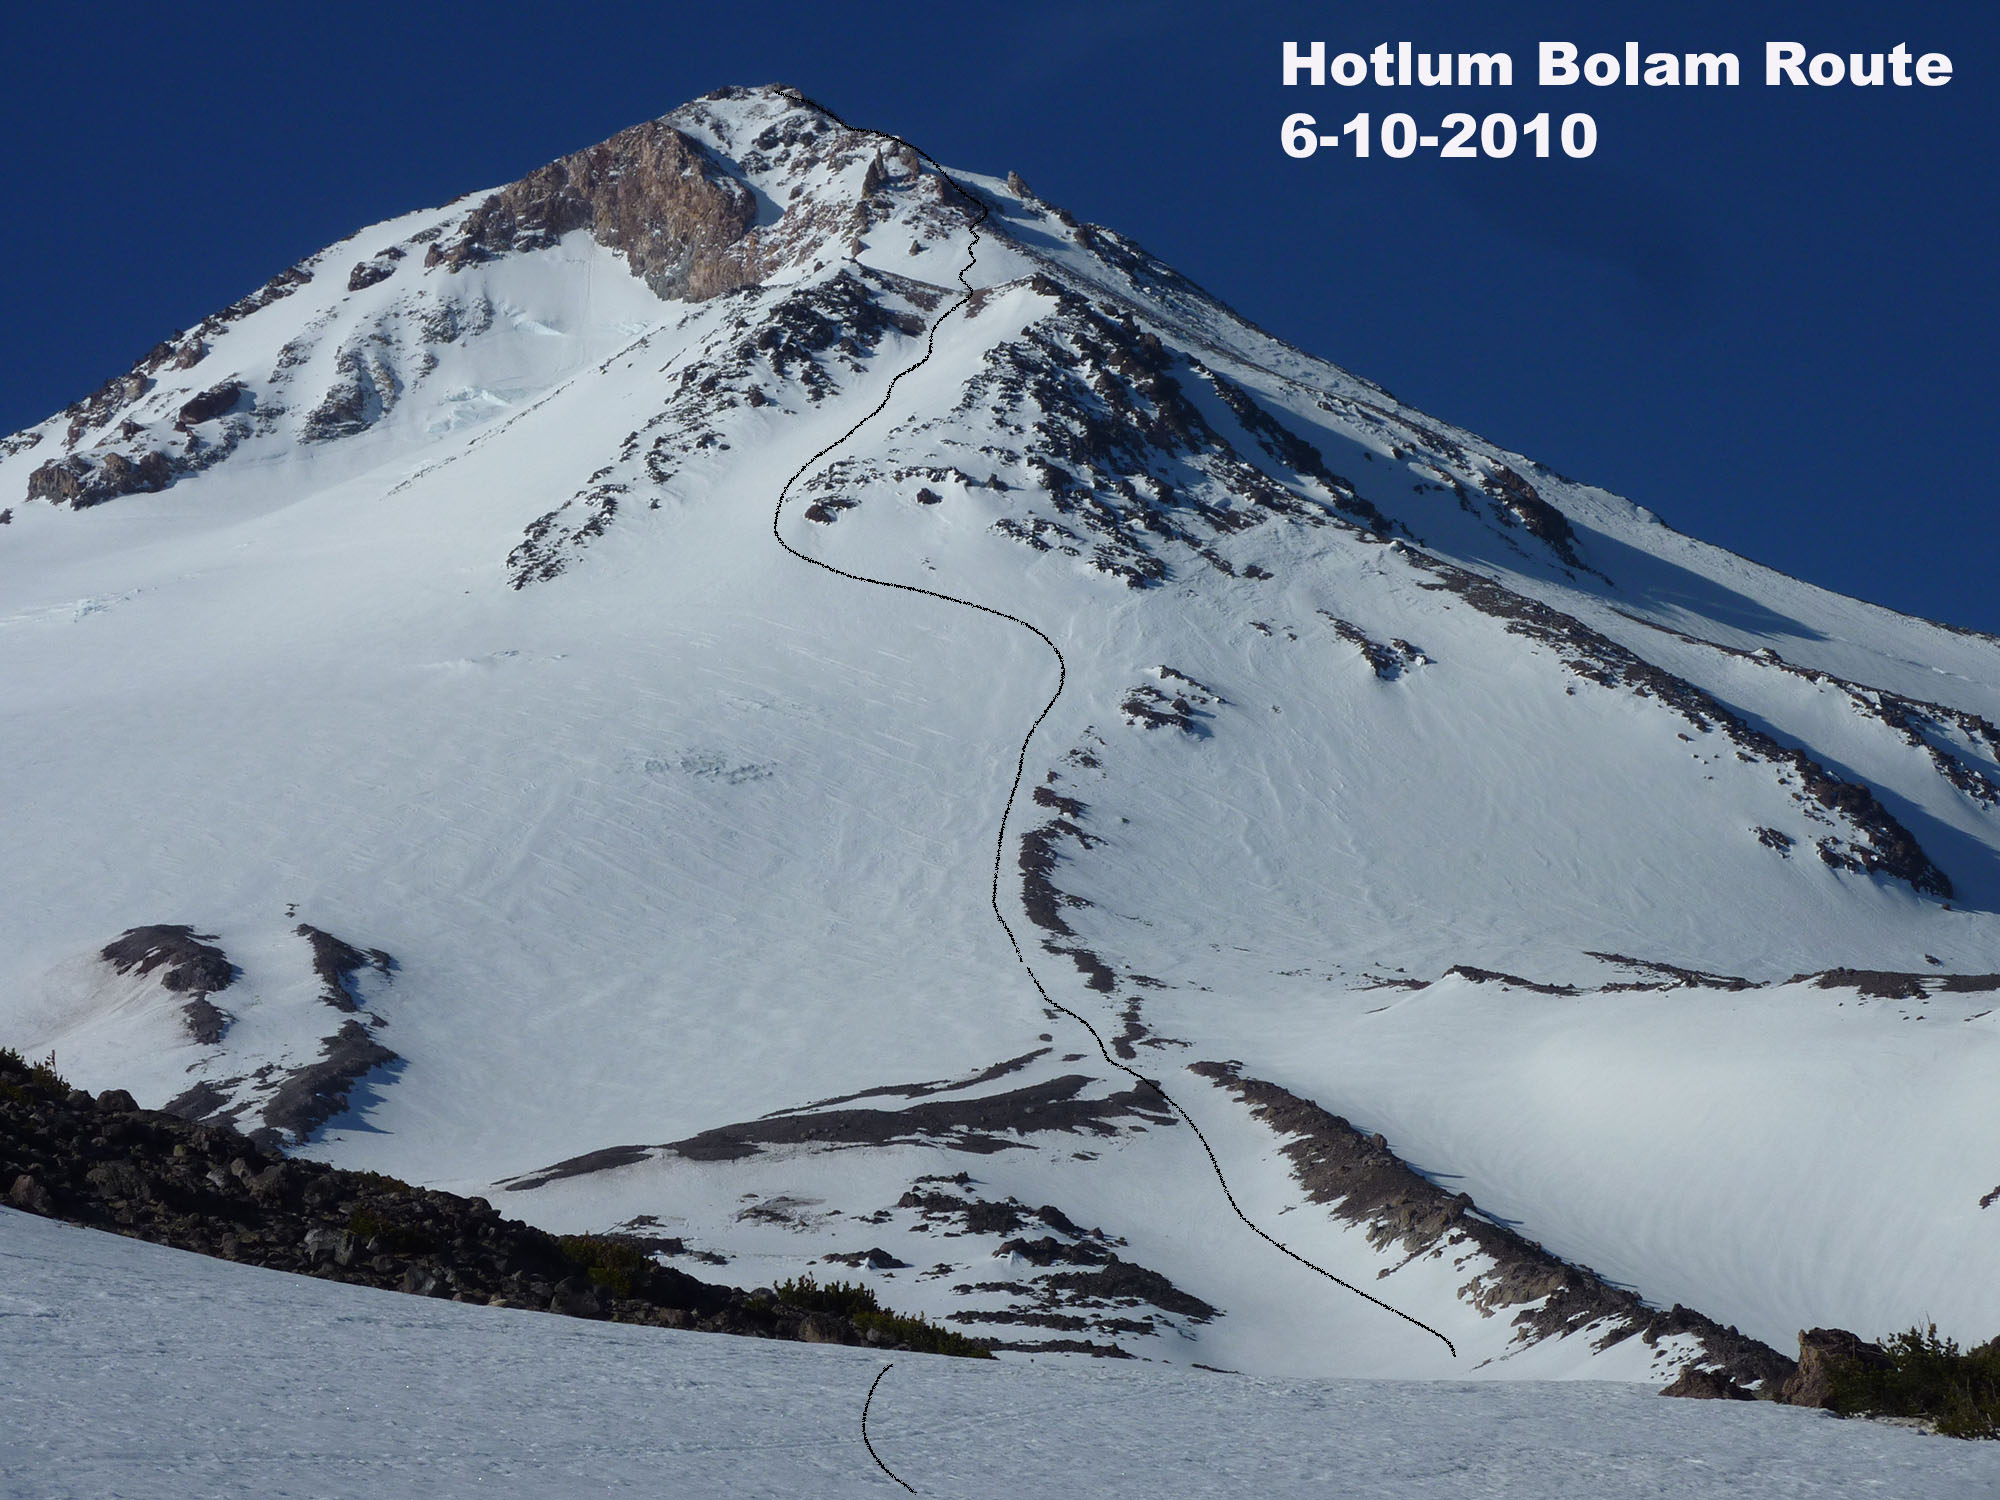
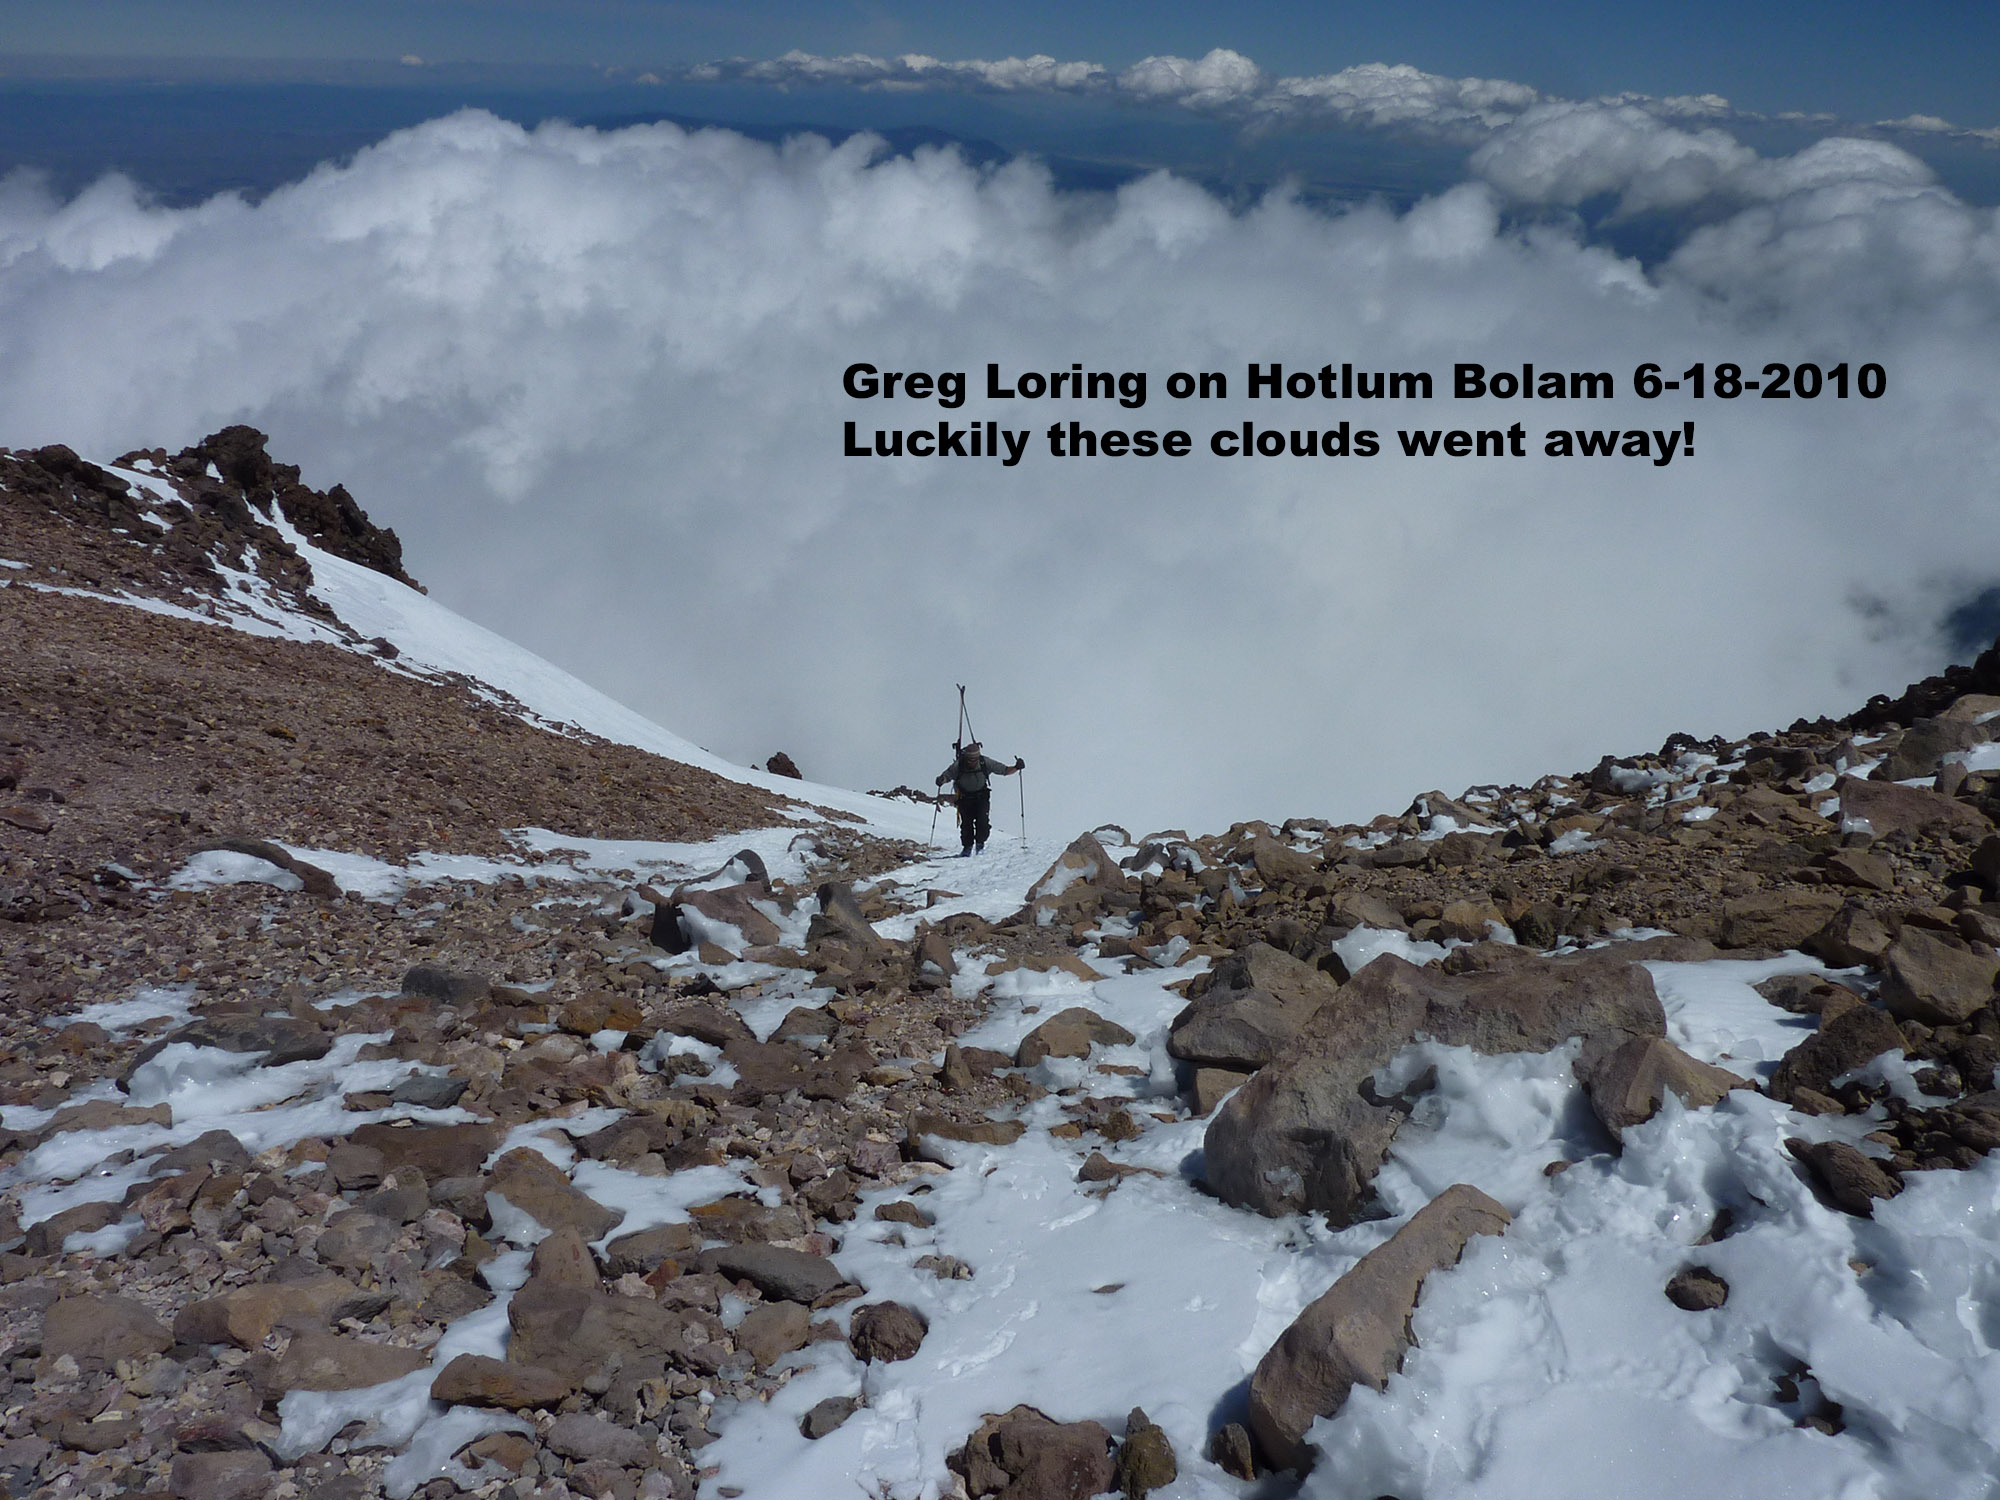
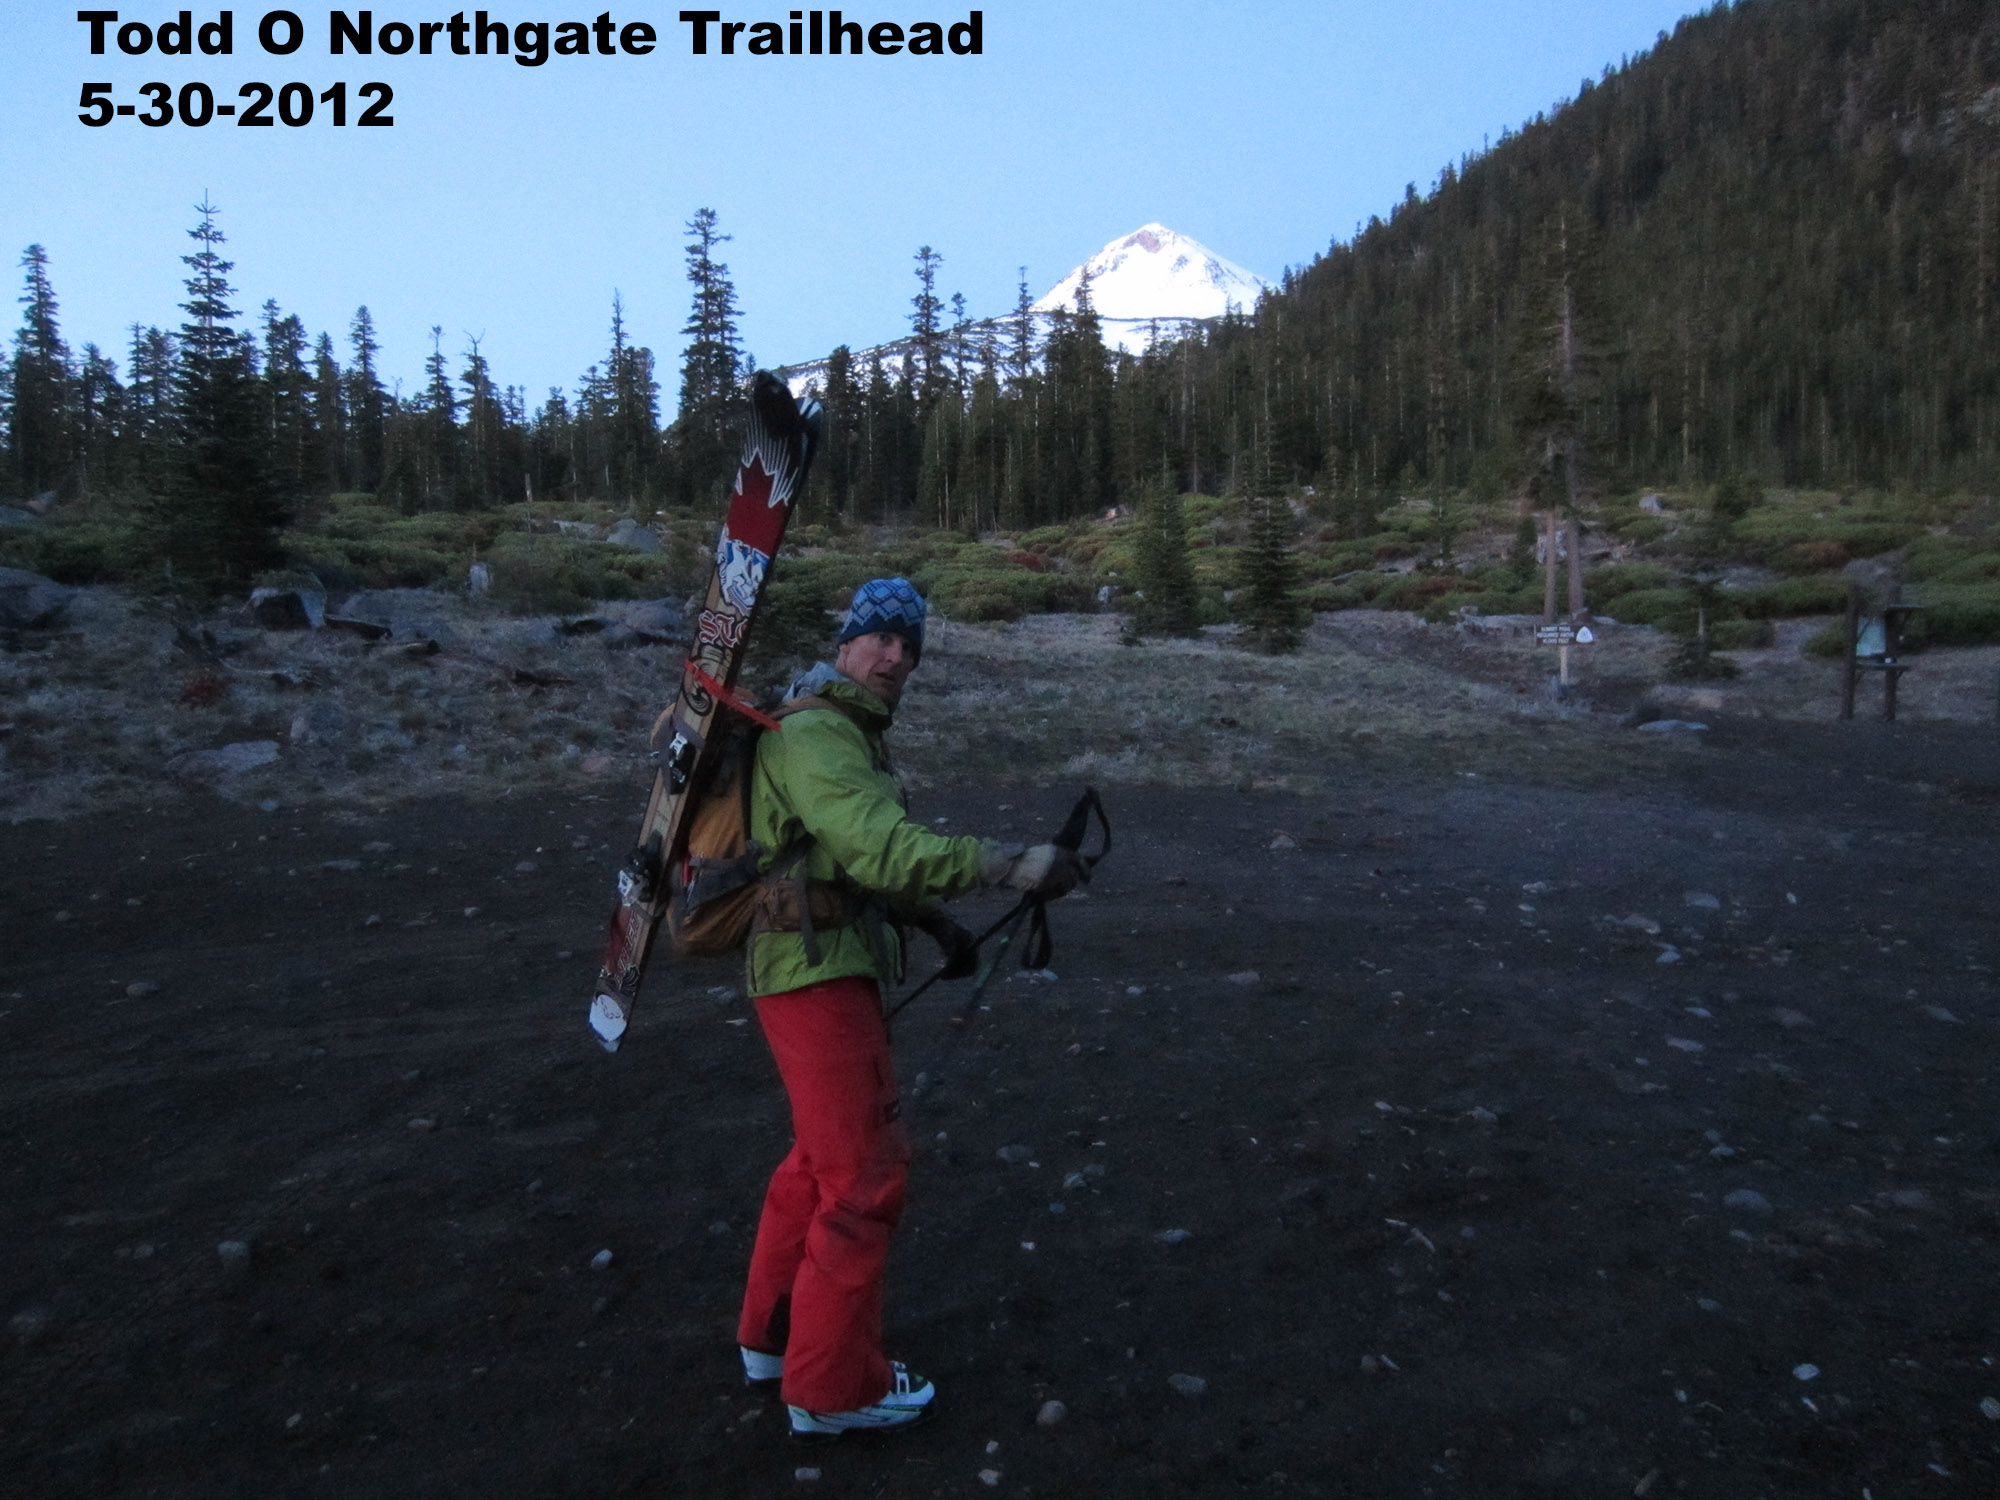
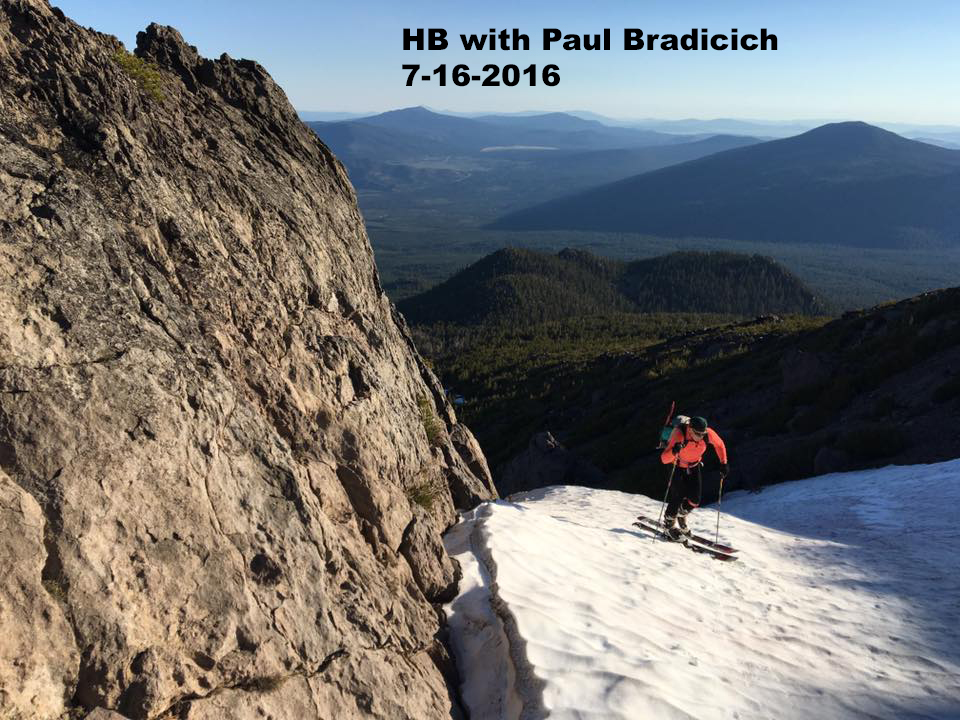
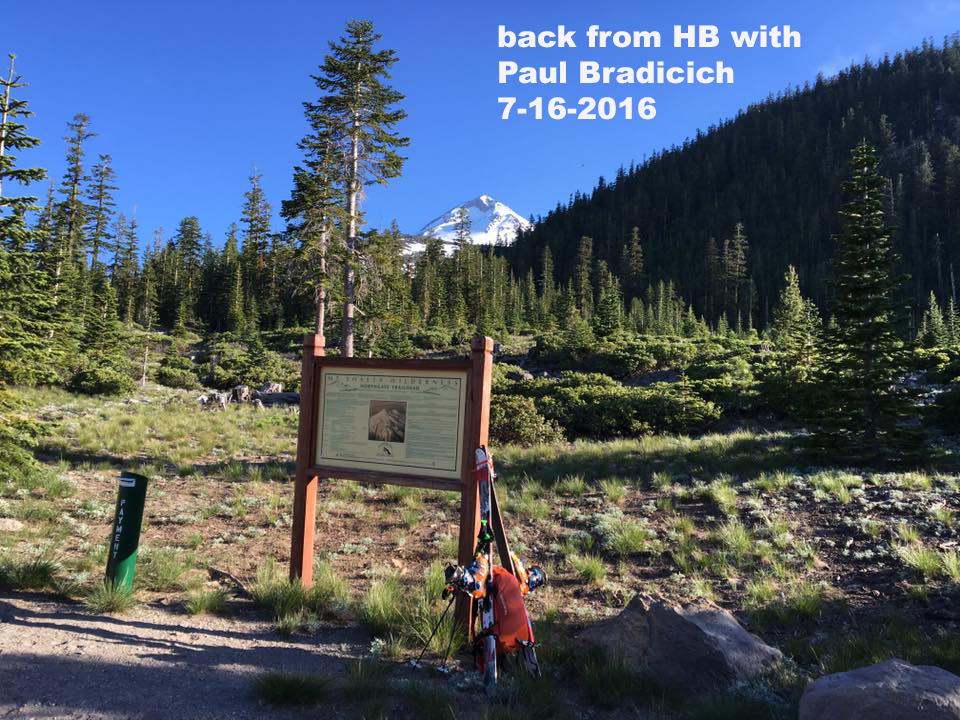
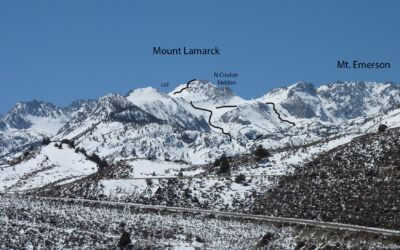
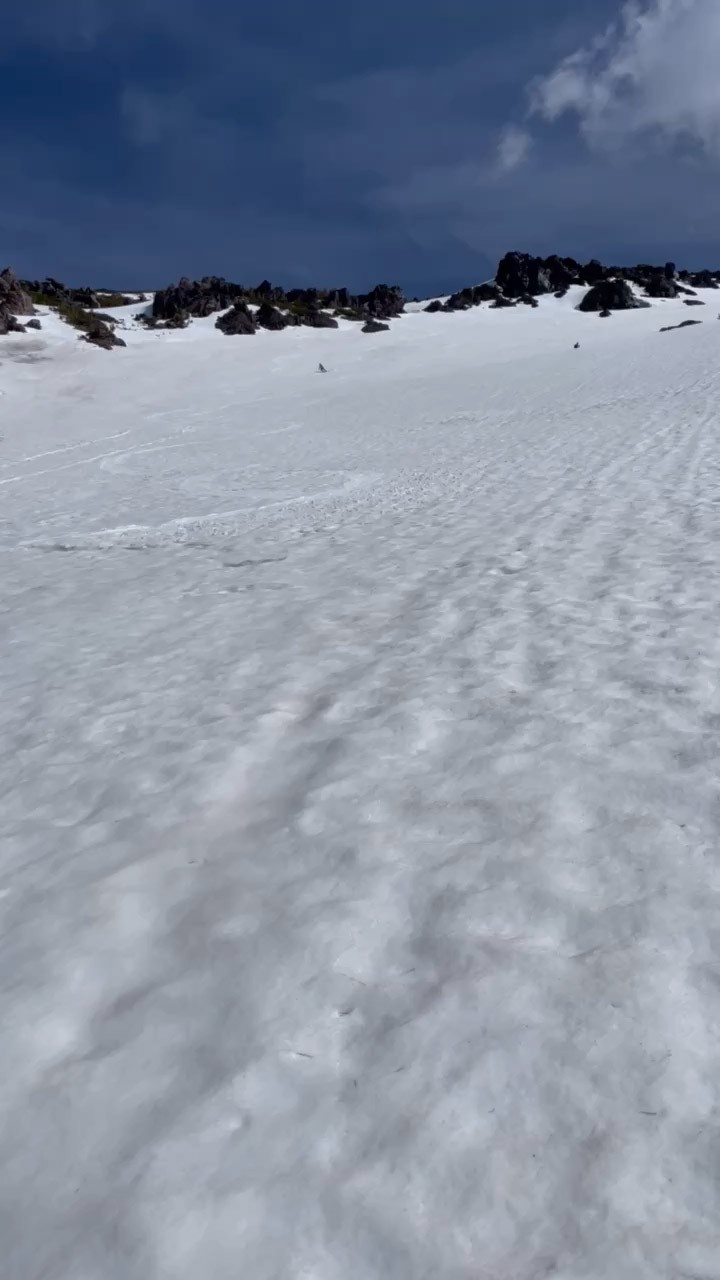
NORTH SIDE – I like to ski the Hotlum-Bolum Ridge Route every year, which feels the most remote and Alpine-like. If the snowpack is a good one, I might wait and ski this route as my last tour of the season. the middle 5000′ should be somewhat smooth still on a warm day in late June early July. You’ll want a 4×4 or AWD vehicle to get up to the North Gate Trailhead. The route up the mountain starts on a trail and winds in a 2 mile long, perfect contour. Walking through the forest more directly is slower due to down trees and soft ground surface. If you can drive to the trailhead, the trail will be dry. If you are a few miles back due to snow drifts, like I was this week, you can bypass the trailhead and trail with full skinning straight towards the mountain. This is the lowest trailhead at 6200′. Prepare yourself mentally to pay attention to your route on the north side, because you can’t see the summit until you get there! Track your route or draw it onto your phone app. Going back to your car gets confusing at the end of the day. This side of the mountain is not for beginners. The terrain above 13k is steep, icy, and hard to ski due to high wind and half covered rocks. Down climbing to skis left at 13k will take more time. I leave skis at 13k about half the time and continue with ski poles AND my ice axe. It would be rare for the top 1000′ of this route to be snow covered and smooth enough for skiing, while also offering reasonable access anywhere near the trailhead. It can happen but it’s also hard to assess. When you get to 13k there is no snow for sure, and you can’t see around the corner. Do you bring the skis and hope? Or do you just bolt for the summit without skis and a lighter backpack? Walking back down icy steep slopes with crampons, axe, AND skis on your back isn’t going to be fun.
The middle of the Hotlum Bolam route crosses over crevasses, but they are well buried into mid-July. To ensure you don’t ski over a crack, you would have to hug the vague Hotlum Bolum Ridge pretty tight and avoid the excellent skiing right down the middle on return. Skiing over bridged crevasses will generally be safer than walking up through them but look for sags in the slope if you do venture out onto the glacier. I have also climbed straight up through the rocks above 13k in a B-line to the summit without skis, rather than traverse right into steep, icy hell. I remember that working out pretty well, but it was so long ago I would have to do it again to recommend it. I’ve also skied down above the Holtum Headwall and hiked back up a bit to traverse out. That was exciting. I have enjoyed skiing the terrain skiers left on the Bolum Glacier as well and found it easy to traverse back without putting skins on. From my experience, the north side simply cannot get too soft. The cooling of the massive glacier and steeper terrain must be a factor. I have gone up there with zero wind and warm temps over and over, and the corn snow was perfect 2″ penetration even at the bottom. And in reality, you’re lucky if the top 2000′ of Mt. Shasta gets soft at all on any of the routes.
Start early and go in a small, experienced group to ski Mt. Shasta. Slap a few pics here on our forum with the reply function please!
My recommend gear list, which we sell on this website and at our shop. Thanks for helping us survive! 2024 will mark our 30th year. Getting through each payroll and rent cycle still feels like a miracle however. You can buy everything a little cheaper from the evil empire. But they didn’t write all this did they?
Climbing Gear and Clothing – We sell all of this at our shop in Truckee. In fact, that is the point of my shop. I only want to sell the core products needed to bike, ski and climb. I generally sell products I personally use. Here we go: Good, light, tech AT bindings known to be adjusted properly and in perfect working order. from Atomic, Dynafit or ATK. We have tried them all, these are the best. I recommend brakes for many reasons. Get AT Ski boots that you KNOW fit you great and ski well. It’s not going to be easy skiing. I LOVE the balance of weight and performance out of Technica Zero G. I use the softer Tour model with Intuition liners. We sell about 5 other comparable boots that seem to fit great, but Zero G fits the most often. I recommend rockered 1600-1700 gram skis that are 106 to 112 at the waist. I skied tele for 20 years. Leave that stuff at home. Snowboarding works fine, even a solid board. You don’t need to traverse anywhere. Bring aluminum boot crampons and ice axe. Camp Nanotech is the best. Sun hat, prefer with ear and neck coverage, good sunscreen, tiny bit of paste wax and skin wax. I don’t bring goggles because I am not going up Shasta in bad weather. Light puffy down jacket with hood to be happy. I love my Rab Mythic down jacket. Ultralight hooded shell jacket. Again, I’m not going up Mt. Shasta or any volcano in foul weather. A thin base layer with sun hoody reduces the need for warm hats or helmet liners and keeps you from getting burned. A super feather lightweight rock-climbing helmet feels great over the sun hoody. I like my BD Vapor helmet, but we sell many others. Merino Wool T shirt rather than cotton or poly. Lightweight mid weight gloves which I leave clipped at my chest harness to dry when not on my hands, and an extra pair for emergency. Softshell ski touring pants are the ticket always. You are more agile and comfortable all day and use the zippered pockets. They dry fast if you sit in the snow for a minute. A first aid kit with Advil and a compression bandage. Duct tape and basic driver tool for binding and crampon adjustment. in my hip pocket is a tiny Syderco serrated knife, Jones lightweight ski scrapper, lip and face protection, and power food. I have my cell phone which works in a lot of places and my Zoleo Satellite communicator device. Summit pass and wag bag from parking lot. Your favorite food you will eat for sure. I eat clean dense spring snow and put it in my water bottles and carry 2 wide mouth Nalgene bottles. That’s going a bit light on water, but more is too heavy. Find the right dense spring snow and ice to put in your mouth often while you are moving. Leave the hydration bladder in your MTB pack, those can fail. Avy shovel and 20′ of 5-6mm chord on a Metolius FS biner. You can make skins, a harness, a rescue sled, or belay for a minute with your axe or buried anchor. My backpack this year is the BCA Stash 30. I also have really liked using the BD Dawn Patrol 32 and the Osprey Soelden 32.
AVY GEAR – Bring a medium size lightweight alloy snow shovel. I like the Mammut Alugator Pro Light Hoe Shovel. What a name! Bring an Avy beacon and Probe if there is even 1% chance of avalanche danger. Sometimes there is zero avalanche danger due to guaranteed firm snow in late spring, and I leave those two items in the truck. If there is no recent wind transport snow or new snow, and firm crust on all terrain steeper than 25 degrees….where is the avy danger? Furthermore a spring wet slide will pulverize you, with no chance for being dug out. You may not have a clue about snow conditions, so bring avy gear. Eventually you get pretty tuned in to the moments in time where an avalanche is just not possible where you are going on that specific day. I’m sure no professional mountain guide will say this, but I will. Consider saving weight and simplify for safety as well. Don’t burden yourself with an avy airbag pack either on a huge climb like this. Going halfway up for powder is another story, bring all the avalanche protection for sure.
Looking for awesome ski and splitboard tours in the Sierras? We’ve got write ups on many common and uncommon tours curated by the owner of the BackCountry, Mike Schwartz.


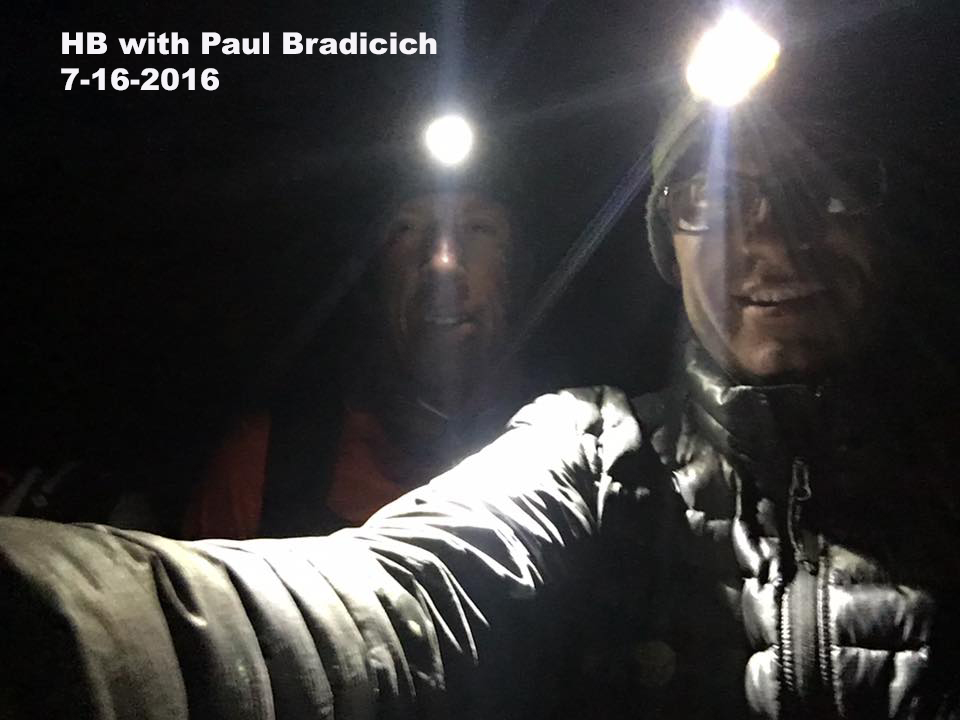
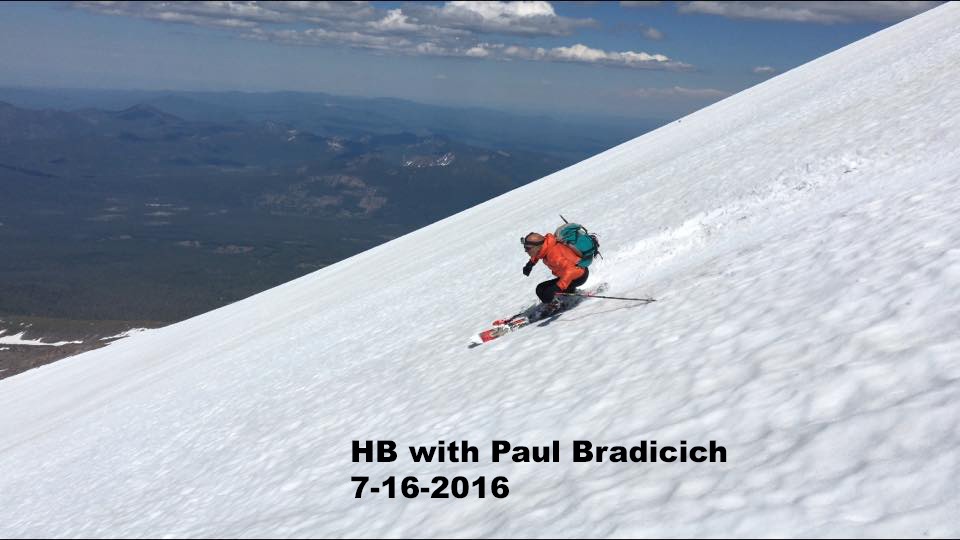
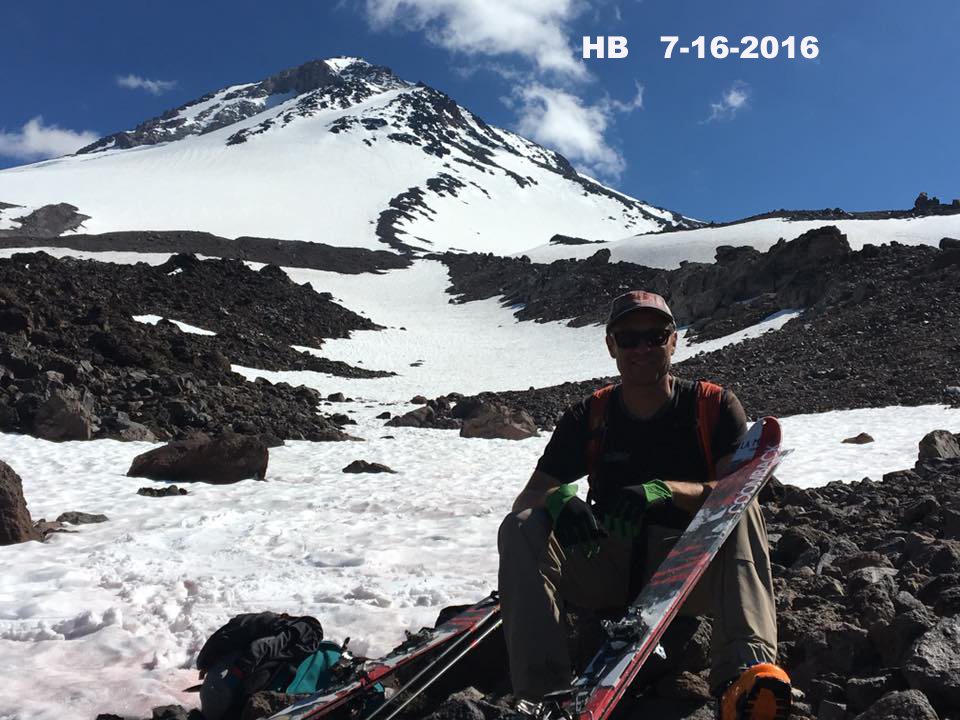
Not exactly recent, but Paul from the shop skied the North Side of Mt. Shasta with me in the first week of July 2016. We were the only 2 on the mountain and skied money smooth snow in the middle. The top was gnarly, and the bottom had no snow. It was a huge day and involved some searching for the right route through the small cliffs on the descent adown low, as I just got confused from the many times I’ve done this route in micro variations. You want to leave some extra time to get this 8000′ ski descent done and start in the dark. The top was icy and blown up with weird snow as usual. Oddly there was no one on top and not a breath of wind all day.